
I remember standing in my living room, staring at a stack of gorgeous white oak planks I’d just spent a small fortune on. I was eager—bordering on reckless—and I figured my subfloor looked ‘flat enough’ to the naked eye. Two weeks later, every step I took sounded like a family of squirrels lived under my floorboards. That hollow ‘clack’ haunts my dreams. It turns out, my subfloor had a dip so subtle I missed it, but my new floor didn’t. This wasn’t just a minor annoyance; it was a structural failure in the making. I spent days meticulously clicking those planks together, only to find that every time I walked past the kitchen island, the floor felt like a trampoline. The first time I saw a pro use a 10-foot straightedge, I thought he was being overly dramatic. I mean, it’s a giant piece of aluminum! But then he showed me a gap that I could slide a stack of three quarters under, and my jaw dropped. That’s the difference between a floor that lasts thirty years and one that fails in three.
You Can’t Build a Masterpiece on a Rollercoaster
If you think you can eyeball a room and see every deviation, let me tell you from experience: your eyes are liars. I learned the hard way that flooring installation mistakes to avoid for lasting results usually start with the prep work nobody sees. We get so excited about the finish—the stain, the grain, the layout—that we forget the foundation. Today, I’m going to show you exactly how to find those hidden valleys and peaks before they ruin your investment. We’re going to look at the tools you actually need—not the ones the big-box stores try to upsell you—and how to get a reading you can actually trust. Trusting your gut is for choosing a paint color, not for precise floor leveling techniques to achieve flawless surfaces. I used to be the guy who thought ‘level’ and ‘flat’ were the same thing. They aren’t. A floor can be sloped like a ski jump and still be perfectly flat enough for tile. But if it has a hump? That’s where the trouble starts. We need to focus on flatness to ensure the structural integrity of your luxury vinyl or hardwood.
Does a Quarter-Inch Really Matter That Much?
You might be thinking, ‘It’s just a tiny hump, the underlayment will cushion it.’ I used to think that too. But even the best foam or cork won’t save a joint that’s being flexed every time a 180-pound human walks over it. In fact, according to the National Wood Flooring Association (NWFA), most wood flooring requires a subfloor to be flat within 3/16 of an inch in a 10-foot radius—any more than that and you are essentially asking for mechanical failure. I once ignored a 1/4-inch dip in a hallway, and within six months, the tongue-and-groove joints literally snapped. It’s a gut-wrenching sound that signifies wasted money and time. If you want to avoid that, you need to learn how to check for high spots with a 10-foot straightedge properly. It’s about more than just laying a board down; it’s about a systematic sweep of the entire room. Have you ever finished a project only to realize you should have spent one more hour on the prep work? I’ve been there, and I want to make sure you aren’t the next person searching for why your LVP floor feels like it’s bouncing when you walk. Let’s get into the nitty-gritty of the measurement process, because your future self—and your feet—will thank you for the extra effort today. We are going to ensure that when you finally lay that first plank, you’re doing it with total confidence.
Grab Your Straightedge and Start the Sweep
To get a reading you can actually trust, you need to perform what I call the ‘clock-face sweep.’ Imagine your room is a giant clock. Place one end of your 10-foot straightedge at the center and rotate the other end slowly, watching for light peeking under the tool. I once tried to ‘stitch’ measurements together using a standard 4-foot carpenter’s level because it was all I had in the truck. By the time I reached the far wall, my small errors had compounded into a massive slope that made the room look like it was melting. Learn how to check for high spots with a 10-foot straightedge by marking every gap larger than 3/16 of an inch with a circle for ‘low’ and an ‘X’ for ‘high.’ This visual map is your blueprint for the next hour of work. 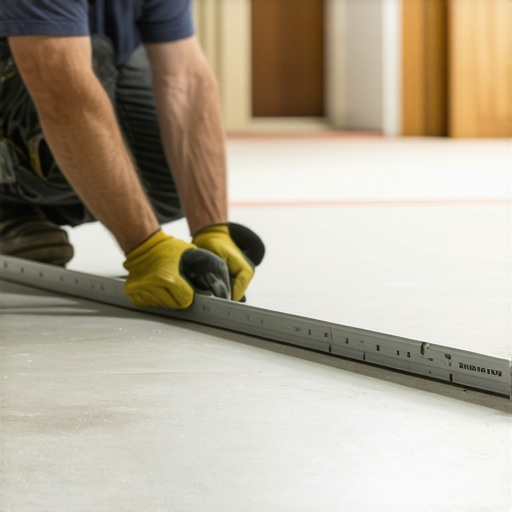
Don’t Let Old Residue Sabotage Your Leveler
If you are working on a concrete slab, your biggest enemy isn’t the dip—it’s the stuff left behind by the previous floor. I spent a whole afternoon trying to pour leveler over old carpet glue, only to watch the leveler flake off like a bad sunburn two days later. You need to get down to the pores of the concrete. Using the best tool for scraping glue off a concrete slab, like a heavy-duty floor scraper or a diamond grinding cup, is the only way to ensure precise floor leveling techniques to achieve flawless surfaces. If that primer doesn’t soak in, your leveler is just a floating sheet of brittle rock waiting to crack under your new hardwood.
Fixing the Bounce in Plywood Subfloors
For those of us working with wood subfloors, the problem is often structural. If you walk across the room and the china in the cabinet rattles, no amount of liquid leveler will fix that. You’re likely dealing with a joist issue. I remember a kitchen remodel where I thought I could just layer on more plywood to fix a dip. It didn’t work because the underlying joist was crowned. You have to get underneath and use the shim trick for fixing a bouncy plywood subfloor to stabilize the movement. Think of it like putting a matchbook under a wobbly restaurant table; you have to find the exact point of contact to stop the vibration.
The Nitty Gritty of the Perfect Pour
Once your ‘X’ and ‘Circle’ marks are ready and the floor is clean, it’s time for the self-leveling compound. This stuff is basically liquid magic, but it has the temperament of a toddler. If you don’t prep your boundaries, it will find every hole in your subfloor and disappear into your basement or crawlspace. I’ve seen guys lose five bags of expensive product because they didn’t learn how to stop your floor leveler from leaking through the subfloor using spray foam or caulk around the perimeter. When you finally mix, remember that consistency is king. Follow the secret to mixing the perfect bucket of self-leveler every time by using a high-torque drill and cool water. If it’s too thick, it won’t flow; too thin, and it won’t have the structural strength to support your flooring installation fundamentals.
Stop Thinking Every Floor Needs to be Level
One of the most persistent myths in the industry is that a floor must be perfectly level to be successful. In reality, unless you are installing a billiard table, levelness is often secondary to flatness. You can have a floor that slopes half an inch across a room, and as long as it is flat, your hardwood will look stunning. However, the ‘oops’ factor usually happens when DIYers confuse the two and try to fix a structural slope with three inches of self-leveler. This adds thousands of pounds of dead weight that your joists weren’t designed to carry. If you notice why your self-leveler is bubbling over plywood, it’s often because the wood is literally gasping for air or reacting to the moisture you’ve just dumped on it.
Is Your Subfloor Actually Strong Enough for Heavy Tile?
Advanced installers know that ‘flat’ doesn’t mean ‘stable.’ The Tile Council of North America (TCNA) specifies a deflection limit of L/360 for ceramic tile and an even stricter L/720 for natural stone. This means if your floor bounces even a fraction of an inch when you walk, your grout lines will eventually turn into dust. I’ve seen beautiful marble installs ruined because the installer ignored the real reason your floor joists are making your tile crack: they simply weren’t stiff enough for the load. Don’t just check for high spots; check for movement. If you can feel the floor give under your heel, you need to address the framing before you even touch a bag of thinset. 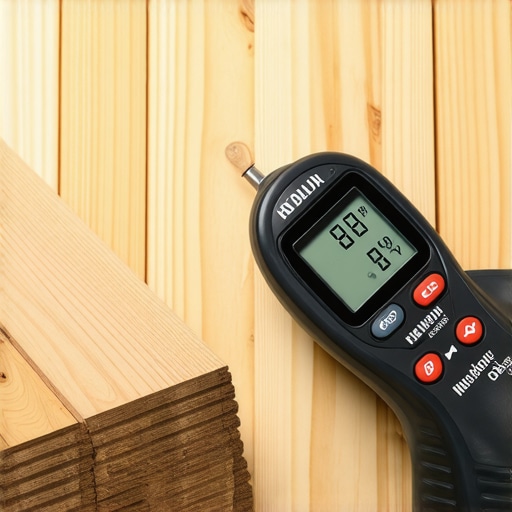
The Moisture Trap That Destroys Hardwood
Even if your floor is as flat as a pane of glass, moisture is the silent killer that most people ignore until it’s too late. Most homeowners skip the one step people skip during waterproof flooring installation in mckinney, which is a proper calcium chloride or electronic moisture test. Wood is a sponge. If your concrete slab is still ‘breathing’ moisture, that expensive white oak will cup and buckle within a season. You absolutely must learn how to use a moisture meter before installing wood floors. If the subfloor moisture and the flooring moisture are more than 4% apart for strip flooring, you are inviting a disaster.
Don’t Trust the Expansion Gap to Luck
I constantly hear people say that a half-inch gap at the wall is ‘overkill.’ It’s not. In fact, on large spans, you might need even more. I always recommend the quarter trick for checking expansion gaps in luxury vinyl floors to ensure the floor has room to breathe. If the floor hits a wall or a heavy kitchen island, it will find the weakest point and pop upward, creating a peak that no amount of weight can flatten. Have you ever fallen into the trap of thinking a subfloor was ‘good enough’ only to regret it later? Let me know in the comments. We’ve all been there, but the goal is to make sure it only happens once. Taking that extra day to grind, prime, and test isn’t just ‘busy work’—it’s the hallmark of a professional-grade installation.To move from ‘good enough’ to ‘architectural grade,’ you have to stop using the basic tools found in the pre-packaged ‘flooring kits’ at the hardware store. I personally won’t touch a self-leveling job without my spiked roller. Most people think it’s just for show, but it’s the only way to break the surface tension and ensure the secret to mixing leveler for a glass-smooth finish actually works. Without it, you get those tiny pinholes that eventually turn into structural weak spots. Using a spiked roller is also the best way to prevent why your self-leveler is bubbling over plywood because it helps those trapped air pockets escape before the product sets up. When you see that glass-like reflection in the wet compound, you know you’ve nailed the prep. 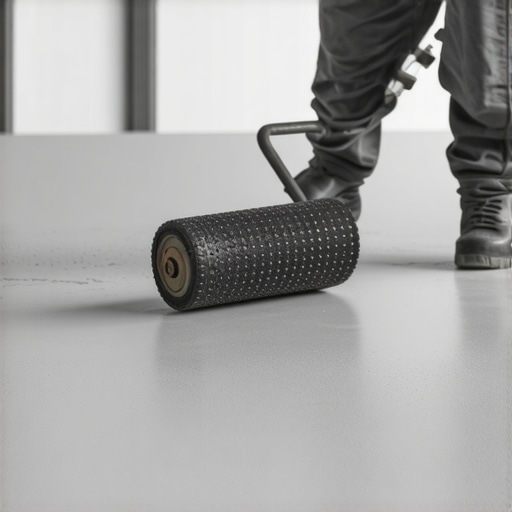
How do I keep these floors looking brand new for a decade?
It comes down to one word: Humidity. I recommend every homeowner buy a dedicated hygrometer for their living space. According to technical documentation from Wagner Meters regarding Equilibrium Moisture Content (EMC), maintaining a consistent Relative Humidity (RH) between 30% and 50% is non-negotiable for wood stability. If you ignore this, you’ll be searching for how to keep your hardwood floors from gapping in the winter before your first year is up. Consistency is more important than the actual number; it’s the rapid swings that cause the boards to move and the finish to crack.
Your Cleaning Routine is Probably Damaging Your Warranty
Then there is the cleaning trap. I see it every day on social media—people using steam mops on luxury vinyl because it’s ‘sanitary.’ Please, for the love of your subfloor, stop. I’ve seen the truth about using steam mops on luxury vinyl planks firsthand: the localized heat can melt the adhesive and force moisture into the core. If you want hardwood floor care secrets to longevity and shine, stick to a barely damp microfiber pad and a pH-neutral cleaner specifically designed for your finish. Avoid the ‘shine-enhancing’ waxes found at grocery stores; they just create a sticky layer of gunk that makes mastering hardwood floor refinishing expert tips for 2025 nearly impossible when you eventually want to refresh the look.
AI and Lasers are Taking Over the Prep Phase
Looking ahead, I see the industry moving toward ‘Smart Prep.’ We are already seeing 3D room scanners that can map a floor’s topography to within a millimeter and feed that data into an app. Soon, your phone will tell you exactly how many bags of leveler you need and where to pour them before you even leave the house. Until those tools are in every toolbox, we rely on the tried-and-true flooring installation fundamentals-leveling for a seamless look. My challenge to you: before you lay your next plank, get a hygrometer and track your room’s humidity for 48 hours. It’s the smallest step that makes the biggest difference in your floor’s lifespan.
The Hardest Lessons My First Failed Floor Taught Me
Looking back at my early mistakes, I realized that a step-by-step guide to flooring installation and leveling success isn’t just a list of tasks; it’s a mindset of precision. I used to think I could outsmart a 1/4-inch dip with extra underlayment, but the floor always wins. I learned that if a subfloor isn’t perfect, even the most expensive hardwood will feel cheap when it bounces under your feet. One lightbulb moment happened when I stopped viewing floor prep as ‘extra work’ and started seeing it as the actual project. The planks are just the decoration. Another lesson? Never trust a subfloor you haven’t scrubbed. Any dust or old adhesive is a barrier that prevents the ultimate guide to floor leveling for a perfect finish from actually bonding. Finally, I realized that silence is the sound of quality. If your floor doesn’t make a sound when you walk, you did your job right.
My Essential Toolkit for Flat-Floor Success
If you want professional results, you need the right gear. I always keep a high-quality 10-foot straightedge nearby because it’s the only objective judge of flatness. I also swear by a high-torque mixing drill; burnt-out motors are a common casualty of DIY leveling projects. For those tackling tile, following tile installation pointers that save time and money often means having a reliable moisture meter on hand to ensure the slab is ready for thinset. I also recommend checking the NWFA technical guidelines, which I consider the ultimate authority on subfloor tolerances. Using a spiked roller is also non-negotiable for me now; it is the only way to get that glass-smooth finish without pinholes.
Build a Surface You Can Be Proud Of
Taking the extra time to perfect your subfloor might feel tedious, but it’s the difference between a floor that lasts decades and one that fails in a season. When you finally master mastering floor leveling pro secrets for perfect installations, you aren’t just putting down boards—you’re creating a permanent foundation for your home. Don’t be afraid to take that extra day to grind a high spot or wait for the leveler to dry perfectly. Your future self will thank you every time you walk across that rock-solid surface. Have you ever found a massive dip in your subfloor that you were tempted to ignore? Let me know how you dealt with it in the comments below!