
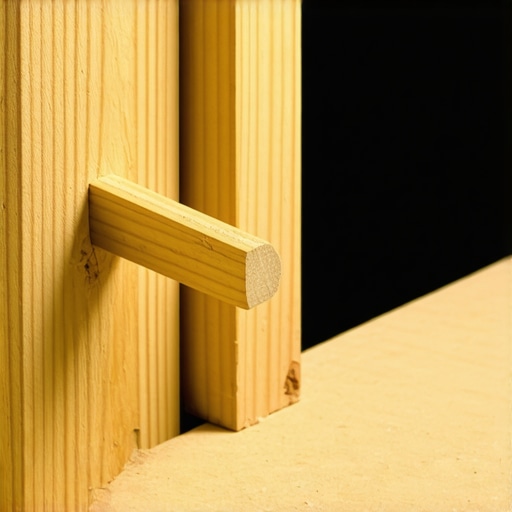
I was standing in my hallway, coffee in hand, when I felt it. That slight, nauseating dip under my feet. It wasn’t a ghost; it was a subfloor that had lost its will to stay rigid. I had just spent a weekend prepping for a new layout, thinking I was ready for installing tiles like a pro, but that ‘trampoline effect’ told a different story. If you’ve ever walked across a room and felt like you were on a diving board, you know the panic. You start wondering if you need to tear everything down to the joists. I’ve been there, and I’ve made the mistake of ignoring it, only to watch my beautiful grout lines turn into a spiderweb of cracks.
Why a Soft Subfloor Kills Your Tile Dreams
Most folks think they need a massive renovation to fix a bouncy floor, but sometimes the answer is hiding right in the gap between your joist and the plywood. When I first started out, I tried to just ‘screw it down tighter,’ which is one of those flooring installation mistakes to avoid at all costs. It just makes the squeak louder and the dip deeper because you’re actually pulling the wood into a tension it wasn’t meant to hold. The real culprit is often a small gap—a ‘void’—where the subfloor doesn’t quite meet the support. Fixing this is crucial because, as experts at the National Wood Flooring Association point out, subfloor deflection is the primary reason why tile and hardwood systems fail prematurely.
Can a few thin pieces of wood actually handle all that weight?
You might be skeptical. I was too. I thought, ‘There is no way a cedar shim is going to stop a full-grown adult from making this floor flex.’ But the shim trick isn’t about structural replacement; it’s about eliminating the travel. It’s about filling that microscopic canyon that lets the wood move in the first place. If you don’t address it, you’re looking at the real reason your floor joists are making your tile crack. I once ignored a soft spot in a laundry room and six months later, I was literally picking pieces of grout out of my socks. Have you ever felt that soft ‘give’ in your floor and just hoped it would go away once the furniture was in? Trust me, it won’t. Before you even think about the ultimate guide to floor leveling, we need to get that subfloor rock-solid. Let’s look at how we can use the shim trick to firm things up without breaking the bank or your back.
Locate the Movement Before You Load the Tile
Think of your subfloor movement like a loose tooth; if it wiggles even a fraction, the ‘filling’ (your grout) is going to fall out. To find the exact spot, you need the buddy system. Send one person to the basement or crawlspace with a high-lumen flashlight and stay upstairs to walk the floor. As you step on the soft spots, your partner looks for the gap where the plywood lifts off the joist. This is the ‘void.’ Sometimes it is just a sixteenth of an inch, but under a heavy 12×24 porcelain tile, that tiny gap becomes a jackhammer. Once you have marked these spots, you can apply the spacing secret for installing tile over plywood to ensure the rest of the layout stays stable.
The Goldilocks Rule for Shimming
The goal here is to fill, not lift. I once worked on a guest bathroom where the floorboard did a little dance every time someone walked near the vanity. I grabbed a cedar shim, slathered it in wood glue, and hammered it in with the enthusiasm of a man who had had too much espresso. I ended up lifting the subfloor so much I created a visible hump that no amount of thinset could hide. Now, I use the ‘Slide and Snug’ method. Apply a generous bead of construction adhesive or wood glue to both sides of the shim. Slide it into the gap until it stops, then give it one—and only one—gentle tap with a hammer. If the shim starts to bend or if you see the plywood move upward, you have gone too far. 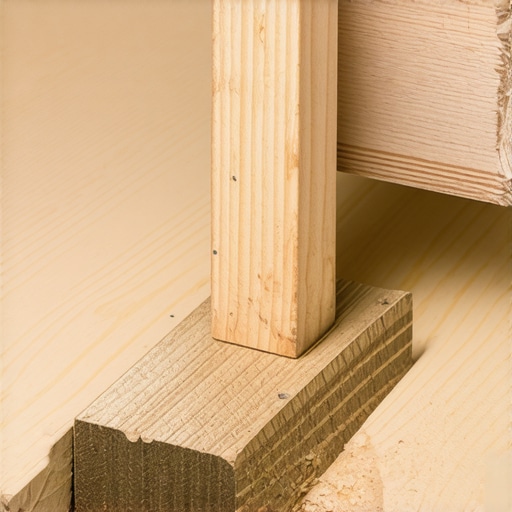
Beef Up the Bones with a Plywood Sandwich
If the joist itself is the problem—maybe it is over-spanned or has a nasty knot right in the center—shimming won’t save you. This is where you use the plywood sandwich trick for fixing bouncy floor joists. You take a piece of 3/4-inch CDX plywood, cut it to the height of the joist, and glue-and-screw it to the side of the existing lumber. It is like putting a splint on a broken leg. It stops the joist from flexing mid-span. This is a critical step before you even think about how to achieve flawless floor leveling before tile laying. If the bones are weak, the leveler will just crack like an eggshell.
One Screw to Rule the Squeak
Sometimes the bounce is caused by a nail that has pulled loose over the decades, turning into a tiny slide-whistle every time you walk by. Instead of just adding more nails, which eventually pull out too, learn how to stop your subfloor from squeaking with one screw by using a specialized breakaway screw. These grab the joist and pull the plywood down tight, then snap off below the wood surface. It is a permanent fix that clears the way for a smooth surface. Once the floor is structurally silent, you can move on to step-by-step guide to flooring installation and leveling success. Always learn how to check for high spots with a 10-foot straightedge after you’ve tightened everything down to make sure your structural fixes did not create new topographical challenges.Most contractors will tell you to get the floor ‘level.’ I’m here to tell you that flatness is far more important than levelness. A floor can be perfectly level but have a 1/4-inch dip in the center, and that dip will cause your tiles to ‘lip’—where one edge sits higher than the other. The Tile Council of North America (TCNA) is very clear about this: for any tile with one side longer than 15 inches, the substrate cannot vary more than 1/8 of an inch over a 10-foot span. If you’re obsessing over the bubble in your level but ignoring the gaps under your straightedge, you are setting yourself up for failure. This is one of the most persistent floor leveling challenges common mistakes and how to avoid them.
Stop Believing the Self-Leveling Marketing Lie
The biggest ‘oops’ factor I see in modern renovations is the misuse of self-leveling underlayment (SLU). The name implies you just pour it and go get a sandwich. In reality, SLU is a finicky chemical beast. If you don’t use a primer specifically designed for your subfloor, the wood or concrete will suck the moisture out of the leveler too fast, leading to why your self-leveler developed spiderweb cracks overnight. You also have to physically move the material with a gauge rake to ensure even distribution. Without that physical intervention, you’ll end up with ‘islands’ that are higher than the rest of the floor, creating a bigger nightmare than you started with. 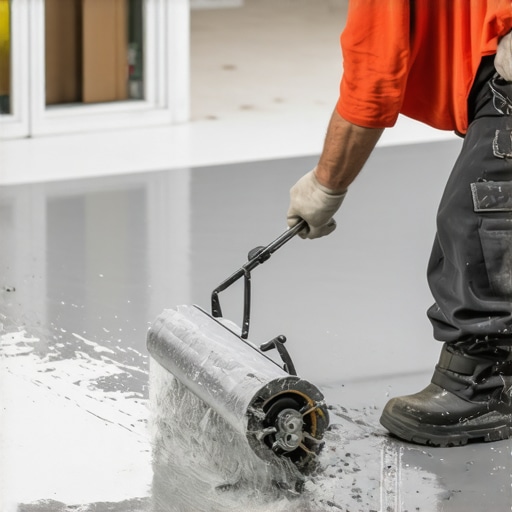
Why Does Large Format Tile Demand a Different Standard of Flatness?
When you move to modern 12×24 or 24×48 tiles, the margin for error disappears. Traditional 12×12 tiles could ‘cheat’ a little bit by following a slight curve in the floor. Large tiles are rigid; they won’t bend. If the floor isn’t flat to that 1/8-inch standard, the corners of the tile will stick up like a sore thumb. This is why you need to understand mastering floor leveling pro secrets for perfect installations. You also have to consider why your large format tiles need back buttering every time. It isn’t just about adhesion; it’s about filling those tiny remaining voids between a ‘mostly flat’ floor and a perfectly flat tile.
The Mixing Speed Trap
Another nuance that pros know—and beginners miss—is the RPM of your drill. If you mix your leveler at 1000 RPM, you’re whipping air into the mixture. When you pour it, those air bubbles rise to the surface and pop, leaving tiny pinholes that weaken the entire slab. Learning the secret to mixing the perfect bucket of self leveler every time means keeping the speed low and steady. It’s these small details that determine whether your floor lasts twenty years or twenty months. Have you ever fallen into this trap? Let me know in the comments.Once you have mastered the mix, the battle moves to the floor itself. I remember the first time I tried to walk through wet self-leveler to fix a puddle; I looked like a frantic crane. That is why I never start a pour without my spiked shoes and a gauge rake. A gauge rake isn’t just a fancy broom; it is the only way to ensure your leveler is exactly the depth you calculated. If you skip this, you will find the reason your leveler is setting up too fast is often because you spread it too thin in one spot. Before you even get to the pour, though, make sure you have the best tool for scraping glue off a concrete slab—a heavy-duty floor scraper with a replaceable blade. If there is old adhesive left behind, your bond is compromised from day one.
Spiked Shoes and Specialized Rakes Are Not Just for Pros
Many DIYers think they can push leveler around with a flat trowel, but that is how you end up with dips and waves. Professional spiked shoes allow you to literally walk into the wet material to address bubbles or thin spots without ruining the surface. It is a terrifying feeling at first, but once you realize you can reach that one missed corner in the center of the room, you will never go back. Combined with precise floor leveling techniques to achieve flawless surfaces, these tools turn a stressful afternoon into a satisfying win.
How do I keep my new floors looking pristine for a decade?
The secret isn’t a magic cleaning solution; it is prevention. For hardwood, you need to understand hardwood floor care secrets to longevity and shine. This means keeping your home humidity between 30% and 50%. If it drops too low in the winter, your wood shrinks and gaps appear. For tile, the grout is your weakest link. I always use a high-performance, rapid-setting grout like Mapei Ultracolor Plus FA, which, according to its technical data sheet, is specifically formulated with ‘DropEffect’ technology to reduce surface absorption and resist mold. This keeps the dirt on top where you can actually wipe it off. Avoid the damp mop mistake that swells your laminate seams or ruins your grout chemistry. 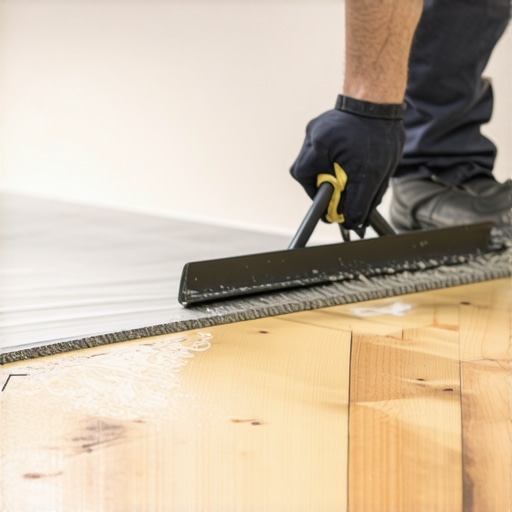
Smart Sensors Might Be the Future of Subfloor Tech
I predict that in the next few years, we will see ‘smart’ subfloors with embedded moisture sensors that alert your phone before a pipe leak ruins your investment. For now, we rely on mechanical integrity and the right equipment. If you want to scale up from a single room to a whole-house project, don’t be afraid to invest in a rotary laser level; it is the only tool that doesn’t lie when the room is 40 feet long. Before you go, I want you to try this: the next time you are prepping a subfloor, use a moisture meter on three different areas of the room. It takes thirty seconds, but it might just be the thing that saves you from a total floor failure. Let me know if you have ever found a hidden leak just by checking the wood moisture content!
Hard Truths About Floors That Nobody Tells You
After years of fixing bouncy joists and pouring self-leveler, I have realized that the most expensive mistake you can make is rushing the cure time. Most DIYers want to walk on their new surface within hours, but the wood and the chemical compounds need time to settle. One major thing to watch for is adhesion failure. If you see your surface starting to flake, it is often because of why your floor primer is peeling off like a sunburn. Always give the primer the full window specified by the manufacturer. Another lightbulb moment for me was realizing that even a perfect-looking floor can hide secrets; I always use the ‘coin tap’ method to find air pockets. Learning how to detect a hollow tile before the grout starts cracking will save you from having to pop up a tile two years down the road. Finally, remember that wood is alive—it breathes. If you are working with oak or pine, you need to know how to keep your hardwood floors from gapping in the winter by managing your home’s micro-climate.
The Gear That Actually Lives in My Truck
I do not get paid to say this, but I never walk onto a job site without a few non-negotiable tools. First, a high-quality moisture meter is a must-have to ensure your subfloor is dry enough to accept adhesive. Second, for the cleanup phase, I swear by the vacuum attachment that actually picks up fine sawdust because silica dust is the enemy of a clean bond. If you are doing a larger project, do not forget the administrative side; I have seen projects stalled by inspectors because people ignore the permit trap why your 10×10 kitchen floor remodel needs paperwork. I also highly recommend the TCNA Handbook for Ceramic, Glass, and Stone Tile Installation as the industry bible for every technical question you might have.
Go Ahead and Take That First Step
The difference between a floor that feels ‘okay’ and one that feels like a solid slab of stone is the prep work you do today. It is tempting to skip the shimming or the extra screws, but your future self will thank you for the silence underfoot. By following a step-by-step guide to flooring installation and leveling success, you are not just laying down material; you are building the foundation of your home’s comfort. Whether you are aiming for transforming your living area with elegant tile designs or just trying to stop that one annoying squeak in the hall, you have the tools and the knowledge to do it right. Have you ever found a floor dip so bad you thought about moving instead of fixing it? Share your subfloor horror stories in the comments below!