
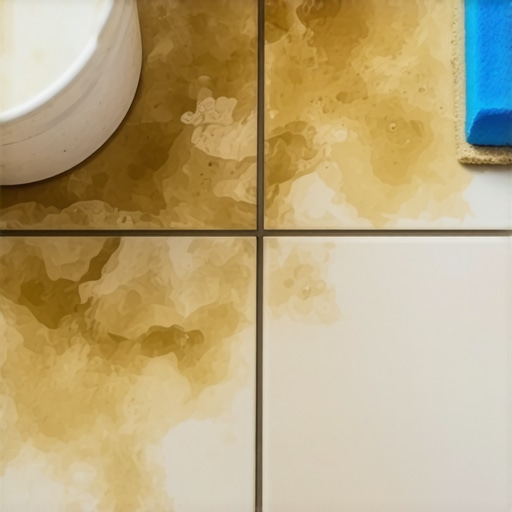
I remember standing in my kitchen at 2 AM, knees aching, staring at a floor I’d just spent fourteen hours tiling. It was supposed to be my masterpiece. But as it dried, that beautiful ‘Arctic White’ grout I’d carefully picked out started looking like it had survived a decade of muddy boots and spilled coffee in a high-traffic subway station. It was splotchy, chalky, and just… old. I felt like I’d aged twenty years right along with it. My mistake wasn’t the layout or the thinset; it was the sponge in my hand. I was so obsessed with getting a clean finish that I literally washed the life out of my floors. The gritty texture felt like sandpaper against my fingertips, and those crisp lines I’d envisioned were replaced by a milky residue that wouldn’t budge. If you’ve ever looked at your DIY project and felt that sinking ‘what went wrong?’ feeling, you aren’t alone. Today, I’m going to show you exactly how to avoid the trap of the ‘over-washed’ joint so your floors stay looking brand new for years. [IMAGE_PLACEHOLDER]
Stop Drowning Your Grout Before It Even Dries
Most of us think that more water equals more clean, but in the world of tile, that logic is a disaster waiting to happen. Early in my career, I thought I could speed things up by using a dripping wet sponge to wipe away haze. I didn’t realize that I was actually diluting the pigments and weakening the structure of the grout itself. This is one of the most common flooring installation mistakes to avoid for lasting results. When you introduce too much moisture during the cleanup phase, you cause ‘efflorescence’—that white, powdery mineral deposit that makes dark grout look dusty and white grout look yellowed. According to the Tile Council of North America, improper water-to-powder ratios during mixing or cleaning can reduce the compressive strength of grout by over 50%. You aren’t just making it look ugly; you’re making it brittle. I’ve seen homeowners try to fix this by scrubbing harder, but once that bond is weakened by excess water, you’re often fighting a losing battle. The key is patience and a nearly dry sponge.
Does the amount of water really matter that much?
It sounds like a small detail, but it’s the difference between a professional finish and a weekend project gone wrong. I once had a neighbor ask me why his grout was ‘falling out’ in the hallway, and the culprit was simply a bucket that was too full. He didn’t know the correct way to mix grout so it doesn’t change color, and he ended up with a soupy mess that never fully cured. Have you ever noticed your grout looks darker in some spots and lighter in others after it dries? That’s almost always a sign of inconsistent water usage during the wipe-down. By the time we’re done here, you’ll know the ‘damp, not wet’ rule that pros live by. You can even use the wet rag trick for cleaning up wet grout haze without compromising the integrity of the joints. Have you ever found yourself staring at a finished project wondering why the ‘perfect’ color looks completely different than it did in the store? It’s likely because of this one simple step. Let’s dive into how to fix the damage and prevent it from ever happening again.
Mix Your Grout Like a Chemist for Total Color Consistency
The biggest mistake happens before the grout even touches the tile. You open the bag, pour some out, and think you can just wing it. I learned this the hard way on a job in Livonia where I mixed half a bag for the first section and the second half later that afternoon. Even though it was the same box, the pigments didn’t distribute evenly, leaving the floor looking like two different rooms. This is why you should always mix the entire bag of grout at once to ensure the color stays uniform across every square inch of your project. If you try to do it in batches, the heavy pigments settle at the bottom of the bag during shipping, and you’ll end up with splotchy results that no amount of cleaning can fix.
Achieving the Perfect Peanut Butter Consistency
Think of your grout like a jar of creamy peanut butter. If it’s too stiff, it won’t penetrate the joints; if it’s too runny, it’ll shrink and crack as it dries. When you are learning how to mix grout by hand without getting air bubbles, you want to stir slowly and let the mixture ‘slake’—that’s just a fancy pro word for letting it sit for ten minutes so the chemicals can fully bond. I used to skip this step because I was in a rush, only to find my grout was full of tiny pinholes the next morning. Use a margin trowel, not a drill mixer, to keep it smooth and dense.
Pack the Joints Tight with a 45-Degree Swipe
When you start spreading, don’t just move the float parallel to the tiles. You’ll just dig the grout right back out of the joints. Hold your rubber float at a 45-degree angle and push the grout in with firm pressure. Imagine you’re trying to force the material into a tiny crevice; it needs to be packed, not just smoothed over. For those working on high-contrast projects, like dark grout with white tile, I highly recommend using the blue tape trick for grouting without making a mess. It saves hours of scrubbing later. If you encounter a gap that looks a bit off, remember you can often how to hide a bad cut under the baseboard like a pro later, but you can’t hide a poorly packed joint.
#IMAGE_PLACE_HOLDER_B#
The Two-Bucket Wipe Down That Prevents Haze
Now, let’s talk about the cleanup, which is where most DIYers drown their floors. You need two buckets of clean water. One is for the initial dirty rinse, and the second is for a final clean pass. Squeeze your sponge until it’s nearly dry—if you can squeeze a single drop out of it, it’s still too wet. Gently wipe across the joints, never along them. If you see a milky film starting to form, don’t panic. You can use the wet rag trick for cleaning up wet grout haze to pull that residue off before it hardens into a nightmare. I remember a kitchen remodel where I didn’t change my water often enough, and I spent three days later with an acid cleaner trying to remove the ‘ghost’ of my own laziness. Keep that water clear, and your grout will reward you with a deep, consistent color that looks like it was done by a master installer.
Self-Leveling is a Marketing Term Not a Fact
Everyone tells you that self-leveling underlayment is the ‘magic eraser’ of flooring. They say you just pour it out, and gravity does the work. In my years of fixing failed jobs, I’ve found that’s a dangerous oversimplification. If you treat it like water, you’re going to end up with high spots and valleys that make your luxury vinyl feel like it’s bouncing when you walk. The truth is, leveler is a ‘self-smoothing’ compound, not a self-leveling one. You have to actively manage it. I’ve seen countless projects ruined because the installer didn’t know how to use a spiked roller for the perfect leveling pour. Without that tool, surface tension keeps the mixture from reaching a true plane, and trapped air creates a moonscape of tiny craters. You need to be fast and deliberate, or you’ll find out the hard way the reason your leveler is setting up too fast before you’ve even finished the first bucket.
The Invisible Bubble Trap That Ruins Your Finish
The biggest ‘oops’ factor I see isn’t the pour itself, but the preparation. People skip the primer or apply it poorly, and then they wonder why your self-leveler is bubbling over plywood. It’s called outgassing. As the wet leveler sits on a porous subfloor, air is pushed out, creating bubbles that harden into permanent pits. I once walked onto a job site where the homeowner thought they could skip the ‘expensive’ primer, only to see why your floor primer is peeling off like a sunburn after just 24 hours. If the primer doesn’t bond, the leveler won’t either. You have to seal that subfloor like it’s a boat hull. I’ve even seen leveler pour right through a tiny gap into the basement because someone didn’t know how to stop your floor leveler from leaking through the subfloor using a simple bead of caulk or spray foam. 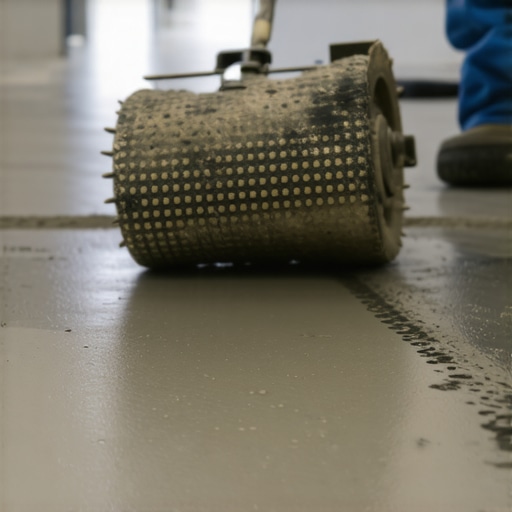
Is Your Subfloor Dry Enough for That Expensive Hardwood?
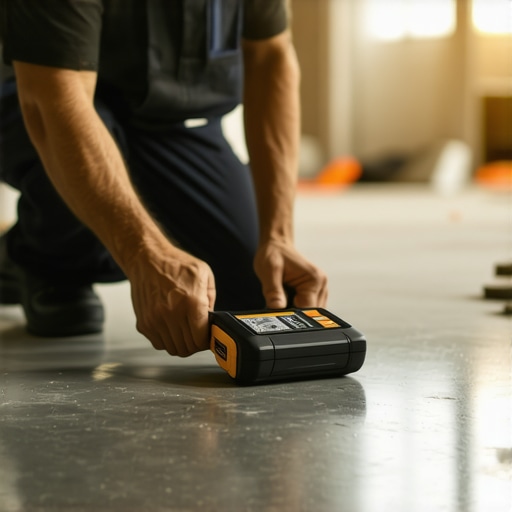
For my advanced readers, the real nuance isn’t just about how flat the floor is, but how dry it is. According to ASTM F710 standards, which govern the preparation of concrete floors, all slabs must be tested for moisture and pH before any floor covering is installed. You can have a floor that is perfectly level, but if you don’t know how to use a moisture meter before installing wood floors, that slab will eventually push moisture into your planks, causing them to cup or warp. This is especially critical in 2025, as many newer homes use fast-setting concrete that holds more internal humidity than we’re used to. Before you even think about installing tiles like a pro, you must ensure the foundation is stable. I always tell my clients that flooring installation fundamentals start with physics, not aesthetics. Have you ever fallen into this trap of rushing the ‘dry time’ only to have a floor fail six months later? Let me know in the comments.
The Secret to a Seamless Transition
The final nuance that separates a pro from an amateur is the transition. I’ve seen beautiful innovative tile designs that elevate hardwood flooring style ruined by a bulky, trip-hazard transition strip. If you focus on precise floor leveling techniques to achieve flawless surfaces from the start, you can often achieve a ‘flush’ transition where the tile and wood meet at the exact same height. It requires calculating the thickness of your thinset, your tile, and your underlayment before you even buy the materials. It’s about mastering floor leveling pro secrets that most people don’t think about until the last day of the project. If you find yourself with a height difference, don’t just wing it; look into the low-profile transition trick to keep the look clean and modern. Remember, a floor is only as good as the prep work you can’t see.
I’ve spent years mastering the ‘perfect pour’ and the ‘tightest joint,’ but the real heartbreak happens two years later when a homeowner calls me because their expensive investment is starting to fail. Maintenance isn’t just about a weekly sweep; it’s about understanding the science of the materials you’ve just installed. For hardwood, the biggest enemy isn’t foot traffic—it’s the air. I always check the National Wood Flooring Association (NWFA) technical manuals, which emphasize that wood floors perform best in a relative humidity range of 30-50%. If you don’t know how to keep your hardwood floors from gapping in the winter, you’re going to see those ugly spaces open up as soon as your HVAC system kicks on and strips the moisture from the planks.
The One Tool That Saves My Lungs and My Finish
I’m often asked what’s in my truck that I can’t live without. It isn’t a fancy laser level; it’s the vacuum attachment that actually picks up fine sawdust. Most people use a standard shop-vac, but that just recirculates micro-particulates that eventually settle into your wet finish. If you are mastering hardwood floor refinishing expert tips for 2025, you know that a single dust speck can ruin a high-gloss coat. This is also why you must sand between polyurethane coats to ensure a mechanical bond. Skipping this is the number one reason why your hardwood polyurethane is peeling in sheets. I personally use a HEPA-rated centrifugal separator attached to my orbital sanders to ensure that the surface is medically clean before that final topcoat goes down.
Looking toward the future of flooring in 2026 and beyond, I expect to see more AI-driven moisture monitoring systems built directly into the underlayments. We are moving away from reactive repairs to proactive sensors that can alert your smartphone if the subfloor gets too damp. This level of technology is already starting to appear in commercial high-rises to protect vast expanses of luxury materials. For the DIYer, it means we’ll soon have ‘smart floors’ that tell us exactly when they need a re-seal or a humidity adjustment.
How do I keep my new flooring looking pristine for the next decade?
It comes down to avoiding what I call the ‘cleaner’s trap.’ I see so many people buy a high-powered steam mop thinking it’s the ultimate sanitizing tool, but why you should never use a steam mop on click-lock floors is a hard lesson in moisture-driven delamination. High-pressure steam forces water into the core of your planks, causing them to swell and buckle. Instead, stick to pH-neutral cleaners and follow the hardwood floor care secrets to longevity and shine. If you have tile, be extra careful with your chemical choices; why you should never use acid-based cleaners on natural stone is because the acid actually eats the calcium in the stone, etching the surface permanently. My final challenge to you: before you start your next install, buy a high-quality moisture meter and map out your subfloor’s ‘wet zones’—it is the one pro move that will save you thousands in future repairs.
The Hard-Won Secrets Behind Every Flawless Surface
After years of hands-on experience, I’ve realized that the difference between a floor that ‘looks okay’ and one that ‘looks professional’ is found in the moments before you ever touch the adhesive. One of the biggest shifts in my workflow came when I embraced the dry-fit rule that prevents costly cutting mistakes. Laying out your tiles or planks without glue allows you to see exactly where those awkward 1-inch slivers will fall at the doorway. It’s a bit more work upfront, but it saves your sanity. I also learned that if you’re working with modern, oversized pieces, you can’t skip the extra steps; why your large format tiles need back buttering every time is simple physics—without that extra layer, you won’t get the suction needed to prevent cracking. And please, pay attention to the trowel notch secret for getting full thinset coverage. If you see air pockets when you pull a tile up, you’re looking at a future failure. These aren’t just ‘extra’ steps; they are the foundation of a job well done.
My Personal Field Kit for Flooring Success
If you were to peek into my work van today, you’d find a few non-negotiable items that I trust implicitly. First, I never start a project without consulting the ultimate guide to floor leveling for a perfect finish. It’s my go-to reference for mixing ratios and temperature control. For my daily workflow, I rely heavily on tile installation pointers that save time and money, especially the advice on using mechanical leveling systems. I also recommend picking up a high-quality pinless moisture meter and a 10-foot straightedge. These aren’t ‘gadgets’; they are your insurance policy against warping and lippage. I trust these tools because they’ve saved me from re-doing thousands of dollars worth of work on more than one occasion. [IMAGE_PLACEHOLDER]
Turn Your Vision into a Floor That Lasts Decades
Flooring is more than just a surface to walk on; it’s the stage upon which your life happens. Whether you are looking to revamp your home with expert flooring installation tips or you’re tackling your very first DIY project, remember that patience is your greatest tool. Don’t rush the leveler, don’t drown the grout, and don’t skip the primer. If you follow this step-by-step guide to flooring installation and leveling success, you’ll create a surface that isn’t just beautiful today, but remains structurally sound for the next twenty years. Flooring installation is a craft that rewards precision over speed. Have you ever faced a grout color disaster or a leveling nightmare? Let me know your story in the comments below!