
I was staring at the bathroom floor, coffee in hand, when the morning sun hit the tiles just right. Instead of a smooth, uniform grid, I saw hundreds of tiny, annoying pinholes staring back at me. It felt like my hard work was mocking me. I had spent days installing tiles like a pro, only to have the very last step look like Swiss cheese. It was a classic amateur move, and honestly, it is one I still see even seasoned DIYers make when they get a little too impatient with a bucket and a margin trowel. If you have ever felt that sinking feeling of seeing your beautiful stone or ceramic work marred by ‘moon craters’ in the joints, this is for you.
Stop Whipping Your Grout Like a Cake Batter
The biggest mistake I made early on—and I mean, I did this for years—was thinking that a drill and a paddle mixer were my best friends. I would crank that speed up, thinking I was being efficient. In reality, I was just folding air into the mixture. When you mix grout at high speeds, you are creating a literal foam of cement. Once that stuff dries, those air pockets pop and leave behind those ugly holes. Learning the correct way to mix grout so it doesn’t change color and texture is all about the slow, steady hand. If you want a finish that looks like a single, solid stone, you have to ditch the ‘power’ and find your ‘patience.’ Today, I am going to show you how to master the manual mix. We are going to talk about the peanut butter consistency that actually lasts and why your hands are often better than any motor. We will also look at tile installation pointers that save time and money by avoiding the need for a total re-grout later. According to the Tile Council of North America (TCNA) handbook, keeping mixing speeds below 300 RPM—or avoiding mechanical mixing altogether for small batches—is essential to prevent air entrapment.
Is hand-mixing actually worth the extra elbow grease?
You might be thinking, ‘My arm is going to fall off before I get through a whole bag.’ I get it. We live in a world of power tools for a reason. But let me ask you this: Have you ever had to scrape out dried, bubbly grout because it started falling out of the joints in the hallway? That is a special kind of hell. Hand-mixing gives you total control over the moisture content and ensures you are not over-aerating the bond. It is the secret to a high-end look without the high-end tool budget. Have you ever dealt with those frustrating pinholes after a long day of tiling? It’s a common hurdle, but it’s one we are going to clear today.
The Secret Ratio for a Solid Batch
Before we dive into the actual stirring, we need to talk about the prep work. Most people just dump water in and hope for the best, but that creates inconsistent strength across the floor. You want to start with a clean bucket and a margin trowel, ensuring your subfloor is already set—perhaps even using the ultimate guide to floor leveling for a perfect finish before the tile even went down. The goal is a dense, creamy paste, not a soup. Let’s get into the specifics of the pour.
Get Your Ratios Right Before You Stir
Start by measuring your water first, then adding the powder. This might seem like a small detail, but dumping water into a pile of grout powder is a recipe for clumps that never quite dissolve. You are aiming for a consistency that mimics heavy peanut butter—thick enough to stand on a trowel without sliding off, but pliable enough to spread. This is why I always recommend that you why you should always mix the entire bag of grout at once. When you try to mix small ‘eyeballed’ batches, you inevitably end up with different water-to-powder ratios, which leads to varying color shades and structural weak points across your floor. Just like a bad batch of leveling compound, inconsistent grout is prone to failure. If you have ever wondered why your self-leveler pitted during the drying process, it is often the same culprit: trapped air and improper moisture balance. Use a margin trowel to fold the mixture over itself, pressing out any visible dry pockets against the side of the bucket. This manual pressure is what kills those potential ‘moon craters’ before they ever reach your tile joints.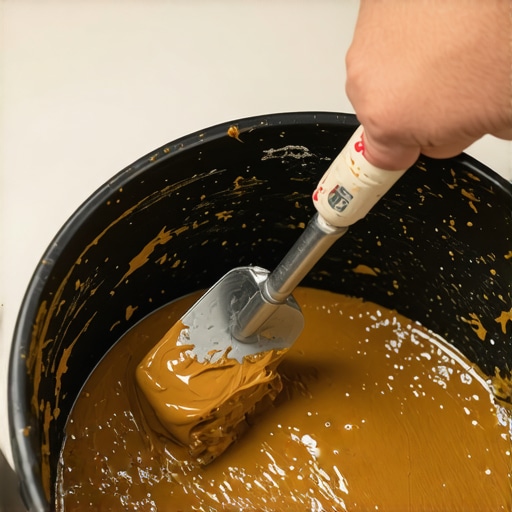
Wait Ten Minutes or Risk a Brittle Mess
Once you think the mixture is perfect, put the trowel down. This is the ‘slake’ period, and it is the most skipped step in DIY history. During these ten minutes, the chemicals in the grout are hydrating and bonding. If you skip this, the grout will pull moisture from the joints too fast, leading to shrinkage and those dreaded pinholes. I learned this lesson the hard way back in 2018 during a frantic kitchen remodel. I was running behind and started spreading the grout immediately after mixing. By the time I was halfway through the room, the grout in my bucket had turned into a gritty, unworkable sand. I had to scrape out the joints while they were half-dry, which is a nightmare that ranks high among flooring installation mistakes to avoid for lasting results. After the slake, give it one final, gentle stir by hand. Do not add more water! If it feels a bit stiffer, the final stir will loosen it back up naturally.
Drive the Grout Deep into the Joints
When you finally move from the bucket to the floor, your goal is physical force, not just surface coverage. Most people just ‘wipe’ the grout over the gaps. Instead, you need to use a hard-rubber grout float at a 45-degree angle to the joints. Think of it like packing a wound; you want to force the material all the way to the bottom of the tile. Just as the trowel notch secret for getting full thinset coverage ensures your tiles actually stick, firm pressure ensures your grout stays put. If you only coat the top, air stays trapped underneath. Eventually, that air will work its way up, creating a hole. Once you have packed the joints, use the float to ‘squeegee’ off as much excess as possible. Removing the bulk now makes the cleanup significantly easier. When you do start the final wipe-down, remember the wet rag trick for cleaning up wet grout haze to keep your tiles looking sharp without washing out the pigment from your freshly packed joints. Mastery of this phase turns a standard project into a professional-grade installation that resists cracking and moisture for years.While everyone focuses on getting the floor perfectly level, I’ve found that chasing ‘level’ is often a fool’s errand that distracts from what actually matters: flatness and deflection. In my experience, a floor can be slightly sloped and still look spectacular, but if it isn’t flat, your large format tiles will have lippage that makes the room look like a staircase. Worse yet, many DIYers assume a thick layer of self-leveler fixes everything. It doesn’t. If your subfloor has too much ‘bounce,’ that leveler is just going to crack. This is why I always emphasize mastering floor leveling pro secrets for perfect installations before you even open a bag of thinset.
Can your subfloor actually handle that heavy stone tile?
This is the advanced question most people forget to ask. We often talk about the surface, but the structure underneath dictates the lifespan of your work. The Tile Council of North America (TCNA) specifies a deflection limit of L/360 for ceramic tile and a much stricter L/720 for natural stone. If your joists are too thin or the span is too long, the floor will flex every time you walk on it. This structural movement is the real reason your floor joists are making your tile crack, and no amount of high-quality grout will save you from that. The ‘Oops’ factor here is ignoring the subfloor thickness. I once saw a beautiful marble entryway fail within six months because the installer put it over a single layer of 1/2-inch plywood. To fix a bouncy subfloor, you often need the plywood sandwich trick for fixing bouncy floor joists, adding a second layer of exterior-grade plywood to stiffen the assembly. Without that rigidity, the bond between the tile and the substrate eventually shears off.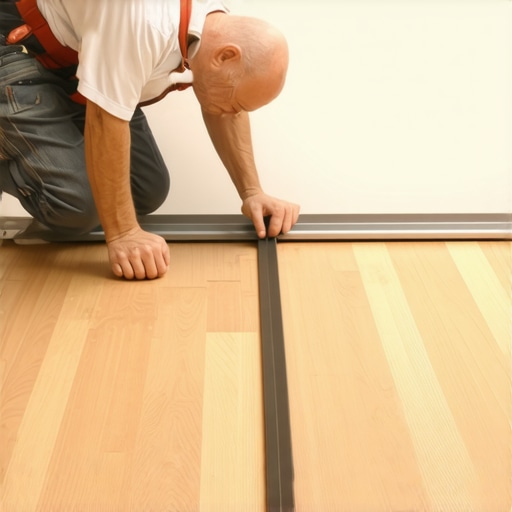 One contrarian tip I live by: Stop trying to ‘level’ the entire house. Focus on ‘flat.’ A 10-foot straightedge is your best friend here. If you find a valley, fill it. If you find a hump, grind it down. If you just dump leveler and walk away, you might find why your self-leveler pitted during the drying process or didn’t flow where you needed it to. Have you ever fallen into this trap where you prioritized a level bubble over a flat surface? Let me know in the comments.
Ditch the Guesswork with a Pinless Moisture Meter
If there is one tool that changed my entire approach to flooring, it is the pinless moisture meter. Early in my career, I assumed if a subfloor felt dry to the touch, it was ready for wood. I was wrong. I ended up with a project where the planks started cupping within a month because the concrete was still holding deep-seated moisture. Now, I never start a job without checking the stats. The National Wood Flooring Association (NWFA) Technical Manual emphasizes that for solid strip flooring, the moisture content of the wood should be within 4% of the subfloor’s moisture content. Without this data, you are basically gambling with your bank account. If you are moving between different materials, like choosing the best tile for your hardwood floor upgrade, you have to ensure the transition zone is structurally sound and dry. I personally use a Wagner Orion meter because it doesn’t leave holes in the expensive oak planks, and it gives me the confidence to know I am not walking into a failure.
How do I maintain my floors for the long haul?
Maintenance isn’t just about a quick sweep; it is about environment control. One of the biggest mistakes I see homeowners make is using a soaking wet mop on wood or high-end laminate. I always tell my clients that hardwood floor care secrets to longevity and shine start with a barely damp microfiber pad and a pH-neutral cleaner. If you have just finished a project, remember why you should never mop new hardwood for at least two weeks to let the finish fully cure. For your tiled areas, keep an eye on the grout. If you start hearing a ‘click’ or a ‘hollow’ sound, you need to know how to detect a hollow tile before the grout starts cracking. A simple golf ball test—dropping it gently across the floor—can reveal air pockets that might lead to future breaks. If you catch these early, you can often inject a specialized adhesive rather than ripping out the whole floor.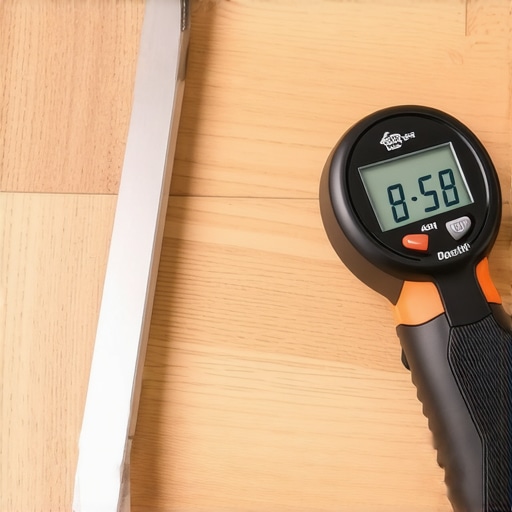
The Future of Perfectly Flat Floors
Looking ahead, the days of dragging a heavy aluminum screed across a room might be numbered. We are seeing a massive shift toward LiDAR-integrated smartphone apps that can map the ‘topography’ of your subfloor in seconds, highlighting high and low spots with heat-map precision. This tech makes mastering floor leveling pro secrets for perfect installations much more accessible for the average DIYer. I predict that within the next two years, we will see ‘smart’ self-leveling compounds that change color when they reach the ideal moisture level for flooring application. Until then, you have to rely on your tools and your patience. If you are dealing with an older home, you might even need mastering hardwood floor refinishing expert tips for 2025 to bring back the original character of the space while ensuring it meets modern flatness standards. During the colder months, don’t forget how to keep your hardwood floors from gapping in the winter by maintaining a consistent humidity level between 30% and 50%. I highly recommend you go out and buy a 10-foot straightedge today; it is the single most important investment you can make to ensure your floor looks like a professional did it. Map your floor before you buy your materials, and you will save yourself a thousand headaches.
Hard Lessons from My Most Humiliating Grout Failures
One thing I have learned after years of scraping out mistakes is that the lighting you work in is your biggest enemy. Always use a high-powered work light at floor level; overhead lights hide the pinholes and shadows that tell you where the grout is low. Also, never underestimate the power of the clean bucket. Even a few dried flakes from a previous mix can introduce grit into your fresh batch, leading to scratches on the tile surface. It is also vital to remember that grout color is a master of disguise. It will look alarmingly dark when you first pack it into the joints. Don’t be tempted to add more powder to ‘lighten’ it up; you will just mess up the chemistry. Trust the drying process and focus on the step-by-step guide to flooring installation and leveling success that emphasizes patience over speed.
Tools That Guarantee a Better Finish Than My First Five Jobs
If you are serious about a professional look, you need to stop eyeballing the flat spots. My 10-foot straightedge is the most borrowed tool in my kit because it reveals the ‘lippage’ before it becomes a permanent trip hazard. Pair that with a high-quality margin trowel for mixing; it allows you to scrape the bottom of the bucket far better than a standard scoop, ensuring no dry powder remains. For those venturing into wood or LVP, the Wagner Orion meter is non-negotiable for preventing the warping and buckling that ruins a beautiful flooring installation. I also recommend keeping a small repair kit on hand. Even with the best prep, life happens. Knowing how to fix a chipped tile without replacing the whole piece can save you from a weekend of demolition if a heavy tool slips out of your hand during the final stages.
Take the Leap and Transform Your Space
Flooring is one of the most physically demanding DIY projects, but it is also the one that provides the most immediate satisfaction. Every time you walk across that smooth, solid surface, you will remember the effort you put into getting the ratios right and the subfloor flat. Don’t let the fear of a few pinholes stop you. By following the dry fit rule that prevents costly cutting mistakes, you give yourself the grace to learn without wasting expensive materials. Your home deserves that custom, professional touch that only comes from a steady hand and a bit of insider knowledge.
Have you ever reached the end of a tiling job only to find a single, annoying mistake right in the middle of the room? Let me know your biggest ‘oops’ moment in the comments below!