

I’ll never forget the cold, damp sensation of my sock soaking up mystery liquid at three in the morning. I thought it was just a spill from the dog’s bowl, but when I pressed down, the floor didn’t just feel wet—it felt spongy. That ‘squish’ is the sound of a homeowner’s bank account crying. I spent the next three days convincing myself it was nothing, a classic case of denial that ended with me ripping up three hundred square feet of perfectly good material. If you have felt a weird bounce or smelled a faint, musty odor in your hallway lately, you aren’t being paranoid. You’re likely dealing with a compromised subfloor. Today, I am going to show you exactly how to find those hidden wet spots before they turn your home into a moldy science project.
Signs Your Subfloor Is Quietly Rotting Away
The tricky thing about engineered wood is that the top veneer often looks pristine while the plywood or OSB underneath is acting like a thirsty sponge. I’ve learned the hard way that hardwood floor care secrets to longevity and shine aren’t just about the polish you use; they are about keeping the foundation bone-dry. One of my biggest early mistakes was assuming that ‘moisture-resistant’ meant ‘waterproof.’ It doesn’t. When water seeps through the seams, it stays trapped between the flooring and the subfloor. If you notice the reason your white oak floor has black water spots is appearing near your baseboards, the damage has likely already moved into the wood beneath. You might also notice the hidden reason your floating floor is pinching isn’t an expansion gap issue at all, but rather the subfloor swelling and pushing the planks upward. Have you ever stepped on a spot in your kitchen that feels just a little too soft? Drop a comment and tell me if you’ve been ignoring that ‘weird’ floor feeling!
Can You Actually Save the Floor Once It Gets Wet?
Many folks believe that if they just run a dehumidifier for a week, everything will snap back into place. I used to be one of them. Unfortunately, once an engineered subfloor delaminates or the glue bonds break, the structural integrity is shot. According to the International Association of Certified Home Inspectors (InterNACHI), moisture levels in wood subfloors should ideally stay between 6% and 12%, and anything consistently higher will lead to rot. You absolutely must learn how to use a moisture meter before installing wood floors—or even after—to get a real reading of what is happening under your feet. Don’t rely on your eyes; rely on the data. Now that we know why we can’t ignore the ‘squish,’ let’s talk about the physical tests you can do right now to confirm your suspicions.To find the rot, you need to think like water. Water doesn’t just sit; it migrates to the lowest point and stays there until the wood gives up. I learned this the hard way during a guest bathroom remodel where I ignored a tiny, barely visible watermark near the toilet. I figured a little primer would hide the sin. Three hours after I poured my expensive self-leveling compound, I realized I hadn’t checked for structural gaps. I watched in horror as twenty gallons of liquid cement vanished through a hole in the subfloor, dripping onto the HVAC ducts below. I should have researched how to stop your floor leveler from leaking through the subfloor before wasting a weekend and three hundred dollars. Now, I always start by mapping the terrain with a clinical eye.
Get Down on the Floor and Hunt for Clues
Start by clearing every stick of furniture out of the room. You can’t diagnose the health of your foundation if you’re looking through the legs of a coffee table. Grab a high-powered flashlight and lay it flat on the floor. This ‘raking light’ technique reveals dips, humps, and water-swelled seams that your eyes normally miss from six feet up. If you see shadows pooling in certain areas, those are your low spots where moisture likely settled. You must know how to measure subfloor flatness before you start installing any new material, or you’re just begging for your new planks to click and groan every time you walk.
Run the 10-Foot Rule Across Your Room
Once you’ve spotted the shadows, confirm them with a tool that doesn’t lie. A 10-foot straightedge is the gold standard for this. I personally use a heavy aluminum box beam, but a very straight 2×4 can work in a pinch. Slide it across the floor in a star pattern. If you can fit more than a couple of stacked quarters under the beam, you’ve got a valley that needs filling. High spots are even worse because they act like a fulcrum, eventually snapping the locking tongues off your new boards. If you find a hump, you must learn how to check for high spots with a 10-foot straightedge and sand them down or plane them before you even think about the finish. 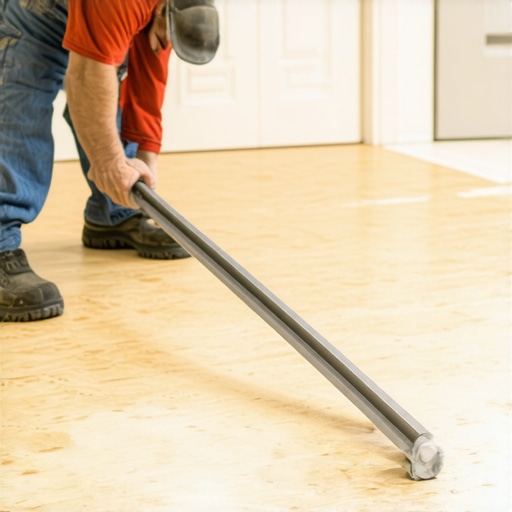
Stop the Bounce Before You Lay the First Plank
A spongy floor isn’t always caused by rot; sometimes it’s just poor support or ‘deflection.’ If you step on a seam and see the plywood move independently of the joist, that’s a failure waiting to happen. If you ignore it, your tile will crack or your luxury vinyl will separate at the joints. I once worked on a house where the floor felt like a trampoline near the hallway. Instead of ripping it all out, we used the shim trick for fixing a bouncy plywood subfloor from the crawlspace to tighten the gap between the joist and the subfloor. It took twenty minutes of work and saved the entire installation.
Watch Out for the Bubble Warning
If you decide to use a liquid leveler to fix these dips, be extremely careful with old, thirsty plywood. I’ve seen DIYers jump straight into the pour, only to find their floor looking like Swiss cheese the next day. This happens because air is trapped in the wood fibers and escapes as the heavy leveler sets. If you don’t prime the wood correctly, you’ll be wondering why your self-leveler is bubbling over plywood while you’re trying to scrape the hardened mess back up. Always seal the wood first to keep those air pockets locked away and ensure a glass-smooth surface.
I am going to let you in on a secret that most hardware store associates won’t tell you: the term ‘self-leveling’ is a total marketing lie. Beginners often pour the mix and walk away, expecting physics to do all the work. In reality, these compounds are ‘self-smoothing,’ not magical liquids that find a perfect horizon on their own. If you don’t help the process along, you will end up wondering why your self-leveler didn’t flow into the low spots as you intended. You have to be the pilot of that liquid, or it will stall out before it reaches the corners.
Stop Relying on Gravity Alone
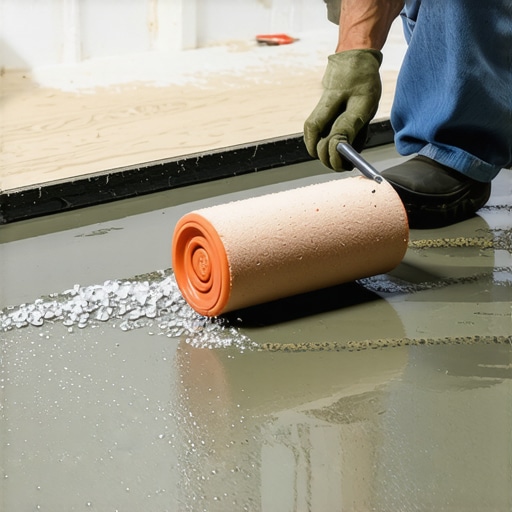
The biggest trap I see DIYers fall into is the ‘more is better’ philosophy with water. They think adding a little extra splash will make the mix run easier. In reality, over-watering ruins the crystalline structure of the cement, leading to a chalky surface that will eventually delaminate. If you don’t use a calibrated measuring bucket, you are gambling with your entire project. I’ve seen beautiful installs ruined because why your floor leveler pitted during the drying process was a direct result of improper mixing ratios. To get that glass-like finish, you must learn how to use a spiked roller for the perfect leveling pour. This tool breaks the surface tension and releases trapped air that the primer didn’t catch, ensuring the mix actually bonds to the subfloor instead of just sitting on top of it.
Why Does Your Perfectly Level Floor Still Crack Two Years Later?
This is the question that keeps homeowners up at night. You spent the weekend leveling, you used the best thinset, and yet, a hairline crack appears in your grout. The nuance most people miss is ‘deflection.’ A floor can be as flat as a billiard table, but if the joists underneath are too flexible, the floor will fail. The Tile Council of North America (TCNA) specifies that for ceramic tile, the maximum allowable deflection is L/360, but for natural stone, it’s a much stricter L/720. If your joists are too thin for the span, the real reason your floor joists are making your tile crack isn’t the leveler at all—it’s the structural bounce. Before you pour a drop of compound, you might need to try the plywood sandwich trick for fixing bouncy floor joists to stiffen the foundation.
Another common ‘oops’ factor is the race against the clock. Many pros don’t realize that the temperature of the water and the room can cut your working time in half. If your bucket is sitting in a 90-degree garage, the reason your leveler is setting up too fast is simply thermal acceleration. Always use cool water and keep your bags in a climate-controlled space. Have you ever started a pour only to have it turn to sludge before you reached the doorway? Let me know in the comments, because we’ve all been there! Before you start your next project, make sure you know the trowel notch secret for getting full thinset coverage to ensure that once the floor is level, the tile actually stays put.
The High-Tech Toolbox You Actually Need
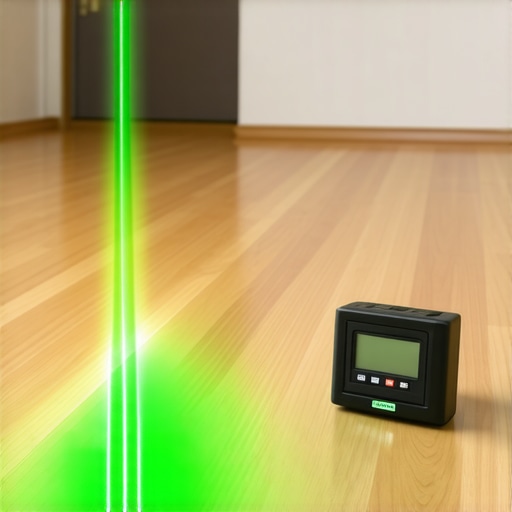
I’ve spent years lugging around heavy toolboxes, but I eventually learned that the most expensive tool isn’t always the best—the most accurate one is. If you’re serious about avoiding flooring installation mistakes to avoid for lasting results, you need to invest in a pinless moisture meter. I personally swear by the Wagner Meters Orion series. Unlike the cheap pin-style meters that only measure the surface, a pinless meter uses electromagnetic waves to see deep into the wood without leaving unsightly holes. According to the National Wood Flooring Association (NWFA), environmental control is the single most important factor in floor longevity, and you can’t control what you can’t measure. I also never start a job without a 360-degree green beam laser level. Red lasers are fine for dark basements, but in a sunlit kitchen, that green line is the difference between a straight grout line and a jagged mess. If you want a truly professional look, you have to prioritize precise floor leveling techniques to achieve flawless surfaces before the first plank is even unboxed.
Looking ahead, I’m seeing a massive shift toward ‘smart subfloors.’ We are already starting to see integrated sensor systems that sit beneath the underlayment and sync to your smartphone, alerting you to a pipe leak before you ever see a drop of water. It’s the ultimate peace of mind for anyone who has dealt with a major flood. Until those become standard, we have to rely on good old-fashioned prep and mastering floor leveling pro secrets for perfect installations to keep things stable.
How do I keep my new floor from moving after I finish?
Maintenance isn’t just about what you do with a mop; it’s about managing the climate. Wood and even some tile substrates are ‘alive’ in the sense that they expand and contract with humidity. If you want to keep your home looking pristine, you need to follow hardwood floor care secrets to longevity and shine, which starts with a high-quality humidifier/dehumidifier system for your HVAC. For those of you dealing with older homes, you might find that mastering hardwood floor refinishing expert tips for 2025 will be necessary every decade to keep the protective seal intact. I also suggest using a spiked roller for every single pour; it’s the secret to mixing leveler for a glass smooth finish because it ensures there are no hidden air pockets that could collapse under the weight of your furniture later. Don’t just settle for ‘flat enough.’ Take the extra hour to verify your moisture levels and flatness. Grab a moisture meter today and check three different spots in your hallway—you might be surprised by what the data tells you!
Hard Truths I Learned After My First Subfloor Failure
If there is one thing that years of renovations have taught me, it is that you cannot negotiate with physics. Many homeowners try to find shortcuts, but after replacing my second ‘saved’ floor, I realized that some corners simply aren’t worth cutting. First, remember that moisture is a ghost—it lingers long after the puddle is gone. Even if the surface feels dry, the internal cells of the wood can still be saturated, leading to a disastrous bond failure. Second, don’t let the cost of materials scare you into doing a mediocre job. Falling for flooring installation mistakes to avoid for lasting results because you wanted to save fifty dollars on primer is a mistake you will regret for a decade. Finally, trust your gut; if a spot feels weird under your boot, it is weird. Open it up and check.
My Personal Arsenal for a Perfect Foundation
I don’t leave my projects to chance anymore, and neither should you. My toolkit is built around accuracy and speed. I always keep a Wagner Orion moisture meter handy because it prevents the guessing game of whether the wood is actually dry. For checking the horizon, I rely on a 360-degree green laser level—it is much easier to see than the old red ones during a midday pour. To avoid the most common floor leveling challenges common mistakes and how to avoid them, I never start a mix without a dedicated, calibrated water bucket. Precision is the difference between a floor that lasts and one that fails in six months. I also suggest bookmarking the ultimate guide to floor leveling for a perfect finish for those moments when the self-leveler starts acting up and you need a quick fix.
#IMAGE_PLACE_HOLDER_E#
Your Journey Toward a Rock-Solid Home
Repairing a subfloor can feel like a daunting, expensive task, but view it as an investment in your peace of mind. There is a deep satisfaction in walking across a room and hearing absolutely nothing. No squeaks, no groans, and definitely no mystery squish. By taking the time to master a step-by-step guide to flooring installation and leveling success, you are protecting the beauty of your home for years to come. Your future self—the one not ripping up planks in five years—will thank you for the diligence you show today. Take the first step, grab that straightedge, and see what your floor is actually telling you. Have you ever found a mystery squish under your carpet or laminate? Let me know in the comments how you handled the discovery!