
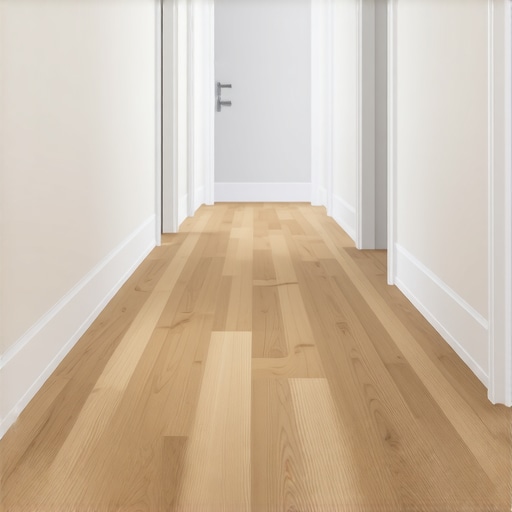
I remember standing at the edge of my first hallway remodel, feeling like a absolute genius. I had decided to run the planks across the width because a random design hack promised it would make the narrow space look wide. It didn’t. It looked like a poorly constructed ladder. Every time I walked to the bedroom, my eyes jumped from joint to joint, making the hall feel shorter and more cluttered than ever. That was the day I learned that some rules exist for a reason, and others are meant to be broken with caution. Today, we’re going to stop the guesswork and figure out exactly how to point those planks so your home feels like an open invitation rather than a claustrophobic tunnel.
Stop Looking at Your Floor Like a Math Problem
When you are staring at a narrow space, it is tempting to try and outsmart the architecture. You want to push the walls out or stretch the ceiling. But flooring isn’t just a visual trick; it is a structural component of your home’s flow. Early in my DIY journey, I ignored the flooring installation fundamentals, thinking I could just ‘wing it’ with the layout. I ended up with a floor that not only looked weird but felt unstable because I didn’t account for the subfloor’s direction. To get it right, you need to think about where the light comes from and how people actually move through the space. One of the most common flooring installation mistakes to avoid is choosing a direction based solely on a single photo you saw online without checking your own home’s ‘bones.’ According to the National Wood Flooring Association (NWFA), flooring should ideally run perpendicular to the floor joists to ensure the most stable surface possible, which often dictates the direction for you before you even pick up a hammer. Have you ever started a project only to realize halfway through that the pattern just looks… off? I’d love to hear your ‘oops’ moments in the comments!
Is running flooring lengthwise actually worth the hype?
A lot of folks worry that running boards the long way will turn their hallway into a literal bowling alley. It is a valid fear. If you have a thirty-foot hall that is only three feet wide, long straight lines can feel a bit intense. However, the alternative—running them crosswise—creates a ‘staccato’ effect that breaks up the visual plane and can make a small area feel incredibly busy. If you find yourself dealing with the best direction to run flooring in a house with no square walls, you already know that layout is everything. Running the floor parallel to the longest wall almost always creates a cleaner, more professional look that guides the eye naturally from one room to the next. It simplifies the transitions and makes the installation process significantly faster with fewer wasted off-cuts.
Get the Base Right Before You Lay a Single Plank
Nothing ruins a visual line faster than a dip in the subfloor. Think of your subfloor as the foundation of a skyscraper; if it is leaning even an inch at the bottom, the top is going to be a disaster. I once ignored a slight slope in a 1920s bungalow hallway, thinking the underlayment would hide it. Three months later, the planks started clicking every time someone walked to the bathroom. To avoid this, you have to learn how to check for high spots with a 10-foot straightedge. If you find a valley, you need to fill it. Mastering floor leveling pro secrets for perfect installations isn’t about achieving a scientific zero; it is about making sure your rigid planks have a flat stage to sit on. If your subfloor is wood and feels like a trampoline, you might need to look at the real reason your floor joists are making your tile crack or causing your wood to gap under the weight of furniture.
#IMAGE_PLACE_HOLDER_B#
Find Your Longest Uninterrupted Run
In most homes, the longest wall is your North Star. It is the constant that won’t lie to you. When you align your flooring with this wall, you are creating a sightline that pulls the eye forward, making the space feel intentional. This is especially true if you are integrating different materials, such as when you transform your space with expert hardwood floor tile combinations. You want those transitions to be seamless, not a jarring 90-degree turn. In my own home, I eventually adopted the sunlight rule: run the planks toward the primary light source. This naturally hides the seams between boards because the light flows along the length rather than catching the edges and casting tiny shadows that highlight every micro-gap.
Map Out Your Layout with a Dry Fit
Before you pull the trigger on the first nail or bead of glue, you have to lay out three or four rows without adhesive. This is the dry fit rule that prevents costly cutting mistakes. I learned this the hard way when I started against a wall that I thought was straight, only to realize forty feet later that the hall narrowed by two inches. I ended up with a sliver of wood at the doorway that looked like a toothpick. Now, I always check the layout first. If you are working with complex patterns or tiles, remember why you should always start your tile layout from the center. Even with planks, measuring from the center and working toward the walls ensures that the cut pieces on either side are even, which keeps the room balanced. If you rush this phase, you will likely see why your luxury vinyl is peaking at the short joints because you forced a fit where there simply was not enough expansion room.
Stop the Bounce with the Right Subfloor Fix
If you are dealing with a concrete slab, moisture is your primary enemy. Learning how to install luxury vinyl over a concrete slab with high moisture involves using a quality vapor barrier that keeps your floors from warping or smelling like a basement. I remember a project where we skipped the primer on a dusty slab, and the self-leveler peeled up like a bad sunburn. Use precise floor leveling techniques to achieve flawless surfaces by ensuring the bond is permanent. A stable floor isn’t just about the aesthetics—it is about the silence of a well-installed surface that doesn’t squeak or groan every time you head to the kitchen for a midnight snack.
Common wisdom suggests that if your subfloor is flat, your tile will be perfectly level. In my experience, that’s a dangerous half-truth. Even with a level surface, I’ve seen countless DIYers—and even some pros—get caught by the ‘shrinkage trap.’ When you use a standard thinset for heavy, large-format tiles, the water evaporates and the mortar actually pulls the tile down slightly as it cures. If one tile has a bit more mortar than its neighbor, you get lippage. This is exactly the hidden cost of using cheap thinset on large format tiles; you save ten dollars on the bag but lose the entire aesthetic of the room. This is also why your large format tiles need back buttering every time. It isn’t just about stickiness; it is about creating a uniform mechanical bond that resists that drying pull. According to the Tile Council of North America (TCNA), large format tiles require at least 80% mortar coverage in dry areas and 95% in wet areas to prevent cracking and hollow spots.
Don’t Let Your Expansion Gaps Become a Visual Nightmare
I used to think expansion gaps were just a suggestion for cheap laminate. Then I installed a high-end floating floor in a sunroom without a transition at the doorway. One humid July afternoon, the floor buckled so hard it looked like a speed bump. This happens because even ‘waterproof’ vinyl expands and contracts with temperature. If you don’t understand the reason your vinyl plank is separating at the thresholds, you’ll likely blame the product when the real culprit was your lack of ‘breathing’ room. People often try to make a floor look ‘seamless’ by running it through every room without breaks, but that’s a recipe for disaster. This is the hidden reason your floating floor is pinching. Instead of fighting physics, use why you need a transition strip between different flooring heights to give each room its own independent movement zone.
#IMAGE_PLACE_HOLDER_C#
Why does my porcelain look wavy when the sun hits it?
This is the ‘optical illusion’ of flooring. You spend hours how to achieve flawless floor leveling before tile laying, the floor is technically flat, yet under recessed lighting, it looks like a choppy sea. This is often why your porcelain tile looks wavy under recessed lighting. The nuance here isn’t just the levelness—it’s the ‘wash’ of the light. If you’re installing tile in a room with floor-to-ceiling windows or low-angle spotlights, you have to be ten times more precise with your layout. Even a 1/32-inch variance will cast a shadow that looks like a mountain. To fix this, you need precise floor leveling techniques to achieve flawless surfaces before you even open a box of tile. Have you ever fallen into this trap? Let me know in the comments!
The Invisible Enemy Hiding in Your Subfloor Prep
If you’ve ever seen self-leveling compound peel up like a sheet of paper, you’ve witnessed a bond failure. Most people sweep the floor and think they are ready. But old concrete is often contaminated with oils, waxes, or ‘laitance’—a weak, milky layer of cement that rises to the top during the pour. I once saw a beautiful job ruined because the installer didn’t realize why your floor primer is peeling off like a sunburn. You must test the porosity of your slab. If a drop of water just sits on top without soaking in, your leveler won’t stick either. You might need the best tool for scraping glue off a concrete slab to get down to the ‘meat’ of the concrete. Only then can you follow a step by step guide to flooring installation and leveling success to ensure that your hard work actually stays put for the next twenty years. When you’re dealing with wood-to-tile transitions, a major nuance people overlook is the moisture content of the subfloor. If your wood is too dry and your tile substrate is damp, that wood will suck the moisture right out of the mortar, causing it to cure too fast and crack. I always recommend checking how to keep your hardwood floors from gapping in the winter to understand how humidity fluctuates. If you don’t, you’ll see why your grout is falling out of the joints in the hallway within a single season change.
You have nailed the layout and survived the leveling process, but the real work starts when the tools go back in the truck. If you don’t have the right kit, your knees and your wallet will eventually pay the price for inefficiency. I am personally obsessed with my dust-extraction setup because silica dust is a nightmare for your lungs and your home’s HVAC system. Most DIYers think a standard shop vac is enough, but without the vacuum attachment that actually picks up fine sawdust, you will be finding fine white powder in your kitchen cabinets for the next three years. When it comes to thinset, stop using those tiny square notches for big tiles. I swear by the slanted Euro-notch because of the trowel notch secret for getting full thinset coverage. It collapses the ridges much more effectively than a standard U-notch, which prevents those dreaded hollow sounds that lead to cracked tiles down the road. #IMAGE_PLACE_HOLDER_D#
How do I keep my floors looking brand new for decades?
The biggest mistake I see after a beautiful install is ‘over-cleaning.’ People get excited about their new surface and start scrubbing with heavy chemicals. But you need to know why you should never mop new hardwood for at least two weeks to let the finish or the adhesive fully cure and reach its maximum hardness. And for the love of all that is holy, stay away from steam cleaners on anything that isn’t solid stone. I have seen countless disasters because homeowners didn’t believe the truth about using steam mops on luxury vinyl planks—it is the fastest way to melt your adhesive and warp the core of your boards. Instead, focus on seasonal adjustments and moisture control. Learn how to keep your hardwood floors from gapping in the winter by managing your home’s humidity levels with a humidifier. I predict that in the next five years, we are going to see self-leveling compounds that are pre-mixed with thermal-conductive fibers, making radiant heat installs twice as fast and much more durable. For now, stick to the hardwood floor care secrets to longevity and shine that rely on pH-neutral cleaners and high-quality felt pads. My challenge to you: before you lay your next plank, go buy a professional-grade pinless moisture meter. According to the National Wood Flooring Association (NWFA), the moisture content (MC) of your subfloor and your wood shouldn’t vary by more than 4% for planks wider than 3 inches. Checking this one metric will save you from a massive floor failure next summer.
The Hard Lessons I Paid for in Blisters and Re-dos
If there is one thing I have learned after years of hands-on work, it is that your floor is only as good as the silence beneath it. I used to think I could speed through the prep, but now I know that every hour spent with a straightedge saves ten hours of regret later. One of the biggest ‘lightbulb moments’ for me was realizing that moisture isn’t just a concern for basements; it is a living factor in every room. I also learned that walking away for an hour when a layout feels tight is better than forcing a cut that looks like a hack job. This is the core of step by step guide to flooring installation and leveling success—patience is a physical tool just as much as a saw is.
My Reliable Toolkit for a Lifetime of Solid Floors
I don’t believe in buying every gadget at the big-box store, but there are a few items that changed the game for me. First, a professional-grade pinless moisture meter is non-negotiable if you want to avoid warping. Second, I swear by the NWFA technical manuals for those ‘weird’ corner cases that YouTube doesn’t cover. #IMAGE_PLACE_HOLDER_E# For my actual work, I always keep a specific kit ready that includes mastering floor leveling pro secrets for perfect installations. I trust these tools because they have survived the grit of real-world jobs and haven’t let me down when a deadline was looming.
Go Ahead and Open That First Box of Planks
You have the knowledge now to turn a stressful renovation into a project you can be proud of. Don’t let the fear of a small mistake stop you from starting. Your home deserves a foundation that looks and feels intentional. Remember that flooring installation is a craft, and like any craft, you get better with every row you lay. Once you are finished, don’t forget to protect that investment by following hardwood floor care secrets to longevity and shine. You have got this!
What part of your subfloor is giving you the most anxiety right now? Drop a comment below and let’s troubleshoot it together.