
I remember the first time I finished a ‘perfect’ kitchen remodel. I’d spent weeks picking out these gorgeous, oversized porcelain tiles. They were sleek, modern, and expensive. But then came the moment of truth. I flipped the switch on the brand-new recessed lighting, and my heart sank. Instead of a mirror-smooth surface, the floor looked like the surface of a choppy lake. Those overhead lights were casting long, brutal shadows across every tiny deviation in the floor. It was a crushing realization that my ‘expert’ installation wasn’t as flat as I thought. I had made the classic mistake of assuming the tile was thick enough to hide a subfloor that was slightly out of whack. Today, I’m going to show you exactly why this happens and, more importantly, how you can stop it before you lay a single piece of mortar. We’re going to dive into the physics of ‘grazing light’ and the prep work that makes or breaks a high-end look.
The Brutal Truth About Grazing Light
When you install recessed lights, you aren’t just brightening the room; you are essentially putting your floor under a microscope. Lighting professionals call this ‘grazing light.’ When a light source is positioned almost parallel to a surface, it highlights even the smallest texture or height difference. If your floor isn’t perfectly flat, the light hits the ‘high’ edges of the tiles and casts a shadow into the ‘low’ spots. This creates that wavy, undulating effect that drives homeowners crazy. I’ve seen it happen with some of the most elegant tile designs out there. Early in my career, I thought I could ‘back-butter’ my way out of a bumpy subfloor. I figured a little extra thinset here and there would level everything out. I was wrong. The Tile Council of North America (TCNA) actually specifies that for large-format tiles, the subfloor should not deviate more than 1/8 inch in 10 feet. Anything more, and you are asking for trouble once those LEDs go on. You really need to master precise floor leveling techniques to stand a chance against overhead lighting.
Will a different grout color hide the waves?
You might think that using a matching grout will mask the shadows, but unfortunately, shadows don’t care about color. If the tile has any ‘lippage’—where one edge is higher than its neighbor—the light will find it. I once spent six hours trying to match a grout perfectly, only to realize the problem was actually the lippage between my large format tiles. If you want a floor that looks like a single sheet of glass, you have to start with a subfloor that is as flat as a pool table. Have you ever turned on your kitchen lights only to see a ‘rolling sea’ on your floor? It’s a gut-punch, isn’t it? Drop a comment or send a message if you’re currently staring at a wavy floor and don’t know where to turn.
Find the Trouble Spots Before You Start
The best way to avoid the ‘wavy’ look is to find the trouble spots before the tile goes down. I use a 10-foot straightedge or a long level to ‘map’ the floor. If you see light peeking under the level, that’s a dip. If the level rocks like a seesaw, you’ve found a high spot. To fix this, you’ll want to look into the secret to getting a flat floor, which usually involves a high-quality self-leveling compound. Don’t forget that the application matters too; using the spiky roller secret can help you get that mirror-smooth finish without the air bubbles that cause their own set of lumps.Once you have identified the dips and peaks, the instinct is to start pouring. But hold on. I learned the hard way that self-leveler is only as good as the surface it is clinging to. I remember a job in a basement where the previous owner had painted the concrete. I thought I could just pour over it. Three days later, I heard a hollow ‘crunch’ when I stepped on it. The leveler had detached completely. This is why most floor levelers fail on top of painted concrete. You have to mechanically abrade that surface or use a specialized primer that acts like industrial-strength Velcro.
Clean Surfaces Save You Money
Before the bucket ever touches the floor, you need a surface so clean you could almost eat off it. Dust is the enemy of adhesion. If you are working on a slab, use the best way to prep a dusty concrete floor for adhesive to ensure the leveler does not just sit on a layer of powder. For those working over wood, you must ensure the subfloor is rock-solid. Use the hammer test for finding loose subfloor nails and drive a screw into any squeak. If the subfloor moves even a fraction of an inch, your beautiful new tile will eventually crack under the pressure of daily foot traffic.
Don’t Whisk Your Leveler Like Cake Batter
Mixing is where many beginners shoot themselves in the foot. You want a smooth, pancake-batter consistency, not a frothy mousse. If you go too fast, you will introduce thousands of tiny air bubbles that will leave pits in your finished floor. The mixing paddle speed that ruins your leveling compound is typically anything over 650 RPM. I once used a high-speed drill because my low-speed one died, and the floor ended up looking like Swiss cheese once it dried. It took me hours of hand-patching to fix that mistake. 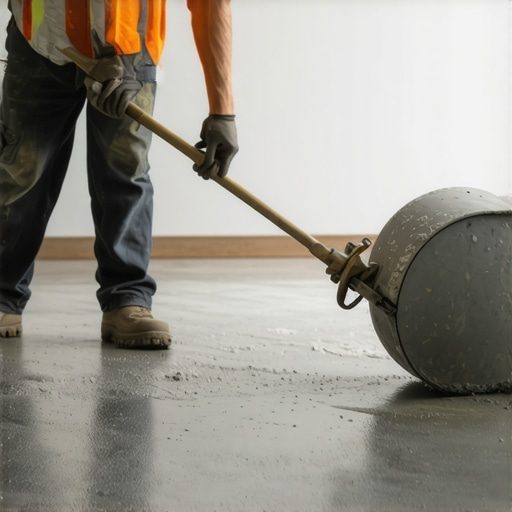
The Magic of the Spiky Roller
Once the pour starts, time is against you. You have about 15 to 20 minutes before the compound begins to set. This is where you use the spiky roller secret for a mirror-smooth pour. Think of the roller as a giant comb that releases trapped air and helps the liquid find its own level. Without it, you will get ghosting marks or ridges where one pour met the next. It is the difference between a floor that looks okay and one that looks like a perfectly flat sheet of ice. If you are tackling a large area, having a partner to mix while you roll is the only way to maintain a wet edge.
Check Every Square Inch With a Straightedge
Even after a good pour, you are not done until you verify. Use your 10-foot level to sweep the room again. This precise floor leveling techniques to achieve flawless surfaces approach ensures that when you finally get to the flooring installation fundamentals, your tiles sit perfectly flat. If you find a tiny hummock that the leveler did not quite swallow, you can often sand it down once it is fully cured, provided you did not over-mix and create a brittle surface. Taking this extra hour to check your work prevents the heartbreak of seeing those ‘rolling waves’ once your overhead lighting is installed.Most pros will tell you to just ‘build up the mud’ if the floor is slightly off. It sounds logical, right? If there’s a dip, just add more thinset. But here is the contrarian truth: adding extra mortar often makes lippage worse. Modern modified thinsets are engineered to be used at a specific thickness—usually 3/16 to 1/2 inch after the tile is embedded. When you exceed that to bridge a gap, the mortar undergoes ‘shrinkage’ during the hydration process. As the water leaves the mix, the mortar pulls the tile downward. If one side of a large-format tile has a thicker bed than the other, that side will sink more, creating a lip that the grazing light will highlight instantly. This is the hidden cost of using cheap thinset on large format tiles; you lose the structural integrity needed to resist that pull.
Does a thicker subfloor always mean more stability?
You’d think beefing up the plywood would solve every bounce issue, but the real nuance lies in the ‘deflection’ across the span, not just the thickness of a single sheet. Even a 1 1/8-inch subfloor can fail if the joists aren’t spaced correctly or if you chose the wrong material. I’ve seen people spend a fortune on thick material only to realize they used a low-grade CDX plywood that delaminated under the moisture of the leveler. You need to know the plywood grade you need for a stable tile underlayment to prevent the ‘oops’ factor of a shifting base. According to the ANSI A108.02 standard, subfloor surfaces must be structurally sound and free of any condition that would prevent a good bond. 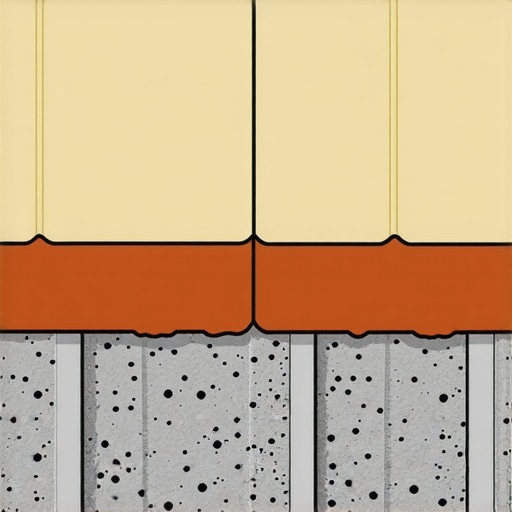 The biggest mistake I see in the field involves priming wood. Most guys splash some primer on and wait ten minutes. But wood is a thirsty, porous beast. If you don’t seal those pores completely, the wood will literally suck the water out of your self-leveler before it has a chance to flow. This is why your self-leveler didn’t bond to the wood subfloor and why it ends up cracking. You want a ‘pinhole-free’ primer coat. If you see bubbles or dry spots after the first pass, go again. Otherwise, you’ll end up with a mess why your self-leveling pour looks like a topographical map instead of a flat plane. These are the flooring installation mistakes to avoid for lasting results that separate the weekend warriors from the masters. Have you ever fallen into the ‘just add more mud’ trap? Let me know in the comments.
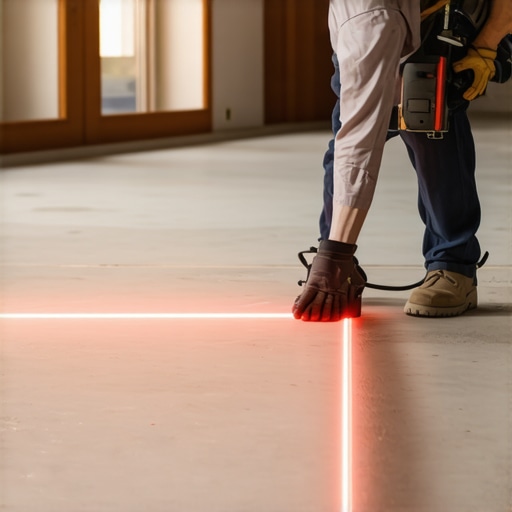
Once you’ve mastered the art of the pour, you need to think about the long game. I used to think a 10-foot level was the pinnacle of precision until I discovered the Bosch GSL 2 Surface Laser. If you are serious about precise floor leveling techniques to achieve flawless surfaces, this tool is a game-changer. It projects two lines onto the floor; if those lines stay together, the floor is flat. If they diverge, you’ve found a high or low spot instantly. It’s far more reliable than the ‘flashlight and prayer’ method I used a decade ago. When you’re dealing with the secret to getting a flat floor for large format tiles, having a digital eye that doesn’t get tired is worth every penny.
How do I keep my new floors looking pristine over the years?
Maintenance is where most homeowners—and even some pros—drop the ball. For tile, it’s all about the grout. Even if you followed the step-by-step guide to flooring installation and leveling success, dirty grout will make the whole floor look dated within two years. I recommend using a high-quality penetrative sealer immediately after the grout has cured for 72 hours. If you’ve opted for wood, remember that moisture is your constant rival. You should already know how to use a moisture meter before you lay wood floors, but you should also keep one in your toolkit for seasonal checks. According to the National Wood Flooring Association (NWFA), maintaining a consistent relative humidity between 30% and 50% is the only way to prevent your boards from cupping or gapping over time. Check out my hardwood floor care secrets to longevity and shine to avoid the ‘cloudy’ finish that ruins a high-end look.
Beyond the basics, I’m obsessed with the future of floor prep. We are moving toward a world where LiDAR technology—the same stuff in your iPhone—will allow us to create 3D contour maps of a subfloor before we even open a bag of leveler. Imagine knowing exactly how many bags of compound you need down to the ounce. This level of precision helps you avoid flooring installation mistakes to avoid for lasting results by removing the guesswork. It also helps when you are planning tile selection tips for elegant hardwood floors in 2025, as you can see exactly where transitions will need to be adjusted. If you’re currently in the middle of a project, my biggest piece of advice is to never rush the drying times. I’ve seen the fast set mortar trick for same-day tile grouting work beautifully, but only if the substrate was perfectly dry to begin with.
If you want to truly level up your craftsmanship, I challenge you to try the ‘skim coat’ method on your next vertical transition. Instead of relying on a bulky transition strip, use a specialized ramp-up compound to create a seamless flow between different flooring heights. It’s a subtle touch that separates a ‘good’ job from an architectural masterpiece. If you hit a snag or aren’t sure which leveler is right for your specific joist spacing, feel free to reach out via our contact us page. I’d love to hear what gear you’re currently using to fight the battle against wavy floors.
What I Finally Realized About Subfloor Prep
After years of chasing the perfect install, I have learned that your final tile surface is only as honest as the subfloor beneath it. One thing that still catches people off guard is the Flash Dry phenomenon. If you have not checked the room temperature, your leveling compound might set up before it even has a chance to flow, leaving you with ridges instead of a mirror finish. This is why your self-leveler is drying faster than you can pour it. Another big one? Ignoring the perimeter. If you do not use foam expansion strips, the leveler will bind to the walls, which can lead to why your self-leveler developed spiderweb cracks overnight. Prep work is not just the first step; it is the most important step.
Gear That Makes the Difference Between Good and Great
I do not leave the shop without a few specific items. First, a dedicated mixing station with a low-speed drill prevents those dreaded air bubbles. Second, I always keep a spiky roller handy—it is the only way to get that professional, glass-like surface. #IMAGE_PLACEHOLDER_E# If I am working with wood, I never skip a reading with a professional-grade moisture meter. You need to know how to use a moisture meter before you lay wood floors to ensure the subfloor is not hiding a moisture bomb that will warp your boards later. Finally, for those tricky transitions, I rely on how to fix a transition between tile and uneven concrete techniques to ensure a seamless flow between rooms.
The Satisfaction of a Truly Flat Floor
There is a unique kind of pride that comes from turning on those overhead lights and seeing a surface that does not cast a single shadow. By committing to precise floor leveling techniques to achieve flawless surfaces, you are not just installing tile or hardwood floors; you are creating a foundation for the rest of your home’s aesthetic. It takes patience, a bit of sweat, and a lot of measuring, but the result is a floor that remains beautiful for decades. Don’t be intimidated by the technical specs—take it one bag of leveler at a time and follow the step-by-step guide to flooring installation and leveling success to stay on track. Have you ever encountered a nightmare subfloor that felt impossible to level? Let me know your story in the comments below!