
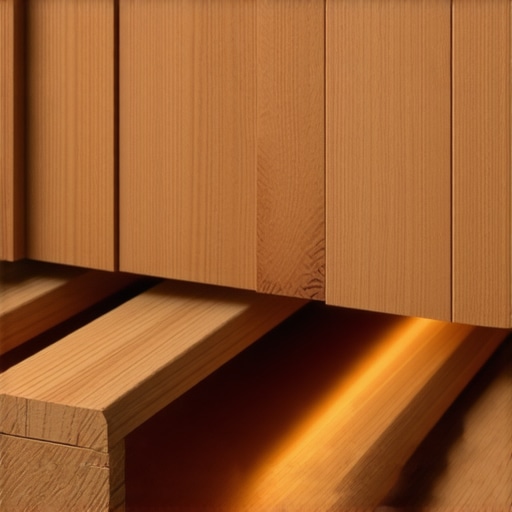
I still remember the first winter after I installed that beautiful white oak in my guest room. I was so proud. I’d spent weeks obsessing over the finish, but I’d been lazy about the perimeter. One night, around 2 AM, a sound like a gunshot echoed through the hallway. I jumped out of bed, heart racing, thinking a window had shattered. It wasn’t an intruder; it was a floorboard. Under the steady warmth of the new radiant heating system, the wood had expanded just enough to lose its battle with the drywall. Because I hadn’t left a proper expansion gap, the board had literally buckled and snapped upward under the pressure. It was a painful, expensive lesson in physics that I don’t want you to repeat.
Give Your Wood Floors a Little Room to Breathe
Radiant heat is a luxury that every homeowner deserves, but it transforms your floor into a dynamic, moving organism. Unlike standard installations, heat coming from directly beneath the planks causes the wood to move more frequently and with more force. If you don’t account for this, you’re essentially building a ticking time bomb. I learned the hard way that flooring installation mistakes to avoid for lasting results start with the very first row you lay down. You need to maintain a consistent gap—usually about 1/2 inch to 3/4 inch—around the entire perimeter of the room. This space is hidden by your baseboards and shoe molding, but it is the lungs of your flooring system. Without it, the wood has nowhere to go but up. I’ve even seen people struggle when they try to install plank flooring under low radiators, forgetting that those areas get even hotter and need even more breathing room. In fact, the National Wood Flooring Association (NWFA) explicitly states that proper acclimation and expansion space are non-negotiable for radiant heat success to prevent permanent structural damage.
Does a tiny gap really make that much difference?
You might be looking at a half-inch gap and thinking it’s overkill. I thought the same thing. I figured the wood was ‘pre-shrunk’ and stable. I was wrong. Wood is hygroscopic; it reacts to both the temperature of your radiant pipes and the humidity in the air. If you are worried that the gap will look ugly, remember that it will be completely covered by trim. You’re not sacrificing aesthetics; you’re buying insurance. If you have a particularly large space, you might even need to look into the expansion joint secret for large tiled living areas because the same principles of movement apply to almost every material. Before you even open a box of flooring, you should be using tools like a moisture meter to prevent floor failure, ensuring your subfloor and your planks are in sync before the heat ever turns on. Have you ever heard your floor ‘pop’ or ‘groan’ when the thermostat kicks in during a cold snap? That’s the sound of tension. Leave a comment below if you’ve ever seen your floors start to peak in the middle of a room—I’d love to help you troubleshoot it before something snaps.
Get the Subfloor Flatter Than a Frozen Lake
Every millimeter counts when you are working with radiant heat. If your subfloor isn’t perfectly flat, the air pockets trapped beneath the planks act as insulators, blocking the warmth you’re paying for and creating annoying “dead spots.” You need to follow the ultimate guide to floor leveling for a perfect finish before you even think about laying your first row. I use a ten-foot straightedge to check for high spots. If you see even a sliver of light under that level, you’ve got a dip that will eventually cause your floor to flex and squeak every time someone walks by.
Find the Dips with the Chalk Dust Secret
Instead of guessing where to sand or fill, I use a trick I picked up from an old-school carpenter. Sprinkle a light layer of blue chalk dust across the suspect area and drag your straightedge over it. The chalk will stay in the “valleys,” giving you a perfect visual map of exactly where you need to apply more compound. 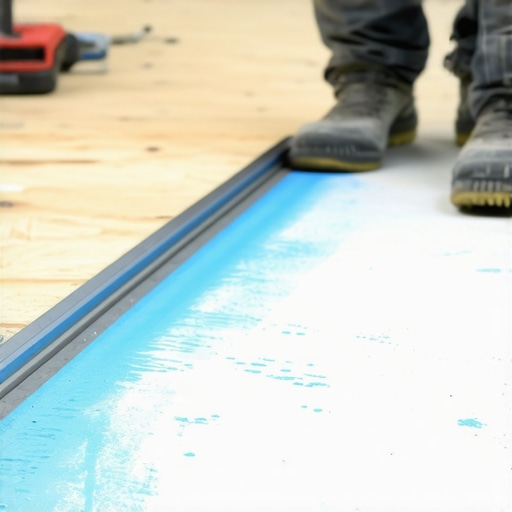 I once spent six hours trying to level a concrete slab in a drafty basement. I skipped the primer and used a cheap patching compound without checking the moisture levels. Three days later, it sounded like I was walking on dry leaves. I had to scrape it all up because subfloor patching compound cracking under pressure is a nightmare when you’re working over active heat pipes.
Stop Using the Wrong Mallet Before You Snap a Joint
Radiant heat makes wood slightly more brittle over time. If you use a standard metal hammer or a cheap plastic block, you will eventually mushroom the edges or crack the tongues. You should be using a dead blow hammer for floor capping to distribute the force evenly. I once ruined a gorgeous batch of cherry wood because I was being too aggressive with a standard mallet; the rubber mallet mistake that ruins tongue and groove joints is a costly error. When the heat kicks in, those micro-fractures in the wood expand, and that’s when the clicking sounds start. Always tap gently and listen for the “thud” that tells you the joint is fully seated.
The Glue-Assist Trick for Wide Plank Stability
If you have fallen in love with 6-inch or 8-inch wide planks, you need to understand that a few nails won’t hold them against the force of radiant heat. Why wide planks need more than just nails to stay flat is a matter of physics: the wider the board, the more leverage the wood has to cup. I always recommend a “glue-assist” method. Apply a serpentine bead of high-quality, flexible urethane adhesive to the back of the board before nailing. This gives the plank a secondary bond to the subfloor, preventing it from lifting as it dries out. I’ve seen beautiful homes where the floors looked like a series of washboards because the installer relied on nails alone. Don’t let your investment warp just to save a few dollars on glue.
Silence the Squeaks Near Your Heat Vents
The areas around your registers are the most volatile because the air is hottest and driest right there. The hidden reason your floor squeaks near the heat vents is often the rapid contraction of the subfloor right at the vent cutout. Make sure you use extra fasteners around these perimeters and leave that crucial expansion gap even against the vent boot. If the wood touches the metal of the vent, the friction will create a high-pitched chirp every time the furnace turns on. I once had to go back to a client’s house four times to find a single squeak that ended up being a board rubbing against a vent flange. A simple 1/8-inch trim with a multi-tool fixed it instantly.
Most DIYers—and even some pros—treat self-leveling compound like a magic potion. They think if they pour it, gravity will do all the heavy lifting. That’s a myth that leads to expensive teardowns and wavy floors. In reality, these mixtures are viscous and have high surface tension. If you just pour and walk away, you’ll end up with ‘islands’ and ‘valleys’ rather than a flat plane. You need to use a spiked roller or a gauge rake to help the material find its level. I’ve seen so many homeowners wonder why your self-leveling pour looks like a topographical map after it dries; it’s almost always because they trusted the label’s ‘self-leveling’ claim too literally. The real ‘oops’ factor involves skipping the substrate preparation. You absolutely must understand why you must prime concrete before every leveling job. Without primer, the porous concrete subfloor sucks the water out of the leveler too fast, preventing the chemical bond and leading to ‘ghosting’ or tiny pinholes. To avoid these, you need to implement precise floor leveling techniques to achieve flawless surfaces. According to the Tile Council of North America (TCNA) handbook, substrate flatness—specifically 1/8 inch over 10 feet for large format tiles—is the single most important factor for preventing cracks over radiant heat. If you’re skipping the concrete etching step you shouldnt skip before leveling, you’re essentially laying your floor on a layer of dust that will eventually delaminate.
Why did my leveler crack even though I followed the mixing instructions?
The answer usually lies in the humidity and temperature of the room during the first four hours of curing. If the air is too dry or there’s a draft, the top of the pour dries significantly faster than the bottom, causing the material to curl and snap. This is a classic case of floor-leveling challenges: common mistakes and how to avoid them. You have to control the environment like a laboratory. 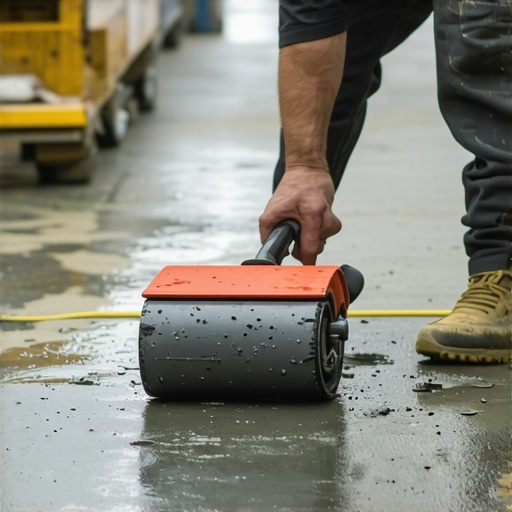 Another nuance often overlooked is the ‘ghosting’ effect. If you don’t seal the subfloor perfectly, you might see how to prevent ghosting marks on your self-leveling finish. These are dark, shadowy outlines of the subfloor structure showing through. While it’s mostly an aesthetic issue for thin-set applications, it’s an indicator of poor hydration and potential bond failure. Have you ever fallen into this trap where you thought the floor was flat, only to have your leveler turn into a jigsaw puzzle? Let me know in the comments below, and we can figure out where the chemistry went wrong.The honeymoon phase of a new floor usually lasts until the first major temperature swing. I’ve seen homeowners invest thousands into premium materials only to watch them degrade because they treated the maintenance like an afterthought. If you’ve survived the leveling and the layout, you need to pivot your mindset toward preservation. Radiant heat is a dry, constant force that acts differently than ambient air, and your cleaning habits have to adapt.
Throw Away Your Steam Mop Right Now
I cannot stress this enough: steam is the natural enemy of wood and tile over radiant heat. When you blast 200-degree vapor into the seams of your planks, you are inviting moisture to sit in the tongue-and-groove joints. When the heat kicks back on, that water turns into pressurized steam, blowing the finish right off the wood. Instead, stick to hardwood floor care secrets to longevity and shine that rely on microfiber and pH-neutral cleaners. You should also learn why you should never mop your floors with dish soap; the filmy residue acts like a magnet for dust, which then acts like sandpaper under your feet. And please, stop using vinegar on your hardwood floors immediately. The acetic acid slowly dissolves the polyurethane, leaving your expensive oak or maple looking dull and “thirsty” within months.
How do I maintain these floors without ruining the finish?
Maintenance for radiant floors is less about scrubbing and more about climate control. Wood is a living material that reacts to the air around it. I keep a digital hygrometer in every room I’ve floored to ensure the relative humidity stays between 30% and 50%. If it drops below that, your boards will shrink and gap; if it goes above, they might cup. According to the National Wood Flooring Association (NWFA) Technical Publication C200, the surface temperature of your flooring should never exceed 85°F. If you feel the floor is “hot” rather than “warm” to the touch, your system is running too hard, and you’re risking permanent structural damage. This is one of the most common flooring installation mistakes to avoid for lasting results—thinking the thermostat on the wall is the only number that matters.
The Moisture Meter is Your Best Friend for Life
I don’t just use my moisture meter during the install; I use it for the life of the house. Every six months, I check a few “baseline” boards. If I see a spike, I know I might have a slow leak in a pipe or a failure in the vapor barrier. If you ever deal with an accidental spill or a minor flood, you can try to how to save a water damaged wood floor with a vacuum by using a wet-vac and a specialized suction plate to pull moisture out from between the layers. 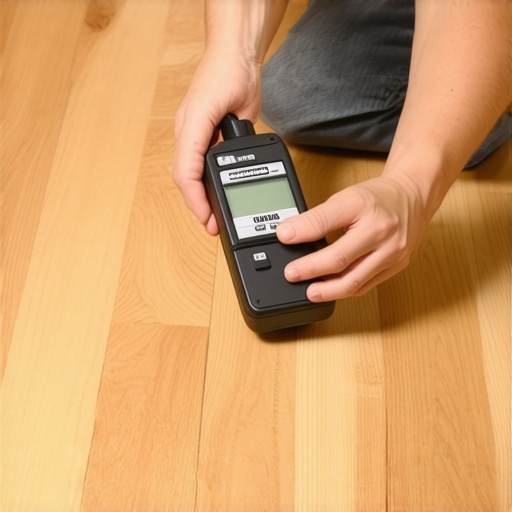 I also use the spray bottle hack for testing floor sealer coverage once a year. Just a mist of water—if it beads up like a freshly waxed car, your protection is intact. If it starts to darken the wood, it’s time for a screen and recoat.
Smart Flooring is Closer Than You Think
We are entering an era where your floor will talk to your phone. I’m already seeing “smart” underlayments hit the market that feature embedded sensors to monitor for heat spikes or moisture ingress. In the next few years, the manual hygrometer on the wall will be replaced by an app that alerts you the second your floor starts to dry out. We are shifting from reactive repairs to proactive management. If you want to stay ahead of the curve, focus on high-quality tools and precise monitoring. My challenge for you: Go out and buy a basic digital hygrometer this week. Place it in the room with your radiant heat and track it for seven days—you might be surprised at how much the environment fluctuates, and it’s the easiest way to save your investment from a costly teardown.
What My Wallet Learned the Hard Way About Wood and Heat
After decades of getting my hands dirty, I have realized that flooring installation over radiant heat is less of a construction project and more of an ongoing relationship with your home. It is easy to get caught up in the aesthetics, but the real secret to longevity is respecting the physics of movement. The ‘Seasonal Creak’ is your floor’s way of breathing. Even with a flawless installation, wood is a natural material that will shift. If you hear a tiny groan when the first frost hits, don’t panic—it means your expansion gaps are doing their job. However, if you are seeing separations, you might need to revisit our step-by-step guide to flooring installation and leveling success to check your math.
Another hard-won lesson: The 2-degree ramp-up rule is non-negotiable. I have seen gorgeous oak floors ruined because a homeowner came home from vacation and cranked the radiant heat from 50 to 80 degrees in one hour. This thermal shock causes the wood to dry too quickly, leading to cracks. Always increase or decrease your floor temperature by no more than two degrees per day to let the wood acclimate slowly. If the damage is already done, you can sometimes recover by mastering hardwood floor refinishing with the right sealers to lock in remaining moisture.
The Non-Negotiable Kit for a Professional Finish
If you want to move beyond the ‘DIY look’ and achieve a gallery-level result, you need more than just a hammer. I never step onto a job site without a pinless moisture meter. It allows you to check the health of your planks without leaving unsightly holes in the wood. I also swear by magnesium straightedges rather than aluminum; they stay truer over time, which is vital when you are mastering floor leveling pro secrets. Finally, keep a copy of the National Wood Flooring Association (NWFA) technical manuals on your phone. It is the industry ‘Bible’ for a reason, and it provides the exact specs you need to keep your warranty intact.
#IMAGE_PLACEHOLDER_E#
Step Onto Your Warmest Investment Yet
There is nothing quite like the feeling of waking up on a January morning and stepping onto a floor that feels like a warm hug. It transforms your house into a true sanctuary. While the technical details of flooring installation might feel overwhelming right now, remember that every careful measurement and every extra minute spent leveling is a deposit into your home’s future value. You are not just laying planks; you are building comfort. If you ever feel stuck, you can always revamp your home with expert flooring installation tips from someone who has been in the trenches. Have you ever been startled by a loud ‘pop’ from your floors in the middle of a cold night? Let me know your experiences below—I would love to help you figure out if it is just a normal shift or something that needs a quick fix.