
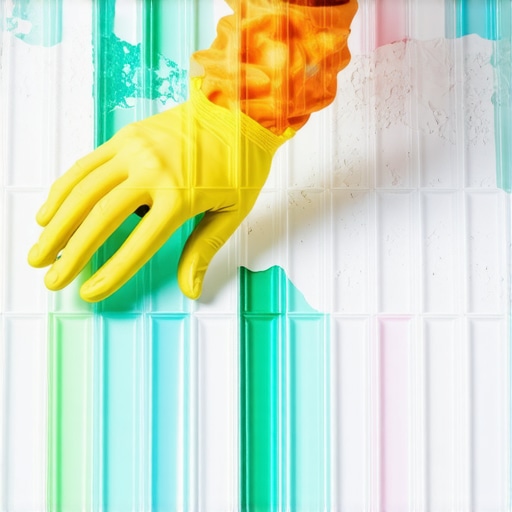
I stood there, coffee in hand, staring at what was supposed to be my dream kitchen backsplash. Instead of the shimmering, recycled glass mosaic I’d spent weeks picking out, I saw a dull, greyish grid that looked more like a rainy sidewalk than a coastal retreat. It was heartbreaking. I’d spent hours on the flooring installation and wall prep, only to ruin it with a bucket of the wrong mud. That was the day I learned the hard way that recycled glass tile isn’t just ‘fancy ceramic’—it’s a different beast entirely. We are going to dive into why that bright white bag of thinset is your best friend and how to make sure your eco-friendly choice actually looks like the luxury item you paid for. [image placeholder]
The Day I Turned My Green Backsplash Grey
It’s a common trap. You go to the big box store, you grab a bag of ‘versatile’ mortar, and you assume it’ll hold anything. I did exactly that during my first big DIY remodel. I was so focused on installing tiles like a pro that I ignored the most basic rule of chemistry: glass is see-through. When you slap a translucent tile onto a bed of standard grey mortar, that dark color bleeds right through the glass. It’s like wearing a dark shirt under a thin white blouse. Everything shows. I didn’t just ruin the look; I also made several flooring installation mistakes that cost me an entire weekend of scraping. If you’ve ever found dried thinset on your tiles after a long day, you know the frustration.
Is Special White Thinset Just a Marketing Gimmick?
A lot of folks ask me if they can just use a heavy coat of white paint on the wall first, or if the ‘glass tile’ label on the bag is just a way for manufacturers to squeeze out a few more bucks. Trust me, it’s not. Recycled glass is incredibly smooth and non-porous. According to the Tile Council of North America (TCNA) handbook, glass tile requires specific high-performance, polymer-modified mortars because it doesn’t ‘grab’ onto the mud the way a clay-backed ceramic tile does. The white color isn’t just for show—it provides a bright, reflective background that makes the colors in the glass pop. Have you ever finished a tile job only to realize the color looks totally different than it did in the store? Today, I’m going to share some tile installation pointers that will save your project (and your sanity). We’ll look at the specific bond requirements for these recycled gems and how to prep your surface so you don’t end up with a ‘muddy’ mess.
Flatten the Foundation First
I learned the hard way that glass acts like a high-powered magnifying glass for your mistakes. If you have a single high spot in your subfloor or wall, the tile won’t just sit slightly unevenly; it will catch the light and broadcast that error to everyone in the room. This is why learning how to achieve flawless floor leveling before tile laying is non-negotiable. Glass tile is brittle. If there is a void or a hump underneath it, a simple dropped pot or even a heavy footfall can cause a stress crack that spiders across your beautiful recycled mosaic. I once rushed a small laundry room project, thinking the wall was ‘close enough.’ By the time the grout dried, the shadows created by the uneven surface made the whole wall look like it was vibrating. I spent the next three days fixing flooring installation mistakes that could have been avoided with twenty minutes of extra prep. Use a straightedge and some high-quality patch to ensure your canvas is as flat as a frozen lake before you even open your box of tiles.
Stop the Barcode Look with the Flattening Move
Most people know to use a notched trowel to get the right amount of mud on the wall. But with glass, those ridges are your enemy. If you press a translucent tile into ridges, those lines will show through the glass forever, creating a distracting ‘barcode’ effect. To prevent this, you must use the flat side of your trowel to knock down those ridges immediately after combing the mud. This creates a smooth, consistent bed of white mortar. When installing tiles like a pro, the goal is 100% coverage with zero air pockets. [image placeholder]
Back-Buttering is Your Secret Weapon
Think of back-buttering as the insurance policy for your tile. It involves spreading a thin, butter-like layer of thinset onto the back of the tile itself before pressing it into the wall. This ensures that the glass is fully bonded and that no air bubbles are trapped behind it. I remember a kitchen remodel where I skipped this on just one section of a decorative border. Three months later, a tiny air pocket behind a clear blue tile began to collect condensation from the stove’s steam. It looked like a permanent fogged-up window in the middle of a pristine backsplash. Following specific tile installation pointers like back-buttering prevents these visual disasters and guarantees the eco-friendly material stays bonded for decades.
The Secret to a Chip-Free Cut
Cutting glass is not like cutting ceramic. If you use a standard diamond blade, the back of the glass tile will chip and flake, leaving a jagged edge that looks unprofessional. You need a specialized glass blade with a continuous rim. When you make the cut, go slow—slower than you think you need to. I always use the ‘wet saw water trick’ to keep the blade cool and the vibration down. If you do end up with a few minor nicks, you can usually smooth them out with a diamond sanding pad. If you happen to get any mortar on the face of the glass during this process, deal with it immediately. If you’ve ever struggled with dried thinset on your tiles, you know that scraping glass is a recipe for scratches. Always keep a bucket of clean water and a fresh sponge nearby to wipe the face of the tiles every few minutes. Professional results aren’t just about the big moves; they are about the constant, small cleanups that happen while the mud is still wet. For more complex shapes around outlets, learn the secret to cutting glass mosaic without chipping to ensure every corner looks crisp and intentional.
Why Rigid Subfloors Are a Secret Death Sentence for Glass
The common wisdom in DIY circles is that “stiffer is better.” When chasing flooring installation and leveling success, we often assume a rock-solid, non-moving substrate is the ultimate goal. But here is the contrarian truth: glass tile is incredibly sensitive to thermal expansion and structural shifts. According to the Tile Council of North America (TCNA), glass has a significantly higher coefficient of expansion than the ceramic or cementitious materials it is often bonded to. If you provide zero room for movement, the glass will eventually shear or crack. This isn’t just a minor mistake; it’s a fundamental physics error that ruins high-end projects. 
Can Your Glass Backsplash Handle the Heat of a Boiling Kettle?
I have seen dozens of beautiful recycled glass installations fail near the stove or large windows because the installer ignored “thermal shock.” Glass expands when it gets hot and shrinks when it cools. If you jam your tiles tight against a cabinet or a countertop without a soft silicone joint, that expansion has nowhere to go, and the tile will literally crush itself. This is a primary reason why your tile grout is cracking at the room corners or along the base of your backsplash. Grout is rigid and brittle; silicone is a shock absorber. Skipping this transition is the number one “oops” factor for professionals and DIYers alike.
The Ghosting Effect and Other Invisible Traps
Even if you buy the most expensive white thinset, you might still see weird, cloudy shadows after a few weeks. This is called “ghosting.” It often happens when the substrate wasn’t properly primed or when the how to prevent ghosting marks on your self-leveling finish steps were ignored. Moisture from the mortar reacts with the underlayment, and because glass is translucent, that chemical reaction remains visible forever. To avoid this, I always recommend a waterproofing membrane even in “dry” areas. It is the same waterproofing move that saves bathroom remodels from failure, providing a neutral, clean canvas for your glass.
The Hidden Trowel Error That Ruins Clarity
Another advanced nuance is the air-pocket trap. If you use a trowel with the wrong notch size, you create air pockets that act like little echo chambers and magnifying glasses behind the glass. Not only does this look messy, but it makes the tile prone to breaking under the slightest impact. Reviewing the trowel size error that leads to hollow sounding tiles is essential before you spread your mortar. For glass, a smaller V-notch followed by the “flattening move” is the only way to ensure 100% coverage. Using the expansion joint secret for large tiled living areas will further protect your investment from the inevitable shifts of your home. Have you ever fallen into the trap of a perfectly installed tile suddenly cracking for no apparent reason? Let me know in the comments below.
The Precision Tools that Save My Projects Every Single Time
When people ask me why my glass tiles don’t crack and my floors never buckle, I don’t point to my hands—I point to my gear. I never start a job without a high-quality moisture meter. Why? Because guessing if a subfloor is dry is a recipe for a five-figure disaster. Knowing how to use a moisture meter to prevent floor failure is the difference between a professional result and a weekend nightmare. I also swear by my self-leveling cross-line laser. It’s not just for hanging cabinets; I use the laser level move for perfectly straight hallways to ensure every row of tile or wood is perfectly indexed. If your foundation is off by even an eighth of an inch, your finish will suffer. This is why I obsess over precise floor leveling techniques to achieve flawless surfaces before the first drop of thinset hits the ground. #IMAGE_PLACE_HOLDER_D#
How do I keep my glass and hardwood looking pristine for years?
Maintenance is where most homeowners (and even some pros) drop the ball. I’ve seen beautiful installs ruined because someone thought a steam mop and white vinegar were ‘natural’ cleaners. Please, I beg you, stop using vinegar on your hardwood floors immediately. The acid eats through the protective finish, leaving your wood vulnerable to moisture and discoloration. According to the National Wood Flooring Association (NWFA) Technical Manual, using non-approved chemicals can void your warranty and cause premature ‘clouding’ of the topcoat. For my glass tile, I stick to pH-neutral cleaners that won’t etch the surface or degrade the grout. Following these hardwood floor care secrets to longevity and shine will ensure that your eco-friendly investment doesn’t lose its luster after just one season.
Where Sustainable Flooring is Heading Next
I predict that in the next few years, the ‘transparency’ trend will go beyond just glass tiles. We are moving toward smart flooring—surfaces that monitor indoor air quality and temperature through integrated sensors. People are finally realizing that how to choose flooring that wont kill your indoor air quality is just as important as the aesthetics. Recycled glass and bio-based resins are becoming the industry standard. If you want to stay ahead of the curve, try one specific advanced move: the next time you prep a room, use a digital level to map out your low spots. It is a game-changer for long-term stability and will prevent those annoying hollow sounds later.
The Brutal Truths My First Glass Tile Project Taught Me
Looking back at that first “rainy sidewalk” disaster, I realize that flooring installation is as much about patience as it is about precision. If I could go back and whisper in my own ear, I’d emphasize that glass is unforgiving but incredibly rewarding when done right. First, never underestimate the power of lighting; always check your layout with the room’s actual light fixtures before the thinset cures to catch any shadows. Second, remember that revamp your home with expert flooring installation tips usually start with the substrate, not the tile itself. Third, white thinset is not just a suggestion—it is a requirement for visual clarity. Lastly, mastering floor leveling pro secrets for perfect installations will save you from the heartbreak of a cracked mosaic six months down the road.
The Gear I Trust When My Reputation is on the Line
I do not get paid to promote brands, but I do rely on specific tools to keep my sanity intact. I always keep the TCNA Handbook nearby; it is the industry bible for every weird tile situation you might encounter. For layout, a 360-degree self-leveling laser is my best friend for achieving the ultimate guide to floor leveling for a perfect finish. When it comes to the materials themselves, I always tell clients to look past the price tag—learning how to spot high-quality engineered wood before you buy or selecting premium-grade glass will always pay off in long-term durability. [image placeholder]
Your Journey Toward a Sustainable Home Starts Here
Choosing recycled materials is more than a design trend; it is a commitment to a healthier home environment and a smaller ecological footprint. Whether you are mixing tile selection tips for elegant hardwood floors in 2025 or going all-in on a shimmering glass wet bar, the effort you put into the foundation and prep work will shine through for decades. Do not be intimidated by the technical requirements—they are the simple building blocks of your sustainable masterpiece. Have you ever tried to install glass tile and faced a “ghosting” or color-bleeding issue? Let me know in the comments below!