
I was standing in the middle of my guest bathroom, sweat dripping onto a half-poured puddle of expensive self-leveling compound that was already turning into a gummy mess. I had a trowel in one hand and a look of pure panic on my face. Five minutes. That’s all it took for my “liquid” floor to start looking like oatmeal. I tried to push it around, but it just dragged, leaving ugly ridges that I knew would be a nightmare to grind down later. It was a classic case of the leveler setting up before I could even finish the first bag. I felt like a failure, honestly. But here’s the thing: I’ve learned exactly why your self-leveler is drying faster than you can pour it, and I’m going to make sure you never have to stand there frozen with a ruined bucket of goo like I did. [image]
Beat the Clock Before Your Leveler Turns to Stone
Today, we are going to fix your workflow so you can actually enjoy the process. Leveling a floor shouldn’t feel like a high-stakes bomb disposal mission. We’ll look at temperature, mixing ratios, and the prep work that most people skip. If you’ve ever wondered why your floor leveler pitted during the drying process or why it stopped flowing the moment it hit the substrate, you’re in the right place.
Is this stuff actually supposed to dry this fast?
Short answer: No. Long answer: Yes, if you aren’t prepared. One of my biggest early mistakes was thinking I could mix one bag at a time by myself. By the time the second bag was ready, the first one had already “skinned over.” According to the American Concrete Institute, the hydration process of rapid-setting cements is significantly accelerated by high ambient temperatures—even a few degrees can cut your working time in half. That’s why professional crews work in teams. If you are tackling this solo, you need to know the secret to mixing the perfect bucket of self-leveler every time to buy yourself those precious extra minutes.
Stop Your Subfloor from Sucking the Life Out of Your Mix
Your subfloor is thirsty. If you’re working on old concrete or plywood without the right prep, that dry surface will suck the water right out of your mix like a sponge. This is a top-tier floor leveling challenge that ruins most weekend projects. Have you ever had a pour go wrong because the leveler just wouldn’t budge? Drop a comment or reach out—I’d love to hear if your experience was as messy as my first one. We’re going to get you to those perfect installations without the stress.
Prime Like Your Project Depends on It
Before you even touch a bag of powder, you have to treat the subfloor. Think of primer as the insurance policy for your floor. I once skipped a second coat of primer on an old slab in a basement, thinking the concrete was “saturated enough.” Within an hour of pouring, I watched in horror as the leveler started bubbling like a witches’ cauldron. That is exactly why your subfloor primer is bubbling on old concrete—the air from the slab is escaping through the wet mix because the seal wasn’t perfect. You want that primer to be tacky, not puddled, and definitely not bone-dry. It creates a chemical bond that ensures the leveler stays stuck for decades rather than peeling up like a bad sunburn.
The Two-Bucket System for Continuous Flow
This is where most DIYers fail. If you are mixing one bag, pouring it, and then starting to mix the next, you’ve already lost. Self-leveler has a “wet edge” time of about 10 to 15 minutes. To win, you need two people and at least two 5-gallon buckets. One person mixes while the other pours and spreads. By the time bucket A is empty, bucket B should be landing on the floor. This prevents cold joints—those ugly ridges where two batches of leveler meet but don’t blend. Following a step-by-step guide to flooring installation and leveling success means treating the pour like a relay race.
Measure Your Water Like a Chemist
Precision is everything here. If you add too much water to make it “runnier,” you’ll end up with a weak, chalky surface that cracks. Too little, and it’ll sit there like a lump of dough. I use a dedicated measuring pitcher, never a “close enough” mark on a bucket. This is one of the most critical flooring installation fundamentals. When the ratio is right, the mix should look like heavy cream. If you see water bleeding to the top, you’ve over-watered, and you’re headed for a failure where the self-leveler develops spiderweb cracks overnight.
Guiding the Liquid with a Gauge Rake
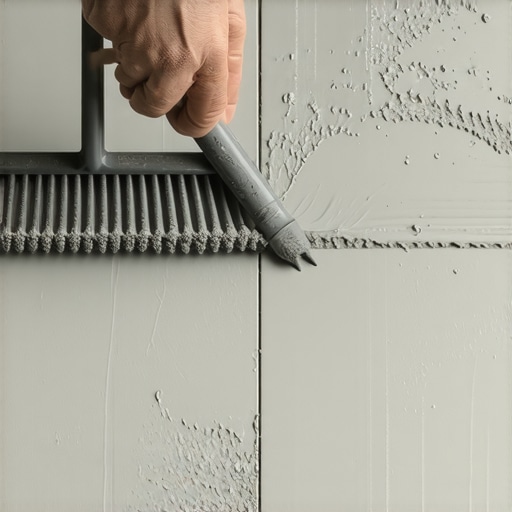
Don’t just pour it and pray. While it’s called “self-leveling,” it actually needs a little help to reach the corners. A gauge rake is your best friend here. It’s a tool with adjustable feet that allows you to set the exact depth of the pour. If you know how to level a floor that has a 2-inch drop across the room, you know that the rake does the heavy lifting while the spiked roller does the finishing. After raking, run a spiked roller through the wet compound. This isn’t just for show; it breaks the surface tension and pops any trapped air bubbles. Without this step, you might find why your floor leveler pitted during the drying process, leaving you with tiny craters that will telegraph through thin luxury vinyl planks later.
But here’s where even the pros get tripped up: the difference between a floor that is ‘level’ and one that is ‘flat.’ Most DIYers spend hours chasing a perfectly level bubble on their spirit level, but if you’re prepping for large format tile, flatness is actually your priority. If a floor is perfectly level but has subtle waves or ‘birdbaths,’ your tiles will have lippage, creating trip hazards and looking unprofessional. This is one of the most overlooked precise floor leveling techniques to achieve flawless surfaces. You need to learn how to check for high spots with a 10-foot straightedge rather than just trusting a shorter tool that can hide long-span dips.
Flatness Beats Levelness Every Single Time
The biggest myth in the flooring world is that ‘self-leveling’ means the product will fix a major deviation without human intervention. It won’t. If you don’t use your straightedge to find the peaks first and mark them with a pencil, the leveler will just follow the contour of the existing slab. Have you ever fallen into this trap? Let me know in the comments. When you are dealing with modern, massive tiles, even a 1/8-inch deviation over 10 feet can lead to the hidden cost of using cheap thinset on large format tiles because you will be forced to ‘back-butter’ and build up mud to compensate, which eventually leads to shrinkage and hollow spots. The Tile Council of North America (TCNA) emphasizes that substrate preparation accounts for the majority of the labor in a high-end install; once the tile is set, the floor’s fate is sealed.
The High-Water Trap That Weakens Your Slab
I see people do this constantly: they add ‘just a splash’ more water than the bag recommends to make the mix flow into corners more easily. This is a massive ‘oops’ factor. Self-levelers are precision-engineered chemical compounds, not just wet sand. According to ASTM C1708, the industry standard for self-leveling mortars, excess water causes ‘segregation.’ This is where the heavy aggregates sink to the bottom while the weak polymers and water bleed to the top. This results in a soft, chalky surface that will literally peel off when the adhesive cures. It’s the same logic behind why you should always mix the entire bag of grout at once; the chemical balance is calibrated for the whole bag, and partial mixes or over-watering destroy the material’s compressive strength.
Why is your leveler covered in tiny pinholes?
If you see tiny craters appearing as the mix dries, you aren’t looking at a bad batch of product; you’re looking at ‘outgassing.’ This occurs when the air trapped inside a porous concrete slab is displaced by the heavier wet leveler. If your primer wasn’t applied in a continuous, void-free film, the air escapes through the wet mix and leaves a moon-like surface full of pits. To avoid this, you must understand the trowel notch secret for getting full thinset coverage later on, because those pinholes can compromise the bond of your thinset. Always perform a ‘bead test’ with a few drops of water on your bare concrete first; if the water disappears instantly, your slab is a ‘thirsty’ sponge and requires a dedicated second coat of primer to seal it tight before the pour begins.
Once that leveler is hard and flat, and you’ve managed to avoid the pinholes and bubbles, the clock doesn’t stop ticking. I used to think the job was done once the mix dried, but now I know that the ‘post-pour’ phase is where the longevity of your floor is actually decided. I’ve found that using the right tools at this stage is the difference between a floor that lasts thirty years and one that fails in three.
The One Mixer That Changed Everything for My Pours
I’ve spent years searching for the perfect equipment, and if I could only give you one piece of advice on tools, it would be this: stop using a standard paint paddle to mix your self-leveler. I use a Collomix DLX paddle exclusively. Why? Because it’s designed specifically to pull dry powder from the bottom of the bucket and shear it into the liquid without whipping in a bunch of air. Most of the floor leveling challenges I used to face disappeared once I stopped fighting my own tools. You want a smooth, vortex-like mix, not a bucket of bubbles that will lead to a failed bond. This tool ensures you avoid flooring installation mistakes to avoid for lasting results right from the start.
Don’t Gamble with Residual Moisture
After the pour is cured, the next tool in my bag is always the moisture meter. The National Wood Flooring Association (NWFA) explicitly states in Technical Publication No. A100 (Water and Wood) that ‘moisture is the most common cause of flooring failure.’ If you don’t know how to use a moisture meter before you lay wood floors, you are essentially gambling with your budget. I check the leveler at multiple points to ensure it’s not just surface-dry but truly cured throughout. This prevents the nightmare scenario of why your hardwood floor is crowning and how to dry it out later, which often happens when moisture gets trapped beneath your new planks.
How do I maintain the integrity of my flooring system over time?
Maintenance starts with environmental control. A leveled floor is part of a structural sandwich; if your home’s humidity swings wildly, even the best-leveled subfloor won’t save your hardwood from gapping. You should follow hardwood floor care secrets to longevity and shine, which include keeping your HVAC system running year-round. This stabilizes the subfloor and prevents the leveler from being stressed by the expansion and contraction of the materials above it. Furthermore, if you’re transitioning between rooms, ensure you know why you need a transition strip between different flooring heights to allow for that natural movement without cracking the leveler at the door frame.
How 3D Mapping is Changing the Way We Level Floors
Looking into the future, I’m seeing more pros adopt LiDAR-based floor scanning apps. Imagine being able to see a heat map of your floor’s high and low spots on your phone before you even open a bag of leveler. We are moving away from manual straightedges toward digital precision that ensures precise floor leveling techniques to achieve flawless surfaces every single time. My big tip for you? Grab a 10-foot straightedge right now and do a ‘sweep’ of your room before your next project begins. It’s the single most authoritative way to prove your floor is ready for the finish material. Trust the metal, not your eyes.
The Hardest Lessons I Learned While Wrestling with Liquid Concrete
Over the years, I’ve realized that floor leveling is 90% preparation and 10% actually pouring the material. My first lightbulb moment was realizing that a clean bucket is non-negotiable. If you don’t scrub the dried residue between bags, those chunks will ruin your smooth finish and create weak spots in the bond. This is one of the main reasons your self-leveler is sticking to the bucket and creating lumps that drag across your floor. Secondly, I learned to trust my timer, not my eyes. When a product says it has a 10-minute wet edge, believe it. Finally, I stopped viewing primer as a suggestion. It is the only thing keeping your floor from sounding like a bag of potato chips in six months. #IMAGE_PLACEHOLDER_E#
The Tactical Toolkit for a Flawless Foundation
I never set foot on a job site without my Stabila straightedge and a professional-grade moisture meter. These aren’t just gadgets; they are the gatekeepers of your reputation. Using these tools correctly is the only way to adhere to flooring installation fundamentals with total confidence. I also highly recommend keeping a dedicated wash station nearby with three buckets of clean water to prevent cross-contamination. If you are prepping for high-end luxury finishes, these precision tools are the secret to getting a flat floor for large format tiles that look like they belong in a designer showroom.
Build Your Legacy on a Solid Foundation
It’s easy to feel overwhelmed by the technicalities, but remember that every master was once standing exactly where you are, staring at a bucket of goo. By respecting the chemical process and refusing to cut corners on the substrate, you are setting yourself up for a result that will look stunning for decades. Proper floor leveling isn’t just about making things flat; it’s about the peace of mind that comes with doing the job right the first time. Now it’s time to stop researching and start mixing. You’ve got this!
Have you ever had a self-leveling pour start to set before you were ready? Tell me your most stressful flooring story or ask a question in the comments below!