
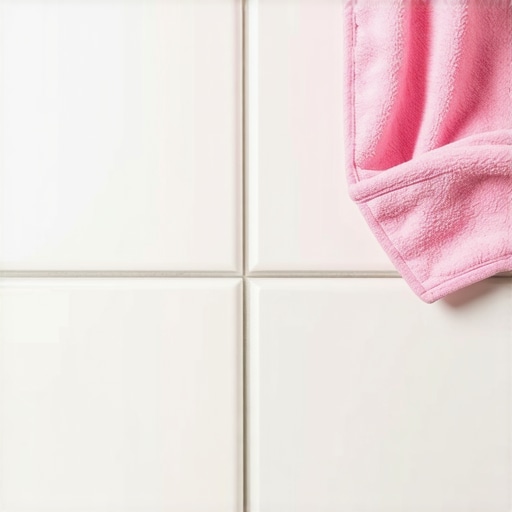
I was standing in my kitchen, knees aching and sweat dripping onto a brand-new polished porcelain floor, staring at what looked like a dried salt flat. I’d spent six hours laying the tile perfectly, but the grout haze was winning. I had a bucket of gray water and a sponge that felt like it was just moving the mess around instead of actually lifting it. It is a gut-wrenching feeling when your proud DIY win starts looking like a total disaster because of a cloudy, milky residue that refuses to budge. That was the moment I realized my biggest mistake: I was treating grout like dirt that needed scrubbing instead of a chemical compound that required finesse. I’ve been in your shoes, hovering over a beautiful installation with a pit in my stomach, wondering if I just permanently ruined the finish of my home upgrade. But there is a better way that does not involve harsh chemicals or hours of scrubbing until your shoulders give out.
Get That Professional Finish Without the Backbreaking Scrub
Today, we are going to fix that together. I’m showing you the wet rag trick—a method that feels almost too simple to work but saves you hours of polishing later. When I first started out, I used to wait way too long to begin the cleaning process, thinking the grout needed to be rock-hard before I touched it. I ended up needing a literal chisel for the corners. Trust me, mastering tile installation pointers that save time and money is mostly about understanding the cleanup window. The trick is to use a damp, wrung-out microfiber cloth to polish the surface while the grout is still in its transitional phase. This captures the haze before it bonds to the tile face. Have you ever finished a tile job only to find a cloudy film the next morning that just wouldn’t budge no matter how hard you wiped? It is incredibly frustrating, but I promise it is totally avoidable if you change your approach right now.
Is a Wet Rag Actually Better Than a Heavy-Duty Sponge?
You might think you need a specialized, expensive grout sponge to get professional results. I used to think so too, and I had a garage full of them to prove it. But the secret isn’t the thickness of the tool; it is the moisture control. A microfiber rag or even an old cotton t-shirt, used at the precise moment, captures the fine particulates that sponges often leave behind in the micro-texture of the tile. If you’ve ever noticed the reason your grout color looks splotchy and uneven, it is usually because of poor water management during this specific phase. Using too much water with a big sponge dilutes the grout mix in the joints. In fact, the Tile Council of North America (TCNA) notes that excessive water during cleanup is a primary cause of pigment leaching, which leaves your joints looking weak, faded, and inconsistent. By switching to a damp rag, you maintain the integrity of the correct way to mix grout so it doesnt change color and ensure a uniform, vibrant look across the entire floor. I also learned the hard way that why you should always mix the entire bag of grout at once matters just as much for consistency as the rag you use to clean it.
Master the Finger Test to Hit the Perfect Timing
The biggest mistake I see is people jumping the gun or waiting for the “perfect” hour according to the bag instructions. Grout doesn’t work on a clock; it works on humidity and temperature. To find your window, use the finger test. Press your fingertip onto a grout joint. If it comes away clean but the grout feels like firm modeling clay, you are in the sweet spot. If it’s still mushy, you’ll just pull the grout out of the track. This timing is critical because once you’ve invested time into installing tiles like a pro step by step strategies for 2025, you don’t want to jeopardize the finish by being impatient. I remember a job where I started too early on a humid day, and I ended up with concave joints that looked like tiny canyons. It was a mess that taught me to wait for that ‘clay-like’ resistance.
Ditch the Bucket and Use This Microfiber Technique
Instead of a soaking wet sponge that behaves like a mop, use a microfiber cloth. Fold the cloth into quarters. You want it damp—not dripping—like a well-wrung towel after a shower. Wipe at a 45-degree angle to the joints. This ensures you aren’t digging grout out of the gaps. The microfiber acts like a thousand tiny hooks, grabbing the haze particles rather than just swirling them around in a sandy soup. This precision is especially important if you are working with large tiles where any imperfection is magnified. In fact, the secret to getting a flat floor for large format tiles often comes down to how clean your joints are; excess grout on the edges can create a visual lippage that makes even a level floor look bumpy. If you find the cloth is getting loaded with residue, flip it to a clean quarter. You should get eight clean ‘faces’ out of one cloth before you need to rinse it.
What to Do When Thinset Hardens on the Tile Face
Sometimes, despite your best efforts, a bit of thinset or grout dries rock-hard on the surface before you can reach it. Don’t reach for a metal scraper! You will scratch the glaze and ruin the aesthetic you worked so hard for. Instead, use the trick for removing dry thinset from the face of a tile which involves using a wooden popsicle stick or a plastic putty knife dampened with a little vinegar. It’s gentle enough to save the finish but firm enough to pop the mortar loose. This is a lifesaver when you’re following revamp your home with expert flooring installation tips and realize you missed a spot under the baseboard line. I once spent an hour carefully “chirping” away dried mortar from a marble mosaic using this method, and it saved me from having to rip out three sheets of tile.
Why Leveling Sets the Stage for Easy Cleanup
You might wonder what floor prep has to do with cleaning grout, but the answer is: everything. If your tiles aren’t level, grout will pool in the low spots and be spread thin over the high spots. This creates an uneven drying rate, making your cleanup window a moving target. Learning how to achieve flawless floor leveling before tile laying ensures that every joint is the same depth. When the depth is consistent, the grout dries uniformly, and your wet rag will glide across a flat surface instead of getting snagged on sharp tile edges. It’s like trying to wipe a smooth countertop versus a gravel driveway—the flatter the prep, the faster the finish.
Let’s dig deeper. While most people think the hardest part of a renovation is the final tiling or the wood-laying, the real battle is won or lost in the substrate. There is a common myth that self-leveling compound is a magic liquid that solves every dip and crown without any effort. In my experience, “self-leveling” is the biggest misnomer in the industry. It should really be called “self-smoothing.” If you just pour it out and walk away, you are asking for a structural disaster. One of the most sophisticated mistakes I see is homeowners—and even some pros—skipping the mechanical bond. According to the Tile Council of North America (TCNA) Handbook, proper substrate preparation, including the use of specific primers and ensuring a clean, sound surface, is non-negotiable for a long-lasting installation. If you don’t prime, the dry subfloor will suck the moisture out of the leveler too fast, leading to “pinholing” or even complete delamination.
Why Your Floor Leveler Isn’t a Magic Cure
If you have ever noticed why your self-leveler developed spiderweb cracks overnight, it is usually because the substrate was not properly sealed. This is a classic example of floor leveling challenges common mistakes and how to avoid them. You see, the leveler needs to cure, not just dry. When the wood or concrete underneath robs it of that hydration, the internal tension causes those tiny cracks that eventually lead to your tiles popping loose. It is also why why your self-leveler didnt bond to the wood subfloor—the dust and lack of primer create a “slip plane” that prevents the two layers from becoming one.
Why does my floor click if the leveler looked flat?
This is usually a case of “telegraphing.” Even a microscopic bump can cause a plank to bridge, leading to that annoying sound every time you step. It is often why your lvp floor feels like its bouncing when you walk. The solution is rarely more leveler; it is using a 10-foot straightedge to find the high spots before the first plank goes down. The real “trap” I fell into early on was ignoring the moisture levels in the subfloor. I once laid a gorgeous oak floor only to watch it buckle six months later because I didn’t realize the concrete slab was “sweating” through the leveler. You absolutely must learn how to use a moisture meter before you lay wood floors. It takes two minutes but saves a five-figure investment. Have you ever fallen into this trap? Let me know in the comments—I’ve been there, and usually, it’s a simple step by step guide to flooring installation and leveling success fix we missed because we were in a hurry.
Once that last plank clicks or the final grout line is polished, you’ve crossed the finish line of the physical labor, but the marathon of maintenance has just begun. I’ve seen homeowners invest five figures in a stunning oak layout only to watch it lose its luster because they used the wrong cleaning solution. The first six months are the most critical. You’ve likely heard a dozen different opinions on how to clean, but I stick to the gold standard: the National Wood Flooring Association (NWFA) Technical Publication A200 on ‘Maintenance and Recoating.’ They emphasize that moisture is the primary enemy of a finish. This is why I always tell my clients to learn the hardwood floor care secrets to longevity and shine before they even buy their first bottle of cleaner. If you use too much liquid, you aren’t just cleaning the surface; you are feeding moisture into the wood’s pores, which is the damp mop mistake that swells your laminate seams and ruins hardwood edges.
The Gear That Actually Matters in My Truck
People always ask me what expensive gadgets they need to buy, but my recommendation is usually surprisingly low-tech. For daily care, you need a high-quality vacuum with a dedicated hard-surface setting. You’d be amazed at how many people use a beater bar designed for carpet on their expensive wood, leaving microscopic scratches that eventually make the floor look dull. I personally use the vacuum attachment that actually picks up fine sawdust because it has soft, natural bristles that won’t mar the finish. Avoiding flooring installation mistakes to avoid for lasting results also means being diligent about grit. A single grain of sand under a shoe is like a piece of sandpaper under a 150-pound weight. It will cut through your poly finish in a heartbeat.
How do I keep my new floors looking Day-One fresh?
The secret isn’t a miracle chemical; it’s pH neutrality and microfiber. I’ve seen why your hardwood floor turned cloudy after cleaning, and nine times out of ten, it’s a buildup of wax-based ‘restorer’ products or harsh acidic cleaners like vinegar. Vinegar is great for salad, but it eats the finish on your floor. If you are dealing with an older installation that has lost its spark, you might need to look into mastering hardwood floor refinishing expert tips for 2025 to bring that life back safely. Consistency is the name of the game. I want you to try one specific advanced tip this week: switch to a dry microfiber dust mop for daily passes and only use a barely-damp (spray-mist only) microfiber for spills. You will notice the ‘cloud’ disappear within two weeks.
What’s Coming Next for Modern Floors
Looking ahead, the industry is shifting toward ‘smart’ substrates and ultra-large format materials. I predict that by 2027, we will see self-leveling compounds with integrated sensors that can report moisture spikes directly to a smartphone app. This would virtually eliminate the ‘guessing game’ of whether a slab is dry enough for wood. We are also seeing a massive push toward porcelain tiles that mimic wood grain so perfectly that you need a magnifying glass to tell the difference. This makes flooring installation fundamentals leveling for a seamless look even more critical because these large-format pieces have zero tolerance for uneven subfloors. The tools are getting smarter, but the basics of a flat, dry, and clean surface will always be the foundation of a floor that lasts a lifetime.
Hard Truths from the Subfloor Trenches
After years of hands-on experience, I’ve realized that the most expensive mistakes aren’t made with a hammer—they’re made with a clock. I once thought I could outsmart a humid afternoon and grout too early, only to spend the next day learning the correct way to mix grout so it doesnt change color because mine had turned a patchy white. Here are a few lightbulb moments I wish someone had told me years ago:
- Layout is everything: Never trust a wall to be square. If you don’t understand why you should always start your tile layout from the center, you will inevitably end up with a tiny, ugly sliver of tile at your most visible threshold.
- The hollow sound is a warning: If you tap your floor and hear a drum-like echo, you have a bond failure. Learning how to detect a hollow tile before the grout starts cracking is the difference between a quick fix and a total tear-out.
- Moisture is a silent killer: You can buy the most expensive oak in the world, but if you don’t how to use a moisture meter before you lay wood floors, the ground will eventually reclaim it through warping and cupping.
#IMAGE_PLACEHOLDER_E#
The Gear That Never Leaves My Van
I don’t carry a lot of “as seen on TV” gadgets. My toolkit is built on reliability and precision. If you are serious about step by step guide to flooring installation and leveling success, these three things are non-negotiable for me. First, a 10-foot straightedge; it’s my truth-teller for every subfloor. Second, I always keep the TCNA Handbook nearby; it’s the ultimate authority when a weird site condition pops up. Finally, I never start a job without a high-quality primer to ensure I don’t see why your floor primer is peeling off like a sunburn two weeks after the check clears. These tools provide the peace of mind that comes from following proven standards.
Step Into Your New Space with Confidence
At the end of the day, flooring is about more than just a surface to walk on; it’s the foundation of your home’s aesthetic and comfort. Whether you are tackling mastering hardwood floor refinishing expert tips for 2025 or laying your first piece of porcelain, the secret is simply refusing to rush the preparation. Every minute you spend checking for level or testing moisture is an hour you won’t spend on repairs later. You’ve got the knowledge, the plan, and the right approach to transform your space with beautiful, lasting hardwood floors or tile. Have you ever discovered a major subfloor dip right as you were about to lay the very last row of flooring? Let me know in the comments below—I’d love to hear how you handled it!