
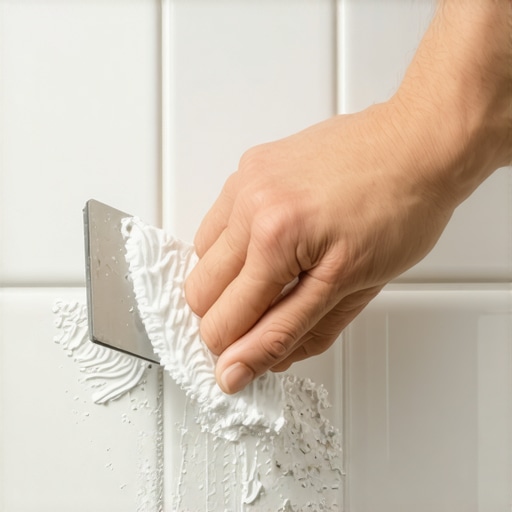
I sat there on the cold bathroom floor, staring at the disaster I’d created. The night before, I had finally finished installing tiles like a pro, or so I thought. But in my rush to finish and grab a beer, I’d been sloppy. I didn’t wipe the faces as I went. Now, those gray, cementitious blobs were cured solid, mocking my laziness. It felt like I was going to have to rip the whole thing out. It’s a visceral kind of frustration—the kind that makes you want to walk away from the whole renovation. We’ve all been there, standing over a “finished” project only to realize the cleanup is going to be harder than the install. But don’t reach for the sledgehammer just yet. There is a way out that doesn’t involve starting over.
Stop Reaching for the Hammer and Chisel
Most people panic when they see dried mortar. I certainly did. In my early days, I grabbed a flathead screwdriver and started prying, which led to my biggest rookie mistake: I chipped the corner of a gorgeous marble-look plank. Instead of a clean floor, I ended up researching how to fix a chipped tile without replacing the whole piece. Dry thinset is stubborn because of the polymers and Portland cement that make it such a beast at bonding. It’s designed to be permanent. According to the Tile Council of North America (TCNA), the shear bond strength of modern thinsets can reach incredible levels to ensure tiles never shift, but that bond is supposed to be under the tile, not on top of it. [image_placeholder_1] Today, I’m going to share the secret to breaking that bond without scarring your beautiful new floor. We’re going to solve this together using a little chemistry and a lot of patience. Whether you are working on a small backsplash or expert flooring installation, the method is the same.
Can You Really Clean This Without Scratching the Finish?
You’re probably thinking that any tool strong enough to scrape off cement will definitely leave a permanent mark on your expensive ceramic. It’s a fair fear. High-gloss finishes are especially vulnerable, and I’ve seen many DIYers ruin a backsplash by being too aggressive with metal scrapers. However, there’s a specific “sweet spot” between too soft and too abrasive that works every time. Whether you’re dealing with the hidden cost of using cheap thinset or a premium modified mortar, the physics of removal stays the same. Have you ever stood there staring at a dried-on mess, wondering if you’ve just ruined your entire project? Drop a comment if you’re in the middle of a thinset crisis right now—I’ve been there, and I promise we can get those tiles looking factory-fresh again.I remember working on a small backsplash where I’d let the thinset dry way too long while trying to figure out how to get a straight line for your first row of tile. I was terrified I’d have to replace the whole wall. I grabbed a wooden shim—yes, a regular cedar shim—and soaked the dried blobs with a wet sponge for twenty minutes. The wood was soft enough not to scratch the glaze but firm enough to pop the mortar loose once it was hydrated. It felt like peeling a stubborn sticker off a new window; satisfying and safe.
Give the Mortar a Drink Before You Scrape
Dried thinset is like a sponge that’s been baked in the sun. If you try to chip it dry, it breaks into shards that can act like sandpaper under your tool. Your first step is to rehydrate it. Use a sponge and warm water to saturate every blob. This doesn’t just soften the bond; it lubricates the surface of the tile so your scraper slides rather than digs. If you’re dealing with a particularly stubborn modified thinset, adding a splash of white vinegar can help, but be careful—as I’ve learned the hard way, the vinegar mistake that eats through your natural stone tiles can turn a cleanup into a disaster if you’re working with marble or limestone.
The Wooden Shim Trick for Delicate Glazes
For high-gloss ceramic or polished porcelain, put the metal away. I use the edge of a wooden shim or a plastic putty knife. It’s about the physics of the bond. You aren’t trying to grind the mortar down; you’re trying to shear it off at the base. By applying pressure at a 45-degree angle against the hydrated blob, the wood will usually win without leaving a single mark. This is especially critical when you’ve invested in transforming your living area with elegant tile designs where the finish is the entire point of the aesthetic. #IMAGE_PLACE_HOLDER_B#
Switching to Sharp Metal When Wood Isn’t Enough
Sometimes the polymer bond is just too strong for plastic or wood. This usually happens when you’re working with large format tiles that require specialized mortars. If you’re in this boat, you need a fresh, single-edge razor blade. Hold it at a very shallow angle—almost flat against the tile. If you’ve done a good job mastering floor leveling pro secrets for perfect installations, the tile surface should be flat enough that the blade won’t catch on any high edges.
Don’t Forget the Grout Lines
While you’re cleaning the faces, look at the joints. If the thinset is oozing out more than halfway, your grout won’t bond properly. I use a stiff nylon brush or a dedicated grout saw, used very gently, to clear these channels. If you leave thinset in the joints, you’ll end up wondering about the reason your grout color looks splotchy and uneven a week later because the thinset is telegraphing through the thin layer of grout. Take the time now to ensure your tile installation pointers that save time and money actually pay off in the final look.Most DIYers—and even some pros I’ve shadowed—think that self-leveling underlayment is a ‘set it and forget it’ miracle in a bag. They assume gravity does 100% of the work. But here’s the truth: gravity is lazy. If you don’t help it along, you’ll end up with a floor that’s technically level but has ‘waves’ that make large format tiles look like a funhouse mirror. This is where the secret to getting a flat floor for large format tiles really comes into play. It’s not just about the pour; it’s about the prep and the tools you use during those critical ten minutes of flow time. Have you ever fallen into this trap? Let me know in the comments.
Stop Assuming the Leveler Does All the Work
One massive trap is skipping the primer. I’ve seen people dump leveler directly onto old plywood or concrete because it ‘looks clean.’ According to the Tile Council of North America (TCNA) Handbook, a primer isn’t just a suggestion; it’s a critical bonding agent that prevents the substrate from sucking the moisture out of the leveler too quickly. If the subfloor drinks that water, the leveler can’t flow, and you’ll find yourself wondering why your self-leveler is drying faster than you can pour it. Worse yet, skipping this step is a top reason why your floor primer is peeling off like a sunburn or failing to bond entirely. 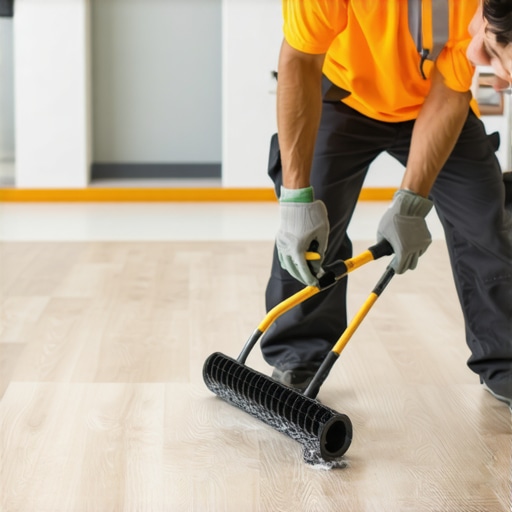
Why Does Your Leveler Crack Even After You Followed the Bag?
A common myth is that self-leveler adds structural integrity to a bouncy floor. It doesn’t. If your subfloor has too much deflection—meaning it flexes when you walk on it—the leveler will snap like a cracker. This is often why your self-leveler developed spiderweb cracks overnight. Before you even open a bag, you need to be mastering floor leveling pro secrets for perfect installations by checking your joist span. If you’re working over a difficult surface, you might even need to know why most floor levelers fail on top of painted concrete. Don’t just pour and pray; ensure your foundation is solid.
The Real Difference Between Flat and Level
I’ve had clients tell me their floor is ‘level enough,’ only for us to find a 1/4-inch dip over ten feet. That might not sound like much, but for modern tile, it’s a disaster. You need to focus on how to achieve flawless floor leveling before tile laying. Using a spiked roller is another nuance most beginners miss; it releases trapped air bubbles that can weaken the finished surface. If you ignore the roller selection that prevents air bubbles in leveler, those tiny pinholes will become weak points. Take the extra five minutes to do it right. It’s the difference between a floor that lasts decades and one that starts failing the moment you move the furniture back in.If you really want to graduate from ‘weekend warrior’ to a pro, you need to stop guessing. My turning point was when I finally invested in a professional-grade moisture meter. I used to think I could ‘feel’ if a subfloor was dry. I was wrong, and a cupped oak floor in a humid July proved it. Now, I never start a project without knowing how to use a moisture meter before you lay wood floors. It is the single most important tool in my kit because it removes the variable of luck. According to the National Wood Flooring Association (NWFA), the moisture content of the wood flooring should typically be within 4 percent of the subfloor moisture for strip flooring, or 2 percent for plank flooring. If you ignore this, you are just waiting for a disaster. 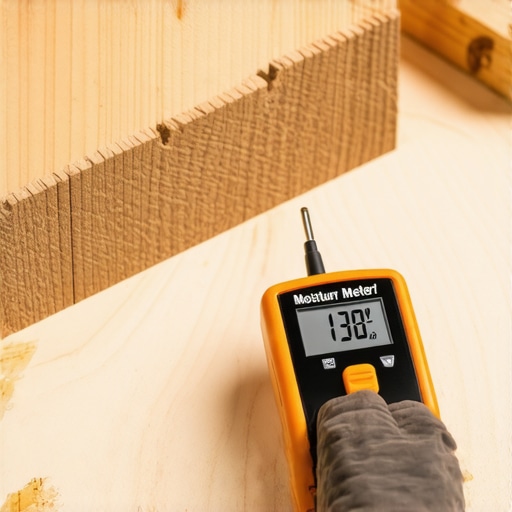
How do I maintain my new floors to keep them looking brand new?
Maintenance is not just about sweeping; it is about chemistry. I see people spend thousands on a project only to commit flooring installation mistakes to avoid for lasting results by using the wrong cleaners later. If you have just finished a hardwood project, you need to learn the hardwood floor care secrets to longevity and shine. Avoid those ‘restoration’ waxes sold at big-box stores; they often contain cheap silicone that creates a hazy buildup. That is usually why your hardwood floor turned cloudy after cleaning. Stick to pH-neutral cleaners specifically designed for your finish. Looking ahead, I see the industry moving toward even more sophisticated polymers in our levelers and adhesives. We are already seeing ‘smart’ self-levelers that can bridge wider gaps without the need for mechanical fasteners. But no matter how advanced the tech gets, the step-by-step guide to flooring installation and leveling success always starts with the basics: clean, prime, and measure. I want you to go out and buy a digital moisture meter before your next install—it will change the way you look at your subfloor forever.
The One Thing My Mentor Taught Me That Saved My Sanity
Reflecting on the stress of dried mortar, I realized that tile installation pointers that save time and money aren’t just about speed; they’re about preventing rework. First, your knees and back are your biggest assets—invest in the best knee-pads you can find. Second, if you feel yourself getting tired and rushing, stop. That is when the blobs happen and the mistakes pile up. Finally, I learned that a failed floor is almost always a failure of patience, not a failure of the material. [image_placeholder_99]
Tools That Will Actually Make Your Life Easier
I don’t go anywhere without my digital moisture meter, especially when I’m trying to choose the right hardwood floors for your home. If you’re tackling a big leveling project, check out the ultimate guide to floor leveling to understand the volume you really need before you start pouring. I also highly recommend keeping a pack of cedar shims and a pack of single-edge razors in your rescue kit. These simple, cheap tools have saved more of my projects than any expensive power tool ever could.
Your Perfect Floor is Closer Than You Think
It is easy to get overwhelmed when you see a mess of dried thinset or a wavy floor. But remember, every pro you see started exactly where you are—staring at a mistake on the bathroom floor. By focusing on flooring installation fundamentals and leveling, you are building a foundation that will last for decades. Take it one tile at a time, trust your measurements, and don’t be afraid to slow down to get it right. You’ve got this! Have you ever dealt with a self-leveling product that didn’t actually level itself? Let me know your horror stories or wins in the comments below!