
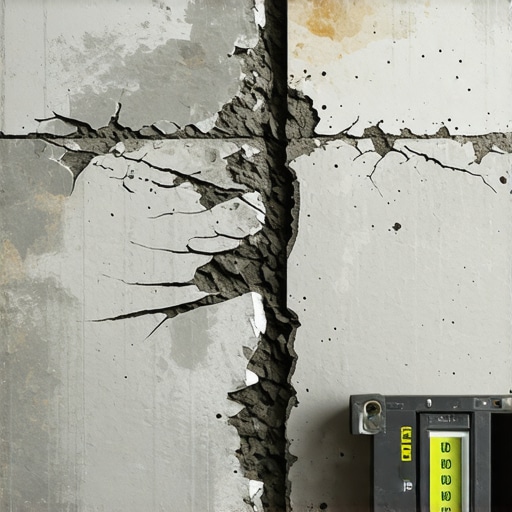
I still have nightmares about the first big sunroom I ever tiled back in the early 2000s. The concrete looked as smooth as a fresh skating rink to my young, eager eyes, so I didn’t think twice before mixing up my first bucket of mortar. Fast forward three months, and the homeowner called me back to show me a hairline fracture that ran like a lightning bolt right through the center of their expensive Italian porcelain. My heart hit the floor. It wasn’t the tile’s fault, and it wasn’t the thinset; the concrete slab had settled and cracked because it wasn’t cured or poured correctly. I learned the hard way that what you don’t see beneath the surface is exactly what will come back to haunt your wallet. If you are staring at a gray slab right now, wondering if it’s ready for its makeover, I want to help you avoid the expensive heartbreak I went through.
Why Your New Slab Might Be Your Biggest Enemy
Most people assume that ‘new’ means ‘perfect,’ but in the world of flooring, a fresh pour is often a ticking time bomb. One of the most common flooring installation mistakes is rushing the process before the concrete has even finished its chemical journey. Concrete is alive for the first month; it breathes, it shrinks, and it shifts. If you try to lock it down with tile too soon, something has to give, and it’s usually your grout lines. Before you even think about layouts, you need to understand how to measure subfloor flatness before you start installing because your eyes will lie to you every single time. I used to trust my ‘contractor’s intuition’ until I realized my intuition was off by half an inch in a ten-foot span. Have you ever noticed a weird white powder on top of your concrete that just won’t go away no matter how much you sweep? That’s called laitance, and if you tile over it, your floor will literally peel off like an old sticker.
Is the Concrete Actually Level or am I Just Paranoid?
It is easy to feel like you are overthinking things when the builder tells you the floor is ‘good to go.’ You might wonder if it is really worth the extra day of prep work. Trust me, it is. According to the experts at the Tile Council of North America (TCNA), the industry standard for large format tile requires a floor to be flat within 1/8 of an inch over a 10-foot area. If you ignore this, you will end up with ‘lippage,’ which is that annoying edge where one tile sits higher than the next, waiting to stub your toe in the middle of the night. Even if you use the trowel notch secret to get better coverage, it cannot compensate for a slab that resembles a rolling hill. You absolutely must learn how to check for high spots with a 10-foot straightedge before you commit to your design. Taking the time for floor leveling now is the only way to ensure your beautiful new space doesn’t start falling apart by next Christmas. Have you ever felt a tile move under your feet and wondered if the whole floor was doomed?
Kill the Dust and Laitance Before You Start
Thinking you can tile over a dusty slab is like trying to put a screen protector on a phone you just dropped in a sandbox; it’s never going to stick. That white powder I mentioned, laitance, is essentially a weak layer of cement and sand that rises to the top during the pour. I once ignored it on a small laundry room job, thinking the thinset would just eat through it. Within six months, the homeowner could literally lift the tiles off with a putty knife. To prevent this, you need to get aggressive. Start by using the best tool for scraping glue off a concrete slab if you are dealing with old adhesive, then move to a mechanical grind or a heavy-duty scrub. If you don’t remove that weak surface layer, your expensive tile is just floating on a bed of dust.
Find the Hidden Hills with a 10-Foot Straightedge
Concrete slabs are rarely as flat as they look. They have dips and humps that act like a roller coaster for your flooring. If you are installing hardwood, these gaps cause that annoying hollow ‘click-clack’ sound when you walk. For tile, it’s even worse; it’s the primary cause of cracked grout. You need to learn how to check for high spots with a 10-foot straightedge to map out the ‘danger zones.’ I carry a piece of chalk and circle every dip deeper than 1/8 of an inch. It feels like you’re doing a crime scene investigation, but it’s the only way to visualize where the floor leveling compound needs to go. 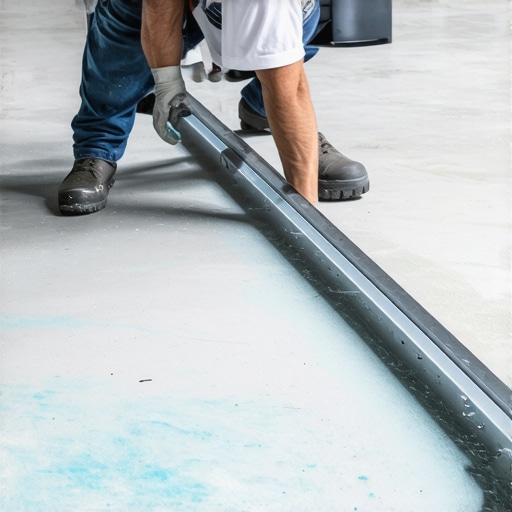
Get the Mix Right for a Glass-Smooth Finish
When you finally start the flooring installation fundamentals, the leveler is your best friend—but only if you treat it right. Most DIYers treat self-leveler like pancake batter, but it should be closer to a heavy cream. If it’s too thick, it won’t flow; if it’s too thin, it loses its structural integrity. I’ve seen guys dump a bag in a bucket and just wing the water ratio. That is a recipe for disaster. You need to discover the secret to mixing leveler for a glass-smooth finish, which usually involves a high-speed mixer and very precise water measurements. If you see bubbles forming in your pour, it’s usually because you skipped the primer or over-mixed. Why your subfloor primer is bubbling on old concrete is often tied to the slab outgassing, so don’t rush the dry time between coats.
Don’t Let the Leveler Dry Before You’re Done
The biggest panic moment in any floor leveling project is when the compound starts to set while you are still trying to move it. This usually happens because the room is too hot or the slab was too thirsty and sucked the moisture out of the mix. Understanding the reason your leveler is setting up too fast can save your floor. Always have a helper. One person mixes while the other pours. Use how to use a spiked roller for the perfect leveling pour to release air bubbles and help the material knit together. I remember a humid July afternoon in a basement where I tried to do it solo; by the time I got the third bucket poured, the first one was already like taffy. I ended up having to grind down the ridges the next day—a mistake that cost me four hours and two expensive grinding pads.
The Lie About ‘Self-Leveling’ Products
One of the biggest misconceptions in the trade is that ‘self-leveling’ underlayment is a set-it-and-forget-it solution. In reality, surface tension and the substrate’s porosity work against you from the second the pour hits the ground. I’ve seen countless DIY projects fail because your self-leveler didn’t flow into the low spots as expected. You cannot simply dump the bucket and walk away; you must actively guide the material with a gauge rake or spreader. If you don’t, the material will often ‘skin over’ before it actually finds its level, leaving you with high spots that are harder to fix than the original dips. It’s a classic flooring installation mistake that separates the weekend warriors from the seasoned professionals.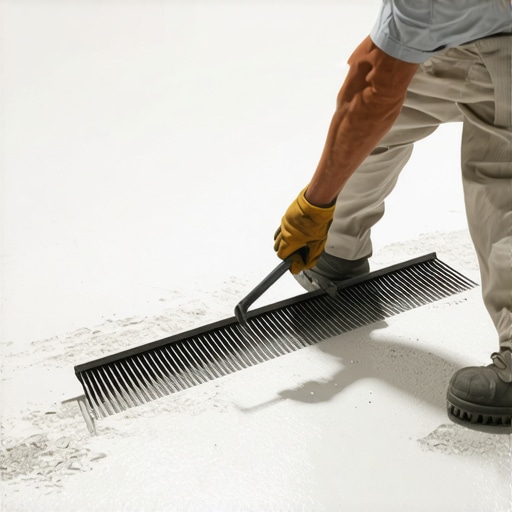
Why Thinset is a Terrible Subfloor Patch
A contrarian view I’ve held for years is that thinset should never be used to fix subfloor deviations, despite what some ‘old-school’ contractors might tell you. Beginners often try to ‘build up’ a low spot with an extra thick layer of mortar while setting tile. However, thinset is an adhesive, not a filler. Because it contains significant moisture, it shrinks as it cures. If you use a half-inch of thinset to level a tile, that tile will pull down and settle lower than its neighbors by the next morning. This is precisely why your large format tiles need back-buttering every time—to ensure a bond, not to create a level surface. You must achieve your flatness during the prep stage using the right way to back-butter onto a surface that was already corrected with proper leveling compounds.
Why Does My Flat Floor Still Feel Bouncy Near the Walls?
Even if you followed every rule and mapped the floor with a straightedge, you might still encounter a hollow or ‘bouncy’ feel. This is often the hidden reason your floating floor is pinching. If you didn’t leave enough room for expansion, the entire floor system ‘tents’ against the drywall. According to the National Wood Flooring Association (NWFA), insufficient expansion space is the primary cause of structural noise and buckling in floating floors. You can easily prevent this by using the quarter trick for checking expansion gaps during the layout phase. If the floor is already down and feels spongy, it might be that your subfloor is structurally weak, requiring the shim trick for fixing a bouncy plywood subfloor from below.
The Invisible Danger of Over-Watering the Mix
The most common ‘trap’ for advanced installers is the temptation to add extra water to the leveling mix to make it ‘flow better.’ This is a recipe for catastrophe. Over-watering breaks the chemical bonds of the polymers, which eventually leads to a surface that is soft and crumbly. If you notice why your new concrete floor is dusting continuously, it’s often a sign that the water-to-powder ratio was ignored. Always use a measuring bucket for your water—don’t eyeball it. Have you ever fallen into this trap of trying to ‘fix’ the flow with more water? Let me know in the comments.The truth is, even the most expensive Italian porcelain or Grade-A white oak won’t survive a bad environment. I never step foot on a job site without my non-destructive moisture meter. It is my personal polygraph test for subfloors. If that meter reads high, we don’t install—period. Learning how to use a moisture meter before installing wood floors is the difference between a floor that lasts decades and one that buckles by the first humid summer. I personally swear by the Wagner Orion series because it tracks environmental conditions over time, ensuring the wood is acclimated perfectly to its new home. Then there is the mixing equipment. I used to use a standard corded drill for leveler, but I kept burning out the brushes because the motor couldn’t handle the viscous pull. Now, I use a dedicated paddle mixer with a helical blade. It pulls the dry powder from the bottom without whipping in excess air. Finding the secret to mixing the perfect bucket of self-leveler every time isn’t just about the water ratio; it is about the mechanical shear of the paddle. For cleanup, don’t just use any shop vac. I use the vacuum attachment that actually picks up fine sawdust to ensure the substrate is clinical-grade clean before the primer ever hits the concrete. #IMAGE_PLACE_HOLDER_D#
How Do I Keep My New Floors Looking Brand New?
The biggest mistake I see homeowners make after a successful install is loving their floor to death with the wrong chemicals. If you have invested in hardwood floor care secrets to longevity and shine, you know that standing water is the ultimate enemy. I have seen countless homeowners destroy a high-end installation because they thought a steam mop was the most sanitary option. Please, reading why you should never use a steam mop on click-lock floors should be a requirement for every new homeowner. The high-pressure heat forces moisture into the HDF core, causing permanent edge swelling that no amount of drying can fix. Stick to a pH-neutral cleaner and a barely-damp microfiber pad to protect the finish.
The High-Tech Future of Floor Prep
We are rapidly approaching a time where the 10-foot straightedge might become a relic of the past. LiDAR scanning technology is already being integrated into pro-grade smartphone apps that allow us to create a digital heat map of a room’s topography in seconds. By 2026, I expect to see smart-leveling compounds that change color to indicate they have reached the perfect internal moisture content for tile or wood. This level of precision is exciting, but it still requires a disciplined approach. According to the Schluter-Systems Technical Manual, even with the best tech, you must achieve 95% mortar coverage in wet areas like showers to prevent mold and bond failure. This is why I always preach a step-by-step guide to flooring installation and leveling success as a manual discipline first, and a digital one second. If you want to take your skills to the next level today, I challenge you to try the dry-fit rule that prevents costly cutting mistakes on your next small project. Lay out three entire rows before you open a single bag of mortar to visualize the finish line before you commit.I’ve spent decades fixing floors that failed far too soon, and if there is one piece of advice I can leave you with, it is that your patience during the prep phase pays dividends for a lifetime.
Hard Lessons from the Floor That Taught Me Everything
Looking back at that cracked Italian porcelain from my early days, I realize that the most expensive materials in the world are worthless if the foundation is flawed. First, never trust your eyes—always trust your tools; a slab can look flat and still be a mountain range of hidden dips. Second, moisture is a silent predator that will ruin a bond if ignored, so always test before you commit to thinset or adhesive. Finally, remember that ‘good enough’ is the exact phrase that leads to the most common flooring installation mistakes. If you aren’t willing to spend an extra day on the prep work, you aren’t ready to lay the first tile.
My Pro-Grade Toolkit for Leveling Perfection
When I head to a job site, I rely on a few specific resources and tools that have never let me down. I always recommend homeowners and apprentices alike review the latest precise floor leveling techniques to achieve flawless surfaces before they crack open their first bag of compound. For hardware, I swear by my Wagner Orion moisture meter for subfloor checks and a dedicated high-shear helical paddle mixer to achieve that perfect, cream-like consistency. If you are moving into the maintenance or restoration phase later on, you will definitely want to study mastering hardwood floor refinishing expert tips for 2025 to ensure your hard work stays protected for years to come.
Take the First Step Toward a Flawless Finish
You now have the insider knowledge needed to avoid the expensive heartbreak of a failing floor. It might seem daunting at first to map out high spots with a straightedge or measure precise moisture ratios, but these steps are what separate a simple DIY project from a professional-grade masterpiece. By learning how to achieve flawless floor leveling before tile laying, you are actively protecting both your financial investment and your long-term peace of mind. Don’t be afraid to get your hands dirty and start the process—just make sure the ground beneath those hands is perfectly level before you begin. Have you ever discovered a hidden dip in your subfloor halfway through a project that threw your layout for a loop? Let me know your story in the comments below!