
I’ll never forget the sound of that first crack. It was 2:00 AM, the house was silent, and then—pop. My heart sank. I had just spent two days and way too much money pouring a “glass-smooth” surface over my old kitchen subfloor, only to realize I’d created a brittle, delaminated mess. I made the classic rookie mistake: I assumed plywood was basically concrete. It’s not. It’s a thirsty, moving, breathing organism that hates sitting under wet cement. If you don’t seal it right, that plywood will drink the water right out of your mix, leaving you with a floor that’s about as structural as a saltine cracker. Let’s make sure that doesn’t happen to you.
Your Self-Leveler is Only as Good as the Glue Holding it Down
If you’re staring at a bouncy or uneven subfloor, you’re probably itching to pour that bucket and call it a day. I get it. But let me tell you, mastering floor leveling starts way before you open the bag of powder. When I started out, I skipped the high-solids primer or used a “multi-surface” junk product that didn’t have the grip needed for wood. The result? The plywood sucked the moisture out so fast that I ended up with self-leveler bubbling over the plywood, which eventually pulled away in sheets. According to the APA – The Engineered Wood Association, plywood can expand significantly when exposed to moisture from wet construction materials. If your primer isn’t flexible enough to move with the wood while also sealing its pores, your floor is doomed before you even lay your first tile. I’m here to show you exactly how to avoid common leveling mistakes by picking a primer that actually creates a chemical bridge.
Is a specialized plywood primer really worth the extra thirty bucks?
You bet your bottom dollar it is. I’ve seen people try to use watered-down wood glue or even leftover paint as a “primer.” Don’t be that person. A dedicated acrylic or epoxy-based primer creates a bond that is stronger than the wood fibers themselves. Have you ever had a DIY project where the “easy” part turned into a total nightmare because of a skipped step? Tell me about your flooring horror stories in the comments! Before you even think about the primer, you have to measure your subfloor flatness to see how much product you actually need. I once estimated one gallon and ended up needing three because the plywood was so parched and the dips were so deep.
Clear Every Speck of Dust
Before you even touch a bottle of primer, you need to treat your subfloor like a surgical suite. I once thought I could just sweep with a broom and be fine. I poured my leveler, and five minutes later, I saw little islands of leveler floating on a sea of microscopic sawdust. It never bonded. I had to spend my Saturday scraping it all up with a chisel. You need to use a high-quality vacuum because a broom just kicks the fine particles back into the air to settle later. Find the vacuum attachment that actually picks up fine sawdust to ensure the wood grain is wide open and ready to grab the primer. If the wood is dirty, the primer sticks to the dirt, not the floor.
Seal the Gaps to Save Your Ceilings
Plywood has seams, and those seams are leveler escape hatches. One time, I was working on a second-story bathroom and missed a tiny gap where a radiator pipe went through the floor. Halfway through the pour, I heard a muffled scream from downstairs. The leveler was raining down on the dining room table like gray, liquid concrete. It was a mess that cost me more in drywall repair than the entire flooring job. Learn how to stop your floor leveler from leaking through the subfloor by using a high-quality silicone caulk or spray foam on every single perimeter gap and pipe penetration. Think of it like building a swimming pool; if it’s not watertight, it’s not leveler-tight. 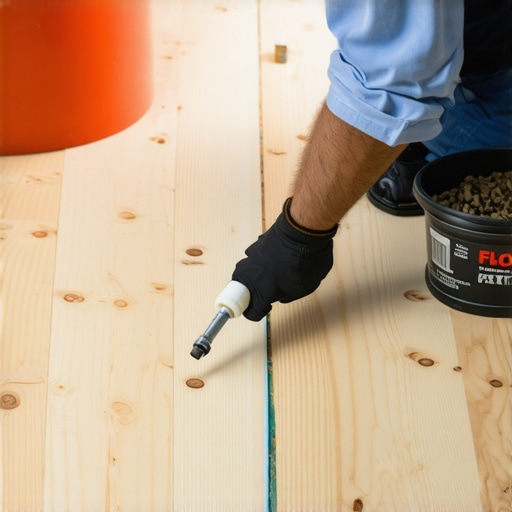
Apply the Primer Like Your Floor Depends on It
This is the one step people skip because they think it’s just ‘wetting the wood.’ It’s not. You are creating a chemical bridge. Use a soft-bristle push broom to work the primer into the wood fibers. You want to see the wood change color as it absorbs the liquid, but you don’t want puddles. If you leave a puddle, that spot will stay wet and cause your leveler to fail later. This is a critical part of a step-by-step guide to flooring installation and leveling success. Let it dry until it is tacky to the touch—usually 2 to 4 hours depending on humidity—but never let it sit overnight, or it will collect dust and lose its ‘grab.’
Mix Fast and Mix Cold
Self-leveler is a race against a chemical clock. The moment that powder hits the water, the countdown starts. I always use ice-cold water because it slows down the reaction. If you use lukewarm water, you might find the reason your leveler is setting up too fast is simply the temperature of your bucket. Use two people: one to mix and one to pour. Mastering the secret to mixing the perfect bucket of self-leveler every time means using a high-torque drill and a specialized paddle that doesn’t whip air into the mix. Air is the enemy of a smooth floor.
Eliminate Air Pockets with the Right Tools
Once the liquid is on the floor, it doesn’t just ‘find level’ on its own like magic. It needs a little nudge. I use a gauge rake to set the depth and then immediately follow up with a spiked roller. If you don’t, you’ll wonder why your floor leveler pitted during the drying process. The spikes pop the tiny bubbles created during mixing and help the different pours blend into one seamless sheet. Knowing how to use a spiked roller for the perfect leveling pour is the difference between a floor that looks like a calm lake and one that looks like the surface of the moon.
Let’s dig deeper into the chemistry that most DIYers—and even some pros—completely ignore. You’ll often hear people say that if the self-leveler feels a bit thick, just add another cup or two of water to help it flow. This is a massive mistake. In my experience, over-watering is the fastest way to ruin the integrity of the mix. When you exceed the manufacturer’s water ratio, the heavy aggregates sink to the bottom while the polymers and water rise to the top. This results in a weak, chalky surface. If you’ve ever wondered why your new concrete floor is dusting continuously, it’s likely because the surface tension was broken by too much H2O. A floor that ‘dusts’ will never hold a bond for tile or hardwood, forcing you to use expensive topical consolidators or, worse, scrape the whole thing up and start over.
The Deflection Trap That Ruins Everything
Here is a nuance that separates the novices from the masters: a floor can be perfectly level but still be structurally ‘dead.’ I see people spend hours using a 10-foot straightedge to check for high spots, only to have their grout lines crack six months later. Why? Because they ignored deflection. Self-leveler adds significant weight to a room. According to the Tile Council of North America (TCNA) Handbook, the maximum allowable deflection for ceramic tile is L/360 under live and dead loads. If your joists are too small or spaced too far apart, that beautiful level surface will flex like a trampoline every time you walk across it. This is the real reason your floor joists are making your tile crack. Before you pour, you need to ensure the structure can actually support the ‘soup’ you’re about to dump on it. Have you ever finished a project only to realize the floor felt ‘bouncy’ afterward? Let me know in the comments!
Is that old black mastic going to ruin your new pour?
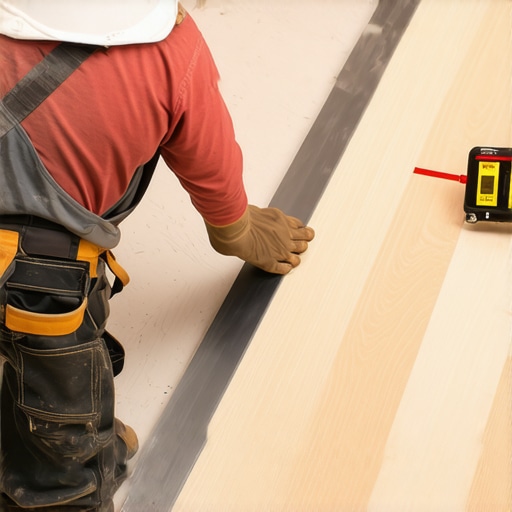
This is the question that keeps renovators up at night. You pull up old linoleum and find that sticky, black ‘cutback’ adhesive. Most people think they can just pour leveler right over it if it’s thin. I disagree. While some primers claim they can bridge over ‘well-bonded residues,’ that old adhesive can react chemically with the new leveler, causing it to delaminate in giant sheets. If you want a floor that lasts decades, you need to get back to a clean substrate. I always recommend using the best tool for scraping glue off a concrete slab or plywood to ensure you are bonding to the actual floor, not a 40-year-old chemical residue. It is back-breaking work, but skipping it is one of the most common flooring installation mistakes to avoid for lasting results. Remember, your finish floor is only as stable as the layer it’s sitting on. Don’t build your house—or your tile floor—on a foundation of old glue and wishful thinking.
Once you’ve conquered the chemistry and the structural prep, you might think you’re in the clear. But scaling up to a full-home renovation introduces a whole new set of headaches. If you’re moving beyond a small bathroom, you need to think about logistics. I stopped hand-mixing in five-gallon buckets years ago for large open-concept areas. Instead, I rent a continuous mixer or a pump. This is one of those precise floor leveling techniques to achieve flawless surfaces that prevents the dreaded ‘cold joint’—where one batch starts to dry before the next one hits it, creating a visible and weak seam in your floor that will eventually crack under pressure.
Why You Can’t Afford to Skip the Moisture Meter
Don’t even think about laying your finish material until you’ve verified the moisture content. I personally swear by pinless moisture meters because they don’t leave holes in my perfect pour. According to the technical experts at Wagner Meters, a concrete or wood subfloor that looks dry on the surface can still hold enough deep-seated moisture to cause catastrophic warping or mold. You must understand how to use a moisture meter before installing wood floors to ensure you aren’t sealing in a disaster. I’ve seen thousands of dollars worth of wide-plank oak cup into U-shapes because the installer was too impatient to wait for the leveler to fully cure through its entire thickness.

How do I keep this floor perfect for the next decade?
Maintenance isn’t just about a mop and bucket; it’s about understanding the ‘cure window.’ For example, if you just finished your install, why you should never mop new hardwood for at least two weeks is the golden rule I live by. The finish needs time to fully cross-link and harden. Long-term, you want to focus on hardwood floor care secrets to longevity and shine, which starts with managing the relative humidity in your home. Too dry, and the wood shrinks; too wet, and it expands, potentially stressing the leveler beneath it.
Make Your Transitions Look Like a Professional Did Them
If you are going from a leveled kitchen to a carpeted living room, don’t just leave a raw edge. You need to understand why you need a transition strip between different flooring heights. I’ve found that even a 1/8-inch height difference can become a major trip hazard or a place where the edge of your tile chips away. In my own home, I custom-mill my transition strips to ensure a dead-flush match, but a high-quality T-molding works wonders for most DIYers who want to avoid a jagged finish.
What to Expect from High-Tech Floor Layouts in 2025
Looking toward the future, I see the industry moving toward Lidar-based floor mapping. Imagine using your phone to create a 3D heat map of your subfloor that tells you exactly how many bags of leveler to buy before you ever head to the store. We are already seeing tile selection tips for elegant hardwood floors in 2025 focusing on precision-engineered products that require tighter tolerances than ever. To get ahead of the curve, I recommend you try the quarter trick for checking expansion gaps in luxury vinyl floors right now. It’s a simple, pro-level habit that ensures your floor can breathe without buckling as the seasons change.
The Expensive Lessons That Taught Me Everything About Subfloors
After years of pouring self-leveler, I’ve realized that the bag instructions only tell half the story. One major lightbulb moment was discovering the shim trick for fixing a bouncy plywood subfloor before I ever touch a bucket of primer. If the wood moves, the cement eventually cracks—period. Another hard truth is that your environment is the boss. On a hot day, your working time isn’t ten minutes; it’s five. I also learned the hard way that you should always check local regulations because the permit trap can catch you off guard even for simple floor remodels if you are altering structural elements. Finally, trust your eyes over your level; sometimes a room needs to look right with the existing baseboards rather than being perfectly dead level to the horizon.
The Gear That Never Leaves My Truck
If you want to revamp your home with expert flooring installation tips, you need more than just a bucket and a prayer. My must-have toolkit includes a high-torque mixing paddle that moves the material upward to prevent air bubbles, the TCNA Handbook for industry-standard deflection specs, and a 360-degree laser level to map out high spots in one go. Using these tools consistently is the only way I know to avoid flooring installation mistakes that lead to hollow spots or lippage later on. I personally trust the TCNA guidelines because they provide the scientific foundation for why specific thinsets work with specific substrates.
Turn That Bumpy Subfloor Into a Masterpiece
Don’t let the fear of a bad pour stop you from starting your project. Successful flooring installation is a skill that rewards patience and prep work above all else. When you take the time to seal every gap and prime every inch, you aren’t just pouring concrete; you’re building a foundation that will hold your home together for decades. Whether you are looking for tile installation pointers that save time and money or laying down high-end hardwood, a flat floor is the secret ingredient for professional results. You have the knowledge now so go mix that first bag and transform your space. Have you ever encountered a mystery hump in your subfloor that refused to go away? Let me know how you handled it in the comments below!