
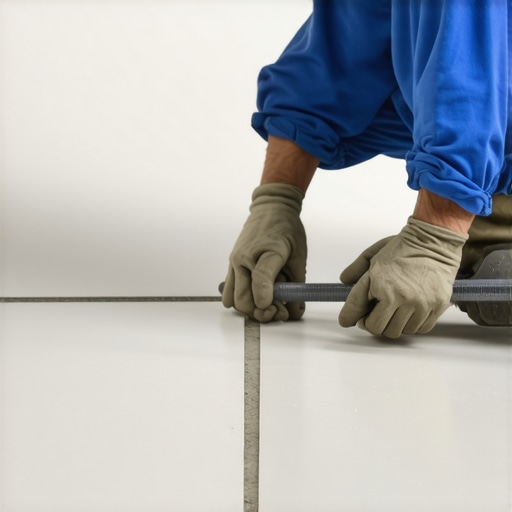
I still remember the first night after I finished my master bathroom remodel. I was walking to the sink in my socks, feeling pretty proud of myself, when thwack—my big toe caught the razor-sharp edge of a marble tile that was just a hair higher than its neighbor. It wasn’t just the pain; it was the soul-crushing realization that my ‘perfect’ layout was actually a tripping hazard. That’s lippage for you. It is the silent floor-killer that turns a beautiful renovation into a source of constant annoyance. I had spent weeks picking out the perfect stone, only to have the final result look like a series of miniature steps instead of a smooth, continuous surface. If you are feeling that same pit in your stomach right now because your grout lines look uneven or your chair keeps catching on a tile corner, take a deep breath. We are going to get through this together.
Why Your New Tile Floor Feels Like a Tripping Hazard
Lippage happens when the edges of adjacent tiles aren’t at the same height, and it usually creeps up on you during the process of installing tiles like a pro. When I first started, I thought I could just ‘eye’ it and fix any issues with a bit more thinset. Huge mistake. I completely ignored the need to how to measure subfloor flatness before you start installing, and I paid for it in stubbed toes. The truth is, even a 1/32-inch difference can be felt underfoot. According to the ANSI A108.02 standard, which is the gold standard for the tile industry, allowable lippage is incredibly tight—often just the thickness of a credit card. If you’re over that, you haven’t just made an aesthetic error; you’ve created a safety issue. Most people think it’s a tile defect, but nine times out of ten, it’s about how the thinset was spread or how the subfloor was prepared. One of my biggest early blunders was not realizing why your trowel size is ruining your tile bond; if your ridges aren’t consistent, your tiles won’t be either.
Is My Tiling Job Actually Beyond Saving?
You are probably staring at that one high corner right now, wondering if you have to rip the whole floor up and start over. I know that fear well. It kept me up at night during my first big kitchen project. But before you grab the sledgehammer, listen: you don’t always have to go to extremes. Whether you are dealing with a slight height mismatch or a major ‘oh no’ moment, there are ways to level the playing field. Have you ever stepped on a brand-new floor only to feel that annoying ‘click’ or ‘lip’ under your foot? Tell me in the comments if you’ve ever had to live with a ‘toe-stubber’ floor! We are going to tackle this by looking at the trowel notch secret for getting full thinset coverage and exploring how to pull up a single problem tile without destroying the surrounding ones. We’ll get that surface back to the glass-smooth finish you were dreaming of when you first bought the boxes.
Stop the Ski Jump Before the Mortar Hardens
You’ve found a high corner. Don’t panic. If you caught it within the first hour, you’re in what I call the “golden window” of tile repair. Think of thinset like wet clay; it’s forgiving until it isn’t. I remember doing a galley kitchen for a friend where I got cocky with some 12×24 porcelains. I stepped back to admire my work and realized the center tile was tilted like a seesaw. One end was perfect, but the other was a miniature ski jump. I had to perform Tile Surgery. I used a small flathead screwdriver to gently scrape the grout line clear, then used a glass suction cup—the kind people use for moving heavy mirrors—to pull the tile straight up. If you just pry from the side with a trowel, you’ll almost certainly chip the neighboring tile, and then you’ve got two problems instead of one.
Clean the Bed and Start Fresh
Once the tile is out, you have to scrape away the old thinset. You can’t just add more on top, or you’ll create a “lippage sandwich” that will never sit right. This is where many DIYers fail; they try to “patch” the height by globbing on extra mortar. You need a clean subfloor for a reset. I always keep a bucket of water and a sponge nearby because the trick for removing dry thinset from the face of a tile is much harder than wiping it away while it’s fresh. When you reset that tile, you must understand how to back butter large format tiles the right way. Applying a thin “butter” coat to the back of the tile—almost like icing a cake—ensures that even if your floor has a slight dip, the tile has enough grab to stay level with its neighbors. This is especially true for why your large format tiles need back buttering every time; the bigger the tile, the more likely a “hollow spot” will cause it to sink.
Let Mechanical Systems Do the Heavy Lifting
If you want to avoid surgical interventions altogether, you need to stop relying on your eyes and start using a mechanical leveling system. These are those little plastic clips and wedges you see in the pro aisles. They aren’t “cheating”—they are essential tools for modern tiling. They lock the tiles into a single plane while the thinset cures. Without them, even a perfectly set tile can “slump” as the moisture leaves the mortar and the tile’s own weight pulls it down. It’s like putting a splint on a broken bone; it keeps everything exactly where it needs to be until it’s strong enough to stand on its own. Using these systems is one of the most important precise floor leveling techniques to achieve flawless surfaces.#IMAGE_PLACE_HOLDER_B#
Verify Every Row with a Straightedge
Don’t trust your hands alone. Our fingers are sensitive, but they can miss a gradual slope that turns into a sharp edge three tiles later. Every three rows, I take a 4-foot level or a straightedge and lay it across the tiles. If it rocks even a tiny bit, I know I have a problem brewing. This is a critical part of the step-by-step guide to flooring installation and leveling success that separates a weekend project from a lifetime floor. If you find a gap under the level, you likely need to revisit the trowel notch secret for getting full thinset coverage. Inconsistent trowel depth is the primary culprit when tiles sink or float at different rates across the room. Keeping your ridges uniform is the only way to ensure the tile bed stays predictable.
Stop Chasing the Bubble and Start Chasing the Line
Most people conflate ‘level’ with ‘flat,’ and that’s a recipe for expensive waste. If you’re mastering floor leveling pro secrets for perfect installations, you quickly realize that a floor can be sloped at a slight angle and still be a perfect candidate for large-format tile—as long as it’s flat. Level refers to the horizontal plane relative to gravity; flat refers to a surface without peaks or valleys. If you try to make an old, settled house perfectly level, you might end up pouring inches of compound on one side, adding weight that your joists weren’t designed to carry. The Tile Council of North America (TCNA) Handbook emphasizes flatness—specifically 1/8 inch in 10 feet for large tiles—over absolute levelness. Have you ever fallen into this trap? Let me know in the comments.#IMAGE_PLACE_HOLDER_C#
The Danger of Adding Just One More Cup of Water
There’s a dangerous ‘oops’ factor when you start mixing compounds. I’ve seen it a hundred times: a DIYer thinks the mix is too thick, so they add an extra splash of water to help it flow. This is a fatal error. Over-watering self-leveler causes the polymers to separate and rise to the top, creating a chalky, brittle surface that will eventually lead to bond failure. You need the secret to mixing the perfect bucket of self-leveler every time to avoid this. If the mix looks ‘too thick’ but you followed the bag’s instructions exactly, you likely didn’t account for the reason your leveler is setting up too fast, such as high room temperature or a thirsty, unprimed subfloor. You must treat the subfloor like a sponge that needs to be sealed before it can accept the ‘finish’ coat.
Why is my leveler peeling off the concrete like old paint?
This advanced issue usually comes down to surface tension or ‘laitance’ on the concrete. Concrete isn’t just a static rock; it has pores that can be clogged with old adhesive or oils. If you don’t mechanically abrade the surface or use the correct primer, you’ll eventually wonder why your self-leveler is pulling away from the concrete. Furthermore, many skip the step of using a spiked roller. You should learn how to use a spiked roller for the perfect leveling pour to release trapped air bubbles and ensure the compound actually bites into the substrate. Failing to do this creates micro-voids that weaken the entire structure of the floor.I have spent a small fortune on tools over the years, but I have learned that the most expensive tool is the one you have to buy twice because the first one was junk. For me, the ultimate game-changer was moving from a cheap bubble level to a professional-grade straightedge. I use it constantly to how to check for high spots with a 10-foot straightedge before I even think about opening a bag of mortar. If you are working with hardwood, I cannot stress enough the need for a high-quality pinless moisture meter. I personally use the Wagner Meters Orion 950 because it provides deep-scan readings without leaving unsightly holes in my expensive white oak planks. You absolutely must how to use a moisture meter before installing wood floors to ensure the subfloor and the finish material are in harmony; otherwise, you are just waiting for the floor to buckle or gap. According to the National Wood Flooring Association (NWFA) Technical Manual, the moisture content of a wood subfloor should typically be within 2 to 4 percent of the flooring itself, depending on the plank width. Ignoring this technical detail is the fastest way to ruin a high-end installation.
My Personal Arsenal for a Glass-Smooth Finish
Beyond the level, I always keep a dedicated set of notched trowels that I never share with anyone. It sounds obsessive, but once you find the perfect weight and handle grip, you do not let those tools out of your sight. I have found that using a high-performance, polymer-modified thinset requires a trowel with enough structural integrity to not flex under the weight of a large-format tile. When I am prepping a surface, I refer back to the ultimate guide to floor leveling for a perfect finish to make sure I am not cutting corners on the foundation. 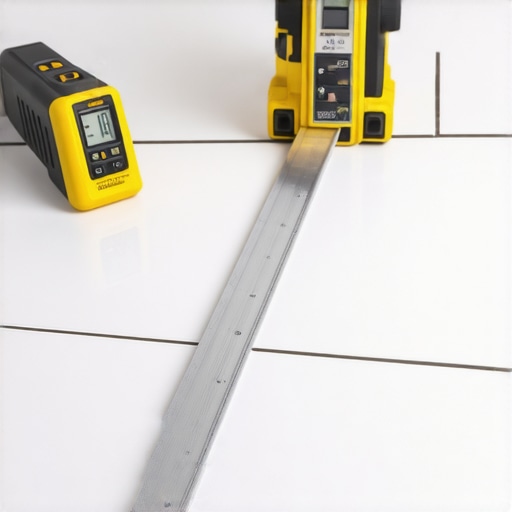
How do I maintain my floor’s finish over the long haul?
Maintenance is not just about sweeping; it is about managing chemistry and moisture. Many homeowners grab a steam mop thinking they are being extra hygienic, but that is often a death sentence for click-lock joints and polyurethane finishes. I have seen countless projects ruined by forced heat and vapor. Instead, focus on hardwood floor care secrets to longevity and shine that rely on pH-neutral cleaners and microfiber pads. If you have tile, the real battle is in the grout lines. Re-sealing your grout once a year takes twenty minutes but saves you twenty hours of scrubbing later. It is the difference between a floor that ages gracefully and one that looks tired after just a few winters.
The Future of Level Floors is Digital
I truly believe we are on the verge of a digital leveling revolution. We are already seeing the emergence of mobile apps that use LiDAR technology on smartphones to create topographical maps of subfloors in real-time. In five years, we likely won’t be guessing where the low spots are; our phones will highlight them in augmented reality. Until that technology becomes the job site standard, you should double-check your manual work. If you want to level up your game right now, try the ‘ping test’—drop a golf ball on your tiles after they have cured. If it sounds hollow, you have a coverage issue you need to address before you move the heavy furniture back into the room. Try this on your next row and see how many hollow spots you catch before it is too late.
Why Speed is Your Worst Enemy on Installation Day
After years of thinset under my fingernails, I realized that the most common flooring installation mistakes to avoid for lasting results almost always stem from rushing the process. I used to think I could save an hour by skipping the secondary level check, only to spend six hours later trying to grind down a high spot. Lighting is another silent snitch; a floor that looks perfect at noon might look like a mountain range under a low-profile evening lamp. I now live by the ‘shadow test.’ Always check your work with a flashlight held parallel to the floor; if the beam casts a long shadow from a tile edge, you’ve got lippage that needs immediate attention before the mortar sets. Taking that extra ten minutes per row saves you a decade of frustration.
#IMAGE_PLACEHOLDER_E#
The Reliable Gear That Lives in My Truck
I don’t just recommend tools; I rely on them to protect my reputation and my knees. First, the TCNA Handbook is the only technical manual I trust for industry standards on allowable tolerances. For moisture control, I never start a project without my pinless meter; I’ve learned how to use a moisture meter before installing wood floors to prevent the heartbreak of a buckled hallway. Finally, always have a set of high-quality glass suction cups in your kit. They allow you to perform ’tile surgery’—pulling up a single sunken tile without prying and chipping its neighbors. These are the tile installation pointers that save time and money because they turn potential disasters into quick fixes.
Build a Floor That Lasts Decades
Installing a floor is a marathon of precision, not a sprint. It’s about the satisfaction of a job well done and the peace of mind that comes with a surface as smooth as a mirror. By mastering the ultimate guide to floor leveling for a perfect finish, you aren’t just laying ceramic or wood; you’re creating a permanent foundation for your home’s daily life. Don’t be intimidated by floor leveling challenges common mistakes and how to avoid them. Take your time, trust your straightedge, and your feet will thank you every time you walk across that beautiful, lippage-free surface. Have you ever discovered a ‘toe-stubber’ tile after the grout had already dried? Tell me your survival story in the comments below!