
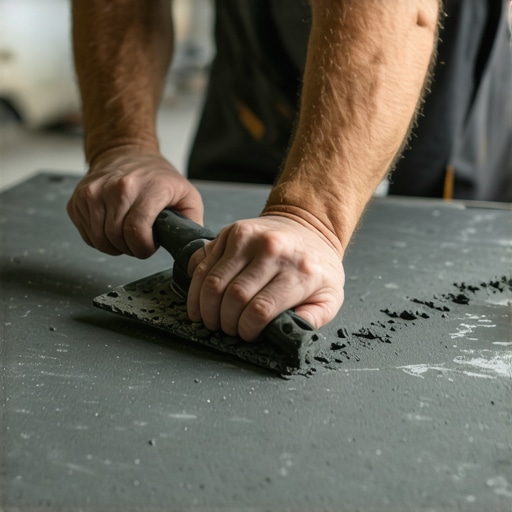
I remember kneeling on my kitchen floor, staring at a beautiful 24×48 porcelain slab, and thinking I could finally take a shortcut. I had spent days mastering floor leveling to get the subfloor like glass, so surely the tiles would sit perfectly, right? Wrong. I skipped back-buttering those big beauties because my lower back was screaming and I just wanted to be done. Fast forward three months: my daughter dropped a heavy wooden block, and *crack*. That expensive tile didn’t just chip; it spider-webbed because there was a microscopic air pocket lurking underneath. I learned the hard way that when it comes to large format tiles, if you aren’t back-buttering, you are basically setting up a very expensive game of Jenga. Today, I want to save you from that same heartbreak by explaining why this one extra step is the only way to ensure your floor lasts as long as your mortgage.
That Hollow Sound is the Death Knell of Your New Floor
Large format tiles—which generally refers to any tile with at least one side longer than 15 inches—are a completely different beast than the standard 12×12 squares of the past. These tiles are heavy, surprisingly rigid, and notoriously unforgiving. If your mortar isn’t perfectly distributed, those tiles will bridge over low spots rather than settling into them. I have seen too many folks ignore the trowel notch secret and end up with “lippage” (where one tile edge sits higher than its neighbor) or, even worse, tiles that simply pop up when the house undergoes its natural seasonal shifts. You might think you’re saving ten minutes per row, but you are actually flirting with the hidden cost of using cheap thinset or rushed techniques that lead to total floor failure. Have you ever walked across a brand new floor and heard a subtle, metallic *clack*? That’s the sound of a tile that isn’t truly bonded to the earth.
Is this extra step actually worth the sweat?
You might be thinking, “Hey, my floor is flat, and I’m using a massive 1/2-inch trowel. Is this really necessary?” The answer is a resounding yes, and science backs me up. According to the Tile Council of North America (TCNA), you need at least 80% mortar coverage for interior dry areas and a massive 95% for wet areas or exteriors to prevent cracking. Without back-buttering—the process of spreading a thin, flat layer of mortar on the back of the tile itself before laying it—achieving that 95% coverage on a large slab is virtually impossible. Have you ever pulled up a failing tile only to see those “combed” mortar lines on the subfloor still perfectly intact, with the back of the tile looking clean as a whistle? That is a bond failure. It means the tile was just resting on the ridges, never actually becoming one with the floor. Before you start your next project, you should also check for high spots with a 10-foot straightedge to make sure you aren’t fighting an uphill battle from the start. Tell me, have you ever felt that sinking feeling of hearing a hollow thud under your feet?
Master the Art of the Perfect Bond
To get this right, you have to stop thinking of mortar as glue and start thinking of it as a structural bridge. If the bridge doesn’t touch both sides securely, it collapses. I remember a humid Tuesday in July when I was installing some beautiful 36-inch porcelain planks in a sunroom. I was rushing because the thinset was skinning over in the heat. I slapped the mortar on the floor, skipped the back-butter, and dropped the tile. Ten minutes later, I had to pull it up because I realized I’d missed a layout line. The tile came up completely clean, while the mortar sat on the floor like a row of abandoned sandcastles. The dust on the back of the tile had acted as a bond breaker. Since then, I never skip the prep.
Scrub the Back Before You Butter
Most people don’t realize that large tiles come from the factory with a fine layer of kiln dust. If you apply mortar directly to that dust, it won’t stick. Take a clean, damp sponge and wipe the back of every single tile. It takes three seconds, but it ensures the mortar actually bites into the porcelain. This is just as important as knowing the best way to prep a dusty concrete floor for adhesive. If either surface is dirty, your bond is compromised from the jump.
Use the Flat Side of Your Trowel
This is the actual buttering part. You aren’t trying to add height here; you are trying to key the mortar into the tile. Take a small scoop of thinset and, using the flat side of your trowel, scrape it across the back of the tile. You want a thin, translucent layer that covers every square inch. Think of it like spreading cold butter on toast—you want to fill all the tiny pores of the bread. 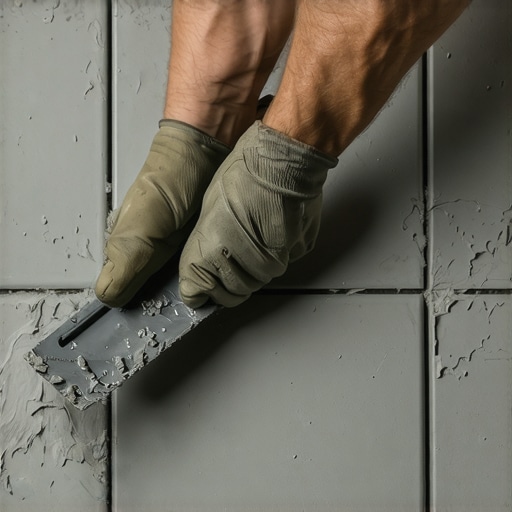
Line Up Those Mortar Ridges
Once your tile is buttered, you need to address the floor. You must use the correct notch size, usually a 1/2-inch x 1/2-inch square notch for large format pieces. The trick is to comb the mortar in straight lines, not swirls. When you set the tile, those straight ridges can collapse and air can escape. If you swirl, you trap air pockets that lead to those dreaded hollow sounds. Learning how to detect a hollow tile before the grout starts cracking is a skill you hope you never have to use, but proper ridging makes it unnecessary.
Collapse the Ridges with a Firm Set
When you lay the tile down, don’t just drop it. Give it a slight back-and-forth wiggle perpendicular to the ridges. This collapses the peaks into the valleys. This is where the trowel notch secret for getting full thinset coverage really pays off. You will feel a physical grab when the vacuum seal forms. If you have done it right, trying to lift that tile back up should feel like trying to pull a suction cup off a mirror. Avoiding common flooring installation mistakes to avoid for lasting results starts with this tactile feedback. Once the tile is set and level, make sure you know the exact moment you should pull your tile spacers for the cleanest lines to prevent them from getting stuck in the hardening mortar.
Why Self-Leveling Compound Isn’t the Magic Wand You Think It Is
Most DIYers—and even some pros—assume that if they dump a few bags of expensive compound on the floor, their job is done. They think the ‘self’ in self-leveling means the material is smart enough to fix every subfloor sin. In reality, it is a fickle beast. I have seen countless projects fail because someone ignored why your self-leveler developed spiderweb cracks overnight. The common belief is that a level floor is a flat floor, but you can have a floor that is perfectly level—meaning parallel to the horizon—but still has waves and dips that will snap a large format tile in weeks. You need to focus on flatness over levelness for tile longevity. Before you pour, make sure you understand why your self-leveler didn’t bond to the wood subfloor to avoid a complete delamination nightmare. Flatness is about the relationship between the tile and the substrate; levelness is just about the earth’s gravity. For large format pieces, flatness is king.
Is 95% Mortar Coverage Actually Possible?
The American National Standards Institute (ANSI) A108.5 standard is very clear: for large format tiles, particularly in wet areas or high-traffic zones, you must achieve at least 95% mortar contact. Most people think they are hitting this target by just ‘using more thinset,’ but that is a dangerous trap. Excess thinset actually shrinks as it cures, which can pull the corners of the tile downward, creating a ‘bow’ that wasn’t there when you laid it. This is exactly why your porcelain tile is cracking in a straight line even though you didn’t drop anything on it. The real nuance is in the directional troweling. If you aren’t pulling your trowel in straight, parallel lines, you are trapping air. 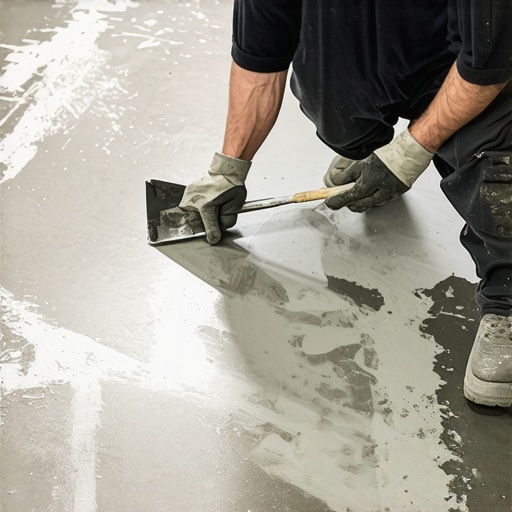
Stop Swirling Your Thinset if You Want the Floor to Last
If you swirl your mortar like you’re frosting a cake, you’ve already lost. Those swirls trap air pockets that have nowhere to go when you set the tile. Under the weight of a massive slab, those air pockets become pressurized zones of weakness. Always trowel in the shortest direction of the tile to let the air escape easily as you bed the piece. If you don’t, you’ll eventually find why your grout is falling out of the joints in the hallway because the tile is slightly micro-moving every time you walk on it. I once had to rip up a 400-square-foot kitchen because the installer thought ‘swirling was faster.’ It wasn’t faster when he had to do the entire job twice. Another common oversight is lighting; poor placement can hide flaws until it’s too late, which is why your porcelain tile looks wavy under recessed lighting once the sun goes down. Have you ever fallen into this trap of thinking the leveler or a thick bed of mortar would do all the heavy lifting? Let me know in the comments.It is one thing to get the tile down, but keeping it there—and making sure it doesn’t look like a DIY disaster after six months—comes down to the gear you trust. I used to think a standard cordless drill could handle mixing thinset. I was wrong. The motor on my favorite drill literally smoked out because it couldn’t handle the torque required for a heavy-bodied mortar. Now, I don’t go anywhere without a dedicated mixing station and a Collomix paddle. It ensures you get the secret to mixing the perfect bucket of self-leveler every time without those nasty dry lumps that ruin your flow.
Stop killing your back with a standard drill
If you are working with large format tiles, you need a mechanical advantage. I’ve become obsessed with using a lippage tuning system (LTS). These aren’t just ‘spacers’; they are tools that physically lock the tiles into a single, flat plane while the thinset cures. I prefer the wedge-and-clip style because you can feel the tension as you click them together. It’s the difference between a floor that looks okay and one that looks like it was installed by a high-end machine. Plus, it helps you execute those precise floor leveling techniques to achieve flawless surfaces without constantly second-guessing your eyesight.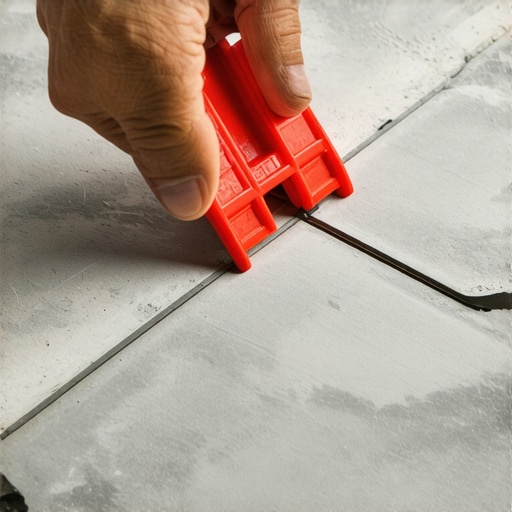
The leveling systems that actually make a difference
I recently dug into the ANSI A108.02 standards, which highlight that for tiles with any side over 15 inches, the allowable lippage is only 1/32 of an inch. That’s roughly the thickness of a credit card. You simply cannot hit that target consistently with your thumb and a prayer. If you want to be installing tiles like a pro, you need to invest in a quality laser level. I use a 360-degree green beam laser because it stays visible even in high-noon sun. It lets me see a dip in the subfloor from twenty feet away before I ever open a bag of mortar.
How do I stop my floors from aging prematurely?
Maintenance is where most people drop the ball. Once the grout is in, you need to wait the full cure time—usually 48 to 72 hours—before you even think about sealing. For hardwood, the rules are even stricter. You should check out these hardwood floor care secrets to longevity and shine to avoid the common mistake of using steam mops that can delaminate the finish. For tile, stick to pH-neutral cleaners. Anything acidic will eventually eat through your sealer and start pitting the grout. Looking toward the future, I see ‘smart’ subfloors becoming a reality. We are already seeing moisture sensors that can be embedded under the underlayment to alert your phone if a pipe leaks under the kitchen island. For now, the best tech you can use is a simple HEPA vacuum. Using the vacuum attachment that actually picks up fine sawdust during the prep phase will do more for your bond strength than any expensive ‘high-grip’ additive ever could. My challenge to you? On your next project, wipe the back of every single tile with a damp sponge and use a wedge-leveling system on every joint—it will change your results forever.
What Nobody Tells You About the First Five Minutes of Tiling
Over the years, I’ve realized that the success of a floor is decided in the first few minutes of the first row. One major realization was that mortar skinning is a silent killer; if you spread too much thinset and it sits for even five minutes in a breeze, it forms a dry film that prevents bonding. I also learned that the “wiggle” isn’t just for show—if you don’t feel that suction-cup resistance when you try to adjust a tile, you’re looking at a future failure. Most importantly, I stopped treating 1/32-inch lippage as “close enough” and started treating it as a failure point. Using precise floor leveling techniques to achieve flawless surfaces isn’t about perfectionism; it’s about physics. Large format tiles simply don’t bend, so if the subfloor isn’t perfectly flat, the tile will eventually snap under pressure.
The Tools That Actually Earn Their Keep in My Van
If you want to move from “DIY-looking” to “professional-grade,” you need to stop fighting your equipment. I never start a job without my Collomix DLX paddle; it’s designed specifically for heavy mortars and prevents the air entrainment that weakens your bond. #IMAGE_PLACEHOLDER_FINISH# For layout, a 360-degree green laser is non-negotiable. It helps you spot subfloor dips that a standard 4-foot level might miss, allowing you to address floor leveling challenges and common mistakes before you’ve mixed a single bag of thinset. I also swear by wedge-style lippage systems because they provide consistent downward pressure that manual spacers just can’t match. Lastly, keep a high-quality HEPA vacuum on hand. It’s the only way to ensure you aren’t trying to bond your expensive porcelain to a layer of drywall dust.
Build a Floor That Outlasts the House
Tiling a floor with massive slabs is an intimidating journey, but the reward is a surface that feels like a solid piece of stone under your feet. Don’t let the extra sweat of back-buttering or the precision of the secret to getting a flat floor for large format tiles discourage you. These steps are what separate a “project” from an “investment.” When you take the time to do it right, you’re not just laying tile; you’re crafting a foundation for your home’s future memories. Follow these tile installation pointers that save time and money in the long run, and you’ll never have to worry about that dreaded hollow sound again. You’ve got the knowledge—now go get that perfect bond. Have you ever discovered a hollow tile after the grout was already dry? Tell me your “horror story” in the comments below!