
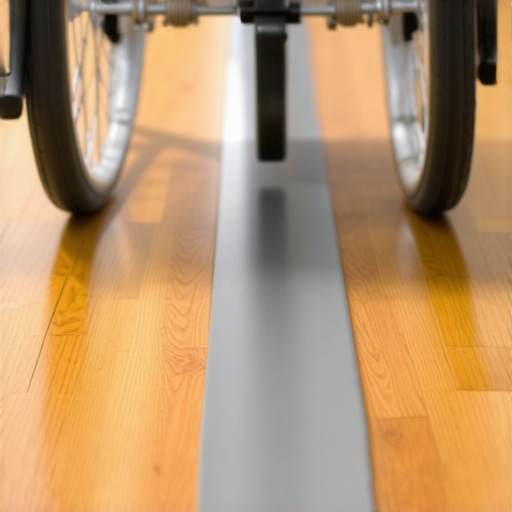
I’ll never forget the sound: a sharp, metallic clack followed by the frantic spinning of rubber wheels against my freshly polished oak. My Uncle Leo was visiting for the first time since his accident, and I’d spent weeks obsessing over the hardwood floor care secrets to longevity and shine. I honestly thought I’d made the house accessible. I had installed those so-called universal transition strips from the big-box store, the ones that claim to work for every possible scenario. But there he was, stuck between the hallway and the bathroom, his front casters caught on a half-inch lip that might as well have been a brick wall. It was embarrassing, frustrating, and a complete failure of my own craftsmanship. [IMAGE_PLACEHOLDER]
Stop Using Those Chunky T-Moldings
Most homeowners and even some pros assume that as long as there’s a ramped edge, it counts as accessible. That’s a myth that leads to a lot of stubbed toes and frustrated wheelchair users. When I first started my DIY journey, I made the classic mistake of thinking I could just fix a transition strip that won’t stay glued down by adding more adhesive or sanding it thinner. Total disaster. The strip ended up snapping under the weight of a chair because it wasn’t supported from beneath. The real trick isn’t actually about the strip itself; it’s about what is happening underneath the surface before the flooring even goes down. To get a truly flush look, you have to look at your subfloor. If you’re dealing with a height difference between rooms, you need to master floor leveling long before the first plank or tile is laid. According to the ADA Accessibility Standards, any vertical change in level over 1/4 inch must be beveled with a slope no steeper than 1:2. In a home setting, even a 1/2 inch jump is a nightmare for manual chairs. You have to think ahead. Have you ever had a guest or family member get stuck on a standard flooring transition in your home? It’s a wake-up call that your floors aren’t as friendly as you thought.
Is a tiny fraction of an inch really worth the extra work?
You might be thinking that a small bump isn’t a big deal. For someone with limited upper body strength or using a heavy power chair, that small bump is a jarring impact every single time they move between rooms. It’s about dignity and independence. By using a low-profile transition trick—which involves a bit of feathering with a high-quality compound—you create a seamless flow. I’ve found that using precise floor leveling techniques to create a gentle, invisible ramp over three feet is a game-changer compared to a steep one-inch strip. Before we get into the nitty-gritty of the feathering method, we need to talk about the prep. If your base isn’t right, your low-profile solution will crack. That’s why I always tell people to check why your self-leveler developed spiderweb cracks before they try to build up a custom slope. If the foundation is solid, the transition will last a lifetime.To avoid the ‘Uncle Leo’ disaster in your own home, you need a plan that starts with a six-foot level and a lot of patience.
Find the Hidden Dips with a Straightedge
You can’t fix what you can’t see. I used to think my eyes were enough to spot a slope, but I was wrong every single time. Take a long straightedge—or even a perfectly straight 2×4 if you’re in a pinch—and slide it across the transition area. You’re looking for ‘light’ under the level. If you see a gap, that’s where your wheelchair casters will get hung up. I remember a kitchen renovation in 2022 where I ignored a seemingly tiny 3/8-inch dip. Once the tile was down, it looked like a literal cliff. I had to learn the ultimate guide to floor leveling for a perfect finish the hard way—by tearing it all back out. Now, I mark every low spot with a pencil directly on the subfloor. This helps you visualize exactly how far back you need to start your ramp to meet the ADA-compliant slope. 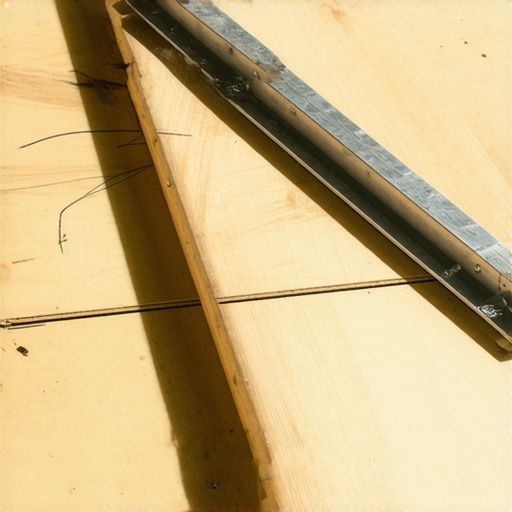
Don’t Pour Leveler Until You’ve Done This First
Before you even think about mixing that bag of compound, you have to secure the foundation. A bouncy subfloor will crack your beautiful new transition in weeks. I’ve spent hours on my hands and knees because I knew that learning how to stop your subfloor from squeaking with one screw was more important than the actual flooring choice. If the wood moves, the leveler fails. Once it’s tight, clean it like you’re performing surgery. Dust is the enemy of adhesion. If you skip the primer, you’ll end up wondering why your self-leveler didn’t bond to the wood subfloor as you watch it flake away. I once had a project where the leveler started bubbling because I was too lazy to vacuum properly. It was a mess that looked like a science experiment gone wrong.
The Secret to the Gentle Slope
This is where the magic happens. You aren’t just dumping a bucket; you are sculpting a path. When you start your pour, begin at the highest point of the transition and let the liquid flow toward the lower room. Use a featheredger or a flat trowel to pull the material out. Think of it like icing a cake—you want a thin, translucent edge where the leveler meets the existing subfloor. This creates a ramp that is so gradual that a wheelchair or a walker won’t even feel the change in elevation. To get this right, you need the secret to mixing the perfect bucket of self-leveler every time, which usually involves a high-speed drill and cold water. If the mix is too thick, it won’t feather; if it’s too thin, it won’t hold its shape. I’ve found that the leveling secret for installing plank flooring over tiles is almost always in the consistency of the pour. It should look like heavy cream, flowing just enough to be helpful but thick enough to stay where you put it. Once you have that base, you can finally focus on how to get a straight line for your first row of tile or wood, knowing that the ground beneath is finally on your side. If you notice any weird textures after it dries, check if it’s a priming issue—sometimes why your floor primer is peeling off like a sunburn is simply because you didn’t give it enough dry time before the pour.
Flatness Trumps Level Every Single Day
Most DIYers and even some contractors get obsessed with the bubble in the spirit level. They want the floor to be perfectly ‘level’ with the horizon. But here is a contrarian truth: in an old house that has settled, chasing a perfectly level floor can create a three-inch step-up at the threshold, which is the exact opposite of what we want for accessibility. In my experience, focusing on flatness is the real secret. A floor can be slightly sloped to match the house’s natural lean while still being perfectly flat. If it’s flat, a wheelchair won’t wobble and a walker won’t catch. When you’re mastering floor leveling pro secrets for perfect installations, you learn that ‘flat’ means no peaks or valleys greater than 1/8 inch over a ten-foot span, a standard often cited by the Tile Council of North America (TCNA). If you ignore this and just pour leveler until the bubble is centered, you might end up with a ‘cliff’ at your doorway that no transition strip can fix.
Stop Trying to Level Your Floors with Thinset
One of the biggest ‘oops’ factors I see is the temptation to use tile thinset to fill in deep dips. It seems logical—you’re already mixing it, and it’s right there. Don’t do it. Thinset is designed to bond, not to act as a structural filler. It shrinks as it cures. If you try to ‘mud up’ a half-inch dip with thinset, it will eventually divot or crack, leading to flooring installation mistakes to avoid for lasting results. Instead, you need precise floor leveling techniques to achieve flawless surfaces using actual self-leveling underlayment. The trap here is timing; if you don’t move fast, you’ll find out why your self-leveler is drying faster than you can pour it, leaving you with ‘cold joints’ that look like scars across your room. 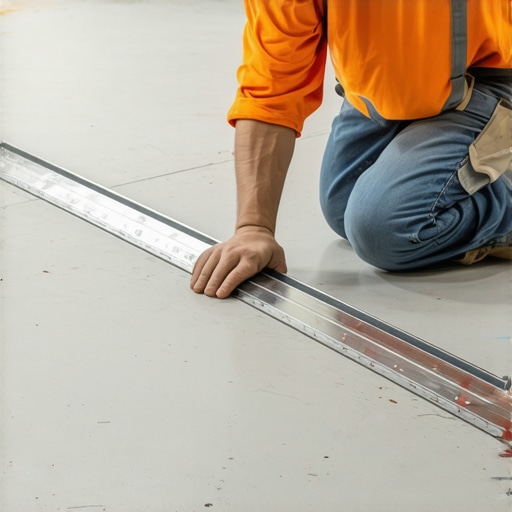
Does your self-leveler play nice with radiant heat?
If you are installing luxury floors, you might be considering under-floor heating. This is where things get technical. You can’t just use any bag of compound from the shelf. You have to choose a floor leveler that wont crack over radiant heat, which usually means a fiber-reinforced or highly flexible formula. Standard levelers can become brittle with the constant expansion and contraction of the heating elements. I’ve seen beautiful marble floors spiderweb because the installer used a cheap, rigid leveler over a heat mat. It’s an expensive mistake that requires a full tear-out. Also, if you’re looking to save time, you might wonder how to install tile over an old vinyl floor without tearing it out. It is possible, but only if the vinyl is fully bonded and you use a specialized ‘non-porous’ primer first. Skip that primer, and your leveler will peel off like a giant sheet of gray plastic. Have you ever fallen into this trap or discovered a ‘cliff’ hidden under your old carpet? Let me know in the comments. To truly get that professional finish, you need the secret to getting a flat floor for large format tiles, which always comes back to the prep work before the first tile ever touches the ground.
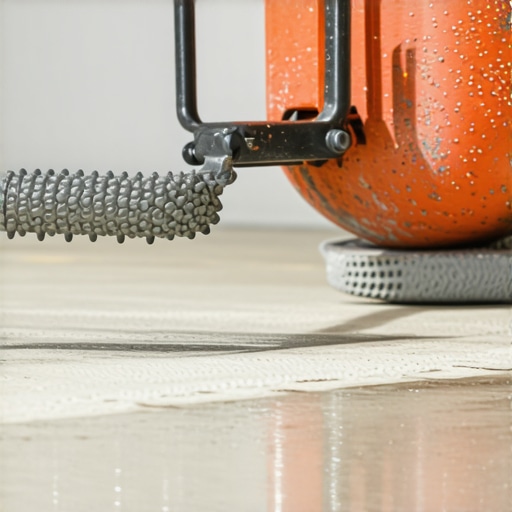
I’ve learned the hard way that high-quality results are 90% preparation and 10% having the right gear in your hands. When you are trying to create that perfect, wheelchair-friendly ramp, a standard bucket and a stick won’t cut it. I’m a bit of a tool snob because I’ve seen cheap equipment fail at the worst possible moments. For example, when you are pouring a large area to meet a threshold, you absolutely need a gauge rake to set the depth, but the real MVP is the spiked roller. I specifically use a roller with rounded plastic tines because the roller selection that prevents air bubbles in leveler is the only way to avoid those tiny pinholes that eventually become structural weak points. If those bubbles remain, they create a ‘honeycomb’ effect under your tile, which is the leading cause of how to detect a hollow tile before the grout starts cracking. One small air pocket can ruin an entire week of work.
How do I keep my leveled floor from failing over time?
Maintenance starts long before the furniture is moved back in. It’s all about moisture control and managing the house’s natural seasonal movement. Even if you have utilized precise floor leveling techniques to achieve flawless surfaces, the subfloor beneath will still breathe. I always tell my clients to invest in a high-end dehumidifier for their crawlspace or basement. If you don’t control the ambient humidity, you’ll eventually be searching for why your hardwood floor is crowning and how to dry it out. A perfectly flat floor stays that way only as long as the wood and concrete stay stable. According to the National Wood Flooring Association (NWFA) Technical Manual, the moisture content of the subfloor must be within 2% to 4% of the flooring material’s moisture content before you even think about installation. I never trust my gut; I always use a pinless moisture meter to be certain.
The Vacuum Setup That Saves Your Lungs
If you are doing this work inside a finished home, dust is your biggest enemy. Do not rely on a standard shop vac with a paper filter. You need a vacuum with a HEPA-rated self-cleaning filter system. I personally use a dedicated extractor because the vacuum attachment that actually picks up fine sawdust is the difference between a clean site and a layer of gray film on every surface of your kitchen. Looking ahead, I suspect we are moving toward a future where we use 3D-mapping software on our phones to identify high spots in the subfloor before we ever open a bag of compound. We are already seeing ‘smart’ leveling compounds that can bridge larger gaps without shrinking, making the ultimate guide to floor leveling for a perfect finish easier for the average DIYer. For now, stop guessing—go out and buy a professional-grade moisture meter today and check three different spots on your subfloor to ensure your project doesn’t fail before it begins.
The Lessons I Learned the Hard Way Under My Own Feet
If I could go back to that day with Uncle Leo, I’d tell myself that ‘good enough’ is the enemy of accessibility. One major lightbulb moment was realizing that the subfloor speaks to you if you listen. Before I even think about flooring installation, I perform the hammer test for finding loose subfloor nails. It’s a simple trick, but it reveals structural weaknesses that no amount of self-leveler can bridge. [IMAGE_PLACEHOLDER] I also learned that you can’t rush the dry time. I once ruined a set of hardwood floor refinishing because I was impatient with the underlying moisture. Now, I treat the subfloor like a canvas—it has to be bone-dry and rock-solid before the first plank goes down.
My Personal Arsenal for a Perfect Threshold
You don’t need a warehouse full of gear, but you do need these three things. First, never skip the moisture check. Learning how to use a moisture meter before you lay wood floors saved me from a $4,000 mistake last summer. Second, if you’re working in a home where people are living, aim for the dust-free move for hardwood floor refinishing by using a high-quality extractor. Finally, for those tricky transitions, I always keep a bag of fiber-reinforced compound handy. It provides the flex needed for flooring installation fundamentals that actually last without cracking under a heavy power chair or heavy furniture.
Building a Home That Welcomes Everyone
At the end of the day, your floors are the foundation of your home’s hospitality. Whether you’re working with stone, tile, or hardwood floors, the effort you put into that invisible slope is an act of care for anyone who enters your space. It’s about more than just aesthetics; it’s about making sure the ‘Uncle Leos’ in your life never have to worry about getting stuck again. Your craftsmanship has the power to remove barriers, one threshold at a time. Have you ever encountered a transition ‘cliff’ that seemed impossible to fix? Let me know in the comments below!