
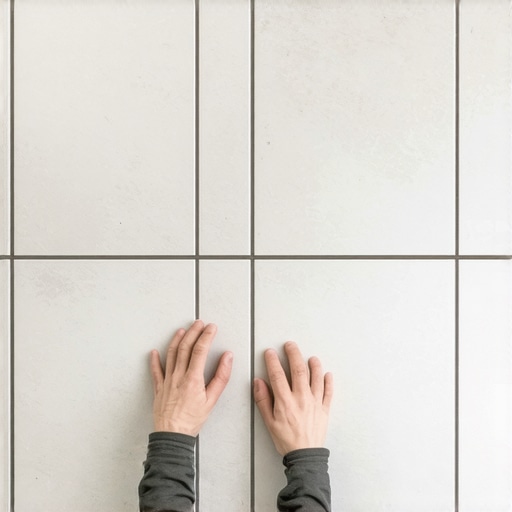
I remember my first big flooring project like it was yesterday. I was standing in my kitchen, staring at a pile of gorgeous slate tiles, feeling like a total pro. I did what most beginners do: I picked the longest, straightest-looking wall and started laying tiles right against it. It seemed so logical at the time. Why overcomplicate things with chalk lines and measurements when the wall is already there, right? Wrong. By the time I worked my way across the room to the opposite wall, I realized the house was slightly out of square. That straight wall led me into a trap. I ended up with a wedge-shaped gap that went from two inches wide on one end to nearly five inches on the other. It looked terrible, and every time I walked into that kitchen for the next few years, that crooked line was all I could see. I learned the hard way that a beautiful floor isn’t about where you start; it’s about where you finish. If you want to avoid that same sinking feeling in your gut, you have to start from the center.
Stop Chasing Your Tail at the Threshold
If you want your home to look like it was handled by a high-end contractor, you have to stop thinking about where the wall starts and start thinking about visual balance. When you start at a wall, you’re essentially gambling. You’re betting that your room is a perfect rectangle. In reality, most rooms are more like slightly squashed trapezoids. By centering your layout, you distribute those inevitable variations to the edges where they’re tucked under baseboards or hidden by furniture. It’s one of those tile installation pointers that save time and money because you won’t be wasting expensive materials on mistakes. I’ve seen so many folks get halfway through a project only to realize their lines are running diagonal to the hallway. It’s a mess. Centering gives you a reset point. It ensures that the most visible part of the floor—the middle—is perfect. Have you ever reached the end of a row only to realize you have a tiny, half-inch sliver that looks more like a mistake than a design choice? Trust me, it’s a nightmare you want to avoid at all costs.
Is Centering Really Worth the Extra Math?
I hear this all the time from neighbors and friends. They’re worried they’ll mess up the calculations and end up with even more waste. I get it; math isn’t everyone’s favorite part of DIY. But skipping this step is one of the biggest flooring installation mistakes to avoid if you care about the long-term value of your home. According to the Tile Council of North America (TCNA), a professional-grade layout should always aim to keep perimeter tiles at a substantial width—ideally at least half a tile. This isn’t just for aesthetics; it provides better support for the grout and prevents those tiny edge pieces from popping loose over time. If you’re working with modern styles, the secret to getting a flat floor starts with a symmetrical grid that doesn’t force you into awkward positions near the walls. When you start in the center, you can dry-lay a few rows in both directions to see exactly where your cuts will land. If you see a sliver coming, you just shift your center line by a few inches. It’s that simple. But before you can do any of that, you need to know how to get a straight line for your first row. It’s the foundation for everything else we’re going to do.
Find Your Room’s True North
Finding the exact center of your space isn’t just about geometry; it’s about creating a visual anchor that tricks the eye into seeing perfection, even if your walls are crooked. Think of your center lines as a telescope’s crosshairs. You want to measure the length of two opposing walls, mark the midpoint on each, and stretch a chalk line between them. Repeat this for the other two walls. Where they intersect is your starting point. I once tried to ‘eye’ a 90-degree angle on a small bathroom floor, thinking it was too small to matter. By the time I reached the shower, my grout lines were angling away like a highway off-ramp. It was a disaster that required a pry bar and a lot of swearing. Following installing tiles like a pro step-by-step strategies for 2025 taught me that the first ten minutes of layout dictate the next ten years of how that floor looks.
Snap the Lines Without the Mess
The first time I used a heavy-duty chalk line, I didn’t realize how much tension those strings hold. I pulled it tight, let go, and—snap—a cloud of cobalt blue dust hit me square in the face. I looked like a cartoon character for the rest of the day, but that line was as crisp as a razor beam. To get a line that doesn’t smudge, snap it once firmly and lift the string straight up, not at an angle. If you’re working on a particularly dusty subfloor, give it a quick vacuum first. This is a crucial part of the ultimate guide to floor leveling for a perfect finish because a clean line on a flat surface is the only way to ensure your first row stays true. If your line is wavy, your tile will be too.
Test the Waters with a Dry Run
Before you even think about cracking open a bag of thinset, you need to perform a dry lay. This is where you lay out your tiles along your chalk lines, moving from the center out toward the walls. You aren’t just looking for straightness; you’re looking for ‘sliver’ cuts. If you reach the wall and realize you need to cut a tiny 1/4-inch strip of tile, stop immediately. Those tiny pieces are a nightmare to cut and even harder to keep in place. Instead, shift your entire center line by a few inches so that you end up with a substantial, half-tile cut at both walls. This balance is the secret to getting a flat floor for large format tiles because larger pieces show off layout errors much more than small ones do.

Don’t Tile Over a Rollercoaster
A centered layout won’t save you if your floor has more peaks and valleys than the Ozarks. If you place a level across your subfloor and see gaps larger than an eighth of an inch, your tiles are going to ‘lippage’—that annoying phenomenon where one edge sticks up higher than the neighbor. If you find yourself staring at a dip that looks like a literal valley, you need to learn how to level a floor that has a 2 inch drop across the room. Using a self-leveling compound acts like water in a lake; it finds the low spots and fills them in perfectly. It’s the difference between a floor that feels like a professional installation and one that feels like a DIY project gone wrong. Once that surface is flat and your lines are snapped, you are finally ready to get your hands dirty with the mortar.
There’s a common myth in the DIY world that more thinset equals a flatter floor. I used to believe this myself—if there was a slight dip in the subfloor, I’d just slap on an extra half-inch of mortar and call it a day. But here’s the contrarian truth: thinset is an adhesive, not a structural filler. When you use excessive mortar, it shrinks significantly as the water evaporates during the curing process. This is exactly the hidden cost of using cheap thinset on large format tiles; that shrinkage pulls the tile down unevenly, leading to ‘lippage’ that creates a tripping hazard. Even worse, if you’re working under bright kitchen lights, you’ll eventually see why your porcelain tile looks wavy under recessed lighting—it’s not the tile that’s crooked, it’s the varying bed depth underneath it.
Why Most DIY Leveling Jobs End in Spiderweb Cracks
Many beginners treat self-leveling compound like magic juice that does all the work for them. The most dangerous ‘trap’ here is timing. I’ve seen countless projects ruined because the installer didn’t realize why your self-leveler is drying faster than you can pour it. If you don’t maintain a continuous ‘wet edge,’ you end up with ridges and cold joints where the batches meet. Furthermore, if you haven’t sealed the subfloor, the substrate will suck the moisture out of the leveler too quickly. This results in why your self-leveler developed spiderweb cracks overnight. According to the Tile Council of North America (TCNA), proper substrate preparation is responsible for over 80% of tile installation successes, yet it’s the step most DIYers rush through. If your primer isn’t compatible or wasn’t allowed to dry, you’ll quickly find why your floor primer is peeling off like a sunburn, taking your new floor with it.
How Do You Prevent Pinholes From Ruining Your Finish?
This is the nuance that separates the pros from the hobbyists. When you pour leveler over a porous subfloor without sealing it perfectly, air escapes from the wood or concrete below, creating tiny bubbles that pop and leave craters. This is why the roller selection that prevents air bubbles in leveler is so critical; a spiked roller doesn’t just spread the material, it de-gasses the pour before it sets. It is a vital part of mastering floor leveling pro secrets for perfect installations. 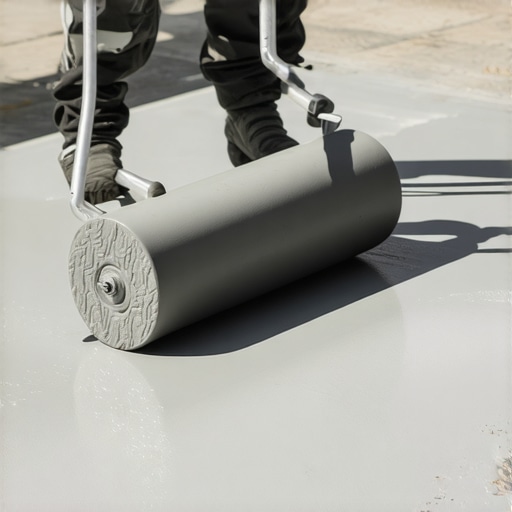 If you are struggling with the mix itself, you might be seeing 5 reasons your self-leveler is sticking to the bucket instead of the floor, which usually points to a mixing speed or water-ratio error. Finally, if you’re transitioning to hardwood, remember that the environment is your biggest enemy. Expert standards from the National Wood Flooring Association (NWFA) emphasize that you must check the subfloor’s health before committing. Learn how to use a moisture meter before you lay wood floors to ensure you aren’t sealing in a disaster that leads to buckling or rot. Have you ever fallen into this trap of thinking the materials would fix a bad subfloor? Let me know in the comments below.
The Gear That Saved My Sanity and My Back
After years of trial and error, I’ve realized that the difference between a grueling weekend and a smooth installation often comes down to two or three specific tools. I used to think a standard shop vac was enough for cleanup, but I spent more time clogging filters than actually working. Now, I never start a project without the vacuum attachment that actually picks up fine sawdust without blowing it back into the room. It’s a game-changer for your lungs and the bond of your adhesive. Similarly, if you’re tired of lumpy mortar, you have to master the secret to mixing the perfect bucket of self-leveler every time by using a high-torque, low-RPM drill. It prevents the ‘over-whipping’ that introduces those dreaded air bubbles into the mix.
How do I keep my new floors looking like Day One?
Maintenance is where most people drop the ball. You spend thousands on materials and days on labor, only to ruin the finish with a harsh chemical. If you’ve ever wondered why your hardwood floor turned cloudy after cleaning, it’s usually because of wax-based soaps building up a film. For tile, the secret is staying ahead of the grime. Use a pH-neutral cleaner and avoid the ‘vinegar and water’ myth that eats away at your grout. If you have matte surfaces, knowing how to remove scuff marks from matte porcelain flooring without using abrasive pads will save your finish from permanent scratches. Consistent, gentle care is the backbone of hardwood floor care secrets to longevity and shine.

Precision Equipment Beats Guesswork Every Time
If you are moving into hardwood or engineered planks, stop guessing about readiness. I live by my moisture meter. According to the National Wood Flooring Association (NWFA) Technical Manual, the moisture content (MC) difference between your subfloor and your hardwood flooring should not exceed 4% for strip flooring. If you ignore this, your floor will cup, gap, or squeak within the first season. Learning how to use a moisture meter before you lay wood floors is the single best way to protect your warranty. For my tile friends, don’t overlook the importance of subfloor prep; I always refer back to the basics of how to achieve flawless floor leveling before tile laying to ensure the substrate is as stable as the tile itself.
The Future of Your Floors is Getting Smarter
Looking ahead to the next few years, I predict we will see a massive shift toward ‘smart substrates.’ We are already seeing the integration of permanent moisture sensors embedded into subfloors that can alert your phone if a leak starts under your hardwood. Until those become standard, your best defense is a high-quality installation. I strongly encourage you to try one advanced tip from this guide: buy a professional-grade moisture meter and document your readings before you nail down a single plank. It’s the ultimate insurance policy for your hard work. Have you ever had a tool completely change the way you work? I’d love to hear your recommendations in the comments below.
Why Your Eyes Will Always Lie to You During a Layout
If there is one thing I’ve learned from decades of flooring installation, it’s that your eyes are naturally programmed to find patterns, even when they aren’t there. When you stand in an empty room, everything looks square, but it almost never is. I spent years trying to ‘eyeball’ the first row only to find that even a microscopic error at the start creates a massive gap by the time you reach the far wall. Now, I never trust my vision; I trust my chalk line and my measurements. Another ‘lightbulb moment’ for me was realizing that substrate preparation is not a suggestion—it is the law. If you skip a quick check for high spots, you are basically building a house on sand. You can find the right path by following a step-by-step guide to flooring installation and leveling success to keep your project on track.
The Toolkit for a Flawless Finish
You don’t need a warehouse full of gadgets, but you do need the right ones. First, never underestimate the power of a clean surface; I always keep the best tool for scraping glue off a concrete slab handy because thinset won’t bond to old residue. Second, a high-quality moisture meter is non-negotiable for wood. Third, invest in a quality rubber mallet—but use it wisely, as I’ve seen many DIYers learn the hard way about damaging click-lock edges. Lastly, keep a handful of transition strips ready. If you’re dealing with noise issues, knowing how to stop a floating floor from clicking when you walk can turn a frustrating project into a peaceful home.
#IMAGE_PLACEHOLDER_E#
Take the First Step Toward Your Dream Floor
Installing a new floor is more than just a home improvement project; it’s a way to completely redefine the energy of your living space. It’s normal to feel a bit of trepidation before you mix that first bag of mortar or nail down that first plank. But remember, every expert started exactly where you are right now—staring at a subfloor and a pile of boxes. By focusing on symmetry, testing your moisture levels, and taking the time to level your substrate, you are setting yourself up for a result that will look stunning for decades. You have the knowledge; now it’s time to pick up the tools and transform your home. Have you ever started a row only to realize the wall was crooked? Let me know your biggest ‘oh no’ moment in the comments below!