
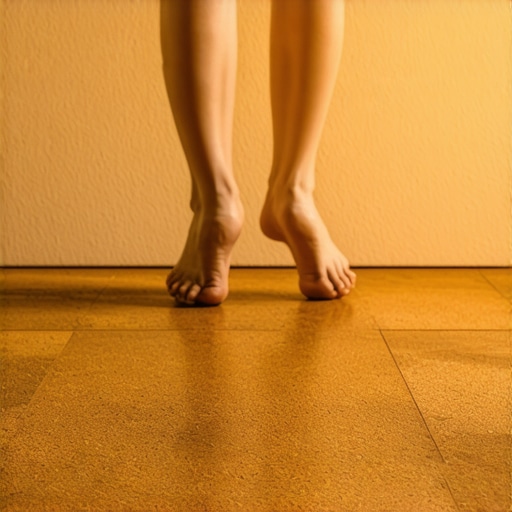
I remember the exact moment I realized I had made a massive mistake with my basement remodel. It was a Tuesday in February, about 6:00 AM, and I wandered downstairs barefoot to grab a tool. The second my feet hit that expensive ceramic tile, a shock of cold shot up my spine like an electric current. It was painful. I had spent weeks obsessing over elegant tile designs, but I had not spent a single second thinking about thermal conductivity. I had created a beautiful, subterranean ice box. That morning, I did not just need a sweater; I needed a solution that did not involve jackhammering up the entire slab.
Stop Freezing Your Feet in Your Own Living Space
If you are currently dreading the walk down your basement stairs because the floor feels like a frozen pond, I have been there. Most of us default to tile or luxury vinyl because we are scared of moisture, but we end up sacrificing comfort. Today, I am going to show you why cork is the secret weapon for the ‘cozy basement’ dream. We will talk about how it handles the cold, why it is better than carpet, and how to avoid the flooring installation mistakes that I personally made during my first DIY attempt. I once tried to install a floating floor over a slab that was as wavy as the Atlantic Ocean, and let us just say my floor leveling skills were not quite there yet.
Is This Soft Wood Really Tough Enough for a High-Traffic Area?
You are probably skeptical. I was too. I thought cork was just for wine bottles and bulletin boards. But here is a surprising fact: cork is naturally resistant to mold and mildew because of a substance called suberin. According to research from the Natural Resources Defense Council, cork is one of the most sustainable and thermally efficient materials on the planet because its cellular structure is essentially a series of tiny air pockets. It does not just ‘feel’ warm; it actively stops the cold from the concrete from reaching your feet. Plus, it is much easier on the joints than hard surfaces. Have you ever felt that deep, aching cold in your bones just from standing in your laundry room? Tell me I am not the only one who has lived through that! Before you commit to another icy winter, let us look at why cork flooring is a smarter choice for your specific home layout. It is about more than just looks; it is about making your basement a place where people actually want to hang out.Before you even touch a plank of cork, you have to treat your concrete slab like a high-maintenance guest. Concrete looks solid, but it is basically a giant, hard sponge that breathes moisture. I once ignored a tiny damp patch in the corner of my basement, thinking it was just ‘basement smell.’ Three months later, I had a science experiment growing under my subfloor. To avoid this, always how to use a moisture meter before installing wood floors or cork is essential knowledge. If your slab is sweating, you need a vapor barrier—no exceptions. This is the one step people skip during waterproof flooring installation in mckinney that ends up costing thousands in repairs.
Get the Concrete Flat or Pay the Price
Next, flatness is your best friend. Think of cork planks like a stiff cracker. If you put that cracker on a flat table and press it, nothing happens. Put it on a pebble and press, and it snaps. Your flooring is the same way; if it spans a dip, it will flex until the locking mechanism breaks. To find those ‘pebbles’ or high spots on your slab, try the flashlight scan for finding high spots in concrete. You just lay a powerful light flat on the floor; any hump will cast a shadow long enough to hide a small dog. Once you find the dips, you will need to know how to measure subfloor flatness before you start installing to determine if you need a self-leveler.
Fix the Dips Before They Ruin Your Planks
If your floor looks like a topographical map, you need self-leveling compound. This stuff is a lifesaver, but it is temperamental. I remember my first pour: I did not mix it quite right, and it turned into a lumpy mess that set up in minutes. Understanding why your self-leveler didn’t flow into the low spots often comes down to the primer or the water-to-powder ratio. For a truly professional result, follow a step-by-step guide to flooring installation and leveling success to ensure the surface is as smooth as glass.
Give the Planks Room to Move
Once the floor is flat and dry, it is time to click. Cork is an organic material, meaning it expands and contracts with the seasons. If you wedge it tight against the walls, the floor will buckle upward like a mountain range in July. This is a common reason why your click-lock flooring is popping out at the joints. You must leave an expansion gap. I use the quarter trick for checking expansion gaps in luxury vinyl floors—which works perfectly for cork too—to ensure there is always about a quarter-inch of breathing room around the perimeter. Even if you are using cork for its acoustic benefits, like the secret to soundproofing an upstairs floor with cork, the mechanical requirements for the basement slab remain the same: flat, dry, and room to grow.Most people treat self-leveling compound like a magic liquid that solves all their problems, but here is the truth: leveler is only as good as the bond it creates with the floor underneath. I see DIYers and even some pros skip the mechanical prep, thinking the primer will do all the heavy lifting. If your concrete is sealed or has a ‘burnished’ finish, that expensive leveler is just going to sit on top like a sheet of ice on a pond. In my experience, a ‘flat’ floor that isn’t properly bonded is actually worse than a wavy one because it will eventually crack and crunch every time you step on it. You have to ensure you’re avoiding floor leveling challenges by checking the surface profile first.
The Dangerous Myth of the Magic Pour
We often hear that levelers are ‘self-leveling,’ but that is a bit of a marketing lie. It is actually ‘self-smoothing.’ Gravity helps, but if you don’t use precise floor leveling techniques to achieve flawless surfaces, you will still end up with slight humps where the pour started. The real secret is in the viscosity. If it is too thick, it won’t flow; too thin, and the aggregate sinks to the bottom, leaving a brittle, dusty surface. Let’s dig deeper into the mechanics.
Why does my leveler pull away from the slab even after I primed it?
It often comes down to the ‘Concrete Surface Profile’ or CSP. The International Concrete Repair Institute (ICRI) emphasizes that surface preparation is the single most important factor in the success of any polymer-modified cementitious overlay. They define specific standards for how rough a surface needs to be. For most levelers, you need a CSP of 2 or 3—roughly the texture of medium-grit sandpaper. If your slab is too smooth, you’re essentially trying to glue glass to glass. This is exactly why your self-leveler is pulling away from the concrete despite your best efforts with a roller.
Stop the Volcano Effect Before It Ruins Your Surface
Then there is the issue of the ‘volcano effect.’ If you are working over plywood, you might notice tiny bubbles popping up through your wet leveler. This happens because the wood is porous and air is being displaced by the weight of the liquid. If you don’t seal it perfectly, you’ll end up with a moonscape of tiny craters. This is why your self-leveler is bubbling over plywood and how you can prevent it. I always recommend the secret to mixing leveler for a glass-smooth finish, which includes letting the mix ‘slake’ or sit for a minute to let those initial air bubbles escape. Using how to use a spiked roller for the perfect leveling pour is another pro move that breaks the surface tension and releases trapped air. If you skip this, those bubbles will harden into sharp little volcanoes that will telegraph through your cork or luxury vinyl. Have you ever fallen into this trap where you thought you were done, only to see bubbles rising? Let me know in the comments!
The Tools I Actually Use When Things Get Tricky
If you are like me, you probably walk into the hardware store and feel overwhelmed by the aisles of specialty gadgets. But after a decade of trial and error, I have narrowed my kit down to three non-negotiables. First, throw away that cheap plastic tapping block and get a heavy-duty pro version. You need something with some mass to it, especially when you are dealing with the dense locking mechanisms of high-end cork or LVP. Second, invest in a 6-foot aluminum straight edge. A tape measure is great for distance, but it is useless for verifying flatness across a long span. I use mine to find those microscopic ‘waves’ in the concrete before the leveler even comes out of the bag. Finally, my absolute favorite is the oscillating multi-tool. It is the only way to get a clean undercut on door jambs so your floor can slide underneath effortlessly. Without it, you are stuck trying to scribe around trim, which always looks like a DIY disaster. If you are struggling with messy edges, learning the best way to scribe baseboards to an uneven floor will save you hours of caulking later.
How do I keep my new floor from failing after the first year?
The biggest threat to your floor is not foot traffic; it is the air in your house. According to the National Wood Flooring Association (NWFA) Technical Manual, maintaining a consistent relative humidity between 30% and 50% is non-negotiable for organic flooring longevity. If your house drops to 15% humidity in the winter, that beautiful cork or oak is going to shrink, and you will see gaps you could fit a nickel into. I always tell my friends to learn how to keep your hardwood floors from gapping in the winter by using a humidifier. On the flip side, when it comes to cleaning, put the steam mop down. I have seen more floors ruined by ‘deep steam cleaning’ than by actual floods. The high-pressure vapor forces moisture into the joints, causing the edges to swell and peel. This is exactly why you should never use a steam mop on click-lock floors if you want them to last. Instead, stick to a damp microfiber mop and a pH-neutral cleaner to protect that factory finish.
Where Flooring Technology is Heading Next
I predict that in the next five years, we are going to see a massive shift toward ‘circular flooring’—materials that are designed to be 100% glue-free and easily disassembled for recycling. We are already seeing this with advanced loose-lay systems that rely on friction and weight rather than click-locks. This is great news for us DIYers because it makes repairs a breeze. If you drop a heavy cast-iron skillet and dent a plank, you won’t have to tear up half the room to fix it. For now, focus on the fundamentals: keep your humidity stable and your cleaning routine gentle. If you want to see how to maintain that showroom glow, check out these hardwood floor care secrets to longevity and shine. My challenge to you? Go buy a $15 hygrometer today and stick it in your basement. Knowing your humidity level is the single most important step in protecting your investment. You have done the hard work of leveling and installing; now, let the tools do the work of keeping it perfect.
What My Most Expensive DIY Scars Taught Me
If there is one thing I have learned after years of trial, error, and a few minor meltdowns, it is that patience is the most valuable tool in your bag. When you are mastering floor leveling pro secrets for perfect installations, the temptation to rush the drying process is immense. Resist it. I once lost a whole weekend of work because I walked on a ‘tack-free’ surface too soon and left a size 11 footprint that telegraphed through my final planks. Another lesson? Tape your perimeters like your life depends on it. Knowing how to stop your floor leveler from leaking through the subfloor or into your HVAC vents is the difference between a successful project and a call to a very expensive professional cleaner.
The Gear That Separates Rookies from Pros
You do not need a warehouse full of tools, but you do need the right ones. Beyond the basics, I swear by a digital hygrometer to monitor your basement’s breath. If you are mixing materials in a multi-use space, stay updated on tile selection tips for elegant hardwood floors in 2025 to ensure your transitions look intentional rather than accidental. For the actual pour, never skip the flooring installation fundamentals leveling for a seamless look. My personal ‘secret weapon’ is a simple spiked roller; it removes the microscopic air bubbles that otherwise create weak spots in your subfloor. These small investments prevent the ‘hollow’ sound that plagues so many amateur basement remodels.
Turn That Ice Box Into Your Favorite Room
#IMAGE_PLACEHOLDER_E#
At the end of the day, you are not just laying planks; you are reclaiming a part of your home. Whether you choose cork for its warmth or apply hardwood floor care secrets to longevity and shine to your upstairs levels, the goal is the same: a space that welcomes you. Don’t let the fear of a ‘wavy’ slab stop you from starting your next flooring installation. Your future self—the one drinking coffee in a cozy, warm basement—will thank you for the work you do today. Have you ever encountered a subfloor problem that seemed impossible to fix? Let me know in the comments below!