
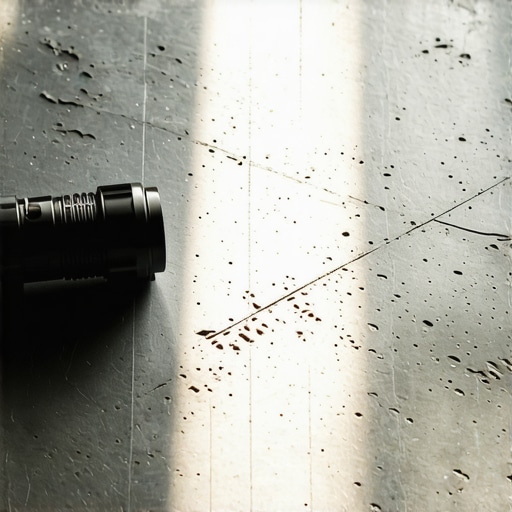
I remember the first time I laid out an expensive set of large-format tiles, feeling like a million bucks until I realized one corner was floating a full quarter-inch in the air. It was a disaster. I had spent hours “eyeballing” the slab, convinced it was flat. But when I set the tile, it teetered like a seesaw. I had to rip everything up, scrape away the wet mortar, and start over. That was the day I learned that your eyes are the biggest liars in home renovation. You might think your concrete is ready, but unless you use a specific technique to reveal the invisible terrain, you are just guessing. Today, I am going to show you how a simple flashlight and a bit of hard-earned floor-leveling wisdom can save you from a week-long headache and hundreds of dollars in wasted materials.
Don’t Let a Hidden Hump Ruin Your Tile Job
The problem with concrete is that it looks perfectly flat until it doesn’t. When you are standing up, a slight rise in the subfloor is invisible to the naked eye. But for your flooring, that’s a mountain. I made the classic mistake of ignoring common floor leveling challenges, assuming my subfloor was “good enough.” It wasn’t. If you are planning a step-by-step flooring installation, you need to know exactly where the high spots are before the first bucket of thinset is mixed. According to the Tile Council of North America (TCNA), the maximum allowable variation for large format tile is often as little as 1/8 inch in 10 feet—a tolerance the human eye simply cannot verify without a point of reference.
Is This Low-Tech Method Actually Worth Your Time?
I get the skepticism. We live in an era of high-end rotary lasers and digital sensors, so why bother with a flashlight? Because shadows do not lie. When you place a straightedge on the floor and shine a light behind it, any gap—no matter how small—glows like a beacon. It is one of those precise floor leveling techniques that professionals use when they want to avoid costly repairs. Have you ever finished a floor only to feel a strange “click” or a soft spot under your feet? Tell me about your worst flooring nightmare in the comments! Whether you are choosing the best tile or prepping for a wood installation, this scan is your first line of defense. You will find that checking for high spots with a 10-foot straightedge combined with a low-angle light is the only way to truly see the reality of your room. If you skip this, even the perfect trowel size will not save you from a floor that feels like a roller coaster.
Clear the Debris Before You Level
First, you need to treat your subfloor like a surgical site. Any dust, paint overspray, or old adhesive will act as a bond-breaker. If your primer can’t soak into the concrete, your leveler will eventually fail, and this is exactly why your self-leveler is pulling away from the concrete after it dries. I usually spend twice as long cleaning as I do pouring. I use a HEPA vacuum and sometimes a floor scraper to ensure the surface is porous. If you pour over a dusty floor, you are essentially building a house on sand. Once the floor is clean, you must seal the perimeter. I learned this the hard way during a remodel in a second-story bathroom when I watched fifty dollars worth of leveler disappear into a gap behind a wall. To avoid a mess in the room below, learn how to stop your floor leveler from leaking through the subfloor by using spray foam or silicone caulk at every edge and pipe penetration.
The Flashlight Trick That Exposes Every Flaw
Now for the magic. Take a 10-foot straightedge—not a 4-foot level, which is too short to catch long-wave humps—and lay it across the floor. Turn off the overhead lights and place a bright flashlight flat on the floor, shining it under the straightedge. The shadows created by the peaks and valleys will look like a topographical map of the moon. This is the most reliable way to how to measure subfloor flatness before you start installing your expensive materials. 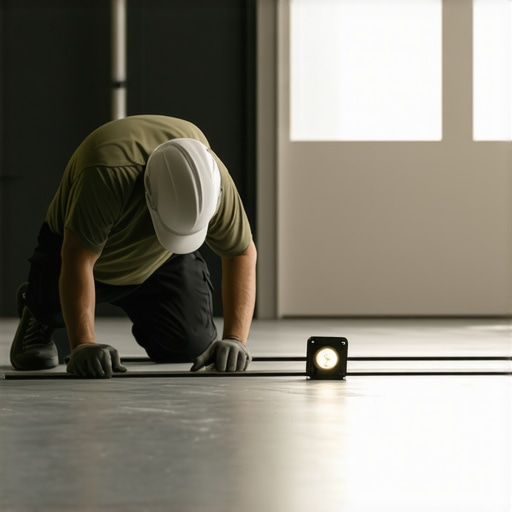 Move the straightedge in a star pattern across the room, marking every high spot with a red pencil and every low spot with a blue one. I once skipped this step on a kitchen job, thinking a small 1/4-inch dip near the island wasn’t a big deal. When the grout started cracking two months later, I had to explain to the homeowner why your new tile floor is making a cracking sound and eventually rip the whole thing up.
Tackle the Peaks Before Filling the Valleys
Most people think floor leveling is just about adding material, but it starts with subtraction. If you have a massive hump, you can’t just pour leveler around it, or you’ll end up raising the entire floor height, which creates massive transition problems at doorways. Use a diamond cup wheel on a grinder to take down the red-marked high spots. It’s a dusty, miserable job, but it is the difference between a floor that lasts decades and one that fails in a year. After grinding, apply a high-quality primer. This isn’t optional. The primer stops the concrete from sucking the moisture out of the leveler too quickly, which is a leading cause of why your floor leveler pitted during the drying process.
The Secret to a Glass Smooth Pour
When you are ready to pour, timing is everything. You need two people: one to mix and one to spread. Use a drill with a high-torque motor and a specialized mixing paddle to ensure you get the secret to mixing leveler for a glass smooth finish without lumps. Once it’s on the floor, don’t just walk away. Use a gauge rake to set the depth and follow up immediately with a spiked roller. This tool isn’t just for show; how to use a spiked roller for the perfect leveling pour is the only way to release trapped air bubbles and help the material break its surface tension so it truly finds its own level. If you see the leveler starting to look dull, stop touching it—the ‘open time’ is over, and you’ll only leave permanent marks.While most DIY guides treat self-leveler like a ‘pour and walk away’ solution, the pros know that gravity alone isn’t your friend. In fact, many flooring installation mistakes to avoid happen because people trust the product label too much. If you don’t manually help the material find its home with a gauge rake or spiked roller, surface tension can keep the liquid from actually filling the low spots you painstakingly marked. I’ve seen countless projects where the leveler simply created a new, smoother hump rather than a flat plane because the installer didn’t understand the physics of the mix.
Can a Porosity Test Save Your Entire Project?
One nuance that separates the weekend warriors from the masters is understanding substrate suction. According to the ASTM F710 standards—the industry benchmark for preparing concrete floors—a subfloor must be properly tested for porosity before any topping is applied. If you pour onto a thirsty slab without the right primer, the concrete will literally suck the water out of the leveler before it has a chance to settle. This leads to a nightmare scenario: a chalky, brittle surface that will eventually delaminate. This is a common culprit for why your self-leveler is bubbling over plywood or concrete. 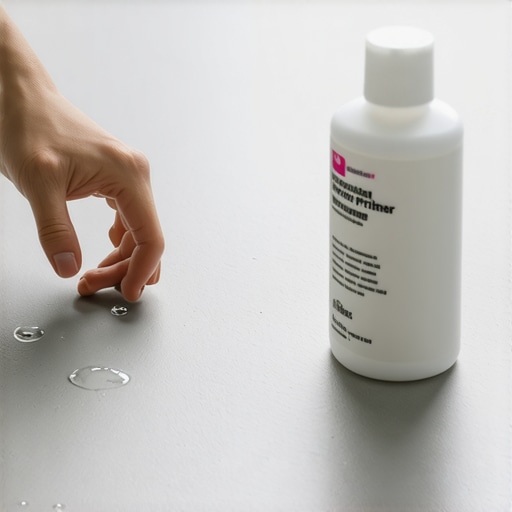 Always perform a simple water-drop test: if the water doesn’t soak in within a minute, your primer won’t either, and your bond will fail.
The Hidden Risk of Leveling Over Wood
If you are working in an older home, you might be tempted to just pour leveler over those bouncy plywood sheets to fix the slope. Stop right there. This is the ultimate ‘oops’ factor. Leveler is incredibly heavy; adding hundreds of pounds of cementitious material to a floor with structural issues is a recipe for disaster. If your subfloor flexes even a fraction of an inch, the cured leveler will crack into a spiderweb of failure. You must address the real reason your floor joists are making your tile crack before you even touch a mixing paddle. I once saw a high-end marble job destroyed because the installer leveled a floor that was structurally ‘trampolining.’ Have you ever had a leveler pour go south on you because of a hidden subfloor issue? I want to hear your horror stories in the comments! If you want to move beyond the basics, check out these pro secrets for perfect installations to ensure your ultimate floor leveling finish is actually permanent.
Stop Guessing and Start Measuring with a Pinless Meter
Once your leveler is dry, you might think the hard work is over. But if you are transitioning to wood, the real challenge is just beginning. I never start a hardwood job without my Wagner Orion 950 moisture meter. It is not just about the leveler being dry to the touch; it is about the moisture equilibrium between the substrate and the planks. According to the National Wood Flooring Association (NWFA) Technical Publication No. A100, wood flooring should not be installed until the subfloor moisture and the flooring moisture are within 2-4% of each other, depending on the plank width. This is why using a moisture meter before installing wood floors is the only way to avoid the heartbreak of cupping or gapping six months down the line. I’ve seen beautiful installs ruined because the installer was too impatient to wait for the ‘slab to breathe.’
How can I keep a leveled floor from failing years later?
Maintenance starts the moment the flooring goes down. If you have gone through the trouble of flooring installation fundamentals and leveling, you need to protect that bond. For tile, this means ensuring your grout remains sealed to prevent water from seeping under the tiles and softening the leveler. For hardwood, it means controlling your home’s humidity. I always recommend a whole-home humidifier for anyone with solid wood. If the air gets too dry in the winter, the wood shrinks, and you will start how to keep your hardwood floors from gapping in the winter by maintaining a steady 35-50% humidity level. Also, stop using those aggressive chemicals. If you want to know the hardwood floor care secrets to longevity and shine, start by throwing away the steam mop. High-heat moisture is the natural enemy of floor leveler and wood alike, and you should never use a steam mop on click-lock floors or any floating system. 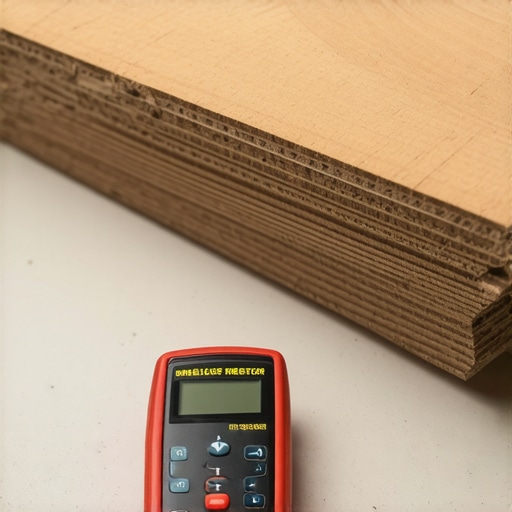
Expect Laser Precision to Become the Standard
Looking ahead, I predict that ‘eyeballing it’ will become a relic of the past even for the most casual DIYer. We are already seeing the rise of affordable LiDAR scanning apps for smartphones that can map a room’s floor flatness in seconds, creating a digital heat map of every dip and hump. Within the next five years, I expect we will see self-leveling compounds with built-in sensors that change color when the moisture content is perfect for wood or tile. The margin for error is shrinking, and that is a good thing for our homes. If you want a floor that doesn’t creak, pop, or crack, you have to embrace these pro secrets for perfect installations. My advice? Go grab a pinless moisture meter and a 10-foot straightedge today—treating your floor like a science project instead of a weekend chore is the only way to get a result that lasts a lifetime.
The Hardest Lessons My Knees Taught Me
After decades of crawling across subfloors, I have realized that the biggest mistake is trusting the label more than your environment. I once added just ‘a splash’ of extra water to a bucket to make it more liquid, only to watch the entire batch turn into a soft, chalky mess that I had to scrape up by hand. Precision is your only friend when you are aiming for how to achieve flawless floor leveling before tile laying. If the bag says 5 quarts, use 5 quarts—not a drop more. I have also learned that the ‘tap test’ never lies; once your leveler is dry, walk the floor and tap it with a hammer handle. A hollow ‘thud’ means it didn’t bond, and you need to fix it before the tile goes down. This is one of those flooring installation mistakes to avoid for lasting results that separates a five-year floor from a fifty-year floor. Lastly, remember that self-leveler is a team sport. If you try to mix and pour alone, you will likely find why your self-leveler didn’t flow into the low spots—it simply sets up too fast for one person to manage the ‘wet edge’ effectively.
Gear That Earned a Permanent Spot in My Truck
I don’t leave for a job site without my 10-foot magnesium straightedge. Unlike aluminum, it stays perfectly true even after years of being tossed in the back of the van. If you are serious about the ultimate floor leveling finish, this is your primary diagnostic tool. I also swear by the Wagner Orion moisture meter; it’s the only way to sleep at night knowing a wood floor won’t buckle. Finally, I always keep a copy of the TCNA Handbook in my glovebox. It is the industry standard that provides the scientific backing for every decision I make on-site. Having the right tools isn’t just about making the job easier; it is about ensuring your work meets the highest professional standards.
#IMAGE_PLACEHOLDER_E#
Your Foundation Defines Your Legacy
At the end of the day, floor leveling is the most thankless part of the job because if you do it right, no one will ever notice it. They will only see the beautiful, flat tile or the seamless hardwood. But you will know. You will know that the floor is solid, silent, and structurally sound. Taking these extra steps—the flashlight scan, the porosity test, the careful mixing—is what transforms a standard renovation into a masterwork. Don’t rush the prep; a few extra hours today saves a lifetime of creaks and cracks. Which part of the leveling process makes you the most nervous—the high-stakes mixing or the actual pour? Let me know in the comments below!