
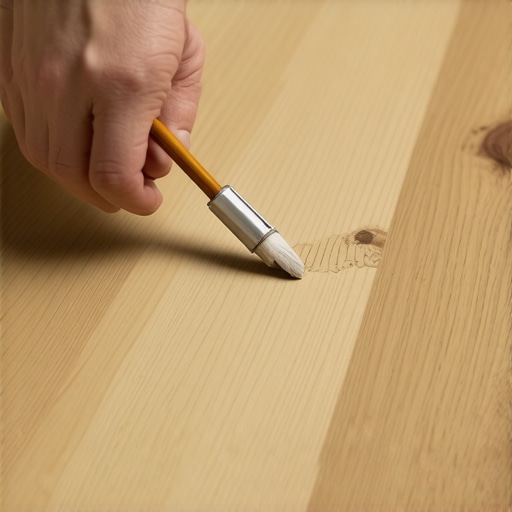
I still remember the sound—a sharp, metallic clink followed by the heavy thud of my favorite cast-iron skillet hitting the floor. I froze. My wife and I had just finished our expert flooring installation three weeks prior, and that matte-finish Luxury Vinyl Plank (LVP) was my pride and joy. I looked down, and there it was: a jagged, white canyon carved right into the center of the kitchen. It wasn’t just a surface scuff; it was deep enough to catch a fingernail and bright enough to be seen from the driveway.
How I Finally Conquered the Dreaded Deep Scratch
I did what most people do—I panicked. I grabbed some wood filler from the garage, thinking I could just “smush” it in there. Big mistake. It looked like an orange-tinted scab on a beautiful grey floor. I realized then that avoiding common installation mistakes is one thing, but living with the floor is another beast entirely. Matte LVP is notoriously tricky because it doesn’t have the high-gloss sheen that masks repairs. If you use the wrong product, the “fix” becomes more visible than the scratch itself. Today, I’m going to show you the one method I’ve found that actually works without forcing you to replace a single damaged plank. We aren’t just filling a hole; we are color-matching and texture-blending to make that scar disappear. Have you ever dropped something and felt that immediate “there goes my security deposit” or “I’ve ruined my house” pit in your stomach?
Can you really make a scratch disappear on a matte surface?
Most people are skeptical, and for good reason. According to the North American Laminate Flooring Association (NALFA), the wear layer of resilient flooring is designed for durability, but once it’s breached, the white core of the plank often shows through. Many “scratch kits” on the market are too shiny for matte floors, leaving a greasy-looking spot. My secret involves a combination of specialized wax melts and a specific buffing technique that mimics the original texture. I learned this the hard way after nearly ruining a section of my hallway by over-sanding. We’re going to dive into the exact tools you need so you don’t repeat my early failures. We’ll also touch on why issues like planks separating in the sun or buckling near windows can sometimes make scratches worse by adding tension to the floor. Let’s get that floor back to looking like the day it was laid.
Clean the Wound Before You Seal It
You wouldn’t put a bandage over a dirty cut, and you shouldn’t put filler into a dirty scratch. The white core showing through the matte finish is often exacerbated by tiny particles of dust and debris that act like a highlighter for the damage. I start by using a soft-bristled toothbrush and a tiny drop of isopropyl alcohol to scrub the groove. This removes any wax buildup or oils that might prevent your repair material from bonding. While hardwood floor care secrets often focus on maintaining a protective sheen, LVP is all about preserving the integrity of that top wear layer. Once the scratch is clinical-level clean, let it dry completely. If you trap moisture inside, the filler will eventually pop out like a loose tooth.
Why Wax Melts Beat Wood Putty Every Time
In my early days of DIY, I used standard wood putty. It was a disaster. Putty is designed for porous materials, and LVP is anything but porous. It sits on top, dries to a different texture, and eventually cracks when the floor naturally shifts. I learned this the hard way when I tried to fix a gouge in my laundry room using a generic ‘oak’ putty. Within two months, it looked like a dried-up piece of chewing gum. Now, I only use hard wax sticks designed for resilient flooring. These waxes are like dental fillings; they are durable, slightly flexible, and come in arrays of colors you can mix. This is a far cry from mastering floor leveling, but it’s just as vital for the longevity of your home’s aesthetics.
The Precision Melt and Mix
This is where the magic happens. You need a battery-operated melting tool—basically a tiny soldering iron for wax. Pick two colors: one that matches the darkest grain in your plank and one that matches the base color. Melt a small amount of the lighter color into the scratch first, then ‘marble’ in the darker shade.
The Credit Card Trick for a Flush Finish
Don’t use a metal putty knife; you’ll just create new scratches. I use an old, expired credit card. While the wax is still warm but not liquid, I drag the edge of the card across the scratch at a 45-degree angle. This shears off the excess wax and leaves the surface perfectly flush with the rest of the plank. I remember my first attempt at this on a neighbor’s floor. I was overconfident and used a lighter to melt a candle crayon. Not only did the color not match, but the soot from the flame turned the repair into a black, greasy smudge. I had to scrub it out with mineral spirits for an hour. That’s why I now insist on a proper wax melting tool. Even if you’ve done everything right during your expert flooring installation, these minor life-accidents require specialized tools.
Dull the Shine to Match the Matte
The biggest giveaway of a repair on a matte floor is the ‘shiny spot.’ Hard wax usually dries with a slight gloss. To fix this, I use a grey scouring pad—the kind you use for heavy-duty dishwashing—and very lightly buff the repair in a circular motion. This micro-abrades the wax to match the low-luster finish of the LVP. If the damage was truly catastrophic, you might need to repair a single damaged plank, but for 90% of deep scratches, this buffing technique makes the mark invisible from a standing height. Always check the area from different angles of light to ensure you haven’t left a hazy halo. It takes patience, but your floor will look as seamless as a professional leveling for a seamless look would suggest.
Forget the Marketing—Self-Leveler Won’t Fix Everything Alone
Everyone tells you that ‘self-leveling’ compound is a magic potion you just pour and forget. In my experience, that is a recipe for a sloping disaster. The common myth is that gravity does 100% of the work. It doesn’t. If your subfloor has a significant dip, the leveler will settle, but without manual intervention, it often creates a ‘lip’ at the edges where it meets the higher spots. I’ve seen DIYers spend hundreds on product only to find their flooring installation fundamentals were completely undermined by a lazy pour. You still need to help it along with a gauge rake to ensure even distribution.
Why did your self-leveler pit during the drying process?
This is the question that haunts advanced installers. You follow the instructions, the floor looks like glass, and then—pop—tiny craters appear everywhere. According to the Tile Council of North America (TCNA), subfloor preparation is about more than just cleanliness; it’s about porosity. Most people skip the dedicated primer or use the wrong ratio, causing the substrate to suck the moisture out of the leveler too fast. This creates air pockets that rise to the surface as ‘pits.’ It’s the same reason why your self-leveler is bubbling over plywood. To avoid this, I always double-prime and use a spiked roller. 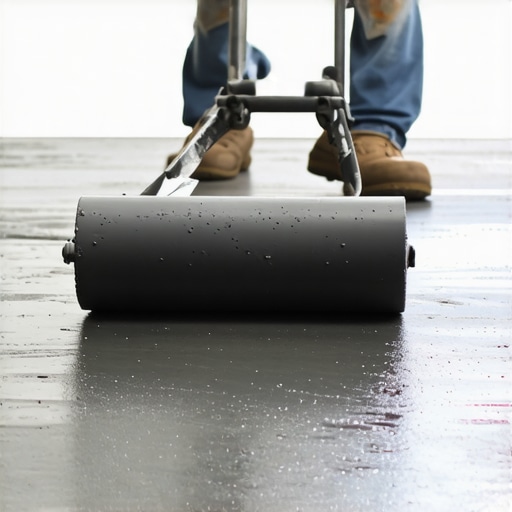
The Air Bubble Disaster That Ruins Modern Floors
One ‘oops’ factor that separates the pros from the weekend warriors is the mixing speed. If you use a high-RPM drill to mix your compound, you are essentially whipping meringue. You’re folding air into a heavy mineral slurry. When that air tries to escape while the floor is setting, it leaves your surface looking like the moon’s landscape. This makes it impossible to achieve the precise floor leveling techniques required for thin-profile LVP or large-format tile. I learned this the hard way on a 200-square-foot kitchen remodel where I had to sand down the entire floor because it was too bumpy to lay plank.
Don’t Let Your Joists Sabotage Your Surface
We often focus on the surface, but the real trouble usually starts underneath. Many people assume a bouncy floor is just ‘character,’ but it’s actually a death sentence for your grout and planks. If you don’t address the real reason your floor joists are making your tile crack, no amount of wax or filler will keep your floor looking good for more than a month. Before you even think about mastering floor leveling, you must ensure the structure is rigid. Have you ever spent days on a repair only to have the scratch or crack return because the floor was shifting? Let me know in the comments if you’ve ever fallen into the ‘it’s level enough’ trap!Once you’ve moved past the initial chaos of a renovation, you start to realize that professional results are 10% sweat and 90% having the right gadget in your back pocket. I spent years guessing if my subfloor was dry enough before I finally invested in a pinless moisture meter. It felt like overkill at the time, but after seeing a friend’s entire living room warp because of a damp slab, I realized that learning how to use a moisture meter before installing wood floors is the only way to sleep at night. If you’re working with anything from solid oak to high-end LVP, that little device tells you the truth about your substrate before you make an expensive mistake.
How do I keep my floors looking new for a decade?
The secret isn’t just an expensive mop; it’s knowing what to stay away from. I once watched a neighbor destroy the finish on a beautiful install because they thought a steam cleaner was more sanitary. In reality, they were forcing high-pressure vapor directly into the core of the planks. That’s why I tell everyone why you should never use a steam mop on click-lock floors. For long-term maintenance, I stick to PH-neutral cleaners and micro-fiber pads. If you really want to scale your home’s value, you need to master hardwood floor care secrets that focus on preventative measures, like high-quality felt pads on every single piece of furniture—yes, even the lightweight ones.
The Specialized Arsenal Every DIYer Actually Needs
If you are tackling a large area, stop using a manual hammer and block for every joint. Invest in a pneumatic flooring nailer or a high-quality suction cup for large-format tiles. For those of us obsessed with precision, a 10-foot straightedge is the only way to truly verify your work before the first plank goes down. According to the National Wood Flooring Association (NWFA) Technical Manual, subfloor flatness should not deviate more than 3/16-inch in a 10-foot radius for nail-down installations. If you skip this verification, you’ll find yourself desperately looking for expert tips for 2025 to fix the squeaks and gaps that inevitably follow.
Where the Flooring World is Heading
I predict we are moving toward smart underlayments that can detect sub-surface leaks and humidity spikes via your phone before they reach your planks. We are already seeing massive advancements in carbon-fiber reinforced cores that make LVP virtually indestructible compared to the products from five years ago. But even with all the tech, the fundamentals remain the same. You still need to ensure your waterproof flooring installation includes a perimeter seal of 100% silicone in wet areas. My big challenge to you: before your next project, go buy a digital moisture meter. It is the single most important difference between a floor that lasts five years and one that lasts fifty.
The Truth About Why My First Three Repairs Failed
If there is one thing I have learned from years of DIY floor maintenance, it is that patience is not just a virtue—it is a requirement. When I first started, I rushed the wax cooling process, thinking I could buff it out while it was still slightly tacky. The result was a gummy, uneven mess that I had to scrape out and restart. I also realized that even the best repair cannot hide a moving floor. If your planks are shifting, you need to stabilize the foundation; I eventually had to master the plywood sandwich trick for fixing bouncy floor joists to stop my LVP from moving and cracking my hard-work repairs. Furthermore, never assume the subfloor is healthy just because it looks dry on top. Learning how to identify water damage in an engineered wood subfloor became my most valuable skill, preventing me from covering up deep-seated rot that would have eventually ruined the entire kitchen. Finally, always check your repair work from the perspective of the primary light source—usually a window—to ensure the texture matches perfectly under the sun’s glare.
The Minimalist Toolkit That Guarantees a Seamless Result
You do not need a garage full of heavy machinery to achieve professional results, but you do need the right specific gadgets. My ‘go-bag’ for every flooring project includes a high-quality battery-powered wax melter, a variety of grey scouring pads for matching matte finishes, and a pinless moisture meter. If you are dealing with uneven surfaces before a repair, knowing how to check for high spots with a 10-foot straightedge is absolutely essential to prevent future plank separation. For those larger leveling projects, I never skip the low-RPM mixing paddle because the secret to mixing leveler for a glass smooth finish is keeping air bubbles out of the slurry from the very start. These tools take the guesswork out of the process and give you the confidence to tackle everything from a minor scratch to a full-room leveling project. #IMAGE_PLACEHOLDER_E#
You Have the Knowledge to Restore Your Home
It is easy to feel overwhelmed by a deep gouge or a buckling floor, but remember that every professional started with a single mistake and a desire to fix it. Taking the time to properly prep, clean, and match the texture of your floor is a small investment that pays off every time you walk into the room and don’t see that distracting white scratch. Whether you are dealing with a minor surface scuff or learning how to fix a chip in your porcelain floor with epoxy in an adjacent room, the principles of patience and precision remain the same. Your home is your biggest investment, and keeping your flooring installation in top shape is one of the best ways to protect its value for decades to come. What is the one flooring mishap that keeps you up at night? Share it in the comments and let’s troubleshoot it together!