
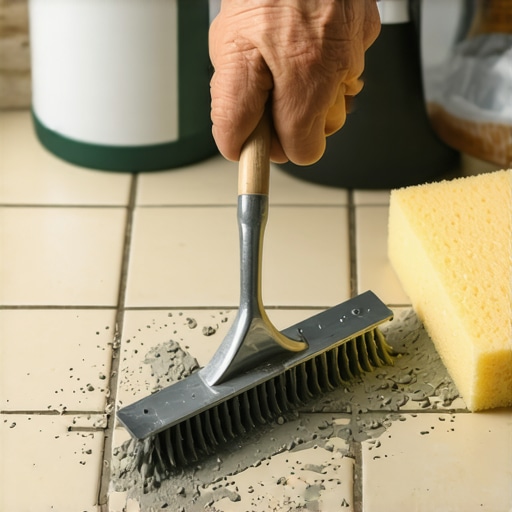
I was standing in my half-finished guest bathroom at 2:00 AM, blinking through the dust and clutching a lukewarm cup of coffee, when I realized I had made a massive mistake. In my rush to finish the layout, I had skipped the cleanup. I thought, ‘Oh, I’ll just wipe those little smears off in the morning.’ Fast forward eight hours, and those ‘little smears’ of mortar had transformed into grey, concrete-strength barnacles fused to my expensive porcelain. If you have ever felt that sinking feeling in your gut while staring at a ruined finish, you are not alone. It is a classic move in the world of DIY, right up there with the common flooring installation mistakes to avoid for lasting results. But here is the good news: you do not have to rip the floor up and start over.
The Morning I Almost Ruined My Bathroom Floor
Removing dried thinset is not just about elbow grease; it is about knowing when to be gentle and when to get aggressive. Early in my career, I grabbed a metal putty knife and went to town on a stubborn glob. Big mistake. I ended up with a permanent silver scratch that no amount of buffing could hide. I eventually had to learn how to fix a chip in your porcelain floor with epoxy just to cover my tracks. Today, I want to show you the method I use now—the one that saves your tiles and your sanity. We are going to talk about the tools that actually work and the household items that are surprisingly effective at softening that bond without eating through your grout or scratching the glaze.
Will this process actually scratch my expensive tiles?
This is the number one fear I hear from neighbors and readers alike. It is a valid concern because once that glaze is gone, it is gone. However, if you follow the right sequence of saturation and use the proper non-marring tools, you can lift even the most stubborn mortar. According to the Tile Council of North America, cementitious mortars are engineered to create a permanent chemical bond with the substrate, which is why they feel like part of the stone once they dry. But they are vulnerable to specific mechanical and chemical ‘shocks’ that we can use to our advantage. If you missed your chance to use the wet rag trick for cleaning up wet grout haze, don’t panic. We are moving into the heavy-duty solutions now. Have you ever tried to scrape off thinset only to realize you were doing more harm than good? Drop a comment and tell me your horror story—I have seen them all and I promise there is a way out. Let’s get into the step-by-step breakdown of how to reclaim your floor.
Soak the Mortar Until it Softens
Before you even think about grabbing a tool, you need to hydrate that dried concrete. Think of dried thinset like a piece of stubborn, dried-on oatmeal on a breakfast plate; if you try to scrape it dry, you will just damage the surface. I like to take a bucket of warm water—sometimes with a splash of white vinegar—and soak a heavy-duty sponge. Lay that dripping sponge directly over the mortar chunks and let it sit for at least 15 to 20 minutes. This process begins to break down the chemical bond just enough to make it brittle rather than rock-hard. This is a critical part of revamp your home with expert flooring installation tips that most beginners rush through.
Ditch the Metal and Grab a Wooden Block
If you take nothing else away from this, remember this rule: metal on tile is a recipe for disaster. Instead of a steel putty knife, I use a scrap piece of oak or a dense 2×4. By placing the edge of the wood against the base of the dried thinset and giving it a sharp, controlled tap with a hammer, the vibration often pops the entire ‘barnacle’ off in one piece. This ‘gentle percussion’ method is far safer than grinding away with a blade. It reminds me of the precision needed when learning how to achieve flawless floor leveling before tile laying, where one wrong move can throw off the entire surface. I once spent three hours trying to scrape thinset off a kitchen island with a metal spatula only to leave behind unsightly grey marks that looked like pencil lead—I never made that mistake again.
The Surgical Strike Technique
For those tiny bits of residue that just won’t budge after the wood block treatment, you need a more targeted approach. I use a stiff nylon brush or a plastic scraper with a bit of grit. If you find the thinset is still bonded tightly, you might be dealing with a high-polymer modified mortar. These are designed to stay put, much like the materials discussed in the best way to remove thinset from a plywood subfloor. In these cases, a heat gun on a low setting can sometimes soften the polymers, but you have to be incredibly careful not to thermal-shock the tile and cause a crack. If you have already managed to damage the surface, you’ll need to look into how to fix a chip in your porcelain floor with epoxy before the grout goes in.
Why Your Scraper Choice Matters More Than You Think
When you are installing tiles like a pro, you learn that every tool has a signature. A plastic scraper is your best friend because its hardness rating is lower than the glaze on your tile. It will wear down before the tile does. If you are struggling with a massive amount of cleanup, it is a sign that your initial installation lacked the proper cleanup routine, which is one of the most common flooring installation mistakes to avoid for lasting results. Keep your workspace clean as you go, but if you have already missed that window, stay patient. The goal is to preserve the integrity of the finish so your floor looks like a professional showroom, not a dusty construction site.
Now, cleaning up dried thinset is a victory, but preventing the structural issues that make a floor feel ‘cheap’ is where true expertise shines. Most beginners assume that if they buy the most expensive tile or the prettiest oak, the result will be magnificent. I have seen $20-per-square-foot marble look like a botched DIY job because of one hidden factor: the difference between a floor being ‘flat’ and being ‘level.’ It is a distinction that even some pros ignore, but it is the line between a lifetime of beauty and a floor that starts cracking in six months.
Stop confusing flat floors with level ones
Common wisdom suggests that as long as the floor looks smooth, you are good to go. I am here to tell you that ‘flat enough’ is the biggest lie in the industry. A floor can be perfectly flat but sloped like a ski hill. If you are transitioning between rooms, a slope will create a ‘trip hazard’ gap that no transition strip can hide. According to the Tile Council of North America (TCNA) and the ANSI A108.02 standards, for any tile with an edge longer than 15 inches, the subfloor variation cannot exceed 1/8 of an inch over 10 feet. Before you lay a single tile, you must learn how to check for high spots with a 10-foot straightedge. Have you ever fallen into the trap of thinking your floor was ‘close enough’? Let me know in the comments—I’ve been there too.
Can you really fix a wonky subfloor by just using extra mortar?
This is a question I get constantly. The temptation is to use a thicker bed of thinset to ‘build up’ the low spots as you go. This is a recipe for disaster. Mortar is designed for bonding, not for structural filling. As the mortar cures, it shrinks. If one side of a large tile has a 1/2-inch bed and the other has 1/8-inch, the uneven shrinkage will pull the tile down at different rates, leaving you with nasty lippage. This is exactly why your large format tiles need back buttering every time—it ensures a consistent mechanical bond that helps resist that shrinkage pull, but it won’t fix a subfloor that wasn’t prepared using the ultimate guide to floor leveling for a perfect finish.
Why your high-speed drill is ruining the pour
When you finally decide to use a self-leveler to fix those dips, there is a technical ‘oops’ factor most people miss: the mixing speed. If you use a standard high-RPM drill, you are whipping air into the mixture. Those tiny air bubbles might look harmless in the bucket, but once poured, they rise to the surface and pop, leaving you with a moon-crater finish that is structurally weak. This is a primary reason why your self-leveler is bubbling over plywood. Always use a low-speed mixing paddle and a spiked roller to release the tension of the pour.
The moisture meter mistake that kills hardwood
If you are moving away from tile and mastering hardwood floor refinishing, the stakes are even higher. The ‘trap’ here is impatience. Wood is a living material; it breathes and moves. Many homeowners install their wood the day it arrives. Big mistake. You must know how to use a moisture meter before installing wood floors to ensure the planks have reached an equilibrium with your home’s environment. If the subfloor is too damp, that expensive oak will cup and buckle before the first coat of polyurethane is even dry. Expertise isn’t just about the tools you use; it is about the patience you show before the first board is nailed down.
Once the dust settles and the tools are packed away, most homeowners think the hard part is over. But honestly, the real work starts on day one of living on that floor. I have seen beautiful white oak floors ruined in a single winter because the owner did not understand how humidity swings cause wood to shrink. To keep things looking pristine, you need to master hardwood floor care secrets to longevity and shine. One of the biggest mistakes is reaching for the bucket and mop too early. I tell every client that you should why you should never mop new hardwood for at least two weeks. The finish needs time to fully cure and reach its maximum hardness; interrupting that process with moisture can cloud the clear coat permanently.
Keep Your Floors From Aging Faster Than You
If you are dealing with stone instead of wood, the rules change entirely. I have watched people strip the finish off expensive travertine because they used a generic supermarket cleaner. This is precisely why you should never use standard mops on natural stone. The wrong pH level will etch the surface, leaving dull spots that no amount of scrubbing can fix. Instead, I always recommend a pH-neutral cleaner and a microfiber system. This is one of those tile installation pointers that save time and money in the long run because it prevents the need for professional resurfacing five years down the line.
How do I keep my high-end floors looking brand new for decades?
The secret is not a magic chemical; it is environmental control. According to the National Wood Flooring Association (NWFA), maintaining a consistent indoor relative humidity between 30% and 50% is non-negotiable for wood stability. If you let your house get bone-dry in the winter, those gaps will open up, and no amount of wood filler will stay put. I personally use a digital hygrometer in every room I floor—it is a $15 tool that saves a $15,000 investment. For tile, the secret is all in the grout seal. I suggest using a high-quality penetrating sealer every two years to prevent that ‘dirty’ look that haunts so many older bathrooms.
The Specific Tools That Actually Make a Difference
When it comes to the actual install or a heavy-duty repair, my kit has evolved. I no longer rely on ‘eyeballing’ things. I use a laser level for every single layout because it eliminates the cumulative error that happens with a standard bubble level. This is vital when you are trying to revamp your home with expert flooring installation tips. Another tool I swear by is the oscillating multi-tool with a diamond blade. It is the only way to get those surgical cuts around door jambs without vibrating the surrounding tile loose. If you are just starting, do not skimp on the basics. Following a step-by-step guide to flooring installation and leveling success is only possible if your measuring tools are accurate. I predict that in the next few years, we will see ‘smart’ underlayments with built-in sensors that alert your phone if a subfloor leak is detected. For now, we have to rely on good old-fashioned prep. If you want to take your skills to the next level, I challenge you to try the ‘Scribe and Fit’ method on your next transition piece instead of using a bulky T-molding. It is an advanced move, but it is what separates the amateurs from the true craftsmen.
The Hardest Lesson I Learned About Pro-Level Prep
Looking back at my early projects, I realized that the biggest mistakes weren’t made with a hammer or a trowel, but with my watch. I used to think I was saving time by rushing into the layout, but the truth is that every minute you shave off subfloor preparation adds an hour to your future maintenance. The ‘flatness’ trap is real: a floor can look smooth to the naked eye but still be a disaster for large-format tiles. Embracing flooring installation fundamentals taught me that subfloor prep isn’t the ‘boring part’—it is the only part that actually matters for longevity.
- The 24-Hour Rule: I never touch a new self-leveling pour for a full day, even if it feels dry. Walking too early can cause micro-fissures you won’t see until the grout starts cracking months later.
- Humidity is the Silent Killer: I once ignored a 2% difference on my moisture meter and watched a beautiful hickory floor cup within a week. Now, I let wood acclimate until it’s perfect, no exceptions.
- Trust the Straightedge: Using precise floor leveling techniques isn’t about being a perfectionist; it’s about ensuring your tile doesn’t ‘lip’ and create a trip hazard.
The Toolkit That Saves My Back and My Sanity
If you are serious about a professional finish, you need to stop relying on generic home center kits. I’ve curated a specific set of tools that I take to every job site because they eliminate the guesswork. First on the list is a 10-foot straightedge for checking for high spots before the first bag of thinset is even opened. Next, I never pour a floor without using a spiked roller for the perfect leveling pour; it’s the only way to get those tiny air bubbles out and ensure a glass-smooth surface. Finally, invest in a high-quality digital hygrometer. It is a small $20 investment that protects thousands of dollars in hardwood by telling you exactly when your home’s environment is stable enough for installation.
#IMAGE_PLACEHOLDER_E#
Your Journey to a Flawless Finish Starts Today
Installing a new floor is more than just a home improvement task; it’s an act of craftsmanship that you will walk on every single day. Whether you are mastering hardwood floor refinishing or trying your hand at a complex tile pattern, the key is to stay patient and respect the materials. The pride you’ll feel when you see a perfectly flat, gap-free floor is worth every extra hour of prep and every sore muscle. Lean into the process, trust the science of your moisture meters, and remember that mastering floor leveling is the true foundation of every professional-looking home. Have you ever discovered a major ‘oops’ moment on your floor long after the mortar had dried? Let me know your story in the comments below!