
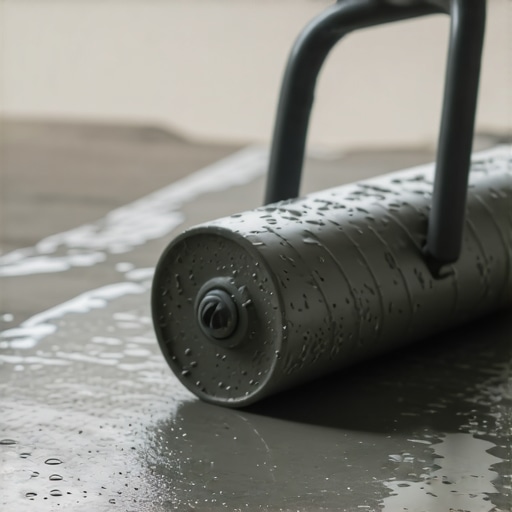
I stood there with my hands on my hips, staring at what was supposed to be a “self-leveling” miracle, but it looked more like a bubbling cauldron. I had followed every instruction on the bag, yet my subfloor was covered in tiny craters and weird ridges. I thought I could just pour the mix and let physics handle the rest, but I was dead wrong. If you have ever felt that sinking feeling when you realize your “flat” floor is actually a bumpy mess, you are not alone. That day, I learned that achieving a perfect finish isn’t just about the mix; it is about how you manage the air trapped inside it. Today, I am going to show you how to use a spiked roller to turn a stressful pour into a glass-smooth surface that is actually ready for your flooring installation. Have you ever had a self-leveler set up on you before it was actually flat? Drop a comment and tell me about your most frustrating floor fail!
Stop Trusting Gravity to Fix Your Subfloor
For a long time, I believed the marketing hype that “self-leveling” meant the compound would just magically find its own level. In reality, these products are thick, and surface tension is a real beast. When you pour, air gets trapped underneath the liquid, and if you don’t give it a way out, it creates those annoying pinholes. My biggest early mistake was thinking I could just “rake” it into place and walk away. That led to a nightmare where my leveler started bubbling over the plywood, ruining the bond. According to the Tile Council of North America (TCNA), subfloor flatness is the single most critical factor for preventing tile failure, yet many DIYers skip the aeration step entirely. Using a spiked roller isn’t just an “extra” step; it is the mechanical bridge between a liquid mess and a professional-grade substrate. [IMAGE_PLACEHOLDER]
Is a Spiked Roller Actually Worth the Hype?
It might look like a medieval torture device on a stick, but this tool is the only way to break the surface tension of the compound while simultaneously releasing trapped air. If you are worried about spending the extra money or adding another step to your workflow, trust me—it is cheaper than grinding down high spots later. I once spent three days trying to fix a floor because I didn’t want to spend twenty minutes rolling out the air. You need the secret to mixing leveler for a glass-smooth finish, and that secret always ends with a spiked roller. Without it, you are just gambling with your expensive materials. When you use the roller correctly, you see the bubbles pop and the ridges melt away in real-time. It is incredibly satisfying, and it is the difference between a floor that looks okay and one that is perfectly prepped for hardwood or tile longevity.
Seal Every Crack Like Your Reputation Depends on It
Before you even crack a bag of mix, you have to treat the room like a swimming pool. If there is a tiny gap under a baseboard or a hole in the subfloor, the leveler will find it and disappear into your basement or onto your neighbor’s ceiling. I remember a job in a 1920s bungalow where I thought a few rags stuffed in the doorway would suffice. Within ten minutes, I watched $100 worth of premium compound vanish into a floor vent I forgot to cover. Learn from my panic: you need to know how to dam a doorway before pouring self-leveler properly. Use foam sills or even hot glue and scrap wood to create a perimeter that is truly watertight.
Stop Your Subfloor from Drinking the Mix
Old plywood or concrete is thirsty. If you don’t prime it, the subfloor will suck the moisture out of your leveler faster than a sponge, causing it to drag and clump. This is usually why your floor primer is peeling off like a sunburn or why the leveler fails to bond. Apply your primer evenly and let it get tacky; this ensures the liquid stays liquid long enough for you to actually work it. 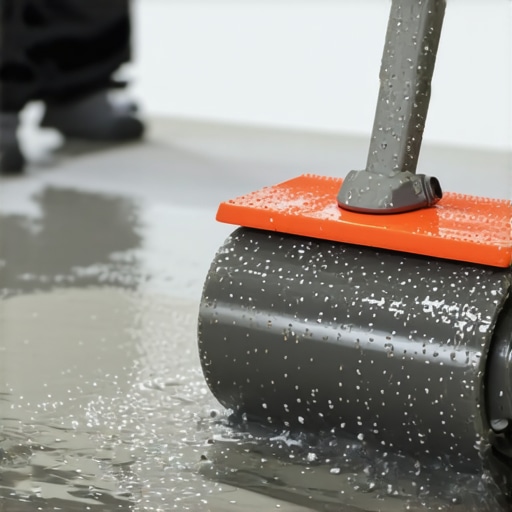
Think of Your Roller Like a Giant Comb for Liquid
Once the pour starts, you aren’t just dumping and hoping. You need to move the material with a gauge rake to the approximate depth, but the spiked roller is what finishes the job. Think of the leveler like a thick, tangled head of hair; the spikes on the roller reach through the ‘knots’ of surface tension and pull everything into alignment. When I first started, I used a flat squeegee, and it was a disaster. It just pushed the ‘waves’ around. A spiked roller, however, allows the material to flow through the spikes while popping the air bubbles that cause pitting. This mechanical agitation is the only way to ensure the mix reaches the lowest points of the room.
Mastering the Wet-Edge Dance
You have a very narrow window before the chemical reaction takes over and the mix starts to stiffen. If you wait too long, you’ll see why your leveler is setting up before you can finish spreading it, leaving you with ugly ‘lap marks’ where two pours met. The trick is to always pour into the ‘wet edge’ of the previous bucket. I usually have a partner mixing while I roll. If you’re solo, you have to move like a sprinter. You should be using precise floor leveling techniques by rolling in two directions—north to south, then east to west—to ensure total aeration and a consistent depth across the entire footprint.
The One Bucket Rule for Consistency
Never guess on the water. Even a half-cup too much can cause the minerals to separate, which is a primary reason why your floor leveler pitted during the drying process. I use a dedicated measuring bucket for water and never eyeball it. Once you have the secret to mixing the perfect bucket of self-leveler every time down to a science, the spiked roller becomes ten times more effective.
Watch the Bubbles Disappear in Real Time
As you pass the roller over the fresh pour, you will see thousands of tiny pinpricks opening and closing. This is the air escaping. If you skip this, those bubbles stay trapped and turn into brittle craters once the floor dries. I’ve seen beautiful flooring installation projects ruined because the installer had to spend a whole day patching pinholes. By the time you finish your final pass, the surface should look like a dark, still lake. If it looks wavy, give it one more light pass with the roller, then step back and let the laws of physics do the rest.Most pros will tell you that the floor needs to be ‘level,’ but that’s actually a trap. You don’t always need a perfectly level floor—what you need is a flat one. If you’re in an old house with a natural slant, trying to make it perfectly level might create massive height differences at the doorways or require you to pour inches of material that the joists weren’t designed to carry. This is one of those floor leveling challenges that separates the weekend warriors from the lifers. I once spent way too much money trying to fight a 2-inch foundation slope when all I really needed was a flat surface for a stable flooring installation.
Can You Actually Pour Two Inches in a Single Go?
Technically, some high-flow compounds claim they can handle deep fills, but in my experience, that’s where the real trouble starts. When you go that deep, the heat generated by the curing process—known as an exothermic reaction—can cause the material to crack, curl, or even delaminate from the substrate. According to ASTM F2873, the industry standard for the installation of self-leveling underlayments, proper substrate preparation and managing the thickness in lifts are often vital to long-term success. If you’re dealing with a massive dip, it’s often safer to do a ‘bulk fill’ with a sand-augmented mix first, then a final skim coat. This prevents the nightmare of why your self-leveler didn’t flow into the low spots because the sheer weight and surface tension of a deep pour can sometimes cause it to ‘bridge’ rather than settle. 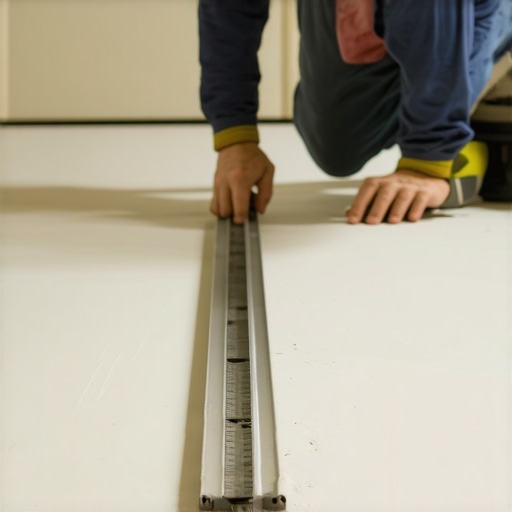
The Trap of Over-Rolling Your Liquid Floor
Another ‘oops’ moment I see constantly is over-processing the mix. There is a specific, fleeting moment where the spiked roller stops being a tool and starts being a weapon against your finish. If you keep rolling after the chemical ‘skin’ starts to form, you aren’t popping bubbles anymore; you are actually tearing the surface and creating new textures. This leads directly to the very thing we are trying to avoid: floor leveler pitting during the drying process. You have to trust your prep. If you’ve followed the ultimate guide to floor leveling and used a 10-foot straightedge to measure subfloor flatness, you should only need two or three passes. Have you ever tried to ‘chase’ a leveler that was already setting up? It’s like trying to comb drying wood glue—it just doesn’t work. Let me know in the comments if you’ve ever had to take a diamond grinder to a floor because you over-worked it! Always remember that the goal is to assist the material, not dominate it. When you step away, it should look like a mirror. If it doesn’t, you likely missed a step in the pro secrets for perfect installations, specifically regarding water-to-powder ratios. Precision isn’t just a suggestion; it’s the law for a floor that lasts.If you think the job ends when the leveler dries, you are setting yourself up for a creaky future. I have seen homeowners execute a perfect pour only to have their flooring installation fail six months later because they did not respect the science of moisture. Once that compound is hard, your next priority is stability. I never start a hardwood job without pulling out my pinless moisture meter. You need to know how to use a moisture meter before installing wood floors because leveler is cementitious—it holds onto water much longer than you think. If you trap that moisture under a vapor-tight finish, you will be looking for tips on how to fix a bubbly finish on a refinished oak floor by next summer.
The Helical Paddle Is Your Secret Weapon
Most DIYers grab the cheapest ‘egg-beater’ style mixing attachment at the big-box store. Stop doing that. A helical mixing paddle is designed to pull the powder from the bottom to the top without folding in excess air. This is the mechanical backbone of pro secrets for perfect installations. When I switched to a dedicated low-RPM mixing drill and a helical blade, my ‘pinhole’ problems virtually vanished overnight. The consistency becomes creamy, almost like pancake batter, which is exactly the secret to mixing leveler for a glass-smooth finish. 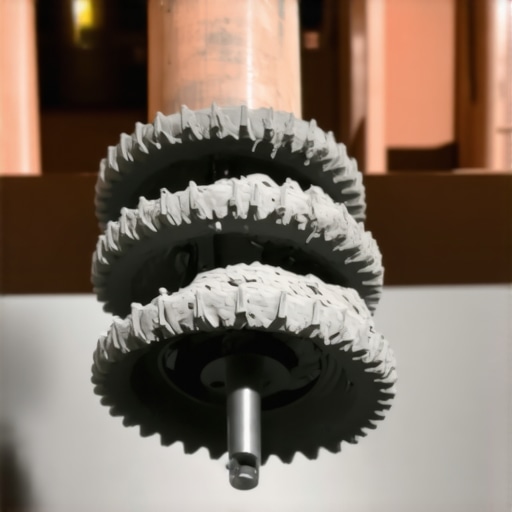
How Can I Keep My Subfloor Stable Over the Years?
Maintaining a flat floor isn’t just about the initial pour; it is about environmental control. According to the National Wood Flooring Association (NWFA), the moisture content between your new subfloor and your hardwood planks should be within a 2% to 4% margin. If your house swings from humid summers to bone-dry winters, that beautiful level surface won’t prevent your wood from moving. You have to know how to keep your hardwood floors from gapping in the winter by maintaining a consistent relative humidity in the home. Neglecting this is one of the most common flooring installation mistakes to avoid for lasting results. Even the best leveler can’t stop a board from shrinking if the air is too dry.
The Future of Precision Leveling
We are rapidly approaching an era where guessing with a straightedge will be obsolete. I am already seeing pros use Lidar-based apps on their smartphones to create high-resolution ‘heat maps’ of floor deviations before they even buy their first bag of mix. This tech makes precise floor leveling techniques accessible to everyone, ensuring you only buy the material you actually need. In the next few years, I expect self-leveling compounds to become even more ‘intelligent,’ with extended working times that don’t sacrifice final hardness. For now, my best advice for long-term hardwood floor care is to start with a rock-solid, bone-dry base. Before you lay your first plank or tile, perform a ‘plastic sheet test’ to ensure no moisture is rising from your new leveler. It is a simple, old-school move that saves your reputation every single time.
What the Hardest Pours Taught Me About Precision
After years of wrestling with compound, I finally realized that the spiked roller is your eyes and ears on the ground. One of my biggest lightbulb moments was realizing that agitation is just as important as leveling. If you don’t break that surface tension, you’re essentially just hoping for a miracle. Another lesson? Never trust your eyes alone—always check for high spots with a 10-foot straightedge before you call it a day. I also learned that the ambient temperature of the room can make or break your working time; if it’s too hot, your spiked roller will start dragging before you’re even halfway through.
The Gear I Actually Keep in My Truck
If you’re serious about avoiding flooring installation mistakes to avoid for lasting results, you need more than just a bucket. My rig always includes a helical paddle, because a standard egg-beater just whips in air. I also never leave for a job without a high-quality spiked roller with nylon spikes—they’re easier to clean and last forever. Finally, a pinless moisture meter is non-negotiable to ensure the slab is ready for the next phase. Following a step-by-step guide to flooring installation and leveling success is much easier when you have the right mechanical advantages on your side.
Your Path to a Flawless Floor Starts Now
Don’t let the fear of a messy pour hold you back from the floor of your dreams. With the right precise floor leveling techniques and a little bit of patience, you can achieve a finish that even the pros would envy. Remember, floor leveling isn’t about rushing to the finish line; it’s about respecting the chemistry of the materials. Grab your roller, trust your prep, and get ready for a surface that’s perfectly flat and ready for years of use. Have you ever had a self-leveling project go sideways on you at the very last second? Tell me your story in the comments below!