
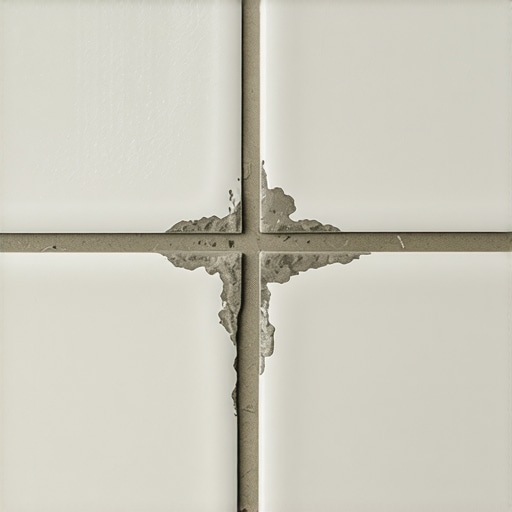
I was kneeling on my bathroom floor, sweat dripping off my nose, staring at a little orange cross that refused to move. I’d spent hours meticulously laying out the tile, feeling like a professional. But when I came back the next morning, those spacers were cemented in like they were part of the foundation. I tried pliers. I tried a flathead screwdriver. I even tried a prayer. In the end, I chipped a brand-new porcelain tile and had to live with a crooked grout line for three years. It was a classic ‘rookie’ move, and honestly, it’s one of those tile installation pointers that save time and money I wish someone had whispered in my ear before I mixed that first bucket of thinset.
Stop Wrestling with Plastic and Start Pulling Them Clean
If you are staring at a spacer that seems to have become one with the subfloor, you aren’t alone. The hidden reason those plastic bits get stuck isn’t just that the thinset dried; it’s that you likely had too much squeeze-out in the joints. When you press a tile into the mortar, the material has to go somewhere. If your trowel notch was too big or your angle was wrong, that mortar travels up the sides of the tile and swallows the spacer whole. I learned the hard way that the trick for removing dry thinset from the face of a tile is much harder than just preventing the mess in the first place. Today, we are going to solve this mystery so you can ensure your next project doesn’t end with a hammer and a chisel.
Can’t I just grout right over the stuck ones?
It is the ultimate temptation. You’ve got three spacers that won’t move, and you think, ‘I’ll just cover them with grout; nobody will know.’ Don’t do it. According to the Tile Council of North America (TCNA), grout joints must be clear of foreign debris to at least two-thirds of the tile’s depth to ensure the grout actually stays put. If you bury those spacers, your grout will eventually crack, discolor, or pop out entirely, especially in high-traffic areas. Trust me, knowing why your grout is falling out of the joints in the hallway is a question you don’t want to be asking six months from now. My biggest early mistake was thinking the spacers would just ‘settle’ into the thinset. They don’t. They float, they tilt, and if you don’t use how to stop thinset from skimming over before you set tile techniques properly, they become permanent landmarks in your floor. Have you ever found yourself surgically removing plastic from your floor at 2 AM? Let me know, because we’ve all been there.
Fix Your Ridge Height Before You Set
The primary reason spacers get stuck is simple physics: too much mortar. Think of thinset like a mattress; if it’s too thick, you’re going to sink right into it. When you use a trowel with notches that are too deep for your tile size, the excess material has no choice but to squeeze upward. I remember my first time tiling a small guest bath. I was so focused on the tiling pattern that makes small livonia bathrooms feel twice as big that I ignored the mortar oozing up around my 1/8-inch spacers. By lunch, I had a graveyard of plastic crosses buried in gray sludge. To avoid this, hold your trowel at a consistent 45-degree angle. This creates uniform ridges that collapse properly without overflowing. If you see mortar creeping more than halfway up the side of the tile, your notch is too big or your angle is too steep. 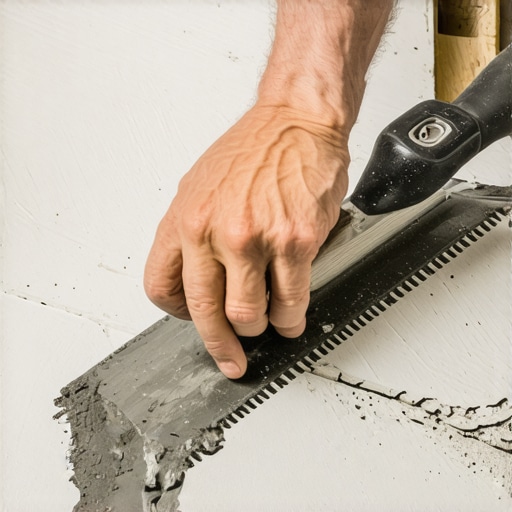
The 20-Minute Extraction Window
You shouldn’t wait until the next morning to pull your spacers. Thinset goes through a ‘gummy’ phase—usually about 20 to 45 minutes after application—where it’s firm enough to hold the tile but soft enough to let go of plastic. I make it a habit to pull spacers as I finish each section, rather than waiting for the whole floor to be done. If you are working with heavier pieces, you must learn how to back butter large format tiles the right way to ensure they don’t slide once the spacers are out. If a spacer feels like it’s fighting back, stop. Use a damp rag to wipe the excess thinset away from the plastic immediately.
Surgical Tools for Dried Mortar
If you missed the window and the mortar is hard, put the hammer down. Using blunt force will chip your tile’s glaze faster than you can blink. Instead, use a needle-nose plier for a vertical pull. If the spacer is truly buried, a sharp utility knife can be used to carefully score the thinset around the plastic. I once spent three hours in a kitchen with a dental pick because I let the floor sit for 24 hours. It’s tedious, but it preserves the tile. This is also why the correct way to mix grout so it doesn’t change color is so important later; if you leave bits of plastic or gray thinset behind, they will ghost through your grout and create dark spots.
Why a Flat Subfloor Saves Your Joints
A crooked floor is a spacer’s worst enemy. When the subfloor has ‘dips,’ one tile sits lower than its neighbor. To bridge the gap, people often tilt their spacers or shove them deeper, which results in them getting pinned under the tile edge. This ‘pinching’ makes removal nearly impossible without breaking the plastic. Mastering how to achieve flawless floor leveling before tile laying ensures that your tiles sit on a flat plane, allowing spacers to sit loosely in the joints as intended. When the floor is flat, the spacers are just guides, not structural supports, and they’ll pop out with zero effort the moment you’re ready to grout.Most people treat self-leveling compound like a ‘set it and forget it’ miracle liquid. They assume it flows like water and settles into a perfect glass-like plane. This is the biggest lie in the flooring world. In reality, it is closer to pancake batter. If you do not actively help it move, you will end up with a series of high ridges where you finished your pours. This is where how to use a spiked roller for the perfect leveling pour becomes your best friend; it breaks the surface tension and releases trapped air. The National Wood Flooring Association (NWFA) emphasizes that a subfloor must be flat within 3/16 inch over 10 feet for a reason—if you are off by just a hair, your expensive planks will bounce or click. Have you ever fallen into the trap of thinking gravity would do all the work for you? Let me know in the comments.
Is a 1/8-inch dip really that big of a deal?
It seems like a minor imperfection, but that tiny gap is a ticking time bomb for flooring installation mistakes to avoid for lasting results. When you walk over a hollow spot, the locking mechanism of your floor flexes. Over time, that friction wears down the tongue-and-groove, leading to those annoying squeaks or, worse, total joint failure. I have seen beautiful installs ruined because someone thought a bit of extra underlayment would ‘cushion’ the dip. It won’t. You need to address why your self-leveler didn’t flow into the low spots before you ever open a box of flooring. 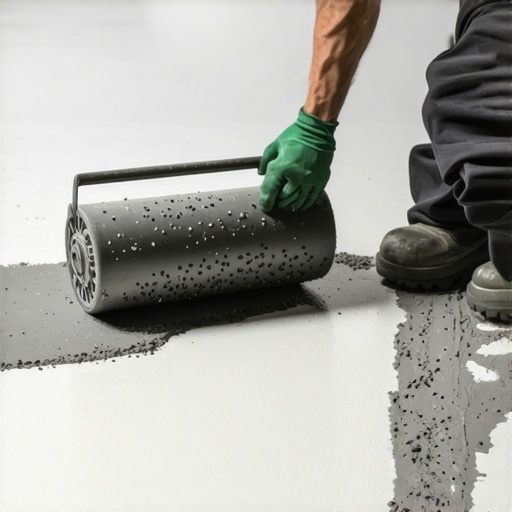
Don’t Skip the Primer or Your Floor Will Curl
Another ‘oops’ factor that kills professional-looking jobs is the failure to prime the substrate. If you pour leveler over dry concrete, the slab acts like a sponge, sucking the hydration out of the mix before the chemical reaction can finish. This is the primary reason why your self-leveler is pulling away from the concrete. Similarly, wood subfloors present a different challenge; without a proper seal, you will be left wondering why your self-leveler is bubbling over plywood. Those bubbles turn into brittle pits that eventually crumble under the weight of furniture.
Stop Trusting the Three-Day Acclimation Rule
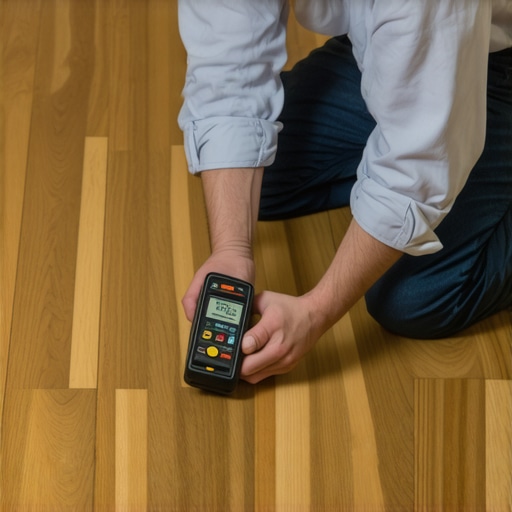
If you are installing hardwood, the common advice of ‘let it sit for three days’ is often flat-out wrong. Acclimation is not about time; it is about equilibrium. If the job site is humid and the wood is bone-dry, three days might not be enough—or it might be too much if the conditions are not controlled. Professional installers know how to use a moisture meter before installing wood floors to verify the wood has actually stabilized. Skipping this step is exactly how to keep your hardwood floors from gapping in the winter becomes an impossible task later on. You cannot fix with a humidifier what you broke with a premature installation.
I’ve realized that the difference between a floor that lasts twenty years and one that fails in five often comes down to the tools you use in the final hours of the project. Once the subfloor is prepped, I never start laying planks without a 10-foot straightedge. Learning how to check for high spots with a 10-foot straightedge isn’t just a suggestion; it is the only way to guarantee your floor doesn’t feel like a trampoline later. If you find a hump, don’t ignore it. Sand it down or use precise floor leveling techniques to achieve flawless surfaces before you lose your mind over clicking sounds every time someone walks by. This phase is where your patience truly pays dividends for the next decade of use.
Invest in a Professional Grade Moisture Meter
You cannot guess what is happening inside a piece of white oak. I personally swear by the Wagner Orion 950 because it tracks moisture deep in the wood without leaving unsightly pinholes in your finish. The National Wood Flooring Association (NWFA) technical manual strictly dictates that the moisture content difference between a wood subfloor and a plank must be no more than 4% for strips and 2% for wide planks. If you ignore this technical specification, you are basically inviting the wood to warp as soon as the seasons change. This level of precision is part of the hardwood floor care secrets to longevity and shine that professionals rarely share in the big-box store aisles. Looking ahead, I suspect we will soon see self-leveling compounds with built-in sensors that notify your phone when they are chemically cured and ready for tile. Until then, stay manual and stay precise.
How do I keep my new floors from wearing out too fast?
Once the install is done, the biggest threat to your investment is actually sitting right in your cleaning closet. I have seen thousands of dollars of luxury vinyl and engineered wood ruined because of one popular tool: the steam mop. You must understand why you should never use a steam mop on click lock floors. The intense heat and pressurized vapor force moisture directly into the core of the plank, causing the edges to swell, buckle, and eventually peel. Instead, stick to a simple microfiber mop and a pH-neutral cleaner designed for the specific finish of your floor. Avoiding these flooring installation mistakes to avoid for lasting results is 90% of the battle. If you really want to ensure your floor stays perfect, try using the ‘quarter trick’ to verify your expansion gaps around every single wall before you nail down that last row of baseboards.
Hard-Won Lessons from My Flooring Failures
After years of wrestling with thinset and leveling compounds, I have realized that the most important tool isn’t in your belt—it is your patience. I used to rush the prep, thinking I could make up for it with extra adhesive, but that is a recipe for disaster. One of the biggest shifts in my workflow came when I started following the dry fit rule that prevents costly cutting mistakes. Laying out the entire room without glue feels like extra work, but it saves hours of panic when you realize your last row is a sliver too thin.
I also learned that sound is just as important as sight. If you step on a subfloor and hear a tiny squeak, do not ignore it. That sound will haunt you once the finished floor is down. I always keep a few shims handy because the shim trick for fixing a bouncy plywood subfloor is a life-saver for older homes with settled joists.
Lastly, never trust your eyes in bad lighting. Shadows can hide lippage in tile or high spots in leveler. I now bring a high-intensity work light and crawl across the floor to see every imperfection before the final install begins.
My Personal Gear for a Perfect Surface
If you are serious about getting professional results, you need to stop guessing. My toolkit always includes a reliable moisture meter; it is the only way to be sure about your substrate’s readiness. For floor prep, I do not use anything less than a high-quality 10-foot straightedge to verify flatness. When I am working with liquid underlayments, I rely on mastering floor leveling pro secrets for perfect installations, specifically using a heavy-duty mixing paddle to ensure no dry clumps remain. These tools aren’t just for pros; they are the bridge that helps a DIYer reach that same level of quality.
#IMAGE_PLACEHOLDER_E#
Take the Leap into Your Next Project
There is a specific kind of pride that comes from walking across a floor you laid with your own hands. Whether you are tackling porcelain in the mudroom or engineered planks in the den, remember that every expert was once a beginner staring at a messy bucket of thinset. Use this step-by-step guide to flooring installation and leveling success as your roadmap. You have the knowledge and the techniques—now you just need to start. Don’t let the fear of a stuck spacer or a crooked line stop you from transforming your home through your next flooring installation. Have you ever encountered a subfloor problem that seemed impossible to fix? Let me know in the comments below!