
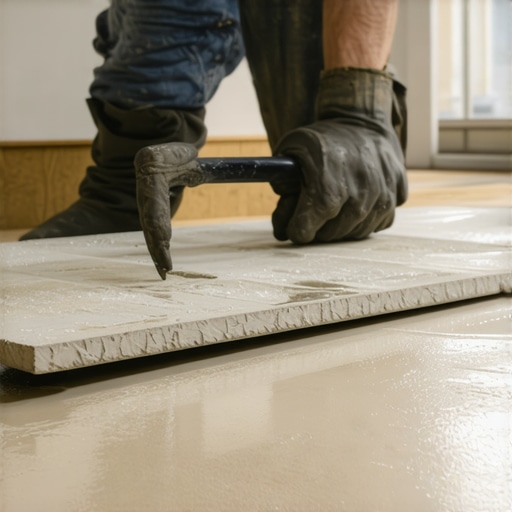
I’ll never forget the sound of that first “hollow” thud. I had spent three hours meticulously prepping my floor, feeling like I’d finally mastered the step-by-step guide to flooring installation and leveling success. I mixed a beautiful, smooth bucket of thinset, spread a generous path, and felt like a champion. Then, the phone rang. It was a two-minute distraction, but when I came back to lay my large-format porcelain, the thinset had developed a dull, papery film. I pushed the tile in anyway, thinking the weight would break through. It didn’t. Two weeks later, that tile popped loose like a dry scab. It was embarrassing, messy, and a complete waste of expensive material. [image_placeholder_1]
Keep Your Mortar From Turning Into a Dry Mess
The “skinning over” phenomenon is the silent killer of good tile work. When the surface of your thinset dries out before the tile hits it, you lose that critical chemical bond. It is essentially like trying to glue two pieces of wood together after the wood glue has already dried. If you want a floor that lasts decades rather than days, you have to install tiles like a pro by managing your open time. This isn’t just about moving faster; it is about controlling the environment and your bucket. The mistake I made early on—and I see homeowners do it constantly—was mixing way too much at once in a hot room. I thought I was being efficient. In reality, I was just creating a ticking time bomb of wasted mortar. According to the Tile Council of North America (TCNA), environmental factors like wind, high humidity, or high temperatures can slash your thinset’s rated open time by more than half. That means a product promised to last 30 minutes might actually give you ten.
The Real Reason Your Mortar Dries Out Too Fast
It is easy to blame the bag of mortar when things go south. You might think you bought a bad batch because it is hardening in the bucket or forming a film on the floor within minutes. But usually, the culprit is a lack of trowel notch secrets for getting full thinset coverage and failing to burn the mortar into the substrate. We are going to walk through how to keep that mix wet, how to test the bond, and why your bucket’s location matters more than you think. Have you ever had to pry up a tile because the thinset just would not grab? It is a soul-crushing moment, but you are definitely not alone in that struggle. Let’s make sure it never happens again.
Stop the Slab from Stealing Your Moisture
The most common reason for premature drying isn’t the air; it is the floor itself. Porous substrates like concrete or old plywood act like giant sponges. If you spread fresh mortar onto a dry, unprimed surface, the substrate will instantly pull the moisture out of the mix. This leaves you with a brittle, sandy layer that has no structural integrity. I remember a humid July afternoon where I thought the moisture in the air would buy me extra time. I skipped the primer on a 20-square-foot patch of old concrete. Within five minutes, the mortar had literal cracks in it because the slab was so thirsty. I had to scrape it all up while it was half-hardened, which is a special kind of hell. Now, I always ensure I am following precise floor leveling techniques to achieve flawless surfaces by properly sealing the substrate first. If you are working over wood, you should also how to use a moisture meter before installing wood floors or tile to ensure the subfloor isn’t going to warp or pull water from your setting materials.
Why Substrate Priming is Non-Negotiable
Using a high-quality primer creates a barrier that keeps the water in the mortar, where it belongs. This is especially vital if you are dealing with situations where your self leveler is bubbling over plywood. A primed surface gives you those extra ten or fifteen minutes of ‘open time’ that can be the difference between a relaxing installation and a panicked race against the clock. Think of primer as the ‘insurance policy’ for your bond strength.
The Mechanical Bond Must Be Forced
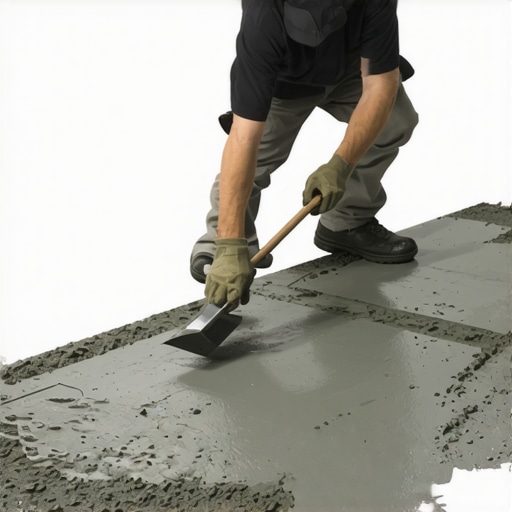
You cannot simply ‘lay’ mortar on the floor and expect it to stick. You have to force it. Professionals use a technique called ‘burning in’ the mortar. This involves using the flat side of your trowel to firmly scrape a thin layer of thinset into the substrate. This fills all the microscopic pores and creates the actual mechanical bond. Only after this initial layer is applied should you go back and use the notched side to create your ridges. Following these tile installation pointers that save time and money ensures that every ridge of mortar is actually attached to the floor rather than just sitting on top of a layer of dust.
Press the Thinset Into the Pores First
When you skip the burn-in step, you are relying on the weight of the tile to create the bond. Spoiler alert: it won’t. If there is even a tiny bit of dust on that slab, the mortar will just sit on the dust. By aggressively flat-troweling first, you cut through the dust and lock the cement into the floor’s profile. I’ve seen entire floors lifted up by hand because the installer just ‘combed’ the mortar and dropped the tile. The back of the tiles were clean, and the mortar stayed on the floor because there was no transfer.
The Rule for Large Format Porcelain
If your tiles are 12×12 or larger, the ridges on the floor are not enough. You must how to back butter large format tiles the right way. This means applying a thin ‘shave coat’ of mortar to the back of every single tile before it hits the floor. It sounds like extra work, and it is, but it guarantees 100% coverage. On a job last year with 24-inch porcelain, I back-buttered every piece and the bond was so strong that when we had to move one tile after five minutes, it nearly took the subfloor with it. That is the kind of peace of mind you want when the furniture starts moving back into the room.
Stop Assuming Your Leveler is Actually Self-Leveling
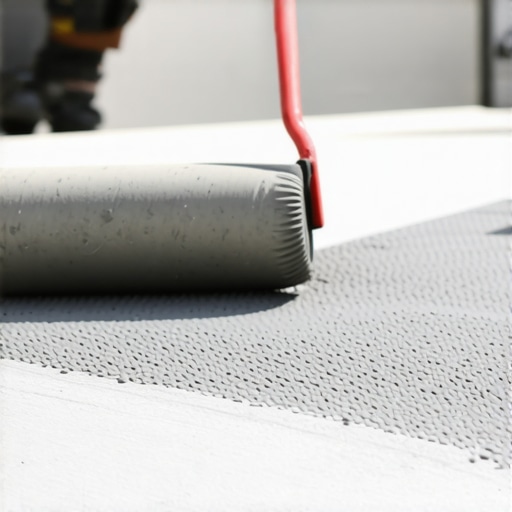
The term ‘self-leveling’ is perhaps the most misleading marketing phrase in the flooring world. I have spent years correcting floors where the homeowner—or even a rushed contractor—poured out five bags of material and expected it to work like magic. The hard truth is that self-leveling underlayment (SLU) is more like ‘self-smoothing.’ It has significant surface tension. If you don’t use a gauge rake to set the depth and a how to use a spiked roller for the perfect leveling pour, the material will simply hump up in some areas and leave voids in others. I’ve seen countless projects fail because the installer assumed the liquid would just find its way to the low spots. In reality, why your self leveler didnt flow into the low spots usually comes down to improper mechanical agitation and failing to break that surface tension.
Why Does Your Leveler Form Craters Even After Priming?
This is a question I get from advanced DIYers who followed the instructions on the bag but still ended up with a floor that looks like Swiss cheese. Even if you think you’ve primed well, air trapped in a porous subfloor wants to escape. As the heavy leveler sits on top, it pushes air up, creating tiny ‘pinholes’ or craters. ASTM C1708 standards for self-leveling mortars highlight that consistent mixing speeds and proper priming are the only way to prevent this outgassing. If you skip a second coat of primer on highly absorbent concrete, you are asking for trouble. I once had to grind down an entire 400-square-foot basement because why your floor leveler pitted during the drying process wasn’t addressed during the prep phase. It’s a gut-wrenching mistake that costs hundreds in extra material and days of labor. Have you ever fallen into this trap? Let me know in the comments.
The Liquid Gold That Escapes Through the Smallest Gaps
Here is the ‘oops’ factor that almost every beginner misses: self-leveler is incredibly thin, and it will find every single crack, knot-hole, or gap in your subfloor. Think of it as liquid gold—except it’s gold you’re literally pouring into your basement or onto the ceiling below. Before you even think about the secret to mixing leveler for a glass smooth finish, you must seal the perimeter. I’ve seen guys pour leveler in a second-story bathroom only to have it start raining gray goo through the kitchen recessed lights downstairs. You must how to stop your floor leveler from leaking through the subfloor by using spray foam, weatherstripping, or high-quality silicone to dam up the area. This isn’t just about cleanliness; if the leveler leaks out, the remaining surface won’t be flat. You have to how to measure subfloor flatness before you start installing and then build a ‘pool’ that can actually hold the liquid. Following the ultimate guide to floor leveling for a perfect finish means spending twice as much time on the ‘dam’ as you do on the pour itself. It’s the nuance between a flat floor and a very expensive mess.
Skip the Mixing Drill and Get a Real Station
If you are serious about achieving that glass-smooth finish, you need to stop relying on a standard handheld drill for large pours. I used to think I was saving money by using a heavy-duty corded drill, but the torque and consistency just weren’t there. Now, I swear by a dedicated mixing station, like the Hippo Mixer. The reason? It maintains a constant RPM while incorporating the powder, which is the secret to mixing the perfect bucket of self-leveler every time. When you mix by hand, you inevitably leave ‘dry balls’ at the bottom of the bucket that later show up as lumps on your floor. A station allows you to mix two or three bags at once, ensuring that the entire floor has a uniform cure time and density. It’s an investment that pays for itself in the hours you save not having to grind down high spots later.
Your Floors Need to Breathe But Not Too Much
Once the leveling is done and the hardwood is down, the battle shifts to the atmosphere. I’ve seen stunning white oak installations ruined in a single season because the homeowner didn’t account for humidity shifts. The National Wood Flooring Association (NWFA) emphasizes that wood is a hygroscopic material, meaning it constantly exchanges moisture with the air. If your home drops below 30% humidity in the winter, you will see gaps. If it spikes above 50% in the summer, you risk cupping. I always tell my clients to how to keep your hardwood floors from gapping in the winter by installing a whole-home humidifier. It’s the difference between a floor that stays tight for fifty years and one that starts creaking after twelve months. If you are already seeing issues, you might need to look at mastering hardwood floor refinishing expert tips for 2025 to restore that seal.
How do I keep these surfaces looking brand new?
Maintenance is where most people fail right at the finish line. I’ve walked into multi-million dollar homes where the owners were using steam mops on their expensive flooring. That is a recipe for disaster. Steam forces moisture into the joints of the wood or the core of your laminate, causing the edges to swell and peel. This is why you should never use a steam mop on click lock floors. Instead, stick to a microfiber mop and a pH-neutral cleaner. For your tile areas, especially if you have transitions, you must why you need a transition strip between different flooring heights to prevent the edges from chipping under vacuum wheels or foot traffic. Looking ahead, I predict we will see a massive shift toward ‘smart underlayments’—materials embedded with sensors that can alert your phone if a subfloor leak is detected before it ruins your hardwood. Until then, your best defense is a high-quality moisture meter and a disciplined cleaning routine. I strongly encourage you to buy a professional-grade moisture meter today; it is the only tool that can tell you if your subfloor is truly ready before you lay a single plank.
Three Hard Truths About Flooring My Early Failures Taught Me
Over the years, I’ve realized that the difference between a ‘good enough’ floor and a masterpiece isn’t talent; it’s patience with the boring parts. First, speed kills. If you whip your grout like you’re making meringue, you’ll end up with a porous, weak mess. I highly recommend learning how to mix grout by hand without getting air bubbles to ensure structural integrity and color consistency. Second, don’t overcomplicate the clean-up. I used to scrub until my fingers bled, but the wet rag trick for cleaning up wet grout haze changed my life by making the final polish effortless. Lastly, math is your friend. Skipping the layout phase is a gamble you’ll lose. It’s why you should always start your tile layout from the center; it guarantees those edges look intentional rather than like a jagged afterthought.
Tools That Make the Difference Between Chaos and Craftsmanship
If you’re building your kit for a major project, don’t just grab whatever is on sale at the big-box store. These three items are non-negotiable for me now: 1. A 10-foot straightedge—this is the only way to objectively find dips that your eye will miss until the light hits the finished floor. I’ve mastered how to check for high spots with a 10-foot straightedge and it’s a step I never skip. 2. A quality moisture meter—because wood and concrete are living, breathing things that will ruin your day if they’re too damp. 3. A spiked roller—essential for breaking surface tension in your leveler. Learning how to use a spiked roller for the perfect leveling pour is what separates a bumpy DIY look from a glass-smooth professional finish. [image_placeholder_E]
The First Step Toward a Floor That Outlasts Your Mortgage
Taking on a flooring installation can feel like a mountain to climb, especially when you start worrying about moisture, bonding, and level lines. But remember, every expert started with a bucket of thinset and a nervous hope that it would stick. By focusing on the prep and avoiding common flooring installation mistakes to avoid for lasting results, you are already ahead of most people who just try to ‘wing it.’ You’ve got the knowledge; now you just need the courage to mix the first bag. Have you ever found a mysterious dip in your floor after you thought you were finished leveling? Let me know in the comments below!