
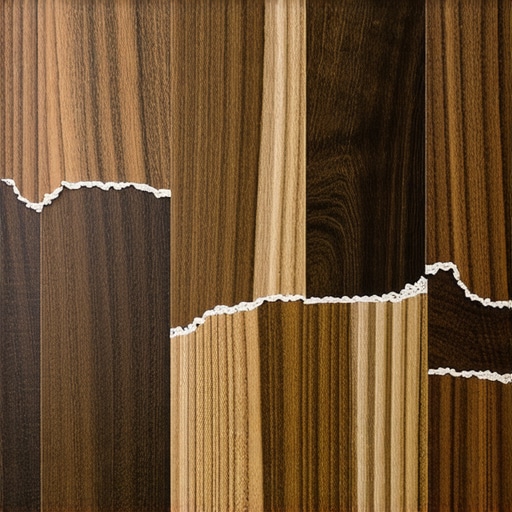
I remember the morning I walked into my living room, cup of coffee in hand, and felt something crunchy under my heel. I looked down, expecting a stray chip, but what I saw was way worse: a translucent strip of polyurethane, curled up like a piece of dead skin. I gave it a little poke, and a sheet the size of a postcard just lifted right off the oak. My heart absolutely sank. If you’re standing there right now looking at a floor that’s shedding like a snake, take a deep breath. You haven’t failed as a homeowner, but your floor finish definitely hit a wall. Today, we’re going to dig into exactly why this happens and, more importantly, how we can stop the spread.
The Day My Floor Decided to Shed Its Skin
That specific failure I experienced happened because I was in a rush. I thought I could skip the fine-grit buffing between my second and third coat of oil-based poly. Big mistake. I learned the hard way that hardwood floor care secrets to longevity and shine aren’t just suggestions—they are the laws of physics. When polyurethane peels in sheets, it’s usually because the layers didn’t actually bond to each other or the wood itself. It’s a phenomenon pros call ‘intercoat adhesion failure.’ Whether you’re dealing with a DIY job gone wrong or a professional’s oversight, it’s usually rooted in a lack of ‘tooth’ for the next layer to grab onto.
Is your floor basically ruined forever?
That’s the first question everyone asks when they see the finish lifting. The short answer is: no, but we’ve got some work to do. You might be worried that you’ll have to sand the whole thing down to the raw wood and start from scratch. Sometimes, that is the case, especially if the problem is deep. However, if the peel is localized, we might be able to save it. Before you lose sleep over it, check out these mastering hardwood floor refinishing techniques to see what kind of recovery we’re looking at. Have you ever looked down and seen a piece of your floor’s finish just waving at you? Tell me I’m not the only one who’s had that panic moment!
What Really Happens When Finish Fails to Stick
There are a few big reasons for this heartbreak. The National Wood Flooring Association (NWFA) points out that peeling is often the result of applying a finish over a surface that was too smooth, too oily, or contaminated with something like wax or silicone. I once made the mistake of using a ‘tack cloth’ that had way too much wax on it, which left a microscopic film that prevented my topcoat from sticking. It’s one of those flooring installation mistakes to avoid at all costs. You might also notice that why your hardwood finish feels rough after drying is a precursor to this; if it didn’t lay flat and bond well, peeling is just the next step in its tragic journey.
Stripping Away the Failure Before You Build Back Up
When I first started doing this, I thought I could just slap a fresh coat of poly over the peeling spots and call it a day. I treated it like a wall that needed a touch-up of paint. Big mistake. One afternoon on a job in a century-old Victorian, I tried to ‘hide’ a small peeling section near a radiator. Within three days, the new finish bubbled up and pulled away the old finish with it. It looked like a topographical map of a disaster. That’s when I realized that mastering hardwood floor refinishing requires a level of surface prep that borders on the obsessive.
The Tape Test for Adhesion
Before you do anything, you need to know if the rest of your floor is about to fail. Take a piece of high-tack duct tape, press it firmly onto a non-peeling section, and rip it off. If finish comes with it, you’re looking at a full sand-down. If it stays put, you might get away with a scuff and recoat. Often, the culprit is hidden contaminants. If you suspect old floor wax is the villain, you’ll need the simple hack for removing wax from new hardwood to ensure the surface is chemically ‘naked’ before you start. Polyurethane is like a high-maintenance guest; if the room isn’t perfect, it won’t stay.
Scuffing the Surface to Create a Mechanical Bond
Think of polyurethane as a series of microscopic hooks. If the surface is too smooth, those hooks have nothing to grab. This is why why your hardwood finish feels rough after drying is actually a sign that you didn’t sand correctly between coats. You need to use a 220-grit screen or sandpaper to ‘cloud’ the existing finish. You aren’t trying to remove the wood; you’re just scratching the surface enough so the new coat can anchor itself. #IMAGE_PLACE_PLACEHOLDER_B#
Lay It Down Right the Second Time
Once you’ve scuffed the floor, the biggest enemy is dust. Even a few specs can ruin the bond. I never trust a standard broom. Using the vacuum attachment that actually picks up fine sawdust is the only way to ensure the pores of the wood (and the scratches you just made) are empty. Follow this with a wipe-down using a microfiber cloth dampened with mineral spirits (for oil-based) or water (for water-based).
Apply with a Long, Fluid Motion
When you finally pour that finish, don’t overwork it. I used to ‘scrub’ the finish in, which just introduces air and leads to a mess. If you end up with a textured surface, you’ll be searching for how to fix a bubbly finish on a refinished oak floor by tomorrow morning. Instead, use a high-quality applicator and move in the direction of the grain, maintaining a ‘wet edge’ at all times. This is the same principle you’d use for hardwood floor care secrets to longevity and shine: consistency is everything. If you rush the drying time or the application, the layers won’t fuse, and you’ll be right back where you started with a floor that sheds like a snake in the spring.
But let’s be real for a second—peeling finish is often just the symptom of a much deeper problem. If you think you can fix a floor by only looking at the top layer, you’re missing the forest for the trees. I see this all the time: homeowners spend a fortune on the best polyurethane but ignore the chemistry happening underneath. Let’s dig deeper into the nuances that the big-box stores won’t tell you on the back of the can.
Stop Believing the ‘Self-Leveling’ Marketing
Here is my contrarian take: ‘self-leveling’ compound is one of the most misleading product names in the entire construction industry. Everyone says you just pour it and it finds the horizon like water. In my experience, if you treat it that way, you’re going to end up with a series of hardened ‘puddles’ and a floor that is still wavy. To get a truly flat surface, you have to actively manage the material. This is where mastering floor leveling pro secrets for perfect installations comes into play. You need a spiked roller and a gauge rake to move the air out and the mass around. If you don’t, you’ll find the reason your leveler is setting up too fast is because you didn’t account for the ambient humidity and the thirst of your subfloor.
Can you trust your eyes when the subfloor looks dry?
The short answer is absolutely not. One of the most advanced mistakes I see is failing to test for ‘hydrostatic pressure.’ You might think your concrete slab is bone dry because it looks grey and dusty, but concrete is essentially a hard sponge. According to the National Wood Flooring Association (NWFA), failing to perform a calcium chloride or relative humidity test is the leading cause of finish delamination. If moisture is pushing up through the slab, it will literally blow the finish right off the wood or cause the adhesive to liquefy. This is why your concrete floor is sweating under the rug, and no amount of high-end poly can fix a moisture vapor issue from below. You must know how to use a moisture meter before installing wood floors to ensure you aren’t sealing in a disaster.
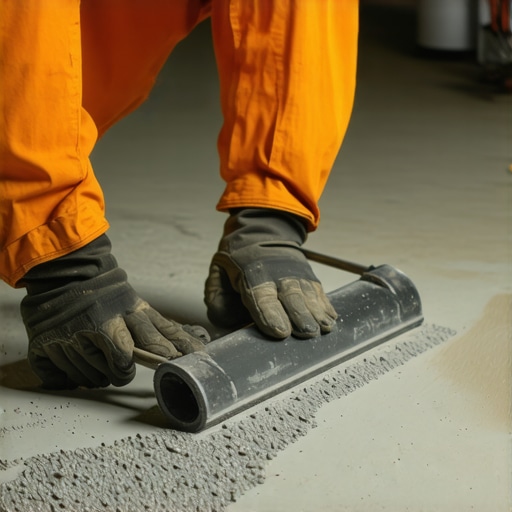
Another ‘trap’ that catches even seasoned DIYers is the ‘outgassing’ phenomenon. When you pour leveler over plywood without a high-quality primer, air escapes from the wood and creates tiny pinholes in your new, expensive surface. This is why your self-leveler is bubbling over plywood. It’s not a product defect; it’s a failure of surface preparation. You have to seal the substrate to prevent it from breathing into your wet leveler.
Why Your Big Tiles are Destined to Crack
If you’re moving from hardwood to tile, don’t assume the same rules apply. With the trend of ‘large format’ tiles (anything over 15 inches on one side), the margin for error is zero. The most common mistake? Thinking a standard trowel spread is enough. I’ve pulled up hundreds of cracked tiles where the mortar was only touching 50% of the tile back. This is why your large format tiles need back buttering every time. Without that thin skim coat on the back of the tile, you’re just setting glass on top of ridges, waiting for someone to step on a hollow spot and snap it.
Even the grout can betray you if you aren’t careful. I once saw a gorgeous marble floor ruined because the installer mixed the grout with too much water, which caused the pigment to wash out. Understanding the correct way to mix grout so it doesn’t change color is an absolute must for a professional-looking finish. Have you ever fallen into this trap where a simple step like priming or back-buttering was skipped? Let me know in the comments—I’ve been there, and we can all learn from those ‘oops’ moments together.
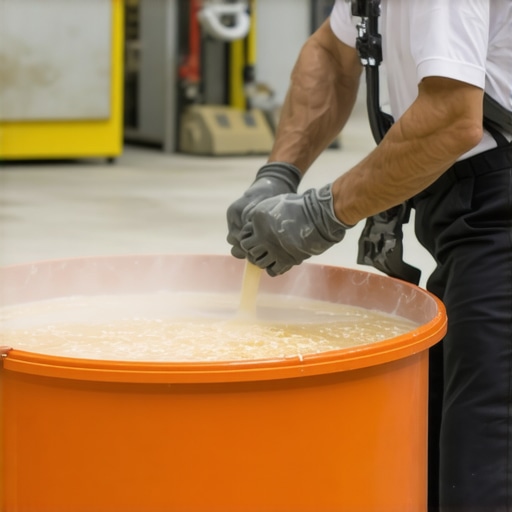
I’ve spent years experimenting with every gimmick in the tool aisle, but I eventually learned that the difference between a floor that lasts five years and one that lasts fifty comes down to the RPM of your drill and the chemistry of your cleaning routine. When I’m doing a major pour, I don’t just use any old five-gallon bucket from the hardware store. I use a dedicated mixing station because the secret to mixing the perfect bucket of self leveler every time isn’t just about getting the water ratio right; it’s about the shear force required to hydrate the polymers. If you don’t break down those microscopic clumps with a high-torque paddle mixer, they’ll settle after the pour and create tiny soft spots that eventually turn into cracks under your tile. Learning the secret to mixing leveler for a glass smooth finish was the single biggest turning point in my career because it meant I stopped spending my Saturdays sanding down high spots.
How can I actually protect my investment for the long haul?
The maintenance stage is where most homeowners unknowingly sabotage their own success. You might spend a fortune on a high-end finish, but then ruin it by using the wrong tools. For instance, why you should never use a steam mop on click lock floors is one of the most important lessons you can learn. The high-pressure steam forced into the joints causes the core material to expand, leading to peaked edges that look terrible and catch on your socks. The same applies to wood; the truth about using steam mops on luxury vinyl planks applies equally to oak or maple. As specified in the Bona Professional Series maintenance guide, using a cleaner with a pH level between 7 and 8 is non-negotiable for preserving the cross-linking of modern waterborne finishes. Anything too acidic or basic will slowly eat away at the sheen until your floor looks dull and lifeless. I always recommend a simple microfiber mop and a dedicated pH-neutral spray for hardwood floor care secrets to longevity and shine.
Smart Sensors and the Future of Worry-Free Flooring
Looking ahead, I suspect we are moving toward a world where ‘dumb’ subfloors are a thing of the past. We’re already seeing the emergence of Bluetooth-enabled moisture sensors that contractors can embed directly into the plywood or concrete during installation. Instead of guessing how to keep your hardwood floors from gapping in the winter, these sensors will send an alert to your thermostat to kick on the humidifier the moment the moisture content drops below a safe threshold. This proactive approach prevents the wood from shrinking and helps avoid why your hardwood floor is crowning and how to dry it out if a leak occurs while you’re on vacation. It’s a game-changer for high-end installs where the cost of replacement is astronomical.
If you really want to level up your DIY game, stop eyeballing your mixing times. My biggest piece of advice? Set a literal timer for your mixing process and your slump test. Consistency is the hallmark of a pro. Once you master the timing, you’ll find that everything from the spread of your thinset to the clarity of your poly becomes much more predictable. Try using a dedicated mixing barrel on your next project—you’ll be shocked at how much smoother the finish turns out!
The Expensive Lessons That Taught Me to Respect the Grit
Over the years, I’ve realized that flooring isn’t just about how it looks; it’s a battle against chemistry and physics. One ‘lightbulb moment’ for me was realizing that over-sanding is just as bad as under-sanding. If you use a grit that’s too fine, you essentially polish the wood, leaving nowhere for the poly to anchor. I also learned that mastering hardwood floor refinishing is 90% cleaning and 10% application. If you see your finish peeling in sheets, check your humidity levels—polyurethane hates a damp room just as much as it hates dust. Another hard truth? Never trust a ‘2-in-1’ product to do the job of a dedicated primer and topcoat. Following a step-by-step guide to flooring installation and leveling success means respecting the dry times on the back of the can, even when you’re in a hurry to move the furniture back in.
Tools I Use to Get It Right the First Time
I don’t leave my results to chance anymore, and neither should you. My ‘go-to’ kit always includes a Tramex moisture meter, which I consider essential because it tells me if the slab is ‘sweating’ before I even open a bucket of leveler. For the finish itself, I swear by the Bona Pro Series cleaners and applicators; they are specifically formulated to maintain the cross-linking of the finish so it doesn’t dull over time. I also keep a copy of the NWFA technical guidelines in my truck—it’s the definitive word on everything from gap tolerances to wood species behavior. Finally, for those tricky transitions, these tile installation pointers that save time and money have helped me avoid the dreaded ‘hollow tile’ sound that ruins an otherwise perfect job. #IMAGE_PLACEHOLDER_E#
Time to Turn Your Floors into a Masterpiece
Don’t let a few peeling strips of polyurethane discourage you. Every pro I know has a story about a floor that didn’t go as planned. The beauty of wood and tile is that they are incredibly forgiving if you are willing to put in the prep work. Take what you’ve learned here—from the importance of ‘tooth’ for adhesion to the necessity of moisture testing—and apply it with confidence. You are now equipped with hardwood floor care secrets to longevity and shine that will keep your home looking stunning for decades. Go slow, trust the process, and remember that the best floors are built from the subfloor up.
Have you ever had a DIY project look perfect on day one only to start peeling a week later? Tell me your story in the comments below—I’d love to help you troubleshoot it!