

I was standing in the middle of my hallway, sweating over a pile of expensive hardwood and a chalk line that seemed to be laughing at me. I’d seen the magazines and I’d watched the ‘five-minute’ tutorials on social media. I thought I knew exactly how to get that classic, sophisticated look without hiring a pro. But there I was, three hours into my Saturday, realizing that my center line was crooked and my first three rows looked like they’d been laid by a drunken sailor. It’s a gut-wrenching feeling when you realize your dream floor is about to become a very expensive mistake. If you’ve ever found yourself second-guessing every measurement or wondering why your pattern is drifting toward the wall, you are not alone.
Why Your Herringbone Pattern Needs More Than Just a Good Eye
The truth is, herringbone is a jealous mistress. It demands precision from the very first plank. Most folks think they can just start in a corner and work their way across, but that is one of the most common flooring installation mistakes to avoid if you want results that actually last. I learned the hard way that if your subfloor isn’t perfect, your pattern will telegraph every single bump and dip. Before you even think about the wood or tile, you need to know how to achieve flawless floor leveling. [IMAGE_PLACEHOLDER] A flat surface is the unsung hero of a successful layout. When I did my first solo project, I ignored a tiny 1/8-inch deviation in the subfloor. By the time I reached the other side of the room, that tiny gap had grown into a half-inch disaster. I had to rip up four rows of glue-down flooring. It was soul-crushing. Today, I want to make sure you don’t repeat my misery. We are going to talk about the ‘dry-fit’ rule, the ‘center-line’ method, and why your tape measure might be lying to you. Have you ever felt that sinking feeling when your pattern starts to ‘run away’ from your layout lines?
Is This Pattern Actually Worth the Extra Math?
You might be sitting there looking at a standard straight-lay and thinking, ‘Why am I doing this to myself?’ According to the National Wood Flooring Association, a properly executed herringbone pattern can significantly increase a home’s perceived value because it’s seen as a high-end architectural detail. It creates a sense of movement and depth that standard planks just can’t match. It makes small spaces feel expansive and large rooms feel curated. But—and this is a big but—it only works if it’s symmetrical. We’re going to solve the symmetry puzzle today so you can walk across your floor with pride instead of squinting at the corners. A major culprit in failed DIY jobs is the tape measure error that ruins your herringbone pattern. We aren’t just measuring the room; we are measuring the ‘geometry of the plank.’ If your planks aren’t exactly twice as long as they are wide, your pattern will ‘grow’ as you go. Before we pick up a saw, let’s get that foundation right.
Master the Dry Fit Rule to Avoid Costly Waste
Before you crack open a single bucket of adhesive or fire up the compressor, you need to verify the math of your materials. Think of herringbone like a complex puzzle where every piece is exactly the same size; if the pieces don’t respect a specific ratio, the puzzle won’t fit. Your planks must have a length that is an exact multiple of their width. For instance, a 12-inch plank should be exactly 3 or 4 inches wide. If it’s off by even a hair, you’ll experience ‘pattern creep’ where the joints slowly open up as you move across the room. This is why following the dry-fit rule that prevents costly cutting mistakes is non-negotiable. I remember a project in a guest bedroom where I assumed the 24-inch boards were a clean 4-inch width. It turned out they were 3 and 7/8 inches. By the fifth row, I had a gap large enough to lose a credit card in. Laying out a dry run on your subfloor allows you to see these discrepancies before they become permanent nightmares.
Find the Center and Stop the Drift
You cannot treat a herringbone floor like a standard straight-lay where you start at the longest wall and move forward. You must treat the room like a runway. You start by snapping a primary chalk line directly down the center of the space. This is your ‘north star.’ Every ‘V’ shape in the pattern—the points of the herringbone—must align perfectly with this line. If you start from a wall, you are betting that your house is perfectly square, which it never is. This is a classic example of flooring installation mistakes to avoid for lasting results. Instead, you should always start your tile layout from the center to ensure the cuts at the perimeter are symmetrical on both sides. 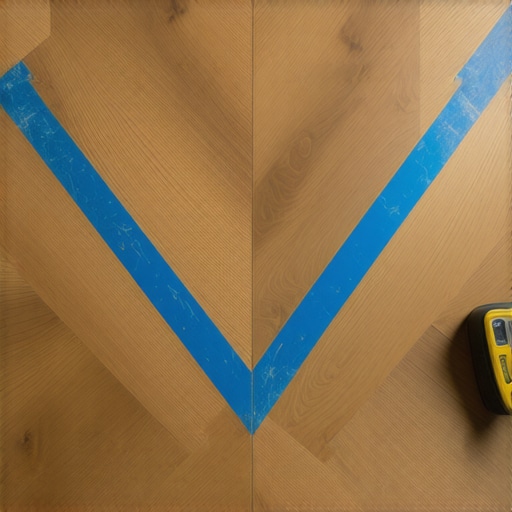
Why Your First Three Planks Determine Everything
The actual installation begins with a ‘starter triangle’ or a dedicated lead row. I once rushed this part on a kitchen remodel, thinking I could correct a 1-degree tilt later. I couldn’t. That 1-degree tilt turned into a 3-inch gap by the time I reached the cabinets. To avoid this, you need to create a 45-degree guide. Use a framing square to ensure your first plank is exactly 45 degrees to your center line. When you place the second plank against the end of the first, they should form a perfect 90-degree angle. This initial ‘V’ is the foundation for the entire room. If you are working with hardwood floors, use a few sacrificial boards screwed into the subfloor to act as a backstop. This prevents the pattern from shifting while the glue sets or while you nail the first few rows. This phase is the heart of a step-by-step guide to flooring installation and leveling success. If you nail this ‘starter’ sequence, the rest of the room becomes a repetitive, rhythmic process of dropping planks into place. Be hyper-aware of the tape measure error that ruins your herringbone pattern—always measure from the same side of the tongue or the same edge of the tile to maintain consistency.
Stop Obsessing Over Level and Start Looking for Flat
There’s a common myth in the DIY community that your subfloor needs to be perfectly level—as in, perfectly horizontal to the earth’s core. In my years of experience, I’ve found that ‘level’ is actually secondary. What matters most for a complex herringbone layout is that the surface is perfectly flat. You can have a floor that slopes an inch from one side of the house to the other, and your herringbone will look stunning, provided there are no humps or valleys. If you don’t learn how to check for high spots with a 10-foot straightedge, your planks will eventually ‘bridge’ over those dips. This creates a hollow sound and eventually causes the tongue-and-groove joints to snap. It’s a nuance that separates a pro job from an amateur one. Let’s dig deeper: if the subfloor isn’t flat to within 1/8 inch over a 10-foot radius, your sophisticated pattern will eventually fail. Have you ever fallen into this trap of chasing the level bubble instead of the straightedge? Let me know in the comments.
The Priming Trap That Ruins Self-Leveling Jobs
When people realize their floor isn’t flat, they often reach for a bag of self-leveler. But here is the ‘oops’ factor that most homeowners miss: they forget the primer. If you pour leveler directly onto a wooden subfloor or old concrete without the specific manufacturer’s primer, the porous substrate will suck the moisture out of the leveler too fast. This causes the mix to stop flowing, leading to a gritty, uneven mess. Even worse, you might find why your self-leveler is bubbling over plywood the hard way. Those tiny bubbles are air escaping the wood, and they will leave pinholes that ruin the bond. This is a critical step in mastering floor leveling pro secrets for perfect installations. Skipping a twenty-dollar bottle of primer is the fastest way to waste five hundred dollars in leveling compound. 
Can You Really Skip Back-Buttering on Sophisticated Patterns?
When working with hardwood floors or tile in a herringbone layout, the question of mortar or adhesive coverage always comes up. The Tile Council of North America (TCNA) Handbook is very clear on this: for large-format tiles and intricate patterns, you need at least 80% contact in dry areas and 95% in wet areas. I’ve seen so many people skip the step of back-buttering, only to find how to detect a hollow tile before the grout starts cracking later on. Because herringbone requires so much shifting and micro-adjusting to get the points to line up, you often ‘starve’ the joint of adhesive during the wiggle process. This is where why your large format tiles need back buttering every time becomes a law rather than a suggestion. Without that extra layer of ‘butter,’ you’re essentially creating air pockets that will lead to lippage—that annoying vertical displacement where one tile sits higher than the neighbor. Understanding the trowel notch secret for getting full thinset coverage is your best defense against a floor that looks wavy under recessed lighting.
Get This One Tool Before You Open a Single Plank
After years of trial and error, I’ve realized that the most expensive mistake isn’t a bad cut—it’s a moisture problem you didn’t see coming. I never start a project without my pinless moisture meter. If you don’t know how to use a moisture meter before installing wood floors, you are essentially gambling with your investment. I personally use a Wagner Orion because it doesn’t leave holes in my expensive white oak. The National Wood Flooring Association (NWFA) guidelines in Section 3 explicitly state that for planks wider than 3 inches, the moisture content difference between the subfloor and the flooring should be no more than 2%. If you ignore this, you’ll be searching for how to keep your hardwood floors from gapping in the winter before your first year is even up.
Why Your Cleaning Routine Is Secretly Killing Your Finish
I see it on social media all the time: people using steam mops on their beautiful new floors. Please, stop. Heat and moisture forced into the seams is a recipe for disaster. I’ve had to help neighbors fix the damp mop mistake that swells your laminate seams more times than I can count. For hardwood floors, stick to a pH-neutral cleaner and a barely-damp microfiber pad. You should never use a steam mop on click-lock floors because the steam penetrates the core and causes irreversible peaking. If you want that showroom glow, look into hardwood floor care secrets to longevity and shine that rely on protective coats rather than harsh chemicals. 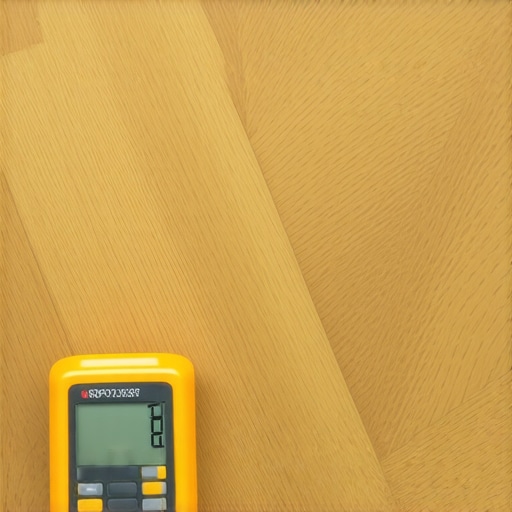
How can I maintain my herringbone pattern’s crisp look for decades?
The secret isn’t just cleaning; it’s environmental control. Wood is a living material that breathes. I recommend installing a whole-home humidifier to keep your indoor humidity between 30% and 50%. This prevents the ‘V’ shapes in your herringbone from pulling apart or crowning. If your floor does start to look tired, you can often perform a ‘screen and recoat’ rather than a full sand-down. This is a vital part of mastering hardwood floor refinishing expert tips for 2025. Also, pay attention to high-traffic areas; using a transition strip properly can save the edges of your pattern. I’ve seen why your thresholds are always the first thing to break, and it’s usually because of poor subfloor support under the transition.
The Future of Precision Layout Tools
I predict that within the next five years, we’ll move away from chalk lines and toward augmented reality (AR) layout apps. We are already seeing laser projection systems that can map a herringbone grid onto your floor with sub-millimeter accuracy. Until then, you need to master the secret to mixing leveler for a glass smooth finish to ensure those high-tech tools have a perfect canvas to work on. If you’re ready to take your skills to the next level, I challenge you to try the ‘dry-run and scribe’ method on your next set of baseboards to match your new floor’s height perfectly. Mastering the secret to a perfect 45-degree miter cut on baseboards will make that herringbone pop like a professional architectural digest feature.
The Hardest Lesson I Learned About Complex Layouts
After years of wrestling with hardwood floors, the biggest lightbulb moment wasn’t about the wood itself, but about the patience required for the initial setup. I used to think I could ‘fix it in the mix,’ but with a herringbone pattern, a 1/16th-inch error at the start becomes a massive gap by the time you reach the far wall. You have to treat the first three ‘Vs’ as the entire project’s foundation. One major takeaway was realizing that ‘square’ is a myth in most homes; you must rely on your center line rather than the walls to avoid a lopsided look. Also, the ‘glue creep’ is real—always clean your joints as you go, because removing dry thinset from an intricate pattern is a frustrating ordeal. Finally, always check your layout under the actual room lights, as porcelain tile can look wavy under recessed lighting if the subfloor has even microscopic humps. Consistency is your best friend in flooring installation.
Gear That Saves My Back and My Budget
I don’t believe in buying every gadget on the shelf, but a few specific items are non-negotiable for a professional result. First, a pinless moisture meter is vital to ensure your wood won’t warp or gap after the first season. Second, a 10-foot straightedge is far more important than a level for critical floor leveling tasks. I also swear by a high-quality laser line for maintaining that ‘north star’ alignment across long distances. For those mixing their own compounds, knowing the secret to mixing the perfect bucket of self-leveler will save you from lumpy, uneven surfaces that ruin a layout. To finish off the look, mastering the secret to a perfect 45-degree miter cut on baseboards ensures your trim work matches the quality of your new floor. These tools aren’t just about speed; they are about the peace of mind that comes from knowing the job is done right.
Build a Floor That Tells a Story
Stepping back to look at a finished tile or wood herringbone floor is one of the most rewarding feelings in home renovation. It is more than just a surface; it is a testament to your attention to detail and your persistence through the ‘math-heavy’ phases of the job. Don’t let the technical requirements of flooring installation intimidate you—once you find your rhythm, the process becomes almost meditative. By focusing on proper floor leveling and precision from the first plank, you are creating a high-end architectural detail that will increase your home’s value for decades. Remember that every professional started exactly where you are now, probably sweating over a crooked chalk line. Take your time, trust your measurements, and enjoy the transformation of your space. Have you ever struggled with a pattern that seemed to have a mind of its own during the dry-fit? Let me know in the comments below!