
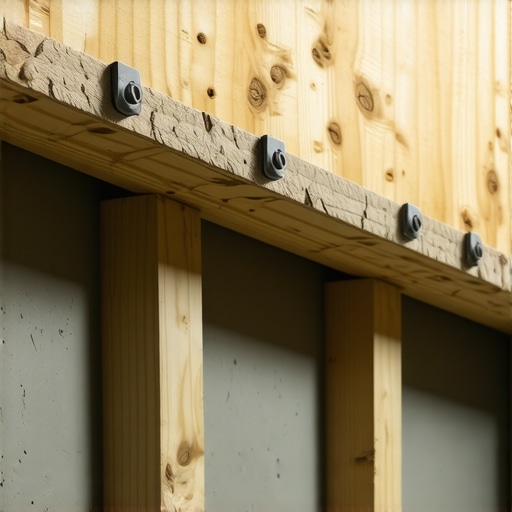
I remember the exact moment I realized my subfloor was basically a trampoline. I was standing in my freshly painted living room with a glass of water on the coffee table. Every time my 60-pound dog trotted across the room, the water rippled like that iconic scene from Jurassic Park, and the china in the hutch rattled like an oncoming freight train. It was demoralizing. I had spent weeks on the aesthetics, but the structural “give” made the whole house feel cheap and unstable. You might even find that your LVP floor feels like its bouncing when you walk, and let me tell you, that sensation never gets easier to ignore. I tried the standard “sistering” method with heavy 2x10s on my first project years ago, but I made the rookie mistake of not using enough structural adhesive—leading to some nasty, rhythmic squeaks later on. That’s when I discovered the plywood sandwich.
Stop the Trampoline Effect Without Tearing Out the Ceiling
Most homeowners assume that if a floor is bouncy, they need to hire a crew to install massive steel I-beams or double up on every single joist with heavy, expensive lumber that is a nightmare to maneuver into a crawlspace. But there is a smarter, lighter, and frankly more effective way to add incredible rigidity: the plywood sandwich trick. By laminating pieces of 3/4-inch CDX plywood to both sides of your existing joists, you create a composite beam that is significantly stiffer than the original wood alone. This matters because a stable base is the foundation for everything else you do to a home. If you are planning on precise floor leveling for a new finish, or if you want to avoid flooring installation mistakes that lead to permanent damage, you have to kill the deflection first. According to research by the Forest Products Laboratory (part of the USDA), the shear strength provided by high-quality wood adhesives combined with mechanical fasteners allows these disparate materials to act as a single, much stronger unit. I’ve used this trick in three different houses now, and the difference is night and day. It’s about more than just peace and quiet; it’s about protecting your investment. If you don’t stiffen those joists, you might eventually be looking for flooring installation and leveling success and find it impossible because the bones of the house are still moving. Have you ever felt that unsettling “sink” when you walk toward your kitchen island or a heavy bookshelf?
Does This Plywood Method Actually Work Long-Term?
I get the skepticism from my fellow DIYers. It’s hard to believe that a few strips of plywood can do what a thick 2×12 can’t. But the secret lies in the cross-laminated grain of the plywood itself. Plywood is made of alternating layers of wood grain, which naturally resists bending and “creep” in multiple directions. When you “sandwich” this against a joist using a heavy bead of construction adhesive, you are essentially creating a custom, site-built flitch plate. It’s a game-changer for older homes with undersized or aging lumber. If you don’t address this movement now, you’ll be checking how to detect a hollow tile or wondering why your grout is crumbling out of the joints in six months. I once ignored a slight bounce in a bathroom remodel, and by the next winter, three of my beautiful floor tiles had hairline fractures. Don’t be like past-me; be the neighbor who fixes it right the first time.
Clean the Joists Before the Glue Hits the Wood
The biggest enemy of a successful plywood sandwich is simple basement dust. If you try to apply high-end structural adhesive to a joist that hasn’t seen a broom since the Eisenhower administration, the glue will bond to the dust, not the wood. I learned this the hard way in a 1920s bungalow remodel. I was so excited to start that I just started slapping glue on the old pine. By the time I got to the third joist, the first strip of plywood literally slid off and hit me in the shoulder, leaving a massive, sticky trail of construction adhesive on my favorite work shirt. Now, I always use a stiff nylon brush or a shop vac with a brush attachment to clear the surface. While you’re down there, it’s the perfect time to check for odors; you might need to figure out how to get the smell of old pet urine out of floor joists before you seal them up behind new layers of wood.
Measure and Rip Your Plywood Strips for a Custom Fit
You want 3/4-inch CDX plywood for this job because it offers the best balance of strength and cost. Don’t use OSB; it doesn’t have the same lateral stiffness when applied vertically. Measure the vertical height of your joist—let’s say it is a standard 2×10, which is actually 9 1/4 inches—and rip your plywood strips to be about 1/4 inch shorter than that height. This gap is vital because it prevents the plywood from rubbing against the underside of the subfloor, which can lead to new, annoying squeaks. Precision here is what separates a professional job from common flooring installation mistakes. If you leave too much of a gap, you lose the structural benefit; too little, and you are creating friction points that will haunt your peaceful mornings later.
Apply the Adhesive in a Thick Serpentine Pattern
The glue is what actually transfers the load between the old joist and the new plywood. Use a high-quality subfloor adhesive and apply a thick, 3/8-inch bead in a zig-zag or serpentine pattern along the entire length of the joist. I once tried to save five bucks by using a cheap multipurpose glue on a project, and the floor started clicking every time someone walked over it because the bond failed under the weight of the furniture. If you don’t get a solid bond, you will eventually be asking why your porcelain tile is cracking in a straight line as the joist continues to deflect independently of your reinforcement. 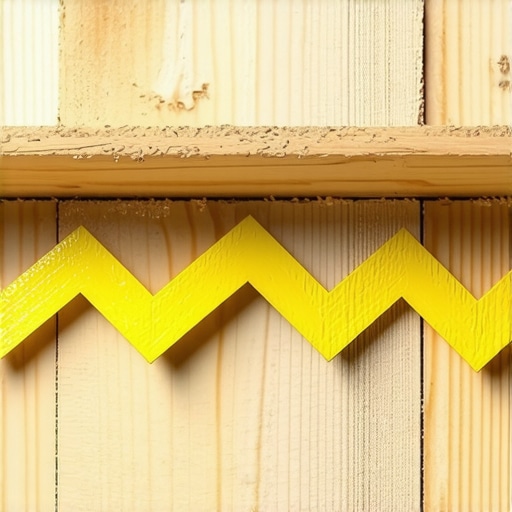
Drive Home the Fasteners to Create a Composite Beam
Once the plywood is pressed into the glue, you need mechanical fasteners to act as a permanent clamp while the adhesive cures. I prefer 2-inch structural screws or 10d common nails driven every 8 to 10 inches in a staggered pattern—one high, one low. This forces the adhesive into the pores of both pieces of wood. This technique is more robust than simply knowing how to stop your subfloor from squeaking with one screw because you are effectively turning a weak, aging 2×8 into a thick, laminated composite beam. This rigidity is the secret to the ultimate guide to floor leveling for a perfect finish. If your bones are stiff, your precise floor leveling compounds won’t hairline crack under pressure. I have seen many homeowners wonder why your self-leveler didn’t bond to the wood subfloor, and the culprit is often micro-movements in the joists that broke the bond during the critical drying phase.
Stop Relying on Thick Subfloors to Fix Bouncy Joists
Everyone says the solution to a flimsy floor is to just keep adding layers of plywood on top until the floor is two inches thick. In my experience, that’s a heavy, expensive mistake. While a thicker subfloor helps with “point loads”—like the leg of a heavy piano not punching through the surface—it does very little to stop the long-span deflection of the joists themselves. You end up with a very heavy floor that still bounces, which is one of the most frustrating floor leveling challenges you can face. Instead of stacking weight, you need to address the structural depth and lateral stability. If you ignore the joists and just pour self-leveler, you are essentially putting a rigid cracker on top of a wet noodle.
Is Your Floor Stiff Enough for Large Format Tile?
This is where the math gets serious and separates the pros from the hobbyists. According to the Tile Council of North America (TCNA) Handbook, standard ceramic tile requires a deflection limit of L/360, but if you are dreaming of marble or heavy natural stone, that requirement jumps to L/720. That means your floor needs to be twice as stiff as the bare minimum building code. If you don’t hit those numbers, even the secret to getting a flat floor for large format tiles won’t save you from grout failure. I’ve seen beautiful 24×48 porcelain slabs snap like glass because the homeowner assumed ‘flat’ meant ‘strong.’ It doesn’t. You can have a perfectly level floor that is structurally inadequate for the weight of the material.
The Invisible Trap of Lateral Joist Roll
The ‘Oops’ factor most DIYers miss is failing to distinguish between static weight and dynamic loads. You can pile bags of sand on a floor to test for level, but that doesn’t tell you how the floor reacts to a person walking across it. This is where cross-bridging becomes your best friend. Those small X-shaped pieces of wood or metal between your joists aren’t just there for decoration; they distribute the weight of a single footstep across three or four joists simultaneously. Without them, the joists can ‘roll’ slightly under your weight. This micro-movement is the primary reason why tile installation pointers often fail—people focus on the surface rather than the lateral stability of the bones underneath.
Don’t Skimp on the Bond Between Layers
If you are reinforcing your floor to prep for a high-end finish, the chemistry of your materials matters as much as the carpentry. I once saw a project where the installer used a cheap, brittle adhesive for their reinforcement layers. Within a year, the floor started making an audible ‘popping’ sound every time the weather changed. This usually leads people to investigate the hidden cost of using cheap thinset on large format tiles, but the real issue was the sub-structural bond failing. For the best results, ensure you are getting full thinset coverage if you’re adding an uncoupling membrane on top of your newly stiffened joists. Have you ever fallen into this trap where you fixed the dip but the bounce stayed? Let me know in the comments!
You cannot simply eyeball a 1/8-inch dip across ten feet and expect a professional result. I tried that once with a cheap string line in my first kitchen and ended up with a center island that looked like it was sinking into the ocean. Now, I never start a reinforcement project without my Bosch GLL3-330CG laser level. It throws a 360-degree green beam that makes how to achieve flawless floor leveling before tile laying a reality rather than a guessing game. But even before the laser comes out, I reach for my Delmhorst moisture meter. If your joists are holding too much moisture, that expensive structural adhesive you just applied will never reach its full shear strength. Knowing how to use a moisture meter before you lay wood floors is the single most important step in preventing future structural failures.
Trust the Laser Instead of Your Tired Eyes
When you are sistering joists or adding a plywood sandwich, you are essentially rebuilding the plane of the room. I use the laser to find the highest point in the room first, then I shim or plane the new reinforcement pieces to match that exact elevation. This prevents the most common flooring installation mistakes to avoid for lasting results, specifically those annoying humps that appear when you just follow the existing, sagging joist line. If you are prepping for a high-end finish, this stage is your only chance to get it right. 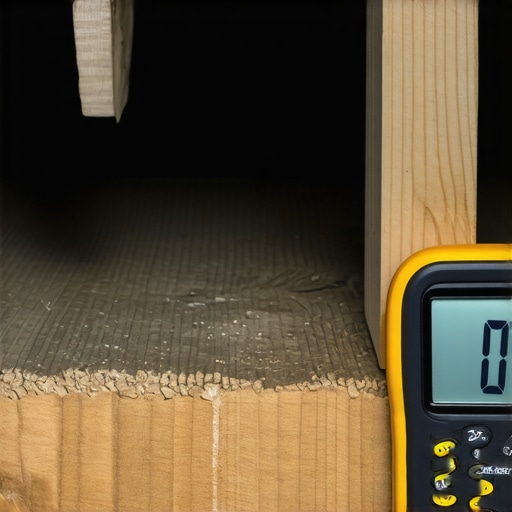
Why Humidity is the Silent Killer of Hardwood
Even the stiffest floor in the world will fail if the environment isn’t controlled. According to the National Wood Flooring Association (NWFA) Technical Manual Section C100, the moisture content of the subfloor and the finish material should typically be within 2% to 4% of each other before installation. If you’ve gone through the trouble of stiffening your joists but your crawlspace is a swamp, the wood will eventually cup or crown. This is why I always recommend hardwood floor care secrets to longevity and shine that start with a high-quality dehumidifier. Without environmental control, your step-by-step guide to flooring installation and leveling success ends in a warped mess by next summer.
How Do I Keep This Structure Stable for Decades?
Long-term stability is about managing movement. Once the plywood sandwich is cured and the floor is level, I always check for any lingering ‘clicking’ sounds at the thresholds. If you hear a noise, check why your threshold is making a clicking sound before you put down your final layer. Usually, it’s a tiny gap between the subfloor and the new reinforcement that needs a single structural screw to close. To maintain this over time, keep your home’s relative humidity between 30% and 50%. This keeps the wood from expanding and contracting enough to break the glue bonds you worked so hard to create.
The High-Tech Future of Leveling Your Living Room
Looking ahead, I suspect we are going to see a massive shift toward augmented reality (AR) apps that can map floor deflection in real-time using your smartphone’s LIDAR sensor. Imagine walking across your room and seeing a heat map of the ‘bouncy’ spots on your screen. Until that tech is perfected, we rely on the fundamentals of flooring installation fundamentals and leveling for a seamless look. My big tip for you? Buy a 10-foot straightedge and use it relentlessly. If you can’t slide a nickel under it anywhere in the room, you are ready for any floor on the market. Grab a moisture meter today and check your joists; you might be surprised by what’s happening under your feet.
What Most Pros Forget to Mention About Structural Flex
After years of wrestling with old-growth lumber and flimsy modern pine, I’ve realized that the ‘plywood sandwich’ isn’t just about strength; it’s about energy transfer. One major lightbulb moment was discovering that structural screws are only as good as the wood they bite into. If your old joists are bone-dry and brittle, pre-drilling is your best friend to avoid splitting the timber. Also, never underestimate the power of that small expansion gap at the top of your plywood strips. If you skip it, you’re just trading a ‘bounce’ for a ‘squeak’ that will drive you crazy in the middle of the night. Lastly, remember that any reinforcement is only as good as the adhesive bond, so never let a layer of basement dust ruin your hard work.
The Gear That Actually Saved My Back and My Grout
To get a floor that feels like a sidewalk, you need more than just a hammer. I swear by my Delmhorst moisture meter; it’s the only way to know if your wood is truly ready to bond or if it’s too damp to hold glue properly. For the actual leveling process, a 10-foot straightedge is a non-negotiable requirement for avoiding common installation mistakes. I also highly recommend picking up a high-volume caulking gun for that thick serpentine bead of subfloor adhesive—your forearms will thank me later. If you’re tackling a larger project, studying the ultimate guide to floor leveling for a perfect finish will help you bridge the gap between structural repair and the final aesthetic layer. #IMAGE_PLACEHOLDER_E#
Your Future Self Will Thank You for the Extra Effort
There is a specific kind of pride that comes with walking across a floor you reinforced yourself. When you don’t feel that ripple in your coffee or hear the china rattle, you’ll know every screw and every ounce of glue was worth the sweat. Proper flooring installation isn’t just about what looks good on the surface; it’s about the invisible bones that support your life for decades. Take the time to get the moisture levels right and follow hardwood floor care secrets to longevity and shine to keep that stability forever. You have the tools and the plan—now it’s time to stop the bounce for good.
Have you ever discovered a ‘trampoline’ floor in your own home that felt impossible to fix? Let me know in the comments below!