
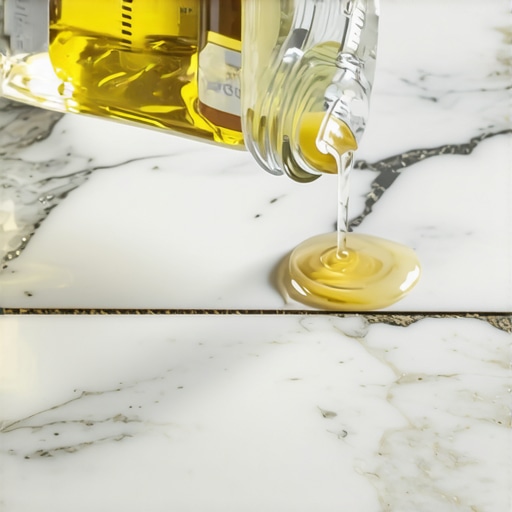
I remember the day clearly: I had just finished a massive flooring installation project in my master bath, and those travertine tiles looked like a million bucks. I wanted to keep them that way without using nasty chemicals, so I grabbed the big jug of white vinegar from under the sink. It’s natural, right? It’s what my grandma used. I mopped, felt like a green-living hero, and went to bed. The next morning, when the sun hit the floor at an angle, my heart sank. The beautiful hone was gone, replaced by dull, cloudy splotches that looked like water stains but wouldn’t wipe away. I hadn’t cleaned my floor; I had literally eaten it. [image]
Stop Pouring Acid on Your Expensive Investment
That ‘clean’ smell is actually the sound of a chemical reaction. Most natural stones—like marble, limestone, and travertine—are made of calcium carbonate. Vinegar is acetic acid. When they meet, the acid dissolves the stone on contact, a process pros call ‘etching.’ It’s the same reason why your marble floor is losing its shine in high traffic spots if you aren’t careful with your cleaner choice. I learned this the hard way after ruining three hundred square feet of stone. It’s a gut-wrenching mistake because, unlike a scuff mark, you can’t just scrub etching away. It’s a permanent change to the surface of the stone.
Does a little bit of vinegar really do that much damage?
You might be thinking I’m being dramatic. After all, it’s just a mild acid. But according to the Natural Stone Institute, even a ‘natural’ cleaner with a low pH can cause immediate and irreversible surface damage to calcitic stones. This isn’t just about aesthetics; it’s about the structural integrity of the finish you worked so hard to achieve. When I first started out, I thought tile selection tips were only about colors and patterns, but the chemistry of maintenance is just as vital. Have you ever noticed dull spots on your stone after a deep clean? Let me know in the comments because I bet you’re not alone. We spend so much time mastering floor leveling and getting the layout perfect, only to melt the finish off in five minutes of ‘cleaning.’ Today, I want to show you how to avoid my $2,000 mistake and what you should actually be using instead.If you want to keep that showroom shine, you have to stop thinking of cleaning as a ‘scrubbing’ job and start thinking of it as a ‘preservation’ job. Imagine your floor’s finish is like the clear coat on a high-end sports car. You wouldn’t hit a Ferrari with a steel wool pad and lemon juice, right? Your travertine or white oak deserves that same level of respect. To get back on track, you need to transition from acidic ‘home remedies’ to a system that actually protects the material.
Get the Chemistry Right with pH-Neutral Cleaners
Most people fail because they think ‘clean’ means ‘sterile.’ For floors, ‘clean’ simply means removing abrasive grit without altering the surface. You need to look specifically for ‘pH-neutral’ solutions. Unlike vinegar, these won’t react with the calcium in your stone or the finish on your wood. I once tried to ‘refresh’ a client’s matte porcelain and mistakenly used a generic floor soap that was way too alkaline. I spent three hours wondering why your new tile grout is turning white and chalky until I realized the cleaner was reacting with the minerals in the grout. Switching to a dedicated stone soap saved my skin—and the client’s kitchen.
Why Your Hardwood Needs a Buffer Not a Scrubber
When it comes to wood, moisture is the enemy, but the wrong chemicals are the assassin. You should stop using vinegar on your hardwood floors immediately because it slowly eats away at the polyurethane. Over time, this is why your hardwood floor turned cloudy after cleaning. Instead, use a microfiber pad that’s just barely damp. Think of it like wiping a pair of glasses; you want to lift the oil and dust, not drown the lens.
Master the Two-Step Lift and Dry Method
If you leave water—even neutral cleaner—sitting on your floor to air dry, you’re inviting streaks and mineral deposits. I learned this when I was working on a massive flooring installation in a sunroom. The light was so bright it showed every single water spot. I started using two microfiber mops: one damp with cleaner to ‘lift’ the dirt, and a second, bone-dry one to ‘buff’ immediately after. It sounds tedious, but it’s the difference between a floor that looks ‘okay’ and one that looks like a mirror.
Test Your Sealant Before the Real Mess Hits
You might think your stone is safe because it was sealed three years ago. Sealers aren’t a ‘one and done’ deal; they are sacrificial layers that wear down. I use the spray bottle hack for testing floor sealer coverage. Just spray a small amount of water on a high-traffic area. If it beads up like a fresh wax job on a car, you’re golden. If it soaks in and darkens the stone within a minute, your floor is ‘naked’ and vulnerable to the next spill. Following proper hardwood floor care secrets to longevity and shine means knowing when to stop cleaning and start re-protecting.Let’s dig deeper into why we often fail before the first tile is even laid. You’ve probably seen the videos: a contractor pours a bucket of grey liquid, it spreads out perfectly, and—voila!—a flat floor. I used to believe that too. But here’s the contrarian truth: self-leveler doesn’t actually level itself. It’s a ‘highly flowable’ material, but without the right prep, you’ll end up seeing why your self-leveling pour looks like a topographical map. Most people treat the subfloor like a suggestion rather than a foundation. If you don’t address the mechanical bond, you’re just pouring money down the drain. According to the Tile Council of North America (TCNA) Handbook, subfloor preparation and proper moisture testing are the non-negotiables of any successful project. One of the biggest ‘traps’ is the mixing speed. I once used a high-speed mud mixer because I was in a rush, only to realize the mixing paddle speed that ruins your leveling compound by whipping air into the mix. Those tiny bubbles later turn into pinholes that compromise the surface. 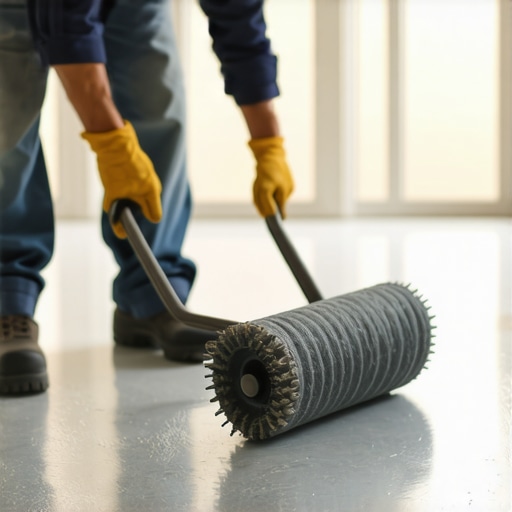
Don’t Skip the Grinder for a Painted Floor
A common myth is that a high-end primer can stick to any surface. It can’t. I’ve seen countless projects where the leveler just peels off like a giant scab because the installer didn’t realize why most floor levelers fail on top of painted concrete. You have to get back to the raw, open pores of the slab. This is where the concrete etching step you shouldnt skip before leveling becomes your best friend. It’s messy and it’s loud, but it’s the only way to ensure your flooring installation fundamentals are actually met. It’s about more than just the surface appearance; it’s about the chemistry of the bond.
What happens if I just use more thinset instead of leveling?
This is the ‘advanced’ mistake I see most often with large format tiles. People think they can just ‘butter it up’ and use a thicker bed of mortar to compensate for a half-inch dip. Here’s the nuance: thinset is designed to be a bond, not a filler. As it cures, it shrinks. If the bed is too thick, that shrinkage pulls on the tile, leading to lippage. Using the secret to installing large format tile without lippage requires a floor that is flat within 1/8 inch over 10 feet—no amount of extra ‘goop’ will fix a wavy subfloor. If you’re doing a heavy demo first, remember the 10 yard dumpster weight limit secret for heavy tile demo in reeds spring so you don’t get stuck with a bin the city won’t haul away. Have you ever had a pour go wrong or a ‘flat’ floor turn out wonky? Let me know in the comments, because these ‘oops’ moments are usually where the real learning happens.To get that professional edge, you need to stop fighting the material and start using the right physics. For instance, if you are still using a regular rake for leveler, you are missing the spiky roller secret for a mirror smooth pour. It breaks the surface tension and releases those trapped air bubbles that cause the topographical maps I mentioned earlier. I personally use a 1.5-inch spiky roller with a splash guard because it is the difference between a floor that needs sanding and one that is ready for tile immediately. Choosing the roller selection that prevents air bubbles in leveler is the kind of detail that separates a DIY job from a masterwork.
How do I maintain my floor’s finish over the next decade?
Long-term beauty is not about deep cleaning; it is about preventing the micro-scratches that kill light reflection. I recommend a dedicated three-tier system: a vacuum with a soft brush attachment, a pH-neutral cleaner, and felt pads on every single piece of furniture. If you follow hardwood floor care secrets to longevity and shine, you will realize that most wear and tear is actually just grit and friction. According to the National Wood Flooring Association (NWFA) Technical Manual, maintaining a consistent relative humidity between 30% and 50% is the single most important factor for wood floor stability. Without this, your expensive planks will cup or gap regardless of how well they were installed. That is why you should how to use a moisture meter before you lay wood floors to establish a baseline before the first board goes down. I predict that in the next few years, we will see smart subfloors with embedded sensors that alert your phone if moisture levels spike behind your baseboards. Until then, the best tool you have is your own due diligence. Pick up a digital moisture meter this weekend and test three different spots in your kitchen. It might just save you from a future of buckling planks and help you master the flooring installation fundamentals that professionals swear by.
The Hardest Lesson I Learned About Flooring Installation
Looking back at my first few projects, the biggest ‘lightbulb moment’ wasn’t about the tools, but about the transition from contractor to caretaker. I realized that mastering floor leveling pro secrets for perfect installations isn’t just about the first pour; it’s about the chemistry of the bond. I used to think I could rush the drying time, but patience is actually a technical requirement. Also, never assume your subfloor is ‘good enough.’ Even a small dip can lead to the secret to getting a flat floor for large format tiles being completely ignored, resulting in expensive lippage. Finally, the most expensive tile in the world will look cheap if you don’t understand the reason your grout color looks splotchy and uneven—it’s usually down to using too much water during cleanup.
The Resources That Saved My Renovations
If you are diving into a project, I cannot recommend the TCNA (Tile Council of North America) Handbook enough; it is the industry bible for a reason. For tools, don’t skimp on a high-quality moisture meter. I trust it because it removes the guesswork from hardwood floor care secrets to longevity and shine. Additionally, finding a reliable way to manage heights is crucial, especially when figuring out how to fix a transition between tile and uneven concrete. These are the tools that transform a stressful weekend into a successful build.
Your Journey to a Perfect Finish Starts Here
Every professional was once a beginner who ruined a floor with vinegar or misjudged a leveler pour. The difference is simply in the willingness to learn from those mistakes and refine your flooring installation process. You have the knowledge now to avoid the $2,000 mistakes I made. Whether you are laying your first plank or your fiftieth, remember that excellence is found in the prep work and the preservation. Have you ever accidentally etched a stone surface or faced a leveling nightmare? Let me know your stories in the comments below!