
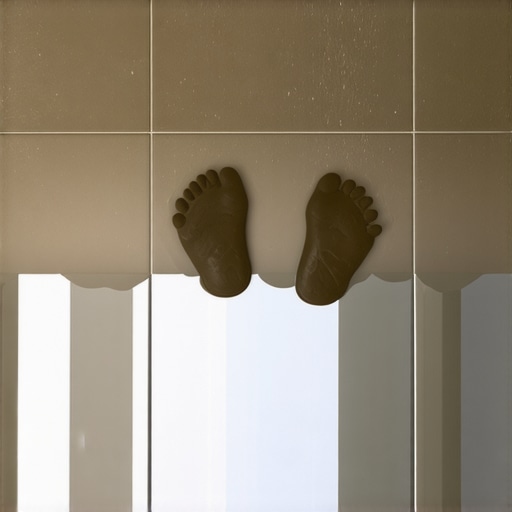
It was a typical Tuesday, and the Michigan sleet was doing its best to turn my driveway into a skating rink. I managed to shuffle inside with three bags of groceries, feeling victorious until my boot hit the mudroom floor. In a split second, my feet were at eye level, the eggs were decorating the ceiling, and my tailbone was making a very painful acquaintance with my beautiful, polished porcelain. I lay there, staring at the high-gloss reflection of my own regret, realizing that my quest for a “magazine-ready” home had turned my entryway into a death trap. If you’ve ever found yourself doing an accidental split while just trying to take off your coat, you know exactly the frustration I’m talking about. Today, I’m going to help you avoid the same common flooring installation mistakes to avoid for lasting results so your home stays both beautiful and, more importantly, safe.
The Dangerous Allure of the Polished Entryway
When I first designed my mudroom, I was obsessed with that “wow” factor. I wanted guests to walk in and see a gleaming, reflective surface that screamed cleanliness. What I didn’t realize was that high-gloss tile has a Coefficient of Friction (COF) that drops to near zero the moment a single drop of water hits it. According to data from the National Safety Council, falls are a leading cause of unintentional injury-related deaths, and slippery indoor surfaces are a primary culprit in home accidents. My big mistake was prioritizing the “glam” over the “grip,” a lesson I learned the hard way after a very expensive trip to the chiropractor. I should have looked into why slip resistance ratings matter even for residential spaces, not just commercial ones. Beyond the safety risk, those glossy tiles showed every single salt stain and muddy paw print within minutes of cleaning. I eventually discovered why matte finish hides scratches better than high gloss and provides the traction a busy household actually needs.
Can’t I Just Use a Rug to Fix the Slip?
A lot of people think they can just throw a decorative runner over a slick floor and call it a day. I tried that too. The problem? The rug just slides across the gloss like a puck on an air-hockey table unless you anchor it with heavy-duty padding. Plus, in a mudroom, rugs get soaked and hold moisture against the tile, which can lead to mold or grout failure over time. If you are planning a renovation, you need to think about how to get a seamless look with different flooring types without sacrificing the physical safety of your family. Have you ever had a “close call” on a floor that looked great but felt like ice under your feet? I would love to know if you’ve faced this same struggle before we dive into the best alternatives.
Fix the Foundation Before You Touch a Tile
You wouldn’t build a house on a pile of marshmallows, and you certainly shouldn’t lay expensive hardwood or tile on a subfloor that looks like a topographical map of the Swiss Alps. Most people rush to the ‘fun part’—picking out patterns—but the real work happens in the prep. I once spent an entire Saturday helping my neighbor in Troy with his bathroom remodel, only to realize he had skipped the structural checks. We ended up with a literal mess because of the plywood mistake that causes grout cracks in Troy bathroom remodels. You have to ensure your subfloor is rigid and flat within 1/8th of an inch over a 10-foot span. If your floor feels bouncy, use the hammer test for finding loose floor joists before you even think about buying materials. Tap the floor with a rubber mallet and listen for the hollow thud; that’s where your screws need to go.
How to Flatten Your Floor Without the Stress
If you’re dealing with a concrete slab, your first job is to clean it until it’s surgical-grade. Dust is the enemy of adhesion. If you skip the vacuum, your leveling compound will simply sit on top of the debris like a blanket, rather than bonding to the floor. This is why you must prime concrete before every leveling job. Primer acts as the glue that keeps your expensive compound from cracking and peeling later on. Think of it like a paint primer; without it, the final product just won’t stick. Also, don’t ignore what’s inside the slab. I once saw a beautiful hardwood floor buckle because the installer didn’t know how to use a moisture meter to prevent floor failure. Wet concrete will ruin wood and compromise tile mortar every single time.
#IMAGE_PLACE_HOLDER_B#
The Spiky Roller Trick for Smooth Results
Once you pour your self-leveling compound, don’t just walk away and hope for the best. Air bubbles are the silent killers of a smooth finish. They create tiny craters that can telegraph through thin vinyl or cause hollow spots under tile. I learned the spiky roller secret for a mirror smooth pour the hard way after a kitchen job looked like the surface of the moon once it dried. This tool breaks the surface tension and releases those bubbles, giving you that ‘glassy’ look you’re after. For those working with wood structures, you might need to know how to level a plywood subfloor without adding weight to avoid stressing old joists.
Setting the Perfect Layout Every Time
Before you spread a single drop of thinset, you need a roadmap. I’ve seen pros and DIYers alike get halfway across a room only to realize their tile lines are running crooked against the far wall. It’s a nightmare to fix once the mortar sets. Instead of eyeing it, use the pencil mark secret for perfectly centered tile layouts. Snap chalk lines through the center of the room to create a crosshair. This ensures your cuts at the edges are even and your ‘main’ view is perfectly symmetrical. Following a step-by-step guide to flooring installation and leveling success means taking the time to dry-fit your tiles first. This lets you see the ‘end’ before you start, preventing those awkward slivers of tile at the doorframe that scream amateur hour.
Self-Leveling Compounds Are Not a Magic Wand
Most DIYers—and even some pros who should know better—treat self-leveling compound like it’s a magical liquid that obeys the laws of physics without any help. Here is the contrarian truth: it doesn’t ‘level’ itself; it ‘seeks’ level, and it’s surprisingly lazy about it. If you don’t follow the ultimate guide to floor leveling for a perfect finish, you are essentially gambling with your floor’s future. The ‘Oops’ factor here is usually found at the end of a drill. I’ve seen countless installs fail because someone used a high-speed mud mixer, creating a vortex that pulls air into the slurry. This results in the mixing paddle speed that ruins your leveling compound, leaving you with a brittle, aerated surface that will eventually crumble like a dry biscuit under the weight of your furniture. You need a slow, deliberate mix to ensure the polymers bond correctly without trapping bubbles that turn your floor into a structural honeycomb. This is the difference between a floor that lasts decades and one that cracks within months.
#IMAGE_PLACE_HOLDER_C#
Why Three Days of Acclimation is Usually a Lie
Everyone tells you to let your hardwood ‘sit’ for three days before installation. In my experience, following that rule blindly is the fastest way to a warped floor. The National Wood Flooring Association (NWFA) emphasizes that acclimation is a process of reaching ‘moisture equilibrium,’ not just waiting for a clock to tick. If you are working with denser materials, you will realize why bamboo floors need triple the acclimation time compared to standard red oak. If the wood’s moisture content doesn’t match your home’s long-term environment within a few percentage points, it will move. This is especially critical if you have modern heating systems; ignoring the expansion gap rule for radiant heated wood floors can lead to boards popping off the subfloor the first time the heat kicks on in November. Wood is a living material, and treating it like a static piece of plastic is a major mistake. You should also consider precise floor leveling techniques to achieve flawless surfaces if you are mixing wood and tile in the same open-concept space, as height differences are often overlooked until the transition strips don’t fit.
Is Your Subfloor Strong Enough for Modern Tiles?
When moving from hardwood to large-format tile, people often forget that tile is heavy and rigid, while wood is light and flexible. A subfloor that is ‘fine’ for carpet or vinyl might fail the L/360 deflection standard required for tile. This is a fancy way of saying your floor shouldn’t bend more than the length of the span divided by 360 when under a load. If your joists are too thin or spaced too far apart, you might see why your floor leveler is cracking over radiant heat pipes or across your grout lines. According to the Tile Council of North America (TCNA), over 80% of installation failures are due to substrate issues rather than the tile itself. It isn’t just about flatness; it’s about structural rigidity and ensuring the subfloor doesn’t act like a trampoline. You must learn how to achieve flawless floor leveling before tile laying to prevent ‘lippage’—that annoying edge where one tile sits higher than its neighbor. Have you ever fallen into this trap of assuming your floor was ‘ready’ just because it looked flat? Let me know in the comments.
When I’m standing in a long hallway, I don’t trust my eyes anymore. Even with a chalk line, there is too much room for human error over thirty or forty feet. This is why I never start a major layout without my 360-degree green beam laser level. If you want a professional result, you need to master the laser level move for perfectly straight hallways. It’s not just about vanity; it’s about ensuring that your hardwood or tile doesn’t slowly drift off-center, leaving you with a wedge-shaped gap that no baseboard can hide. I personally use the Bosch GLL3-330CG because the green beam is visible even in bright Michigan sunlight, and it connects to my phone via Bluetooth so I can adjust the lines without constantly walking back and forth. For anyone serious about a high-end look, this tool is the single best investment you can make to avoid the headaches found in the ultimate guide to floor leveling for a perfect finish.
#IMAGE_PLACE_HOLDER_D#
How do I keep my new floors looking fresh for a decade?
Maintenance is where most people accidentally destroy their investment within the first year. I’ve seen homeowners spend five figures on beautiful white oak only to ruin the finish because they thought a DIY solution was safer. You need to stop using vinegar on your hardwood floors immediately. The acid in vinegar slowly eats away at the polyurethane seal, eventually leaving the wood vulnerable to moisture. Instead, I stick to pH-neutral cleaners specifically formulated for the finish type. If you’ve gone the luxury vinyl route, why you should never use a steam mop on luxury vinyl is a lesson in thermodynamics; the heat can actually delaminate the layers and cause the planks to curl. For those who already have a few years on their floors, looking into hardwood floor care secrets to longevity and shine can help you decide when it’s time for a simple screen-and-recoat versus a full sand. If a disaster happens, like a burst pipe, you can even learn how to save a water damaged wood floor with a vacuum before the cupping becomes permanent.
The High-Tech Future Under Your Feet
As we look toward 2025 and beyond, the biggest shift I see is the integration of “smart” substrates. We are already seeing the emergence of embedded moisture sensors that can alert your phone if a subfloor starts to damp up before you ever see a stain. According to technical documentation from Wagner Meters, the industry is moving toward non-destructive, continuous monitoring systems for concrete slabs. This is a game-changer for anyone worried about mastering hardwood floor refinishing expert tips for 2025 because it removes the guesswork from moisture equilibrium. I predict that within five years, high-end installs will standardly include these sensors near plumbing stacks and exterior doors. If you are ready to take your project to the next level, I highly recommend trying the “spiky roller” technique I mentioned earlier—it’s the one pro-move that immediately separates a DIY ‘good enough’ job from a ‘magazine-ready’ floor. Go ahead and grab a moisture meter for your next project; it’s the one tool that will save you more money than any other.
The Costly Truths I Learned While Crawling on My Knees
After sweating through dozens of projects, I’ve realized that the biggest ‘aha’ moments don’t come from a manual; they come from the mistakes. First, ‘level’ and ‘flat’ are two very different things. A floor can be perfectly level but have a hump in the middle that will snap a tile in half. Second, your knees are your most valuable tool—invest in the most expensive knee pads you can find before you start mastering floor leveling pro secrets for perfect installations. Third, don’t rush the ‘open time’ of your adhesive; if the thinset skins over, you’re just laying expensive stones on dry dirt. Lastly, always buy 15% more material than you think you need. There is no stress quite like being two tiles short on a Sunday evening when the supply store is closed. Dealing with floor leveling challenges common mistakes and how to avoid them taught me that patience is actually a structural requirement.
#IMAGE_PLACE_HOLDER_E#
The Gear That Actually Saved My Back and My Budget
If you want to revamp your home with expert flooring installation tips, you need a toolkit that works as hard as you do. I never step onto a job site without my moisture meter; it’s the only way to know if a subfloor is lying to you about its dry state. I also swear by the Tile Council of North America (TCNA) handbook; it is the industry bible for every possible scenario you’ll encounter. For those of you looking to transform your living area with elegant tile designs, a high-quality manual tile cutter is often faster and cleaner than a wet saw for straight cuts. These tools aren’t just luxuries; they are the difference between a floor that squeaks and one that stays silent for a generation.
Go Ahead and Make Your First Mark
I know the sheer scale of a flooring installation project can feel overwhelming, especially when you’re staring at a bare subfloor. But remember, every professional was once standing exactly where you are, holding a chalk line and a dream. Take it one square foot at a time, trust your prep work, and don’t be afraid to pull up a plank if it doesn’t feel right. You are building the foundation for your family’s daily life, and that’s worth the extra hour of leveling. Have you ever faced a subfloor that felt like it was fighting back against your leveling efforts? Let me know your biggest struggle below!