

I’ll never forget that rainy Tuesday morning back in 2018. I had just finished a stunning retail entryway for a local boutique—pristine, high-gloss porcelain that looked like a million bucks under the LED lights. I was so proud. Then, the first customer walked in with wet boots. In a split second, that perfect floor turned into a skating rink. Seeing someone wobble like a newborn giraffe because of my poor material choice was the ultimate wake-up call. I had focused so much on the wow factor that I completely ignored the DCOF or Dynamic Coefficient of Friction. It was a rookie mistake that could have ended in a lawsuit, and it changed how I look at every single tile box I open.
Stop Thinking About Style and Start Measuring Grip
When you are running a shop, your entryway is the handshake of your business. But if that handshake is slippery, you are inviting disaster into your showroom. I have learned the hard way that a floor is not just about color or pattern; it is about rigorous safety protocols that protect both you and your patrons. Today, I want to walk you through exactly how to decode those cryptic slip resistance ratings so you never have to hold your breath every time it pours outside. We are going to cover why the right texture beats a glossy finish every single time, especially when you are dealing with high foot traffic and wet umbrellas. [image_placeholder]
Is that extra cost for safety actually a smart investment?
I get it. You see the price tag on a textured, slip-resistant tile and your wallet starts to ache. You might think a standard indoor tile is good enough if you just toss down a few rugs. Trust me, it is not. According to the National Floor Safety Institute (NFSI), slip and fall accidents account for over 8 million hospital emergency room visits annually. That is a staggering number that can sink a small business. In the retail world, a single incident can wipe out your profits for the entire year. Investing in the right material upfront is much cheaper than an insurance hike or a legal battle. When I first started out, I thought I could skip the technical specs as long as the subfloor was solid. I even failed to check for subfloor flex before you lay rigid tile, which just made the slippery surface even more prone to issues. I have seen many signs your tile contractor is cutting corners on prep work, but ignoring the slip rating is the biggest corner you can cut. Following tile installation pointers that save time and money is helpful, but never at the expense of a customer’s safety. Have you ever had that heart-in-your-throat moment watching a customer slide across your shop floor? It is a terrifying feeling, is it not? Let us make sure that never happens again. We need to look at the numbers before we look at the aesthetics.
Get Your Base Rock-Solid Before the First Tile Hits
Think of your subfloor as the chassis of a car. If the chassis is warped, it does not matter how shiny the paint is; the car will never drive straight. In tiling, a subfloor that is not perfectly flat creates ‘lippage’—those tiny vertical edges where one tile sits higher than another. In a retail shop, these are not just unsightly; they are trip hazards that catch on heels and canes. To prevent this, I always apply the 3-foot level test for checking subfloor flatness like a pro. If I see a gap larger than an eighth of an inch, I know I have work to do. You must learn how to achieve flawless floor leveling before tile laying to ensure the surface is a blank, flat canvas. I once ignored a slight dip in a grocery store vestibule, thinking the thinset would build it up. By the time the grout dried, we had a ‘toe-stubber’ right in the middle of the aisle. I had to rip out six tiles and start over. Now, I never skip the straight-edge check. 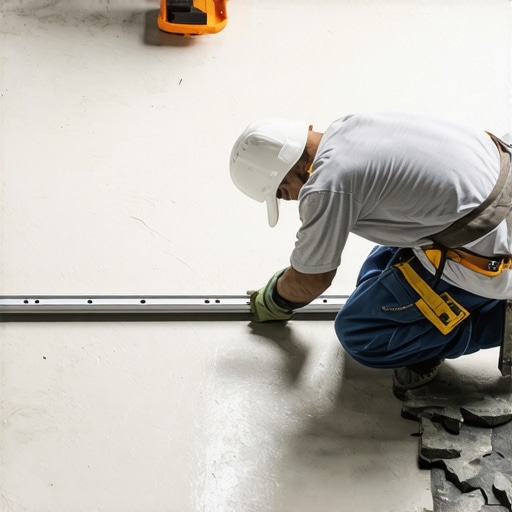
Avoid the Dreaded Lake Bed Crack in Your Leveler
When you are leveling, you might be tempted to just pour the compound and walk away. Don’t. If the concrete is too thirsty or the room is too hot, the leveler loses its moisture too fast. This is exactly why your self-leveling compound is cracking like a dry lake bed. I learned this the hard way during a summer renovation in a sun-drenched showroom. I didn’t prime the slab properly, and the leveler pulled away from the floor in giant, brittle sheets. Always refer to the ultimate guide to floor leveling for a perfect finish to ensure your bond is permanent.
Identify the Grip Rating That Actually Protects Your Business
Once the floor is flat, we have to talk about the friction. DCOF, or Dynamic Coefficient of Friction, is the industry standard used to measure how much grip a floor provides when wet. For a commercial entryway, you are looking for a DCOF value of 0.42 or higher. Think of it like the tread on a tire; the more texture there is, the better the ‘hydroplaning’ resistance. When you are browsing samples, don’t just feel them with your hand. Rub a wet finger across the surface. If it glides easily, it is too smooth for a wet umbrella zone.
Why DCOF 0.42 is Your New Safety Standard
This number is not just a suggestion from manufacturers; it is the benchmark for preventing lawsuits. However, the best tile in the world won’t save you if the installation is botched. Using the wrong tools leads to weak spots. For example, the trowel size error that leads to hollow sounding tiles can cause the tile to crack under the weight of heavy shopping carts or delivery dollies. In retail, every tile must have 95% to 100% thinset coverage to handle the constant vibration and weight of foot traffic. I once saw a beautiful porcelain floor in a coffee shop crumble within three months because the installer used a trowel meant for small wall tiles on large format floor slabs. The tiles were essentially ‘floating’ on air pockets, and they snapped like crackers the moment a heavy fridge was rolled over them.
Stop Calling It Self-Leveling (It’s Actually Self-Smoothing)
Let’s dig deeper into a nuance that even some seasoned pros ignore: the ‘magic’ of self-leveling compound. Most people treat this material like a magic potion—you pour it out and expect a glass-flat surface to appear while you grab a coffee. In my experience, that is the quickest way to end up with a floor that looks like a calm sea on a windy day. The industry calls it ‘self-leveling,’ but it is actually ‘self-smoothing.’ Without manual help, the surface tension of the liquid creates humps and valleys. I always use a spiked roller to release air and a gauge rake to ensure uniform thickness. According to the Tile Council of North America (TCNA) Handbook, the responsibility for substrate flatness lies solely with the installer, not the material manufacturer. If you don’t help the product move, you are just creating a different kind of uneven mess. 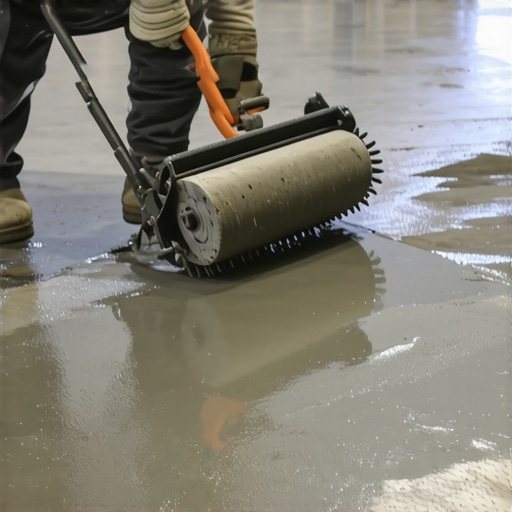
Don’t Let Your Concrete Drink Your Profits
The biggest ‘oops’ factor I see with beginners is skipping the primer or, worse, using the wrong one. Concrete is a sponge. If you don’t seal it first, the slab will literally suck the moisture out of your leveling compound in minutes. This causes the mix to dry too fast, leading to a finish that looks like a dried-up riverbed. I have seen many people wonder why your self-leveling compound is cracking like a dry lake bed, and nine times out of ten, it is because they did not respect the ‘thirst’ of the subfloor. You must learn the best way to mix self-leveler for a perfectly smooth surface, which includes a two-stage priming process for particularly porous slabs.
Why does your leveler peel off like an old sunburn?
It is an advanced nightmare: you think you have done everything right, but then you notice the entire layer of leveler is lifting away from the concrete. This usually happens because of a chemical incompatibility or a failure to remove ‘laitance’—that thin, weak layer of cement dust on top of a new slab. If you do not mechanically grind that away, your primer is just bonding to dust. I often explain why your self-leveler is peeling off the concrete in sheets to clients who tried to save a buck on prep work. Sometimes, the issue is even more subtle, like why your floor primer is making the leveler bubbling worse because it was not allowed to fully tack up.
The Deadly Sin of Over-Watering Your Mix
In a rush to make the compound flow better, many people add an extra quart of water. This is a fatal mistake. The water-to-powder ratio is a precise chemical equation. Too much water causes the sand to settle at the bottom and the polymers to float to the top. You end up with a chalky, weak surface that will crumble the moment you walk on it. Before you even start mixing, you should perform the simple test to see if your subfloor is strong enough for tile. If the foundation is not rigid, even the best leveler will crack. Have you ever fallen into this trap and had to scrape up bags of hardened leveler? Let me know in the comments below; I have been there, and I know how much it hurts both your back and your budget.
I have spent thousands of dollars on gadgets that promised to revolutionize my workflow, but only a handful of items actually stay in my truck year after year. If you are serious about this, you need to stop using a standard cordless drill to mix your leveler. I learned the hard way when I smoked a brand-new $200 drill on a job site because the thick slurry created too much torque. Now, I only use a dedicated high-torque mixing station. It ensures that every bag reaches that perfect, creamy consistency without introducing the excess air that leads to pinholes. Getting the mix right is the first step toward hardwood floor care secrets to longevity and shine that actually work.
The Few Tools I’d Risk My Reputation On
Beyond the mixer, a spiked roller is non-negotiable. It is the only way to truly pop the bubbles that rise as the leveler settles. If you skip this, you are leaving tiny craters that will eventually telegraph through your vinyl or weaken your tile bond. For wood installs, I never walk onto a site without a moisture meter. I’ve seen beautiful planks cup and buckle because the installer didn’t wait for the subfloor to dry. You should check out my list of 7 tools you actually need for a professional DIY hardwood install to see what else makes the cut. These aren’t just for show; they are the difference between a floor that lasts twenty years and one that fails in two. 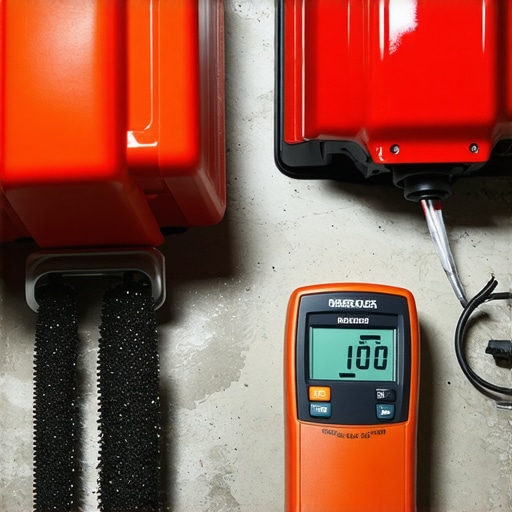
How do I keep these surfaces looking brand new for a decade?
Maintenance is where most people drop the ball. I’ve seen clients spend $15,000 on a custom engineered oak floor only to destroy it in six months with a steam mop. The National Wood Flooring Association (NWFA) explicitly warns in their technical maintenance guidelines that excessive heat and moisture from steam cleaners can cause finish peeling and structural damage to the wood fibers. You should why you should never use a steam mop on engineered wood floors if you want to avoid a total loss. Instead, stick to a pH-neutral cleaner and a microfiber pad. If you have just finished a project, knowing how to clean hardwood floors after a major renovation is crucial to removing that fine construction dust without scratching the new finish. I also highly recommend using the dustless sanding secret for home renovations if you ever decide to refinish, as it keeps your HVAC system and your lungs clear.
The Future of Flooring involves Lasers and Pixels
I predict that within the next five years, augmented reality (AR) will be the standard for every pro. We are already seeing apps that can map a room’s high and low spots with millimeter precision using a phone’s LiDAR sensor. This will take the guesswork out of how to achieve flawless floor leveling before tile laying and make the ‘3-foot level test’ look like a relic from the Stone Age. We are moving toward a world where you can see a heat map of your subfloor’s imperfections through a pair of glasses before you even open a single bag of compound.
If you want your floors to stand the test of time, I challenge you to try one advanced tip this week: grab a high-quality moisture meter and test three different spots on your subfloor. You might be surprised at the hidden dampness lurking beneath the surface. Knowing the facts before you lay the first plank is the ultimate pro move.
Hard Lessons Learned from Decades on My Knees
Over the years, I have realized that the most expensive mistake you can make isn’t buying the wrong tile; it’s rushing the preparation. You might feel like you are saving time by skipping the primer, but you are actually just scheduling a repair for next year. I’ve learned to treat every subfloor like a living thing that breathes and moves. Always respect the moisture levels in the room and never assume a slab is flat just because it looks okay to the naked eye.
Another ‘lightbulb moment’ was realizing that the DCOF rating is a legal shield as much as a safety feature. In a commercial setting, documented safety choices are your best defense against liability. Finally, always buy 10% more material than you think you need. Batch variations are real, and trying to find a matching tile from a different lot six months later is a nightmare you want to avoid.
Tools I Trust When My Reputation is on the Line
If you want to move from ‘weekend warrior’ to professional results, your toolkit needs an upgrade. First, I never start a job without a high-quality moisture meter. It is the only way to be sure you are not trapping rot under your beautiful new boards. For the best start, check out these 7 tools you actually need for a professional DIY hardwood install. I also swear by the spiked roller for self-leveling; it’s the difference between a pinhole-riddled mess and a glass-smooth finish.
For anyone tackling a full room, I highly recommend following a step-by-step guide to flooring installation and leveling success to keep your workflow organized. And please, invest in a dedicated mixing station for your compounds. Your cordless drill was not built to churn five gallons of heavy slurry, and the consistency of the mix is everything. [image_placeholder]
Turn These Pro Secrets Into Your Next Success
Building a floor is about more than just aesthetics; it is about creating a safe, durable foundation for your life or business. By following these protocols, you are avoiding the common flooring installation mistakes to avoid for lasting results. Take your time, measure twice, and don’t be afraid to redo a section if it doesn’t meet your standards. Your future self will thank you every time they walk across that perfectly level, slip-resistant surface. What was the most challenging part of your last flooring installation? Let me know in the comments below!