
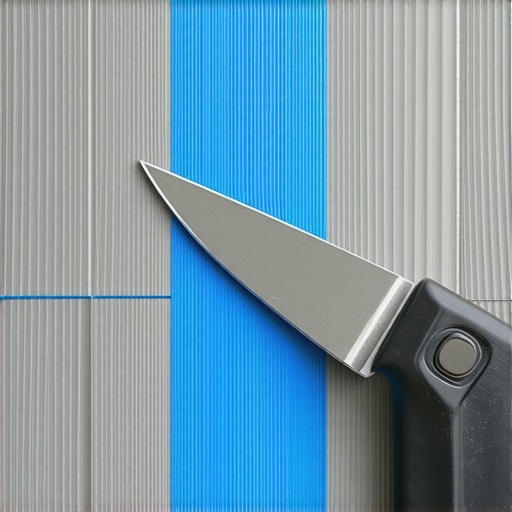
I’ll never forget the ‘grey snow’ incident of 2019. I was halfway through laying a beautiful new floor in my guest bedroom, feeling like a total pro, until I realized a fine, gritty powder had coated every single book on the shelf and even found its way into my morning coffee. I had been scoring and snapping most of the floor, but those intricate jigsaw cuts for the door jambs were turning my home into a disaster zone. It was a classic example of the many 7 mistakes that ruin your luxury vinyl plank installation experience. That’s when I realized that revamp your home with expert flooring installation tips aren’t just about the final look—they are about surviving the process without losing your mind to the cleanup. Today, I am sharing the exact method I use to keep my workspace, my lungs, and my coffee clear.
Keep Your House Liveable While You Work
When you are deep in the zone, it is easy to ignore the mess. But Luxury Vinyl Plank (LVP) dust is stubborn. It is heavier than wood dust and tends to stick to surfaces like static-charged glitter. I learned the hard way that once that dust gets into your HVAC system, you will be smelling ‘new floor’ for six months. This is especially true if you are also dealing with flooring installation fundamentals elsewhere in the house. The goal is a clean install, and that starts with controlling the debris at the source before it ever takes flight. I once tried to shortcut this by just ‘cutting fast,’ thinking it would limit the spread, but I only ended up with jagged edges and a cloud of grey smoke.
Is this extra step actually worth your time?
You might be thinking that adding a step to every cut will double your project time. I used to say the same thing. However, the time you spend applying a simple strip of painter’s tape is nothing compared to the hours of scrubbing baseboards or repainting walls because the dust scratched the finish. Plus, this isn’t just about the mess; it’s about the quality of the cut. According to the Occupational Safety and Health Administration (OSHA), maintaining a clean workspace is a primary factor in preventing job site accidents and minimizing respiratory irritation from synthetic particulates. Beyond safety, using the tape trick for preventing splinters ensures that your planks don’t have those nasty jagged edges that make a DIY job look amateur. Have you ever finished a row only to realize your cuts look like they were chewed by a lawnmower?
The Simple Science of Why Tape Works
It sounds like magic, but it is actually just basic physics. When a blade—whether it is a jigsaw, a multi-tool, or a circular saw—hits the surface of a vinyl plank, the vibration causes the decorative wear layer to micro-shatter. This is where that fine powder comes from. By applying a high-quality painter’s tape along your cut line, you are essentially ‘holding’ the surface together. It dampens the vibration and traps the majority of the micro-particulates before they can become airborne. If you want installing like a pro step-by-step strategies for your home, you have to embrace these small, proactive steps. I remember the moment a veteran contractor showed me this; I felt silly for all the years I spent wearing a respirator just to make a few notch cuts. In the next section, we will walk through the exact tape-and-cut workflow I use to keep things pristine.
Stick the Landing with High-Tack Painter’s Tape
To begin, the surface of your plank must be perfectly clean. Any factory residue or leftover debris from flooring installation fundamentals work elsewhere will prevent the tape from bonding, causing it to flap and tear mid-cut. Lay down a strip of 2-inch high-quality painter’s tape exactly where your cut line will be. Press it down with enough force to see the texture of the vinyl through the tape. This intimate bond is what prevents the wear layer from vibrating into a million tiny pieces. Redraw your measurement line on top of the tape using a fine-tip permanent marker. This method is a key component in avoiding the flooring installation mistakes to avoid for lasting results that most weekend warriors make when they rely on a simple pencil mark on the dark vinyl surface.
Why My First Kitchen Reno Smelled Like Burnt Plastic
I learned the value of this step during a frantic 2 a.m. kitchen remodel. I was tired, skipped the tape, and used a standard wood blade to notch around a complex cabinet corner. Not only did the friction melt the edges of the vinyl, creating a foul-smelling smoke, but the resulting edge was so jagged that I couldn’t get a tight fit against the baseboard. I ended up wasting three full planks before I slowed down and applied the tape. That single mistake delayed the project by an entire day because I had to find a way to hide the gaps. This is why the secret to seamless flooring transitions between kitchen and living rooms usually starts with the patience to prep each individual cut.
Match Your Blade Teeth to the Plank Material
The tool is just as important as the tape. If you are using a jigsaw, you must use a ‘down-cut’ or ‘reverse-pitch’ blade. Standard blades pull upward, which is exactly what causes the decorative layer of your LVP to chip and splinter. A reverse-pitch blade pushes the material downward, compressing it against the subfloor and keeping the top edge crisp. This is the hardware side of the tape trick for preventing splinters. When combined with the tape, the blade slices through the core without the aggressive upward tearing motion. It is the same precision you would expect when learning the trick to getting perfect tile cuts around narrow toilet flanges for a bathroom project.
Hook Up Your Shop Vac Directly to the Source
Even with the best tape and blade, the core material of LVP—often a stone-plastic composite—needs to go somewhere. Most modern jigsaws and circular saws come with a dust port. Do not ignore it. Connecting a shop-vac with a HEPA filter directly to your saw will capture roughly 90% of the heavier particles before they ever hit your floor. If your saw doesn’t have a port, have a partner hold the vacuum nozzle two inches behind the blade as you move. This is just as vital as knowing how to sand a floor without creating a dust storm in other renovation phases. By keeping the cut line clear of debris, you also see your mark better, which is essential when you need the right way to undercut baseboards for a clean flooring finish. A clean workspace isn’t just about the cleanup at the end; it’s about seeing the precision of your work in real-time.Most DIYers—and even some pros who should know better—spend hours chasing a perfectly level floor. They want that bubble in the center of the vial every single time. But here is the truth: your house is likely sinking, shifting, or leaning, and trying to make a 100-year-old floor perfectly level is a fool’s errand. What actually matters for LVP and hardwood is flatness. A floor can be tilted at a 2-degree angle across the room, and as long as it is flat, your tongue-and-groove joints will stay locked. If you focus on ‘level’ but ignore the ‘waves,’ you’re heading straight for flooring installation mistakes to avoid for lasting results. The National Wood Flooring Association (NWFA) specifies that for most installations, the subfloor should be flat to within 3/16-inch in a 10-foot radius. This isn’t about gravity; it’s about eliminating the ‘void’ under the plank that causes clicking and bouncing. Using the 3-foot level test for checking subfloor flatness like a pro is much more valuable than a laser level in the corner of the room.
Why is my expensive self-leveling compound cracking like a desert floor?
I’ve seen it dozens of times: a homeowner buys ten bags of high-end compound, pours it out, and three days later it looks like a dried-up lake bed. The mistake isn’t the product; it’s the prep. If you don’t seal the subfloor, the thirsty concrete or wood beneath will suck the moisture out of the compound before it has a chance to chemically cure. This is exactly why your self-leveling compound is cracking like a dry lake bed. You must understand that why you must prime concrete before every leveling job is about creating a moisture barrier, not just a sticky surface. Have you ever fallen into this trap where you spent more on leveler than the actual flooring? Let me know in the comments below.
The Primer Trap That Most Pros Won’t Tell You About
Another nuance people miss is the ‘puddling’ effect. If your primer isn’t spread evenly, it creates a film that can actually delaminate under the weight of the floor. If you see 7 signs your tile contractor is cutting corners on prep work, it usually starts with a messy primer application. This foundation is what prevents you from needing the simple way to fix a floating floor that moves later on. Before you even think about laying your first plank, you have to how to check for subfloor flex before you lay rigid tile or LVP. If the subfloor bounces, no amount of tape, leveler, or high-end adhesive will save you from eventually hearing those annoying squeaks. Precision starts at the slab, not the wear layer.
Don’t Let Your Steam Mop Kill Your Floor
I see it all the time on social media: people blast their luxury vinyl or engineered wood with high-temperature steam, thinking they are achieving a deeper clean. In reality, you are playing a dangerous game with the adhesive and the core material. Even the most robust planks have limits. I’ve personally watched a friend’s brand-new install start to peel because the heat delaminated the wear layer. This is exactly why you should never use a steam mop on engineered wood floors or even LVP. The moisture gets forced into the seams, and before you know it, you’re dealing with why your vinyl plank floor is bubbling near large windows or high-moisture zones. Instead, I stick to a pH-neutral cleaner and a barely-damp microfiber pad. It’s boring, but it’s the only way to ensure your hardwood floor care secrets to longevity and shine actually pay off over the next decade.
How do I maintain my flooring investment over time?
Maintenance isn’t just about cleaning; it’s about monitoring the environment. According to the National Wood Flooring Association (NWFA) Technical Manual, maintaining a consistent relative humidity between 30% and 50% is the single most important factor in preventing gapping or crowning. If you let your house get too bone-dry in the winter, those how to install wide plank hardwood to minimize future gapping techniques won’t matter; the wood will shrink regardless. I keep a cheap digital hygrometer in my hallway just to keep an eye on things. For those inevitable accidents, I always keep a specific kit on hand. Knowing how to patch a deep gouge in luxury vinyl planks or how to fix a dent in your vinyl floor with a heat gun has saved me from tearing up entire rows of flooring more times than I care to admit.
The One Tool I Carry for Emergency Repairs
If you are doing your own install, buy a dead blow hammer. Not a rubber mallet, not a standard claw hammer—a dead blow. It contains loose shot inside the head that prevents bounce-back, which means all the energy goes directly into the tapping block. This is why you should use a dead blow hammer for floor capping and seating planks. It’s the difference between a joint that’s ‘mostly’ closed and one that is hermetically sealed. As for the future, I predict we are moving toward ‘sensor-integrated’ subfloors. Imagine a subfloor that sends a notification to your phone the second it detects a leak under your dishwasher before it ruins your right hardwood floors for your home. Until then, we rely on prep and the right tools. If you want to level up your DIY game, I challenge you to try the ‘heat gun trick’ on a scrap piece of vinyl today—learning how the material reacts to heat will give you a massive advantage when the real repairs are needed.
Three LVP Myths That Nearly Ruined My First Project
After years of trial and error, I have realized that much of the ‘common knowledge’ in big-box stores is actually detrimental to your home. First, the myth that ‘waterproof’ flooring means your subfloor is safe. Even if the LVP is waterproof, water can still seep through the seams and rot your wooden subfloor or create mold on a concrete slab. Second, many DIYers believe they can skip the acclimation period for vinyl because it is synthetic. While it does not expand like solid oak, LVP still reacts to temperature shifts; laying it straight from a cold truck into a warm room is one of the 7 mistakes that ruin your luxury vinyl plank installation. Finally, never assume your walls are square. If you do not check your starting line against the entire room, you will end up with ‘wedged’ planks at the far end. Following revamp your home with expert flooring installation tips means measuring twice and trusting your chalk line over your drywall.
The Toolkit I Trust for a Pro-Level Finish
To achieve a high-end look, your tools must be as precise as your measurements. I never start a job without my 6-foot straight edge; a standard level is simply too short to find the subtle dips that cause clicking sounds later. For the installation itself, why you should use a dead blow hammer for floor capping becomes obvious the moment you see how it seats a plank without the damaging bounce-back of a rubber mallet. I also swear by using reverse-pitch jigsaw blades for those intricate cuts around door frames to keep the wear layer from chipping. If you are struggling with uneven surfaces, mastering floor leveling pro secrets for perfect installations often comes down to having a high-speed mixer and a spiked roller to release air bubbles from your compound. #IMAGE_PLACEHOLDER_E#
Your Future Floor is Just One Cut Away
There is a unique sense of pride that comes from walking across a floor you laid with your own hands. It transforms the energy of a room from a construction site into a sanctuary. Don’t let the fear of a few complex cuts or the mess of the process stop you from starting. Flooring is the foundation of your home’s aesthetic, and with the right prep, you can achieve a result that rivals any professional crew. Every great **flooring installation** starts with that first row—once you get that straight, the rest is just a rhythm. Have you ever encountered a ‘grey snow’ dust storm during your own DIY projects, or do you have a secret trick for keeping the workspace clean? Let me know your experiences in the comments below.