
I remember the exact moment I almost threw my trowel through a window. It was a humid Tuesday, and I was finishing a guest bathroom. One specific plank—just one!—refused to cooperate. Every time I turned my back, that corner would lift just a fraction of an inch. I had even tried the notched trowel hack to ensure the glue was even, but the vinyl had a mind of its own. It’s a classic case of vinyl curling at the edges, a nightmare that haunts even the most seasoned installers. That’s when I realized that sometimes, finesse needs to be replaced by brute force. Today, we’re going to talk about why that happens and how a simple piece of gym equipment can be the difference between a professional-looking floor and a tripping hazard. We are going to solve the pop-up problem once and for all.
Vinyl Corners Are My Literal Nemesis
In my early days, I thought I could just tape those corners down with painter’s tape and call it a day. Big mistake. The tape would stretch, the glue would dry unevenly, and I’d end up with a hollow sound that drove me crazy. If you’ve heard that noise, you should definitely check out how to fix a hollow sound under luxury vinyl, but prevention is much easier than the cure. The material memory in modern LVP is incredibly strong. If the plank spent three months in a cold warehouse slightly bowed, it’s going to try to return to that bow the moment you let go. The key is understanding that adhesive isn’t magic; it’s chemistry. According to the Resilient Floor Covering Institute, the initial bond strength of pressure-sensitive adhesives is exponentially improved by consistent, dead-weight pressure during the first 30 minutes of contact. This is why avoiding common installation mistakes starts with having the right heavy objects on hand.
Is using heavy gym weights actually a good idea?
It sounds a bit garage-engineered, doesn’t it? You might worry that 25 or 45 pounds of iron will crush the core of your expensive flooring or leave a permanent mark. But here is the reality: as long as you provide a buffer, like a scrap piece of carpet or a microfiber towel, the weight is perfectly safe. It’s actually more controlled than a heavy floor roller because it stays put exactly where the lift is occurring. Have you ever felt like you were losing a wrestling match with a piece of plastic? Tell me about your most stubborn flooring project in the comments! We’re going to walk through the prep, the placement, and the timing to make sure those corners stay flat forever. Before we dive into the weights, make sure you aren’t dealing with tent-peaking issues caused by a lack of expansion gaps, because no amount of weight will fix a floor that doesn’t have room to breathe.
Flatten those stubborn corners for good
Before you even reach for your dumbbells, you have to ensure the foundation is sound. I learned this the hard way during a renovation in a drafty 1920s bungalow. I tried to force a heavy-duty plank down over a slight hump, thinking the weight would just mold the vinyl into place. Instead, the tension was so high that once I removed the weight three hours later, the plank didn’t just lift—it actually pulled the top layer of the subfloor with it. This is why mastering precise floor leveling techniques to achieve flawless surfaces is the most important pre-game step you can take. If the floor isn’t flat, no amount of iron will keep it down permanently.
Priming and surface prep are not optional
Once your floor is flat, you need to prep the surface to ensure the adhesive actually works. You cannot expect a lasting bond if you skip the primer. If you prime concrete before every leveling job or vinyl install, you create a grippy, sealed surface that the adhesive can bite into. Without it, the glue just sits on top of micro-dust, and your ‘permanent’ fix will last about as long as a New Year’s resolution. I’ve seen entire rows of luxury vinyl lift because the installer thought ‘clean enough’ was good enough. It never is.
The sandwich technique protects your investment
Now, let’s talk about the physical placement of the weights. You never place iron or rubber directly on the new vinyl. I once did that with a 25-pound hex dumbbell on a commercial job and left a permanent black smudge on a light oak-colored plank. Now, I always use what I call the ‘Weight Sandwich.’ Place a clean microfiber towel down first, followed by a flat scrap piece of the flooring itself (ribbed side up), and then the gym weight. This distributes the pressure evenly across the entire edge rather than concentrating it in one tiny spot, which helps avoid 7 mistakes that ruin your luxury vinyl plank installation like indentation marks or core crushing. 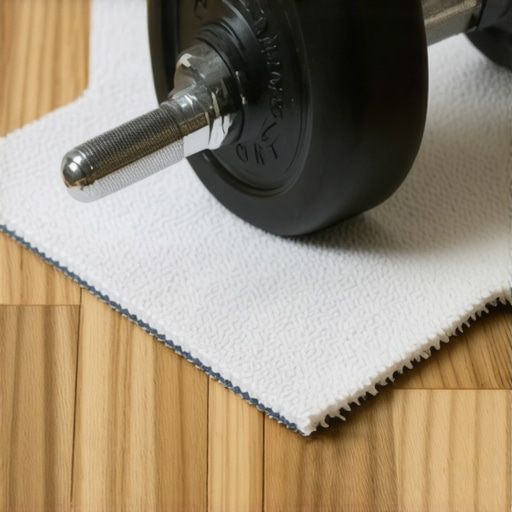
Timing your pressure for the ultimate bond
Timing is everything in the world of pressure-sensitive adhesives. If you apply the weight too early, you might displace the glue, creating a ‘hump’ or ridge under the plank. If you apply it too late, the glue has already skinned over and won’t grab the backing. I typically wait about 10 minutes after laying the plank—just enough for the adhesive to become aggressively tacky—before I set my ‘iron anchors.’ This ensures a dense, gap-free bond that mimics the professional results found in a step-by-step guide to flooring installation and leveling success. Leave the weights in place for at least 30 to 60 minutes. During this window, check the seams for glue ‘squeeze-out.’ If you see adhesive oozing between planks, it’s a sign you used a trowel with the wrong notch size, which can lead to issues like hollow sounding floors or messy cleanup later. Wipe the excess immediately with a damp rag. If the plank continues to fight the weight, you may need to look at how to hide a bad subfloor transition without a transition strip by feathering out your patch further, as the tension usually stems from a height mismatch between two different subfloor materials.This brings us to one of the biggest misconceptions in the industry: the difference between a floor being ‘level’ and a floor being ‘flat.’ Stop worrying about level and start worrying about flat. Everyone tells you to buy a laser level, but a level floor is often a vanity metric. In many older homes, the entire structure may have settled, and if you try to make the floor perfectly level in one room, you might create a massive trip hazard at the doorway. What actually matters for the long-term integrity of your vinyl or hardwood is flatness. The National Wood Flooring Association (NWFA) defines a flat subfloor as having no more than a 3/16-inch change over a 10-foot radius. If you ignore this, the locking mechanisms on your planks will experience ‘cyclic loading’—constantly bending and flexing every time you walk across the room until they eventually snap. This is the primary reason why your lvp floor is clicking when you walk on it. Have you ever fallen into this trap? Let me know in the comments. The self-leveling trap that turns your subfloor into dust is another major hurdle for the uninitiated. Most people treat self-leveling compound like it’s just ‘liquid floor’ that fixes every mistake. But here is the nuance: water chemistry is everything. If you add even a fraction more water than the bag specifies to make it ‘flow better,’ you effectively kill the polymer bonds within the mix. You’ll end up wondering why your self-leveling compound is cracking like a dry lake bed just a few days later. Always use a calibrated measuring pitcher; never ‘eyeball’ it with a garden hose. If you’re currently struggling with a pour that didn’t go as planned, look into floor leveling challenges and how to avoid them to see how to recover. 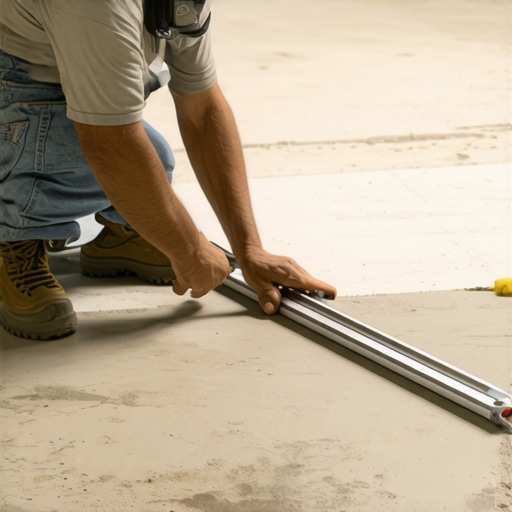
Is a standard 1/4-inch expansion gap actually enough for wide planks?
The short answer is almost always no. While the instructions on the box might provide a generic 1/4-inch recommendation, that’s usually a baseline for standard 3-inch strips. Modern luxury vinyl and engineered wood are getting wider, and wide planks need more than just nails to stay flat. They require significantly more room to breathe because the cumulative expansion of wider boards is much greater. For a room wider than 20 feet, I always bump that gap to at least 1/2-inch. If you are using precise floor leveling techniques to achieve flawless surfaces, the floor becomes so stable that installers often forget the material itself still moves with humidity. Additionally, when you are mixing materials, such as in expert hardwood floor and tile combinations, you must account for the different expansion rates of wood versus the total rigidity of ceramic. Use a flexible color-matched caulk at that junction instead of rigid grout, or you will see cracking within the first season. To prevent these ‘invisible’ errors from ruining your hard work, check out these flooring installation mistakes to avoid for lasting results before you lock in that last row.
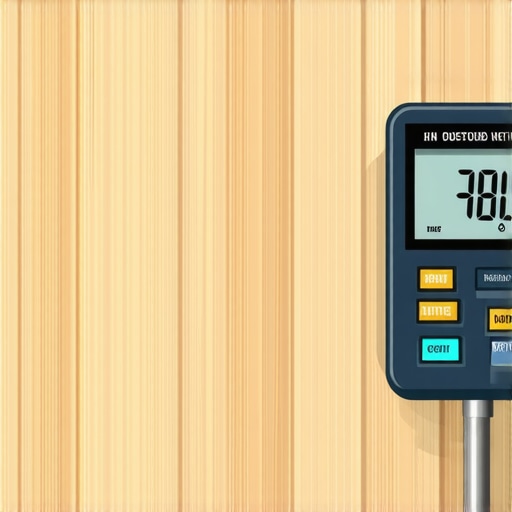
Once that last row is clicked into place and the spacers are removed, you might think the hard part is over. In reality, you’ve just moved from the construction phase to the preservation phase. If you want those floors to look just as crisp in five years as they do today, you need to stop guessing and start measuring. I’ve seen $20,000 installs ruined because the homeowner didn’t realize their HVAC system was pulling all the humidity out of the air, causing the boards to shrink and gap. This is why I never start a project without my pinless moisture meter. Learning how to use a moisture meter to prevent floor failure is the single most important skill you can acquire after you’ve mastered the actual layout.
The one tool that saves me from $10,000 mistakes
I don’t care if you are a DIYer or a pro; you need to own a high-quality moisture meter. I personally use the Wagner Meters Orion series because it doesn’t leave holes in the finish, but any reputable brand will do. The National Wood Flooring Association (NWFA) provides a clear directive in their technical manual: for planks wider than 3 inches, the moisture content (MC) of the flooring must be within 2 percent of the subfloor’s MC before installation. If you ignore this, the floor will eventually buckle or gap, and no amount of weight or glue will save it. This is one of the 7 tools you actually need for a professional diy hardwood install if you want to sleep at night. Don’t trust the ‘acclimation’ period suggested on the box blindly; trust the data from your meter.
How do I maintain my floor’s finish for decades?
Maintenance isn’t just about sweeping; it’s about chemistry. Most people reach for the most aggressive cleaner they can find when they see a scuff, but that is a recipe for disaster. You should never mop your floors with dish soap or any oil-based soaps. These products leave a microscopic film that attracts dirt and eventually makes the floor look cloudy. Once that film builds up, your only option is a full sand and finish, which is a massive headache. Instead, use a pH-neutral cleaner specifically designed for your finish type. If you have natural stone in the mix, stop using bleach on your natural stone floors immediately. It eats away at the sealer and makes the stone porous and prone to permanent staining. Following these hardwood floor care secrets to longevity and shine will save you from needing a professional refinish for at least fifteen years.
Is your cleaning routine actually eating your floor?
The future of flooring is moving toward ‘smart’ maintenance—think sensors embedded in the subfloor that alert you to leaks before you see them—but for now, your best defense is a good offense. One often overlooked detail is the trim work. I always take the extra hour to ensure the right way to undercut baseboards for a clean flooring finish, which allows the floor to expand and contract under the trim without being pinched. If the floor is pinched, it can’t move, and that leads to ‘clicking’ sounds or peaks. As we look toward 2025, I expect to see even more emphasis on hardwood floor refinishing expert tips for 2025 that focus on water-based, low-VOC finishes that are as durable as the old toxic stuff. My big challenge to you: before your next project, go buy a moisture meter and test three different spots in your house. You’ll be shocked at how much the readings vary from room to room.
Hard Truths About Why Your Floor Won’t Stay Flat
Over the years, I’ve realized that flooring isn’t just about the top layer you see; it’s an ecosystem. Here are the lightbulb moments that changed my approach forever. First, weight is a temporary fix for a permanent problem if your subfloor isn’t right. I spent years trying to ‘glue and pray’ before I finally accepted that mastering floor leveling pro secrets for perfect installations was the only way to avoid callbacks. Second, your environment is in constant flux. Even the best vinyl or wood will react to humidity, and ignoring this is a recipe for disaster. Finally, remember that the adhesive is only as strong as the surface it’s stuck to. If you don’t address floor leveling challenges and how to avoid them, you’re essentially building on a foundation of sand.
The Gear I Actually Use on Every Job
If you’re serious about a professional finish, you need more than just a hammer and a saw. I never walk onto a job site without a pinless moisture meter. It’s the only way to know if your subfloor is actually ready for a new install. I also highly recommend investing time in learning how to spot high quality engineered wood before you buy, because the best installation techniques in the world won’t save a product with a failing core. For maintenance, skip the grocery store aisle and look for specialized, pH-neutral cleaners that follow the hardwood floor care secrets to longevity and shine. These tools and products aren’t just ‘nice-to-haves’; they are your insurance policy against a $10,000 mistake.
Ready to Level Up Your Flooring Game?
Installing a new floor is one of the most rewarding home improvement projects you can take on. It changes the light, the sound, and the very feel of your home. Don’t let the technical details intimidate you. Every pro was once a beginner staring at a box of planks wondering where to start. By focusing on flatness, moisture control, and the right tools, you are already ahead of most DIYers. Now, get out there and turn those stubborn corners into a perfectly flat masterpiece with your new flooring installation skills. Have you ever tried the weight trick on a stubborn vinyl corner, or did you find another way to keep it down? Let me know in the comments below!