
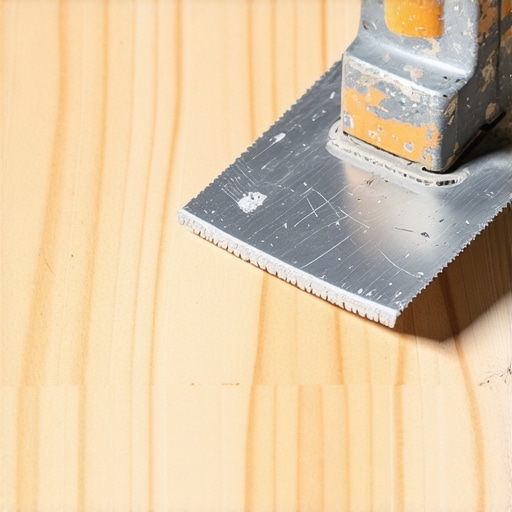
I still remember the first time I tried to glue down hardwood treads on a narrow staircase. I thought a simple flat putty knife would do the trick, just schmearing it around like peanut butter on toast. Boy, was I wrong. Within a year, every single step had developed a distinct ‘click-clack’ sound that drove my wife crazy. It was a classic case of flooring installation mistakes that I could have easily avoided if I’d known about the notched trowel hack. That experience taught me that the secret to a professional finish isn’t just the wood you choose, but the invisible layer of adhesive beneath it. Today, I’m sharing how this one simple tool change ensures your stairs stay silent and secure for decades.
Stop Guessing Where the Glue Actually Goes
When you’re working on stairs, you’re fighting gravity and tight spaces. Most people just squeeze a few beads of adhesive out of a tube and hope for the best. I call it the ‘squish and pray’ method. The problem is that without proper mechanical ridges, the glue doesn’t spread evenly when you press the tread down. You end up with ‘islands’ of glue and ‘oceans’ of air. I once made the mistake of over-applying in the center, which caused a mess to ooze out the back, making sanding the stairs later a complete nightmare. By using a small notched trowel, you create uniform valleys and peaks. According to the experts at Fine Homebuilding, achieving consistent adhesive transfer is the single most important factor for preventing bond failure in high-traffic wood installations. This hack ensures you hit that mark every time.
Is This Really Better Than Just Squiggling the Glue Tube?
I get it. You’re worried that using a trowel is going to be a sticky, time-consuming mess. You might think it’s overkill for a few small treads. But let me tell you, the five extra minutes it takes to comb that glue out saves you five hours of repair work later. It’s the same logic behind a step-by-step guide to flooring installation: the prep work is where the magic happens. When you use the heavy-duty glue tactic with a notched edge, the air is allowed to escape as you set the wood, creating a vacuum-like bond. Have you ever stepped on a stair and felt it slightly shift under your weight? That’s the exact problem we’re going to kill today. Drop a comment below if you’ve ever had a stair tread start ‘singing’ to you after only a month!
Your Subfloor Needs to Be Flatter Than You Think
Before you even touch a bucket of adhesive, you have to realize that glue is not a filler. It is a binder. I remember working on a 1920s craftsman where the stairs looked like a topographical map of the Andes. I tried to ‘build up’ the low spots with extra glue—a rookie move that led to flooring installation mistakes I still regret. The glue didn’t support the weight; it just acted like a slow-motion hydraulic fluid until the tread eventually cracked. You need to treat your subfloor like a surgical site. Use the ultimate guide to floor leveling for a perfect finish as your roadmap. If those plywood steps aren’t perfectly flat, your hardwood treads will eventually flex and fail.
Pass the Flashlight Test Before You Glue
Grab a straightedge and a bright flashlight. Lay the level across the step and shine the light from behind. If you see light bleeding through under the level, you have a dip. This is where the flashlight test for checking floor flatness before glue becomes your best friend. For small dips, a bit of feather-finish patch works wonders. For big ones, you might need to rethink the subfloor entirely. Do not ignore a 1/8-inch gap; over time, that gap becomes the source of that annoying ‘click’ every time you walk up to bed.
Master the Combing Technique for Maximum Grip
Once your surface is flat, it is time for the ‘meat’ of the hack: the combing. Think of your adhesive like the tread on a tire. If the tire is bald, it slides. If it has deep grooves, it bites. When you use a 3/16-inch V-notched trowel, you are creating mechanical ridges. As you press the heavy oak or maple tread down, those ridges collapse and spread out, filling the entire surface area without creating air pockets. 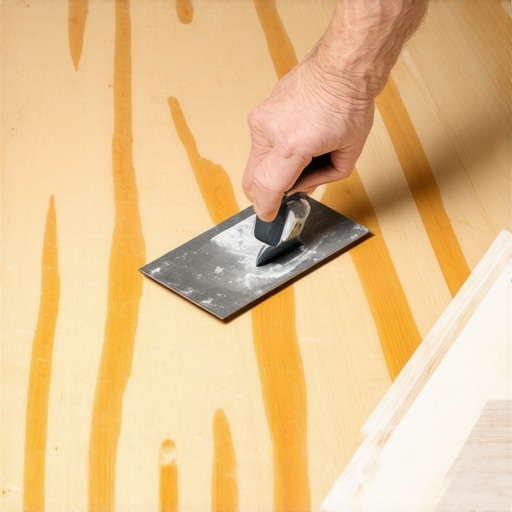
Why the V-Notch Beats the Flat Blade Every Time
A flat blade just smears the glue thin, often leaving bare spots where the wood doesn’t even touch the adhesive. With a notched trowel, you are guaranteeing a specific volume of glue per square inch. It’s the same precision required when installing tiles like a pro. I once tried to rush a job by just using a scrap piece of wood to spread the glue—it was a sticky disaster that resulted in uneven heights across the staircase. Use a dedicated trowel and pull it at a 45-degree angle. This ensures the peaks are the right height.
Avoiding the Squeeze Out Mess at the Riser
The trickiest part is the edges. If you comb the glue all the way to the very edge of the stringer or the riser, it will ooze out like toothpaste when you set the tread. I leave a half-inch ‘dry zone’ around the perimeter. When the ridges collapse under the weight of the wood, the glue expands into that dry zone but stays hidden. This keeps your cleanup minimal and prevents you from having to spend hours on mastering hardwood floor refinishing just to get dried glue off your beautiful new wood. If you do get a bit of squeeze-out, don’t wipe it immediately with a wet rag—let it skin over slightly, then use a plastic scraper to pop it off without smearing the residue into the grain. Using the heavy-duty glue tactic for stair nose stability combined with this perimeter gap ensures your stairs are both silent and clean.
Leveling Compounds Aren’t Magic in a Bucket
Here’s the hard truth: the term ‘self-leveling’ is one of the biggest marketing lies in the flooring industry. Beginners often assume they can just pour the mixture, go grab a coffee, and come back to a glass-smooth surface. In reality, liquid levelers have a high surface tension. If you don’t use precise floor leveling techniques to achieve flawless surfaces, you’ll end up with a series of connected puddles rather than a flat plane. According to the National Wood Flooring Association (NWFA), a subfloor for hardwood must be flat to within 3/16 of an inch over a 10-foot radius. If you rely solely on gravity, you’ll rarely hit that mark. You need to actively ‘help’ the material with a gauge rake or a spiked roller to break that surface tension and release trapped air. Failing to do this is one of the most common flooring installation mistakes that professionals see daily.
Why Is My Leveler Cracking Like a Desert Floor?
I’ve seen this happen to seasoned pros: you follow the water-to-powder ratio perfectly, yet the next morning the floor looks like a dried-out lake bed in Death Valley. This usually happens because the substrate sucked the moisture out of the leveler too fast, or the mix was over-watered to make it flow better. If you find yourself asking why your self-leveling compound is cracking like a dry lake bed, look at your mixing bucket. People often add ‘just a splash’ more water to get a better pour, but that destroys the polymer chain. It’s better to use the best way to mix self-leveler for a perfectly smooth surface by using a digital scale for water and a high-torque, low-RPM drill to avoid whipping air into the slurry.
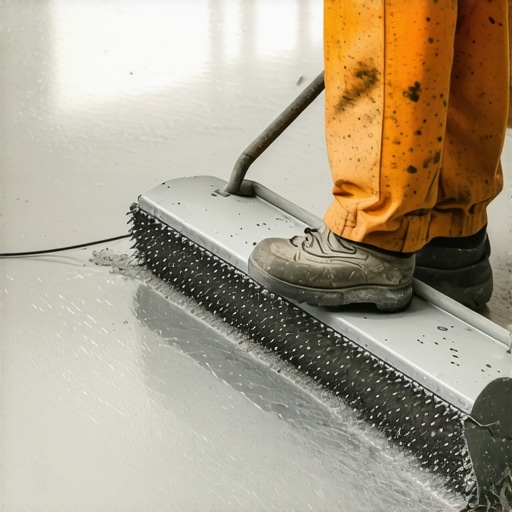
The Primer Trap That No One Talks About
Everyone focuses on the pour, but the secret is actually the primer. I once saw a massive commercial job fail because the crew skipped the second coat of primer on a highly porous concrete slab. The leveler didn’t just crack; it literally delaminated in giant sheets. If you’re wondering why your leveling primer is peeling off the concrete, it’s likely because of ‘outgassing.’ As the leveler cures, it pushes air down into the concrete; if the primer hasn’t sealed those pores, the air pushes back up, creating bubbles and weak spots. Before you pour, use the 3-foot level test for checking subfloor flatness like a pro to identify the deep zones that need extra attention. Also, don’t forget to how to check for subfloor flex before you lay rigid tile or wood, because no amount of leveler can fix a structural bounce. Have you ever fallen into this trap where the leveler just didn’t behave? Let me know in the comments below!
I’ve learned that the difference between a floor that lasts five years and one that lasts fifty is usually found in the quality of your toolbox. If you’re serious about this, you need to stop eyeballing your substrate and start measuring it. I used to think I could feel if a subfloor was dry just by touching it—spoiler alert: I couldn’t. This is why 7 tools you actually need for a professional DIY hardwood install always includes a high-quality moisture meter. I personally swear by the Wagner Orion series because it’s pinless and won’t mar your expensive planks. According to the technical documentation from Wagner Meters, wood floor failure is most often caused by ignoring the ‘equilibrium moisture content’ (EMC) during the acclimation phase. If the wood is too wet compared to the environment of the house, it shrinks; if it’s too dry, it buckles. Performing the moisture test you must do before gluing down wood is the only way to sleep soundly at night after the job is finished.
Invest in a Meter Before You Invest in the Wood
I remember a client who insisted on laying wide-plank walnut in a basement without checking the slab. Three months later, the floor looked like a roller coaster. If they had used a simple calcium chloride test or a digital meter, they would have seen the red flags. It’s the same level of care you need when revamping your home with expert flooring installation tips. Don’t just buy the wood; buy the data that tells you the wood is ready.
How do I keep my new floors from looking old in a year?
The biggest threat to your hard work isn’t high heels or dog claws; it’s the way you clean it. I see homeowners spend thousands on choosing the right hardwood floors for your home, only to ruin them with a $50 steam mop. Please, I am begging you, read up on why you should never use a steam mop on engineered wood floors. The heat and pressurized water force moisture into the core of the wood, causing the edges to peel and swell almost instantly. Instead, lean into hardwood floor care secrets to longevity and shine. A simple microfiber mop and a pH-neutral cleaner are all you really need to keep that factory finish.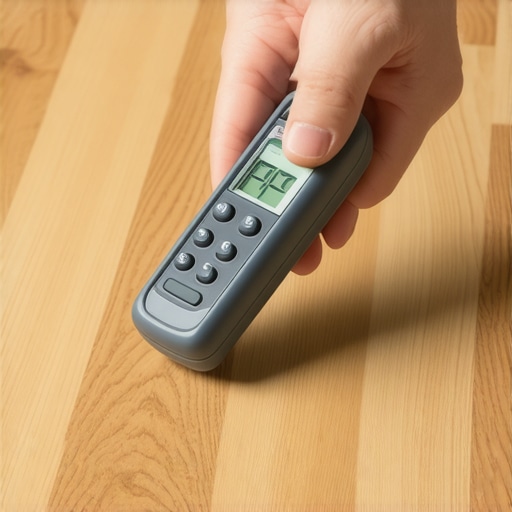
The Death of the Steam Mop
I predict that in the next decade, we’re going to see a massive shift toward hybrid flooring materials that are virtually indestructible and resistant to thermal shock, but for now, your best bet is to maintain the integrity of what you have installed today. If you’ve already got some minor surface scratches, don’t panic. You can look into mastering hardwood floor refinishing expert tips for 2025 to bring that glow back without a full, dusty sand-down. My favorite pro move is a ‘screen and recoat’—it’s faster, cheaper, and preserves the thickness of your wear layer for future generations. Go grab a moisture meter today and check three different spots in your living room. You might be surprised at the readings, and it could save you from a very expensive mistake during your next renovation.
The Real Cost of Cutting Corners on Stair Glue
If there is one thing a decade of renovation has taught me, it’s that your eyes will lie to you. I used to think I could ‘feel’ if a stair tread was solid, but without those mechanical ridges from a notched trowel, you are just gambling with future squeaks. Another lightbulb moment was realizing that most flooring installation mistakes aren’t actually made during the installation itself, but in the 48 hours of prep before you even open the glue. If you don’t use the 3-foot level test for checking subfloor flatness like a pro, you are essentially building on a shaky foundation. Lastly, never underestimate the power of a half-inch ‘dry zone’ near your risers; it is the absolute secret to a clean finish that doesn’t require hours of scrubbing adhesive off your expensive new oak.
What I Reach for When the Job Is on the Line
I don’t get paid to promote brands, but certain items make my life easier every single day on the job site. First, a high-quality 3/16-inch V-notched trowel is non-negotiable for executing the heavy-duty glue tactic for stair nose stability. I also never step onto a job site without my digital moisture meter. It is easily one of the 7 tools you actually need for a professional DIY hardwood install because it removes all the stressful guesswork regarding wood acclimation. Finally, I always keep a bag of plastic scrapers handy for that inevitable glue squeeze-out—they won’t mar the delicate wood grain like a metal putty knife will.
#IMAGE_PLACEHOLDER_E#
Take the First Step Toward a Silent Staircase
You now have the technical blueprint to stop the clicks, groans, and shifts that plague so many DIY stair projects. Installing hardwood is about much more than just the beauty you see on the surface; it’s about the integrity of the bond you create underneath where no one is looking. Before you spread that first bit of adhesive, remember to perform the moisture test you must do before gluing down wood to ensure your subfloor is ready for the bond. Your future self—and your family’s ears—will thank you for the extra effort you put in today. Which part of the stair-gluing process makes you the most nervous, or have you already dealt with a ‘singing’ staircase? Let’s talk about it in the comments below!