
I will never forget the sound—that sudden, sharp crack followed by the sickening feeling of the tread shifting under my weight as I carried a heavy laundry basket down to the basement. I had spent three weekends meticulously choosing the right hardwood floors and installing them, but I skipped the “overkill” on the stair nose because I thought six finish nails were plenty. Boy, was I wrong. That loose board was not just annoying; it was a trip hazard waiting to happen. If you have ever felt that slight wiggle under your toes at the top of a flight, you know exactly the kind of anxiety I am talking about. It is the silent killer of a great flooring job, and today, I am going to show you how to fix it forever using the heavy-duty glue tactic.
Why Nails Alone Are a Recipe for Disaster on Your Stairs
We often treat stairs like regular flooring, but they take a localized impact that a flat room never sees. Every time you step on that edge, you are applying hundreds of pounds of leveraged force directly to the nose. If you have ever wondered why your floor squeaks near vents or transitions, imagine that same friction concentrated on a single piece of trim. Early in my DIY journey, I relied solely on a brad nailer. I thought I was being a pro by keeping the holes small. Within a single season of humidity changes, those nails started “backing out” like tiny, sharp landmines. The wood moved, the nails stayed put, and the bond was broken. This is why flooring installation fundamentals must include a chemical bond for high-stress areas.
Is glue actually worth the extra mess and effort?
I get the skepticism. We have been taught that mechanical fasteners are the gold standard. But in the world of high-traffic transitions, a high-quality polyurethane adhesive creates a chemical bond that spreads the load across the entire surface area of the wood. According to the International Association of Certified Home Inspectors (InterNACHI), stair safety is one of the most cited issues in residential inspections, often due to loose or improperly secured components. When you use the heavy-duty glue tactic, you are not just sticking wood to wood; you are creating a single, unified structure. It is the difference between a floor that feels solid and one that feels like a deck of cards. I have found that even the perfect finish cannot hide the feeling of a hollow, moving stair nose. Have you ever had a stair nose pop loose right after you finished a project? It is soul-crushing, right? I want to hear about your stair-stepping nightmares in the comments below. Before we dive into the specific brands of adhesive I swear by, we need to address the prep work that makes or breaks this entire tactic.
Clean Surfaces Make for Permanent Bonds
You wouldn’t try to tape two dusty pieces of paper together and expect them to hold, yet I see people throw high-end adhesive onto a subfloor covered in sawdust all the time. Before you even open that tube of glue, you need to treat the stair tread like a surgical site. Start by using the 3-foot level test for checking subfloor flatness like a pro. If that tread has a hump or a dip, the glue won’t make full contact, and you’ll end up with a hollow sound. I once ignored a 1/8-inch dip on a landing, and the clicking sound drove me crazy for a year until I ripped it out. Sand the subfloor with 40-grit paper to “open” the pores of the wood or plywood; this gives the adhesive something to bite into. Wipe everything down with a tack cloth or a vacuum with a HEPA filter to ensure zero dust remains.
How to Apply Adhesive Without Making a Massive Mess
Think of the adhesive as a structural gasket, not just a sticky layer. You want a polyurethane construction adhesive—something that remains slightly flexible but has a high “grab” strength. Lay down a continuous 1/4-inch bead in a serpentine pattern along the flat of the tread where the nose will sit. Do not stop there. Run a separate, thin bead along the vertical face of the riser. This “L-shaped” bond is what prevents the nose from rotating forward under your weight.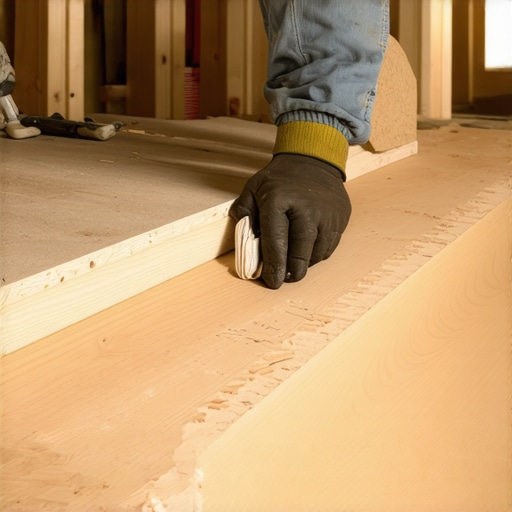 I learned the hard way about over-applying. During a job on a beautiful walnut staircase, I squeezed out way too much PL Premium. When I pressed the nose down, it oozed out like toothpaste onto the finished riser. I spent two hours with mineral spirits trying to clean it up without ruining the finish. Now, I use the blue tape secret—I tape off the edges of the nose and the riser before I even touch the glue. If it oozes, it hits the tape, not the wood. Avoid these flooring installation mistakes to avoid for lasting results by keeping your application controlled and your surfaces protected.
Combine Glue and Fasteners for the Ultimate Fix
The glue is your long-term strength, but the nails are your “clamps” while that glue cures. You cannot just glue a stair nose and walk away; it will shift. While the adhesive is wet, use 18-gauge brad nails to pin the nose every 6 to 8 inches. Aim the nails into the thickest part of the nose and into the subfloor or tread beneath. This is one of those 7 tools you actually need for a professional DIY hardwood install—a reliable pneumatic nailer. If you find the subfloor has too much movement before you start, learn how to fix a squeak in an upstairs hallway first. A moving subfloor will eventually break even the strongest chemical bond. By pinning the nose, you ensure the glue stays in tight contact with both surfaces during the critical 24-hour curing period. Use the flashlight test for checking floor flatness before glue to verify that the nose is sitting perfectly flush with the rest of your flooring.Most “pro” videos show you how to click a floor together like Lego blocks, leading many to believe that the stair nose should be part of that same floating system. Here is the hard truth: a floating stair nose is an accident waiting to happen. While you definitely need to why you need a perimeter expansion gap for every room, the stair nose is the one place where you must abandon the floating philosophy entirely. It needs to be an extension of the subfloor, not the flooring. I see DIYers try to leave expansion gaps at the stair nose, which creates a structural weakness where the most pressure is applied. According to the National Wood Flooring Association (NWFA), any trim or transition piece subject to foot traffic must be mechanically and chemically fastened to the subfloor to prevent disengagement. If you are worried about movement, you manage that at the walls, not at the edge of a step. 
The Myth of the Integrated Locking System
I have seen it time and again: homeowners buying “matching” stair nosing that is designed to click into the rest of the floor. In theory, it is brilliant; in practice, it is the primary reason for 7 mistakes that ruin your luxury vinyl plank installation. These click systems often lack the thickness required to withstand constant vertical shear. If you are using these, you still need to bypass the click mechanism with adhesive.
Can you really skip the metal track on stair transitions?
Many modern kits come with a flimsy metal track meant to hold the nose. I personally avoid them whenever possible. They eventually wiggle, and then you are stuck with a how to fix a hollow sounding tile without tearing it up situation but with wood. The nuance here is “back-buttering” the nose. Just like when you are learning the right way to mix thinset for heavy tiles, you want 100% coverage on the bonding surface. The “Oops” factor I see most often? Using the wrong type of adhesive. I once used a standard wood glue (PVA) because I ran out of construction adhesive. Big mistake. PVA glue has a high water content, which caused the nose to swell slightly and pull away from the riser. Always stick to a moisture-cure polyurethane. Before you commit, always perform the moisture test you must do before gluing down wood on your subfloor. If there is hidden dampness, your expensive glue will just peel off in a sheet like a bad sunburn. Have you ever fallen into the trap of trusting a click-lock system on a staircase without reinforcing it? Let me know in the comments. We have all been there, thinking the system would save us the extra work, only to find ourselves facing floor leveling challenges and common mistakes six months later. Don’t let your hard work literally slide out from under you.
The tools that saved my back and my sanity
When I first started, I thought a hammer and a cheap saw were enough. I quickly learned that the difference between a project that looks DIY and one that looks high-end lies in the specificity of your kit. For a job involving stairs and transitions, you cannot compromise on prep. I always start with a high-powered vacuum to ensure the bonding surface is pristine; check out the best way to clean dust after sanding hardwood floors to understand why this is a non-negotiable step. Without a clean slate, even the most expensive polyurethane adhesive is just sticking to debris, not your home. Another essential is a pinless moisture meter. I use the Wagner Orion 950 because it gives me a deep-scan reading without poking holes in my expensive treads. Before you even think about applying glue, you must perform the moisture test you must do before gluing down wood. If you skip this, you are essentially gambling with the longevity of your installation. According to the National Wood Flooring Association (NWFA) Technical Publication No. A100, the equilibrium moisture content (EMC) of your hardwood must be within a strict 2-4% range of the subfloor to prevent the very expansion and contraction that causes stair noses to fail. This is one of those 7 tools you actually need for a professional DIY hardwood install that most people overlook until it is too far gone.
How do I keep these stairs looking brand new for a decade?
Once the glue has cured and the nails are set, the battle moves to maintenance. The biggest mistake I see homeowners make is using too much water. You should never use a steam mop on engineered wood floors or stairs. The heat and pressurized moisture can break down the very chemical bonds we worked so hard to create. Instead, focus on dry-mopping with a microfiber cloth and using a pH-neutral cleaner specifically formulated for hardwood. For long-term shine, you need to understand hardwood floor care secrets to longevity and shine. 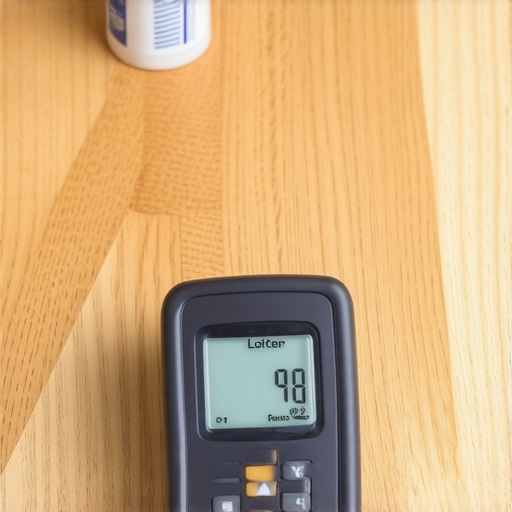 Over time, high-traffic areas like the stair nose will naturally lose their luster. When that happens, do not immediately reach for the heavy sander; stop sanding your hardwood until you read this. Often, a simple screen and recoat is all you need to restore that factory finish. If you are planning for the future, keep an eye on mastering hardwood floor refinishing expert tips for 2025 to stay ahead of the latest sealant technologies.
Smart wood and better glue are coming for your home
Looking ahead, the flooring industry is moving toward ‘smart’ adhesives that change color when they reach full cure and hybrid cores that are almost entirely immune to humidity fluctuations. We are seeing a rise in moisture-curing adhesives that actually get stronger when they encounter humidity, which is a game-changer for basements and entryways. My challenge for you: On your next transition or stair nose, try the ‘back-buttering’ technique I mentioned—applying a thin layer of adhesive to both the subfloor and the back of the wood—and let it cure for a full 48 hours before allowing foot traffic. You will notice a rock-solid feel that simply cannot be achieved with nails alone.
Why Glue Is Your Best Friend on High-Stress Steps
The most important lightbulb moment I had was realizing that silence is the sound of a job well done. If your stairs click or thud, you have failed the longevity test. Using a mechanical-only approach is asking for trouble because wood breathes, but glue holds firm. I have learned that knowing how to fix a hollow sounding tile without tearing it up starts with preventing the air gaps in the first place during the installation. Do not let marketing fool you; bypassing the click-lock system with adhesive is exactly how you avoid 7 mistakes that ruin your luxury vinyl plank installation on high-traffic transitions. Finally, always over-test your subfloor flatness because even a tiny 1/16th inch gap can become an annoying squeak later.
Gear That Actually Makes a Difference
I do not recommend products unless they have saved my hide on a job site. First, invest in a Wagner Orion 950 moisture meter; it is the gold standard for verifying your wood is ready for bonding. Second, keep a high-quality HEPA vacuum nearby because the best way to clean dust after sanding hardwood floors is to never let it settle into the pores of the subfloor in the first place. #IMAGE_PLACEHOLDER_E# Third, always have a fresh supply of 18-gauge brads—these act as temporary clamps that make the permanent polyurethane glue bond possible. These tools turn a frustrating weekend project into a professional-grade victory.
Step Confidently Into Your Next Project
Taking on a staircase can feel intimidating, but once you master these flooring installation fundamentals, you are no longer just a DIYer—you are a craftsman. Your home is your biggest investment, and these small, hidden details like chemical bonding are what keep it safe and beautiful. Once the hard work is done, remember that hardwood floor care secrets to longevity and shine will keep those steps looking brand new for years. You have the knowledge and the strategy; now it is time to build something that lasts. Have you ever had a transition piece or stair nose pop loose after only a few months of use? Let me know your biggest stair-fixing headache in the comments below!