
I stood there looking at a pile of shattered porcelain, my knees aching and my patience thinner than a cheap trowel. I’d just botched my fourth attempt at cutting a complex shape around a stubborn door casing. I had the expensive wet saw, I had the fancy diamond blade, and I even followed the trick for cutting porcelain tiles without cracking them to the letter. But the measurements? They were a total nightmare. Every time I took my tape measure to those three different angles, something got lost in translation between the floor and the saw. That’s when I realized that most of us are trying to play a game of math when we should be playing a game of crafts.
Stop Fighting Your Tape Measure Around Door Frames
Most DIYers—and even some pros who are in too much of a hurry—rely entirely on a metal tape measure for complex corners. I used to be that guy. I’d measure from the last full tile to the wall, then from the corner to the door frame, and try to draw it out on the tile surface with a wax pencil. It almost never works perfectly because walls aren’t straight and corners are rarely 90 degrees. Before you even start thinking about the layout, you really need to achieve flawless floor leveling before tile laying, because a bumpy subfloor will make even a perfect cut look like a disaster. My lightbulb moment happened when I watched an old-school mason grab a cereal box from his lunch bag. He wasn’t hungry; he was making a template. By using a piece of stiff cardboard, you can physically fit the shape into the space, trim it until it’s snug, and then simply trace it onto your tile. No math. No second-guessing. No crying over ruined slabs of natural stone. If you’ve ever seen 7 signs your tile contractor is cutting corners, not taking the time to template complex cuts is usually high on the list.
Is this method just a waste of a perfectly good cereal box?
I know what you’re thinking: “I don’t want to spend an hour playing with cardboard when I could be laying tile.” I thought the same thing until I realized that a single botched cut costs at least 15 minutes of resetting the saw and another $15 in wasted material. According to the National Association of the Remodeling Industry (NARI), tile waste can easily account for up to 10-15% of project costs if you aren’t precise. Using the cardboard secret reduces that waste to almost zero. It’s about slowing down for five minutes to save an hour of frustration later. Have you ever spent more on your “oops” tiles than on the actual floor itself? Trust me, I’ve been there, and it’s a gut-punch to the budget. We’re going to fix that today.
Make the Floor Earn Your Trust First
Before you even think about cutting, you need to be certain your foundation is telling you the truth. I once spent two hours meticulously templating a corner in a 1920s bungalow, only to realize the subfloor had a ‘pregnant’ bulge right where the tile was supposed to sit. The template, being flexible cardboard, hugged the curve, but my rigid porcelain tile wouldn’t budge. It was a $40 mistake. This is why you must perform the 3-foot level test for checking subfloor flatness like a pro. If the floor is wavy, your ‘perfect’ cut will sit at an angle, leaving a jagged, uneven grout line that even the most expensive color-matched caulk can’t hide.
Turn That Cereal Box Into a Pro Tool
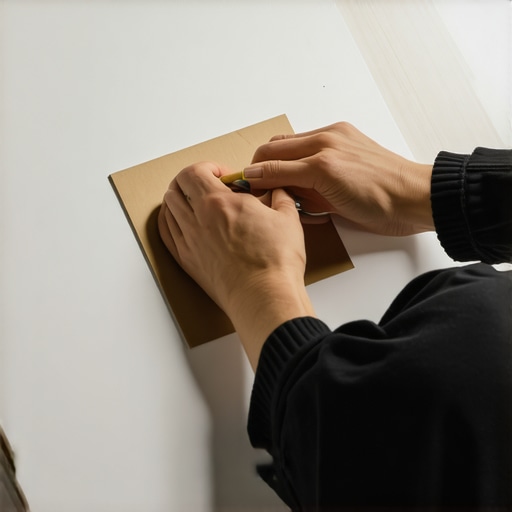
Once your floor is flat, it’s time to build your ‘mock’ tile. Grab a piece of stiff cardboard—I’ve found that old soda 12-pack boxes are the gold standard because they are rigid enough to hold a shape but thin enough to slide into tight gaps. Cut the cardboard to the exact dimensions of the tile you’re about to install. If you’re working with a 12×24 inch plank, your cardboard must be exactly 12×24. Place the cardboard against the last laid tile, using your spacers to maintain the gap. Now, take a smaller scrap of cardboard and ‘scribe’ the shape of the door frame or the corner by sliding the scrap along the wall and marking where it hits your main template.
Slide Under the Trim Instead of Circling It
One of the biggest mistakes I see—and I’m guilty of this from my early days—is trying to cut a tile to perfectly hug the outside of a door casing. It looks amateur and leaves a gap that collects dirt. Professional results come from the right way to undercut baseboards for a clean flooring finish. Take a scrap piece of your tile, flip it upside down (so the smooth side doesn’t get scratched), and use it as a height guide for an oscillating multi-tool. Cut into the door jamb so the tile can slide right underneath it. Now, when you make your template, you’re not measuring to the edge of the wood; you’re measuring a quarter-inch past it. This hides the cut edge entirely, giving you that seamless look you see in high-end hotels.
The Moment of Truth at the Wet Saw
Now that you have a perfect cardboard replica that fits snugly under the jamb and flush against the wall, lay it over your actual tile. Use a fine-point permanent marker or a mechanical pencil. If you are installing tiles like a pro, you know that the thickness of a standard carpenter’s pencil line can be 1/16th of an inch. That might not sound like much, but in the world of precision tiling, it’s the difference between a ‘snug fit’ and ‘won’t go in.’ When you head to the saw, cut on the waste side of the line. If you’re dealing with a really tight squeeze, like the trick to getting perfect tile cuts around narrow toilet flanges, take off a little less than you think you need. You can always ‘grind’ away a hair more with the side of the diamond blade, but you can’t put the porcelain back once it’s gone.
Why Self-Leveling Is Often a Marketing Lie
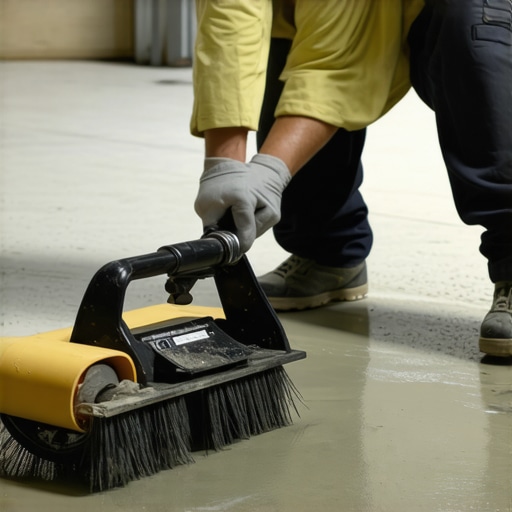
Let’s dig deeper into the biggest myth in the flooring industry: the idea that ‘self-leveling’ compound actually levels itself. If you just pour a bag of mix onto the floor and expect it to behave like water, you are in for a world of hurt. In my early days, I assumed the liquid would find its own level perfectly. Instead, I ended up with a series of hardened ‘puddles’ that were actually higher than the original floor. The nuance that pros know is that self-leveler is a high-viscosity fluid; it needs mechanical help. You need a gauge rake to set the depth and a spike roller to release trapped air. If you ignore this, you’ll find out quickly why your self-leveling mix is not flowing correctly and leaving you with more grinding to do.
The Invisible Trap of Subfloor Flex
Even if your floor looks as flat as a pool table, it might be a ticking time bomb. This is where most DIYers—and even some general contractors—miss the mark. It’s not just about flatness; it’s about deflection. According to the Tile Council of North America (TCNA) Handbook, the standard for ceramic and porcelain tile is a deflection limit of L/360 under live load. In plain English? If your floor joists are too thin or spaced too far apart, the floor will ‘bounce’ when you walk on it. That bounce is microscopic, but it’s enough to snap grout lines and crack tiles in a perfectly straight line. Before you even mix your thinset, you must check for subfloor flex before you lay rigid tile. If it’s too bouncy, you might need to sister your joists or add a layer of plywood, because no amount of fancy leveling compound can fix a structural wobble.
Will your floor bounce ruin the grout in six months?
I get this question a lot from homeowners who notice a slight ‘give’ in their kitchen floor. The answer is almost always yes. If you ignore the structural integrity and go straight to the pretty finish, you’re just masking a problem. This is a classic ‘oops’ factor: assuming that a 1/2-inch layer of concrete-based leveler adds structural strength. It doesn’t. It adds weight, which can actually increase the deflection if the subfloor wasn’t reinforced. If you’re seeing bubbles or cracks early on, it’s often because your floor primer is making the leveler bubbling worse by not sealing the substrate properly, or the floor is simply moving too much.
The Acclimation Myth for Hardwood
When it comes to hardwood, the advanced mistake is ‘passive’ acclimation. People leave the boxes in the room for three days and think they’re safe. But the air inside the middle of a stacked pallet of wood hasn’t changed at all. Professional installers know you have to ‘cross-stack’ or ‘sticker’ the planks to let air circulate around every single board. If you don’t, you’ll deal with gapping or cupping within the first season. Learn how to acclimate your hardwood without taking over the whole house to avoid these costly movement issues. Have you ever fallen into this trap of rushing the prep because the finish line was so close? Let me know in the comments below.
Stop Using the Wrong Chemicals on Your Tile
Once the dust settles and you’re admiring those crisp lines, the real work begins. I’ve seen $20,000 floors ruined in six months because someone thought a splash of acid-based cleaner was the way to ‘deep clean’ the pores. In reality, the vinegar mistake why it destroys your tile grout is a lesson learned the hard way by many; it eats away at the cementitious bond until your grout is literally crumbling under your feet. You must also stop using bleach on your grout before you read this, as it can discolor your carefully selected pigments and leave you with a blotchy mess. Instead, stick to pH-neutral cleaners specifically formulated for natural stone or porcelain.
How do I maintain my flooring over time?
Maintenance isn’t about scrubbing harder; it’s about scrubbing smarter. For those of you with wood, hardwood floor care secrets to longevity and shine usually boil down to one rule: keep it dry. I always tell my clients that why you should never use a steam mop on engineered wood floors is due to the extreme heat and moisture forcing their way into the glue layers, causing delamination that no amount of sanding can fix. A simple micro-fiber dust mop and a slightly damp (never soaking) cloth are your best friends for life.
The Moisture Meter That Saved My Reputation
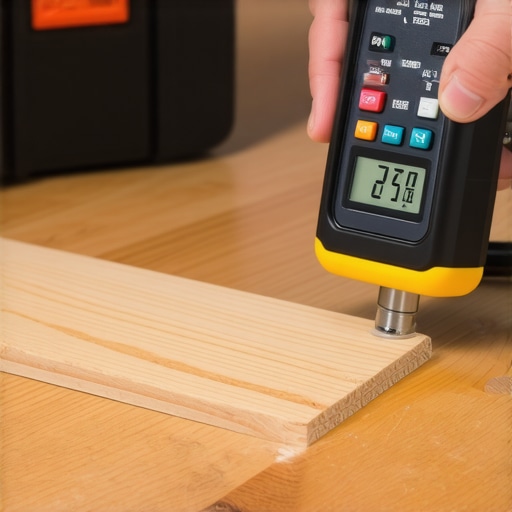
If you’re serious about the ‘pro’ part of DIY, you need to stop guessing. My most trusted tool isn’t a fancy saw; it’s my pin-less moisture meter. According to the NWFA (National Wood Flooring Association) Technical Publication No. A100, for solid strip flooring up to 3 inches wide, the moisture content of the wood should be within 4% of the subfloor’s moisture. For wider planks, that gap shrinks to 2%. Without a meter, you’re just throwing expensive wood at a wet subfloor and praying. You absolutely must perform the moisture test you must do before gluing down wood to ensure you aren’t sealing in a disaster.
Better Polymers and Smarter Surfaces
Looking ahead, the industry is moving toward high-performance, rapid-set materials that take the ‘wait’ out of the game. We are seeing self-leveling compounds with built-in fiberglass strands for better tension strength and grouts that never need sealing. Knowing the best way to mix self-leveler for a perfectly smooth surface today will give you a head start on these new ‘smart’ mixes coming to big-box stores in 2025. The trend is clearly shifting away from rigid, brittle systems toward flexible, high-bond adhesives that move with the house. I challenge you to go out and grab a digital moisture meter before your next project. Test three different spots on your subfloor—one in the center and two near exterior walls. It’s a ten-minute check that could save you thousands of dollars and years of regret.
What Nobody Mentions About Floor Leveling at the Hardware Store
Over the years, I’ve realized that the biggest enemy of a perfect floor isn’t a lack of skill; it’s a lack of patience with the invisible parts of the process. One lightbulb moment for me was accepting that prep work is 80% of the job. If you rush the drying time or skimp on primer, you’ll likely face floor leveling challenges that show up as cracks months later. Another lesson? Never trust your eyes. Even if a floor looks flat, it rarely is. Always use a straight edge because those tiny dips are exactly where your furniture will wobble. Lastly, remember that perfection is a process. If you mess up a pour, don’t panic; precise floor leveling techniques often involve a second, thinner ‘skim’ coat to get that glass-like finish.
The Precision Kit I Never Leave Behind
I’ve wasted thousands of dollars on tools that promised the world but delivered nothing. Today, my ‘pro’ kit is actually quite simple. I never start a job without a high-quality pin-less moisture meter to ensure the subfloor is ready. I also swear by a dedicated mixing paddle for my drill; mixing by hand or with a stick introduces air bubbles that ruin your finish. For those tricky edges, the blue tape secret for cleaner caulking is a lifesaver when transitioning from floor to wall. And finally, keep a few tile installation pointers in your back pocket, like using a laser level for your first row, which saves more time than any expensive saw ever could.
Build a Foundation That Lasts a Lifetime
Stepping back to look at a finished room where the planks click perfectly and the tiles sit level is one of the most rewarding feelings in DIY. It’s more than just aesthetics; it’s about the peace of mind that comes from knowing you didn’t cut corners. Whether you are mastering hardwood floor refinishing or laying your very first porcelain slab, the key is to respect the floor leveling process. Take your time, trust your tools, and don’t be afraid to ask for help when the mix doesn’t look right. You’ve got the knowledge now—it’s time to get your hands dirty. Have you ever encountered a ‘mystery hump’ in your subfloor that nearly ruined your project? Tell me how you handled it below!