
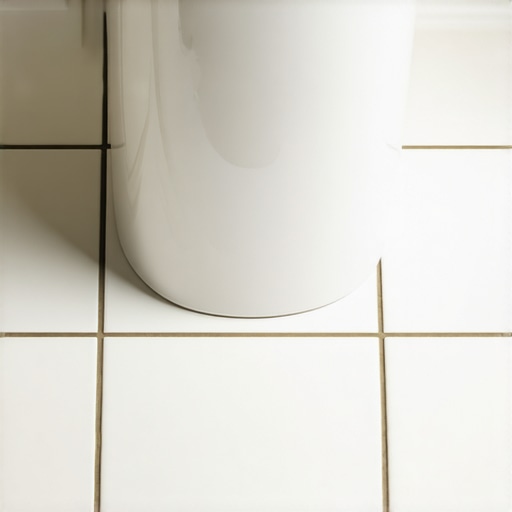
I remember the first time I hosted a dinner party in my new house. I spent hours polishing the counters and lighting candles, only to notice my guest’s eyes drift toward the base of the toilet. There it was—that nasty, butter-yellow stain creeping across the white grout. I had scrubbed it that morning, but it looked like I had ignored it for a decade. It is embarrassing, right? You keep a clean house, but the floor around the porcelain throne looks… well, questionable.
That Yellow Tint Isn’t Always What You Think
Most people assume it is just a matter of hygiene, but I learned the hard way that it is often more about chemistry and moisture. Early on, I made the classic flooring installation mistake of using a cheap, non-breathable sealer that actually trapped moisture underneath. That moisture reacts with the minerals in your water or the alkalinity of the concrete subfloor. According to the Tile Council of North America, moisture migration through a slab can carry soluble salts that discolor grout over time. It was not just a cleaning issue; it was an installation oversight that required a deeper fix than a bottle of bleach.
Is this just a permanent stain I have to live with?
I used to think I would have to tear the whole floor up and start over. But after mastering floor leveling and learning the nuances of tile installation, I realized that yellowing is usually a surface or sub-surface reaction that can be stopped. It is about breaking the cycle of moisture and improper cleaners. Have you ever spent an hour on your hands and knees scrubbing, only for the yellow to come back two days later?
Stop Blaming the Mop and Start Looking at the Sealant
I once thought a steam mop was the ultimate solution for a deep clean, but I quickly discovered why you should never use a steam mop on certain surfaces—and even on tile, it can sometimes blow the sealant right out of the pores. When that sealant fails, the grout becomes a sponge for everything from iron-heavy tap water to bathroom cleaners that are too acidic. If you did not back butter those large format tiles or ensure a perfect seal during the initial bathroom floor waterproofing, you are fighting an uphill battle against chemistry. We are going to look at how to strip that old residue and finally keep those lines crisp and white.
Strip Away the Junk and Start Fresh
To get rid of that stubborn yellow, you have to realize that you are likely looking at a layer of ‘gunk’ rather than the grout itself. Think of old sealant and floor wax like a bad spray tan; it looks okay for a week, but eventually, it turns orange and starts to flake in the most unattractive ways. I once worked on a project in a tight space where the owner had applied three different ‘miracle’ shine products over five years. The floor looked like it was covered in dried honey. I had to use the simple hack for removing wax from new hardwood as inspiration, realizing that a heavy-duty alkaline stripper was the only way to melt through those layers. You need a stiff nylon brush—not metal, which can leave grey streaks—and a lot of patience to lift that chemical film. If you skip this and just bleach over the top, you are just whitening the dirt.
Stop Using Vinegar and Acid Cleaners
One of the biggest mistakes I see—and I am guilty of this too—is reaching for the vinegar bottle. We are told it is a natural wonder, but on grout and stone, it is a disaster. Acidic cleaners eat away at the cement binder in your grout, making it more porous. This is even worse if you have natural stone. I learned this the hard way when I ruined a marble threshold by trying to ‘deep clean’ it with a citrus-based spray. You should never use acid-based cleaners on natural stone because they create microscopic pits that trap the very urine or iron-rich water you are trying to clean. Instead, use a pH-neutral cleaner that lifts the dirt without dissolving the floor’s integrity.
Seal the Subfloor Before the Yellow Returns
If you have stripped the floor and the yellowing is still coming back from the edges of the toilet or the shower, you likely have a moisture migration issue. Moisture is like a highway for minerals. If your subfloor was not prepped correctly, those minerals travel upward and settle in your grout lines. When I was first learning installing tiles like a pro, I ignored the dampness of the concrete slab, thinking the thinset would block it. It didn’t. This is why your bathroom floor needs a waterproofing membrane. Without that barrier, the grout acts as a wick. If you are starting fresh or can pull up a few tiles, ensuring a dry, level subfloor is the only permanent fix.
The Right Way to Re-Seal Your Grout Lines
Once you have the grout back to its original color, you must lock it down. Don’t just spray a cheap aerosol sealer and call it a day. You want a penetrating sealer that actually sinks into the pores. I prefer using a small applicator bottle with a roller wheel to ensure every inch is saturated. It is similar to the correct way to mix grout so it doesn’t change color—precision matters. If you leave a gap in the sealer, the next time you mop, that dirty water will find the hole and start the yellowing process all over again. By the time I finished that honey-stained floor I mentioned earlier, the crisp white lines made the tiling pattern that makes small Livonia bathrooms feel twice as big finally stand out properly.But getting those grout lines white is just the surface of the battle. If the foundation isn’t right, you’re building on sand—literally.
Flat Beats Level Every Single Time
Everyone tells you that you need a ‘level’ floor for tile or hardwood. In my experience, ‘flat’ is actually far more important than ‘level.’ You can have a floor that is perfectly level across the room but has a 1/4-inch dip in the middle. That dip is what causes tiles to crack or hardwood planks to bounce. When I was mastering floor leveling, I stopped worrying about the bubble on my level and started focusing on my 10-foot straightedge. If you haven’t learned how to check for high spots with a 10-foot straightedge, you are leaving the structural integrity of your floor to chance.
Stop Overwatering Your Mix
The biggest ‘oops’ I see with DIYers and even some pros is adding extra water to self-leveling compound to make it ‘flow better.’ It’s a trap. If you don’t prime the subfloor correctly, the dry concrete or plywood siphons the water out of the leveler too fast, causing it to pinhole or pull away. This is why your self-leveler is pulling away from the concrete before it even has a chance to cure. You end up with a brittle shell instead of a solid base.
Why is my self-leveling compound cracking even though I followed the instructions?
Usually, it comes down to the mix ratio and the environmental temperature. Adding even half a cup too much water to increase workability actually destroys the polymer bonds. According to a study by the International Concrete Repair Institute (ICRI), over-watering self-leveling underlayments can reduce compressive strength by up to 50%, leading to spider-web cracks that eventually telegraph through your expensive tile. Always use a measured bucket, not a garden hose.
Master the Moisture Meter Before You Start
Another nuance that gets ignored is the ‘acclimation myth.’ People think leaving wood in a room for three days is enough. It isn’t. You need to know how to use a moisture meter before installing wood floors to compare the subfloor moisture to the plank moisture. If they are more than 2-4% apart, your floor will fail regardless of how much you paid for the material. If you skip this, you’ll eventually wonder why your hardwood floor is crowning six months down the line.
The Trowel Notch Matters More Than You Think
When it comes to the actual setting of tile, the ‘swirl’ method is a recipe for disaster. Air gets trapped in those circular ridges and creates hollow spots. You must use the trowel notch secret for getting full thinset coverage: comb the thinset in straight lines. This allows the air to escape when you collapse the ridges. It’s the difference between a floor that lasts thirty years and one where the grout starts cracking because the tile is shifting.
Why does my hardwood still squeak after I leveled everything?
Leveling the surface doesn’t fix a loose subfloor. If the plywood is rubbing against the floor joists, no amount of leveler will stop that sound. You have to learn how to stop your subfloor from squeaking with one screw before you ever lay your underlayment. Otherwise, you’re just burying a mechanical problem under a pretty surface. Have you ever fallen into this trap? Let me know in the comments.If you are serious about never seeing that yellow grout again, or preventing a $5,000 hardwood floor from buckling, you have to stop relying on ‘feel’ and start relying on data. I spent years guessing at moisture levels until I finally invested in a pinless moisture meter. It changed everything. I stopped having callbacks because I finally knew exactly how to use a moisture meter before installing wood floors to ensure the subfloor and the wood were in harmony. Most pros skip this, but according to the National Wood Flooring Association (NWFA) technical guidelines, for strip flooring, the moisture content of the wood and the subfloor should not vary by more than 4 percent. If it does, you are just waiting for a disaster.
How do I maintain my flooring’s integrity over several years?
The secret is not just a daily sweep; it is about controlling the environment. You need to keep your home’s humidity between 30% and 50%. If you let it drop too low in the winter, you will be searching for how to keep your hardwood floors from gapping in the winter. If it is too high, the wood swells. For tile, longevity is all about keeping the grout sealed. I re-seal my bathroom grout every 18 months, regardless of what the bottle says. It is a 30-minute job that saves a $2,000 re-grout later. This is part of the hardwood floor care secrets to longevity and shine that apply just as well to luxury tile setups.
Why Your Cordless Drill is Ruining Your Leveling Batches
I have seen it a hundred times: a DIYer tries to mix a 50-pound bag of self-leveler with a standard 18V cordless drill. The motor smokes, the mix stays lumpy, and the result is a pitted mess. You need a dedicated, high-torque mixing station or a heavy-duty corded drill that can handle the sheer force of thick compounds. This is the secret to mixing the perfect bucket of self-leveler every time. You need those polymers fully hydrated and consistent. Looking ahead, I expect we will see more ‘smart’ underlayments that can report moisture spikes to your phone via Bluetooth. But until then, you are the sensor. Do not be afraid to get messy with the prep work. If you find yourself needing to sand down a high spot, make sure you have the vacuum attachment that actually picks up fine sawdust so you do not ruin your lungs or your home’s HVAC system. My challenge to you: pick up a 10-foot straightedge before your next project and find the dips you did not know were there. It is the first step to mastering hardwood floor refinishing and installation like a true craftsman.
What Your Flooring Salesman Won’t Mention About Maintenance
I have learned the hard way that the biggest enemy of a beautiful floor isn’t actually dirt; it is the invisible chemistry happening underneath the surface. One major lightbulb moment for me was realizing that grout isn’t a solid, inert rock; it is a breathing filter. If you do not treat it with high-quality penetrating sealants, it will trap every mineral in your tap water until it glows that dreaded yellow. Another hard truth? Most ‘quick fixes’ for hardwood actually strip away the protective finish, leaving you searching for expert tips for hardwood floor refinishing much sooner than you planned. I spent years fighting the symptoms of yellowing instead of the cause, which is almost always moisture migration or the use of improper, high-pH cleaners.
#IMAGE_PLACEHOLDER_E#
The Three Tools I Never Start Without
If you want professional results that stand the test of time, you have to stop guessing and start measuring. My personal toolkit for every flooring installation always includes a 10-foot straightedge because you simply cannot trust your eyes to see a subtle 1/8-inch dip that will eventually crack your tile. I also swear by a pinless moisture meter; it is the only way to avoid the nightmare of gapping or crowning in wood floors. Finally, never underestimate the power of a high-torque mixer for your leveling compounds. For a deep dive into these fundamentals, I highly recommend reading the ultimate guide to floor leveling. These aren’t just gadgets; they are the difference between a floor that lasts decades and one that fails in three years.
Take the First Step Toward Better Floors
It is easy to feel overwhelmed by the technicalities of subfloor prep, but the reward of a crisp, white, and perfectly flat floor is worth every hour of labor. You do not have to be a master builder to achieve a flawless finish; you just have to be willing to slow down and follow a step-by-step guide to flooring installation that prioritizes the foundation over the aesthetics. Once you master the nuances of moisture control and leveling, the actual tiling or plank laying becomes the easiest part of the job. Have you ever discovered a major subfloor issue after you already started laying your tile or wood? Let me know in the comments below.