
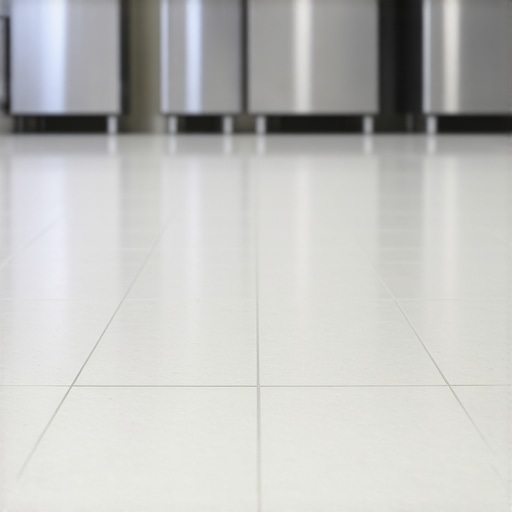
I’ll never forget the look on my first client’s face when the health inspector pointed out the ‘organic growth’ blooming in the grout lines of her restaurant kitchen. It was humiliating. I had spent two weeks installing what I thought was a masterpiece, but I’d made the classic rookie error of using standard cementitious grout in a high-grease environment. That porous stuff soaked up chicken fat like a sponge, and no amount of sealer could save it. It’s a visceral memory that still makes me cringe every time I walk into a commercial space. Today, we’re going to break that cycle of endless scrubbing and failing by diving into why epoxy grout is the only sane choice for a commercial kitchen. If you’ve been fighting a losing battle against stained floors, this guide is for you.
Stop Scrubbing and Start Sanitizing
If you’re still using cement-based grout in a kitchen that pumps out a hundred covers a night, you’re essentially building a luxury hotel for bacteria. I learned this the hard way after a floor I installed started looking twenty years old in just six months. It wasn’t pretty. Standard grout is porous, meaning every spill, every drop of acidic tomato sauce, and every splash from a dirty mop bucket finds a permanent home deep inside the floor structure. You can’t just wipe it away because the grime is literally part of the floor now. Epoxy grout, on the other hand, is a completely different beast. It’s a non-porous resin that doesn’t just sit in the gaps; it seals them off entirely. It’s basically liquid plastic that hardens into a rock-solid, waterproof barrier. According to the Food Safety and Inspection Service (FSIS), floors in food prep areas must be easily cleanable and non-absorbent to prevent cross-contamination. Cement grout fails this test almost immediately as it begins to degrade. This is why following tile installation pointers that save time and money usually involves choosing the right materials before the first tile is even set. [IMAGE_PLACEHOLDER]
Is the hefty price tag really justified?
I get it. Epoxy is significantly more expensive than the stuff you buy in big bags at the warehouse, and it’s notoriously difficult to apply. When I first started, I didn’t realize that epoxy grout has a ‘pot life’ shorter than my patience on a Monday morning. If you don’t move fast, it turns into a bucket of unusable plastic before you’ve even finished the first row. You have to know how to mix grout by hand without getting air bubbles, or you’ll end up with a pitted surface that traps even more dirt. You’re probably wondering if you can just get away with a high-quality sealer instead. In my experience? Absolutely not. Sealers are a temporary band-aid. They wear off under the intense heat and harsh chemicals used in commercial cleaning. Epoxy is the only material that stands up to the pressure of a high-volume kitchen without flinching. Have you ever had a kitchen floor that felt ‘slimy’ no matter how much you mopped? That’s the grease trapped in your grout calling for help. It’s a safety hazard that leads to slips and falls, not to mention the smell. We’re going to look at how to transition your space to a more durable, cleaner alternative that actually lasts.
Make the Subfloor Your Best Friend
Before you even crack a seal on that expensive epoxy resin, your tile joints have to be bone-dry and surgically clean. Think of it like trying to tape a wet cardboard box; nothing is going to stick. I remember a job in a seafood bistro where I rushed the prep. There was a tiny bit of residual moisture trapped in the joints from the previous day’s cleaning. When I applied the epoxy, it started to ‘fish-eye’ and bubble. I had to scrape it all out with a dental pick—not my finest hour. This is why the one step people skip during waterproof flooring installation in mckinney is often the most critical: moisture testing. If your subfloor is damp, your epoxy won’t bond. You also need to ensure you haven’t left any spacers behind. The hidden reason your tile spacers are stuck in the grout is usually because you didn’t pull them before the thinset cured, and with epoxy, those little plastic ghosts will be visible forever. 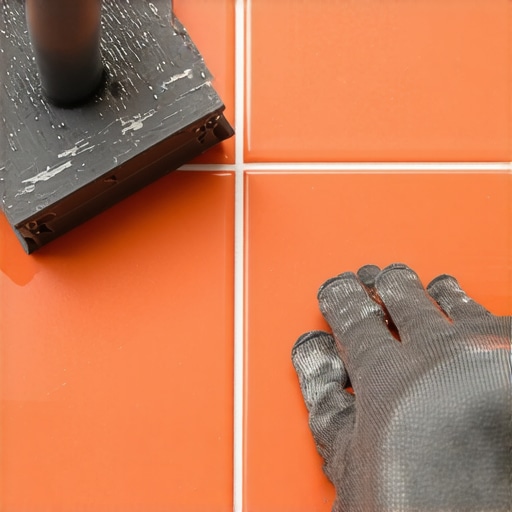
Don’t Let Your Grout Turn Into a Brick in the Bucket
Mixing epoxy is more like a chemistry experiment than traditional masonry. You have Part A and Part B, and once they meet, the clock starts ticking. I use a low-speed drill because high speeds introduce air. If you ignore how to mix grout by hand without getting air bubbles, you’ll end up with pinholes that harbor the very bacteria you’re trying to avoid. One trick I learned the hard way is to dump the mixed grout out onto a piece of cardboard or a scrap piece of plywood immediately. Leaving it in the bucket creates an ‘exothermic reaction’—it generates its own heat, which makes it set up twice as fast. Spreading it out keeps it cool and gives you an extra ten minutes of working time.
Work Small and Move Fast
When you start spreading, don’t try to tackle the whole kitchen at once. I usually work in 10-square-foot sections. Use a hard rubber float, not the soft ones you use for standard grout. You need to push that resin deep into the joint. I once watched a guy try to ‘skim’ epoxy like he was icing a cake; three weeks later, the grout started popping out because it was only 1/8th of an inch deep. You have to pack it tight. To keep things clean, some pros swear by the blue tape trick for grouting without making a mess, especially around sensitive equipment or stainless steel legs.
Master the Two-Bucket Cleaning Method
This is where most people fail. You need two buckets of water: one for the first ‘dirty’ wipe and one for the final rinse. Add a splash of white vinegar to the second bucket to help break down the resin haze. Use a white scrub pad first to loosen the epoxy on the tile surface, then follow up with a high-quality sponge. If you leave a haze behind, it’s practically permanent. I always keep a few microfiber towels handy for the wet rag trick for cleaning up wet grout haze before it turns into a rock-hard film. I once had a helper forget to change the rinse water in a large walk-in cooler. By the time we realized the water was too ‘loaded’ with resin, the floor had a cloudy, sticky sheen that looked like someone had spilled syrup and let it dry. We had to use an industrial-strength stripper that smelled like a chemistry lab explosion to get it off. Save yourself the headache: if the water looks like milk, change it immediately.Most contractors will tell you that a little dip in the concrete doesn’t matter because you can ‘back-butter’ your way out of it. I’m here to tell you that’s a dangerous lie. In a commercial kitchen, where heavy refrigeration units are rolled across the floor daily, that extra pocket of thinset will eventually shrink or crush, leading to the dreaded ‘hollow sound.’ I’ve seen entire sections of quarry tile shatter because the installer thought they could skip the prep and use adhesive as a filler. You have to know how to measure subfloor flatness before you start installing or you’re just building on a foundation of sand.
Why does your self-leveler look like a moonscape?
One of the most common advanced mistakes I see involves the ‘chemistry’ of the subfloor itself. People pour leveler and wonder why it’s full of tiny craters. Usually, why your self-leveler pitted during the drying process comes down to outgassing—air escaping from the concrete pores because you didn’t prime it correctly. The Tile Council of North America (TCNA) specifies that for tiles with any side longer than 15 inches, the floor shouldn’t deviate more than 1/8th of an inch over 10 feet. If you try to bridge a massive gap with thinset, why your trowel size is ruining your tile bond becomes a very expensive lesson in physics.
The Structural Trap Most Installers Ignore
When a floor fails in a high-traffic area, everyone blames the grout or the tile quality. But often, the real reason your floor joists are making your tile crack is deflection. If the subfloor has even a millimeter of ‘bounce’ under the weight of a commercial range, the rigid epoxy grout will eventually lose its bond with the tile edge. This is why precise floor leveling techniques to achieve flawless surfaces are about more than just aesthetics; they are about long-term structural integrity. I once spent three days reinforcing a floor from the basement up because the client wanted ‘forever floors.’ It was a hard sell at the time, but five years later, those tiles haven’t budged. Have you ever fallen into this trap? Let me know in the comments.
The One Tool that Separates Pros from Amateurs
If you’re serious about your reputation, there’s one piece of kit you can’t skip. I’m talking about the spiked roller. When I was first mastering the basics of flooring installation fundamentals leveling for a seamless look, I thought a standard gauge rake was enough. I was wrong. A spiked roller isn’t just for show; it breaks the surface tension of the leveler and releases trapped air that causes those annoying pinholes. If you’ve ever wondered how to use a spiked roller for the perfect leveling pour, the secret is in the speed. You want to pass it through the wet material like you’re mowing a lawn—steady, overlapping strokes. This small step ensures that your epoxy grout sits on a foundation that is as smooth as glass, preventing the grout from ‘sinking’ into subfloor voids weeks after the job is done. Using precise floor leveling techniques to achieve flawless surfaces is the only way to guarantee that your high-end epoxy work doesn’t look like a DIY disaster.
Why You Should Toss Your Old Mop in the Trash
Maintenance is where the reality of commercial flooring hits home. I’ve seen million-dollar kitchens ruined by a janitorial crew with a dirty string mop and a bucket of bleach. According to the National Tile Contractors Association (NTCA) Reference Manual, epoxy grout requires a neutral pH cleaner to avoid breaking down the resin’s top layer over time. This is critical. You should also know that you should never use acid-based cleaners on natural stone or high-performance grouts, as they can cause etching or premature failure. Even though we are focusing on tile, many hardwood floor care secrets to longevity and shine apply here too—namely, the avoidance of harsh chemicals that strip the protective finish. In the next five years, I expect we’ll see ‘smart’ epoxy resins that change color when they’ve been exposed to enough heat or bacteria to require a deep-clean, taking the guesswork out of commercial maintenance entirely. 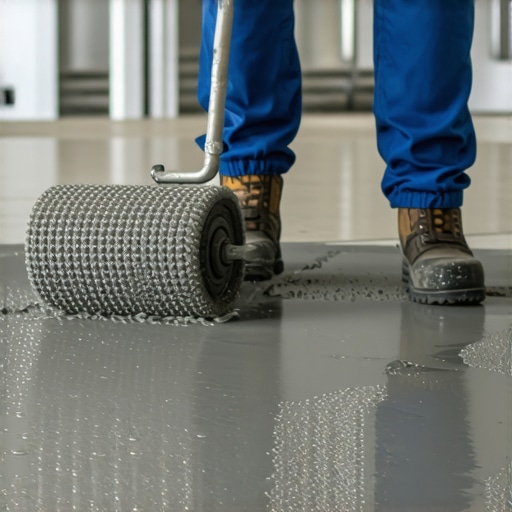
How do I keep this floor looking brand new for the next decade?
The secret isn’t a magic chemical; it’s a mechanical brush. I always tell my clients to invest in a low-speed floor buffer with a medium-stiff nylon brush attachment. Once a week, they should run it over the grout lines with a neutral cleaner. This physically agitates the grease out of the micro-texture of the epoxy before it can bond. If you just mop, you’re just moving the grease from the center of the tile into the grout joints. I challenge you to try the spiked roller trick on your next prep job—you’ll never go back to just using a rake and a prayer.
Hard Lessons from My Most Expensive Epoxy Mistakes
After years in the trenches, I’ve realized that the biggest enemy of a perfect epoxy job isn’t the material—it’s the environment. I once tried to grout a commercial bakery line while the ovens were still cooling down. The heat made the epoxy ‘flash set’ in the bucket, wasting five hundred dollars of material in fifteen minutes. Now, I insist that the HVAC is cranked down to 68 degrees for twelve hours before I even arrive. Another myth is that you can ‘stretch’ epoxy if you run short. You can’t. If you don’t have enough, stop, seal the edges, and wait for a new batch. Trying to thin it out with water or solvent will lead to soft spots that will eventually crumble. You also need to be meticulous about ratios; checking the correct way to mix grout so it doesnt change color is vital because epoxy is far less forgiving than cement. Finally, never reuse a sponge from a previous day. Microscopic resin beads stay in the pores and will scratch your next floor. [IMAGE_PLACEHOLDER_FINAL]
The Small Kit That Saves Big Jobs
I never step onto a job site without my TCNA Handbook; it is the absolute bible for installing tiles like a pro step by step strategies for 2025 and provides the data you need to win arguments with stubborn general contractors. For hardware, I strictly use the Barwalt brand epoxy floats because the rubber density is perfectly calibrated to push thick resins without dragging them back out of the joint. I also highly recommend keeping a pack of white 3M Scotch-Brite pads for the initial scrub; they are aggressive enough to break the surface tension of the resin without damaging the tile glaze. If you are new to the trade, following a step by step guide to flooring installation and leveling success will ensure you don’t skip the cleaning steps that make or break an epoxy finish.
Create a Floor That Stands the Test of Time
Making the switch from standard grout to epoxy resin is the single most important transition you can make to elevate your reputation as a master installer. It requires more patience, more cleanup, and a higher level of precision, but the result is a floor that remains sanitary and beautiful long after the building has changed hands. By avoiding the most common flooring installation mistakes to avoid for lasting results, you ensure that your work becomes a landmark of quality in your local market. Go ahead and take the leap into high-performance materials; your clients will see the value in every square inch. Have you ever had an epoxy job go south because the room was too hot? Let me know your horror stories in the comments below!