
I stood in my kitchen with a gallon of concentrated bleach and a bucket of steaming water, feeling like the absolute king of home maintenance. I had just finished my first big renovation, and I wanted that ‘hospital-grade’ clean to show off the wood-look planks. I thought I was being thorough, but within three months, those beautiful planks looked like they had been dragged through a dusty desert. The factory glow was gone, replaced by a milky, white haze that made the whole room look cheap and neglected. It was a heart-wrenching realization that my obsession with cleanliness was actually eating my floor alive. I learned the hard way that LVP isn’t just a plastic sheet; it’s a carefully engineered surface that reacts violently to harsh chemicals. Today, I’m going to pull back the curtain on why that bottle of Clorox is the biggest threat to your home’s aesthetic and how you can avoid the same [flooring installation mistakes to avoid for lasting results](https://tiletrendshop.com/flooring-installation-mistakes-to-avoid-for-lasting-results) that I made.
Why Bleach Turned My Dream Floor Into a Hazy Mess
When I first noticed the dulling, I assumed it was just footprint grease. I scrubbed harder with even more bleach, which is essentially the flooring equivalent of putting out a fire with gasoline. Most people don’t realize that luxury vinyl has a specialized ‘wear layer’ designed to resist scratches and spills, but it has a massive weakness: high pH levels. Bleach is an incredibly basic substance on the pH scale, and it slowly dissolves the topical finish that gives your floor its character. If you’ve already noticed your [luxury vinyl planks are separating in the sun](https://tiletrendshop.com/why-your-luxury-vinyl-planks-are-separating-in-the-sun), the last thing you want to do is introduce a corrosive liquid that can seep into those gaps and attack the core material. I spent hours trying to buff out the damage before admitting that I had chemically burned my own home.
Is Bleach Actually as Dangerous as People Claim?
Many of my neighbors still swear by it because ‘it kills everything,’ but there is a massive difference between sanitizing a countertop and maintaining a floor. According to technical reports from the Resilient Floor Covering Institute, using cleaners with a pH higher than 10—like bleach—can permanently degrade the UV-cured urethane coatings found on most modern LVP. You aren’t just cleaning; you are performing a slow-motion chemical peel on your living room. Have you ever noticed a strange film on your floors that won’t go away no matter how much you mop? Drop a comment below and tell me what you’ve been using—I’d love to help you troubleshoot before the damage becomes permanent.
The Real Reason Your Wear Layer is Failing
[image placeholder] It isn’t just about the aesthetics; it’s about the structural integrity of the plank’s surface. When bleach interacts with the vinyl, it can cause the material to become brittle. Over time, this leads to micro-cracking which allows dirt to get trapped *inside* the finish rather than sitting on top of it. This is why your floors might look ‘dirty’ even right after a deep clean. If you want to keep that showroom shine, you have to treat your vinyl with the same respect you’d give to [hardwood floor care secrets to longevity and shine](https://tiletrendshop.com/hardwood-floor-care-secrets-to-longevity-and-shine). Using a pH-neutral cleaner is the only way to ensure you aren’t paying for a full replacement in five years. We are going to look at the specific science of these reactions next, so you can understand exactly what happens when that mop hits the floor.
Stop the Chemical War with pH-Neutral Solutions
The first step in rehabilitating my floor was throwing away every generic “multi-surface” cleaner in the cabinet. These are often too acidic or too alkaline for the delicate urethane wear layer. You need a solution specifically labeled as pH-neutral. I’ve found that a simple mixture of a professional-grade concentrate and distilled water does more for the shine than any “shine-enhancing” wax ever could. Think of it like washing a sports car; you wouldn’t use dish soap because it strips the protective coating. Your LVP wear layer needs that same level of respect to maintain its factory luster. For those of you transitioning from wood to vinyl, many hardwood floor care secrets to longevity and shine actually apply here, specifically the absolute avoidance of harsh saturating liquids.
Master the Damp-Mop Method
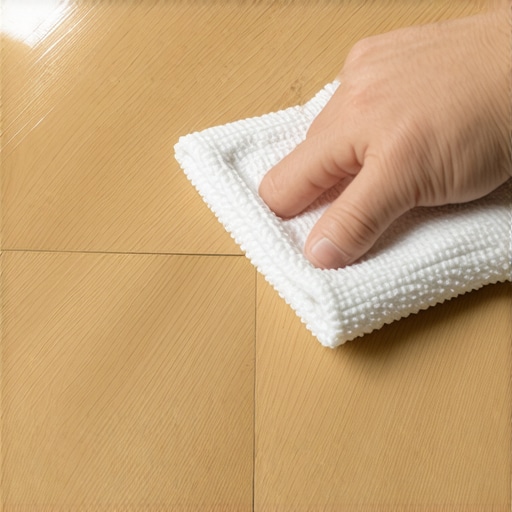
Saturation is the silent killer of modern flooring. Even if you aren’t using bleach, dumping a bucket of water on the floor is a recipe for disaster. I once helped a friend who thought ‘waterproof’ meant ‘flood-proof.’ We ended up pulling up planks because water trapped underneath started a mold party that smelled like a wet basement within a week. Instead, use a spray bottle and a microfiber flat mop. Mist a small area, wipe, and move on. This ensures no liquid seeps into the joints. This is especially critical because the one step people skip during waterproof flooring installation in mckinney is often ensuring the perimeter is correctly sealed with 100% silicone, leaving the edges vulnerable to moisture wicking.
Avoid the Heat Trap
I made the mistake of thinking heat was the ultimate sanitizer. I bought a high-end steam mop and went to town on my LVP thinking I was being more hygienic. Within two weeks, I noticed the planks were starting to cup and the clicking joints were making a popping sound. The high-temperature steam forced moisture into the click-lock joints and broke down the internal core bond. It’s a painful, expensive lesson, but you must remember why you should never use a steam mop on click lock floors. The heat essentially “cooks” the vinyl, making it expand and contract far beyond its design limits, which leads to permanent warping.
Spot Cleaning Secrets That Save Your Finish
If you have a stubborn scuff or a dried spill that won’t budge, don’t reach for the scouring pad. A soft white pencil eraser or a drop of isopropyl alcohol on a cotton ball can lift most marks without scratching the urethane. If the floor feels rough, it might not be dirt; it could be the start of a failure. Regularly checking your perimeter is also vital—I use the quarter trick for checking expansion gaps in luxury vinyl floors to make sure the floor has room to breathe. If the floor is pinched against a wall, no amount of cleaning will stop it from looking warped and damaged.
Manage the Sun to Protect the Surface
Heat doesn’t just come from mops; it comes from the window. Direct UV rays can act like a slow-motion chemical reaction on your wear layer. I noticed my floor was dulling significantly faster in the 3-foot strip right in front of my sliding glass door. This is a common issue, and understanding why your luxury vinyl plank is buckling near the window can help you realize that maintenance isn’t just about mopping—it’s about environment control. Close the blinds during peak afternoon heat to prevent the wear layer from getting brittle. Proper prep during the initial build is also key, so always revisit flooring installation fundamentals-leveling for a seamless look to ensure your planks are sitting flat and not under unnecessary tension from an uneven subfloor.
Stop Obsessing Over Level and Start Measuring Flatness
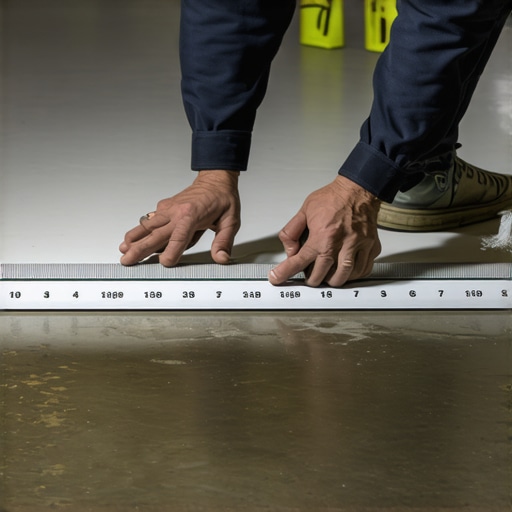
The industry likes to use the word ‘level’ as a catch-all, but that’s the biggest trap for a DIYer. A floor can be perfectly sloped (not level) and still be a great candidate for flooring, as long as it is flat. If you have a humped subfloor, your luxury vinyl will ‘bridge’ over the dip, creating a hollow sound that drives homeowners crazy. According to the Tile Council of North America (TCNA) Handbook, the industry standard for substrate flatness is typically 1/8 inch in 10 feet for large-format tiles. If you miss this, even the most expensive LVP or tile will fail. I learned this the hard way when I realized my concrete was ‘level’ but had a massive 1/4-inch dip that made my planks pop every time I stepped on them. Before you lay a single plank, you must learn how to measure subfloor flatness before you start installing to avoid these structural headaches.
Why Does Your Substrate Still Bubble After Using Primer?
You followed the instructions, bought the expensive primer, and poured your self-leveler, only to see it look like a science experiment gone wrong. This ‘pinholing’ or bubbling happens because the subfloor is ‘off-gassing.’ If the primer isn’t applied correctly or if the concrete is too porous, air escapes from the slab and gets trapped in the wet leveler. This creates a weak, honeycombed surface that will eventually crumble under the weight of your furniture. It’s a common ‘oops’ factor that ruins hundreds of installs every year. Understanding why your self-leveler is bubbling over plywood or concrete is the difference between a floor that lasts twenty years and one that needs a redo in six months. Have you ever fallen into this trap? Let me know in the comments; I’ve seen some leveler disasters that looked like the surface of the moon.
Fix the Joist Bounce to Stop the Grout Cracks
People often blame the grout or the thinset when their tile cracks, but the culprit is usually living in the crawlspace. Most residential floor joists are designed for ‘L/360’ deflection—meaning they can bend a little under weight—but natural stone and large tiles require a much stiffer floor (L/720). If your floor has a ‘bounce,’ no amount of expensive adhesive will save it. This is the real reason your floor joists are making your tile crack. You have to address the structural rigidity first. If you’re currently planning a remodel, take the time to learn how to achieve flawless floor leveling before tile laying. It’s much cheaper to sister a few joists now than to tear out five hundred square feet of cracked porcelain later. By looking at these hidden nuances, you move from being a ‘cleaner’ to being a true steward of your home’s value, avoiding the most common flooring installation mistakes to avoid for lasting results.
If you’re serious about moving beyond basic DIY and into professional-grade results, you have to stop guessing. My most prized tool isn’t a fancy saw; it’s my pinless moisture meter. Before I even think about opening a box of planks, I’m checking the slab. I’ve seen beautiful installs ruined because someone didn’t know how to use a moisture meter before installing wood floors. If your concrete is sweating, your LVP will fail, and your hardwood will cup. There’s no negotiating with physics.
Stop guessing and start measuring with a moisture meter
I personally use a Lignomat meter because it provides depth-specific readings without marring the surface. The National Wood Flooring Association (NWFA) Technical Manual specifically highlights that maintaining a consistent relative humidity between 30% and 50% is the single most important factor for wood stability. If you ignore this, you’re essentially gambling with your bank account. You can follow a step-by-step guide to flooring installation and leveling success, but if the substrate is wet, none of those steps will save you from a failure six months down the road.
Reach for the Euro-notch trowel to save your tile bond
When it comes to tile, the biggest mistake I see pros and amateurs alike making is using a standard square-notch trowel for large-format tiles. I switched to a Euro-notch (or slanted notch) trowel years ago, and I’ve never looked back. The way the ridges collapse ensures nearly 100% thinset coverage without needing to beat the tile with a mallet. If you’ve ever wondered why your trowel size is ruining your tile bond, it’s usually because the air isn’t escaping, leading to those hollow sounds and eventual cracks. This tool is the secret to avoiding the need to how to fix a lippage problem in your new tile layout later on.
#IMAGE_PLACE_HOLDER_D#
How do I maintain my flooring investment over time?
Maintenance isn’t about scrubbing; it’s about environment control and the right chemistry. I keep a dedicated ‘floor first aid kit’ in my pantry. It includes a high-quality pH-neutral cleaner, a dedicated microfiber flat mop, and felt floor protectors for every single piece of furniture. You should also be looking at mastering hardwood floor refinishing expert tips for 2025 to understand that a ‘screen and recoat’ every few years is significantly cheaper than waiting for the finish to wear through to the raw wood. Prevention is the only way to avoid the most common flooring installation mistakes to avoid for lasting results.
Smart sensors are the next frontier for your subfloor
Looking ahead, I predict we are going to see a massive shift toward ‘smart subfloors.’ We are already seeing the introduction of Bluetooth-enabled moisture sensors that sit beneath your underlayment and alert your phone if a pipe leaks or if humidity levels spike. This kind of tech will eventually be standard in high-end homes, turning your floor from a passive surface into an active participant in your home’s health. For now, the best thing you can do is commit to a professional measurement routine. Grab a high-quality moisture meter this weekend and scan your rooms—you might be surprised at what’s happening beneath your feet.
[image placeholder]
Hard Truths About Why Even ‘Waterproof’ Floors Fail
If there is one thing my years of trial and error have taught me, it’s that the word ‘waterproof’ is the most misunderstood term in the home improvement industry. While the core of your luxury vinyl might not swell, your subfloor certainly will, and the chemical bond of your finish is far more fragile than the box lead you to believe. I realized that my floor wasn’t just a surface; it was a complex system. One major lightbulb moment was discovering that the shim trick for fixing a bouncy plywood subfloor could have saved me months of annoying squeaks and clicking. I also learned that if you ignore the environmental humidity, you’ll eventually be asking how to keep your hardwood floors from gapping in the winter even if you think you followed the instructions to a T. Your cleaning closet is often the ‘crime scene’ for floor failure—alkaline residues build up over time, creating a sticky trap for dirt that no amount of mopping can fix. True longevity comes from respecting the chemistry of your wear layer and the physics of your substrate.
The Essential Gear That Lives in My Maintenance Kit
I don’t believe in buying every gadget on the shelf, but these three items have saved my home from a full renovation multiple times. First, a high-quality pinless moisture meter is non-negotiable; it tells you what your eyes cannot see behind the planks. Second, I always keep a bottle of professional-grade pH-neutral cleaner concentrate, which prevents the ‘haze’ that ruined my first floor. Finally, I swear by heavy-duty felt floor protectors with a reinforced adhesive back. Without these, your furniture will eventually win the war against your urethane layer. If you’re dealing with tile instead of vinyl, you’ll need to know how to fix a lippage problem in your new tile layout early on, as uneven edges are the primary cause of premature wear and chipping. I trust these tools because they focus on prevention rather than just hiding the damage after it occurs.
Build a Floor That Stands the Test of Time
You’ve put in the sweat equity to transform your space, and now you have the knowledge to protect that investment. Don’t let the fear of making a mistake stop you from enjoying your home. By mastering the art of the damp-mop, choosing the right cleaning chemistry, and ensuring your subfloor is flat and dry, you are already ahead of 90% of homeowners. You can effectively sidestep the most common flooring installation mistakes to avoid for lasting results by simply slowing down and measuring twice. If things ever sound off, like why your new tile floor is making a cracking sound, you now know to look at the structural deflection rather than just the surface. You are the steward of your home’s value, and with these professional habits, your floors will look as good in ten years as they do today. Have you ever noticed your floor making a strange popping or cracking sound after a change in the weather? Let me know in the comments below!