

I’ll never forget the sound of a heavy gurney rolling over a brand-new hospital wing in Detroit. Instead of that silent, smooth glide you expect in a sterile environment, it was a sickening crunch-pop. I knelt down, pressed my hand against the luxury vinyl, and felt a literal bubble. The floor was ‘weeping.’ It wasn’t a leak from the ceiling or a spilled IV bag; it was the concrete subfloor itself exhaling moisture it should have lost months ago. That was my wake-up call. We spent thousands on the best materials but ignored the one thing that actually mattered. It was a classic case of rushing the job, a mistake I made early on when I thought a quick touch-test was enough to green-light an installation. Today, I want to show you exactly how to avoid that disaster so your facility doesn’t become a cautionary tale of delamination and mold.
Stop Treating Your Subfloor Like an Afterthought
Hospital floors have to handle a lot—chemical spills, 500-pound equipment, and constant foot traffic. But the real battle happens underneath. Most people think once concrete looks gray and hard, it’s ready. If you’ve ever wondered how to use a moisture meter before installing wood floors, you already know more than I did on my first big contract. Moisture vapor emission is a relentless force. If you don’t address it, you end up with why your self-leveler is pulling away from the concrete, which is a nightmare in a high-stakes medical environment. According to the Resilient Floor Covering Institute (RFCI), moisture-related flooring failures are estimated to cost the construction industry over $1 billion every single year. That is a staggering amount of waste for something that is entirely preventable.
Is all this testing really worth the extra time?
I get it. The project manager is breathing down your neck to open the ward. You might think, ‘The surface is dry, let’s just lay the tile.’ But even concrete that feels dry can have a high relative humidity deep inside. If you trap that under a non-porous hospital-grade floor, it turns into an alkaline soup that eats your adhesive for breakfast. You’ll see the same issues as when someone tries installing tiles like a pro but skips the fundamental prep work. Before you start, you need a solid plan, like the one found in this step-by-step guide to flooring installation and leveling success. Have you ever walked across a relatively new floor and felt that weird, soft ‘give’ under your feet? That is the sound of money evaporating. Tell me, have you ever faced a moisture problem that didn’t show up until weeks after the job was done? It’s a gut-punch, but learning the ‘why’ is the first step to making sure it never happens again.To keep that clinic floor from bubbling, you have to move past visual inspections and start measuring. Concrete is like a sponge that never quite finishes drying in the middle, even if the surface is dusty. If you are dealing with a wood-based subfloor in a residential wing, you absolutely must know how to use a moisture meter before installing wood floors to ensure the material doesn’t cup later. For heavy-duty medical concrete, a Relative Humidity (RH) probe is your best friend. It tells you what is happening three inches down, not just on the surface.
Stop Guessing and Start Measuring
Before you even open a bag of leveler, you need to map out the ‘geography’ of your floor. I used to think I could spot a dip by eye, but concrete is deceptive. Use a 10-foot straightedge to find the valleys and peaks. If you want to be surgical about it, try the flashlight scan for finding high spots in concrete. By laying a powerful beam flat against the floor, every high spot will cast a shadow like a mountain range at sunset. It’s the fastest way to see exactly where you need to grind or fill before you ever mix a drop of product. This is part of the essential how to measure subfloor flatness before you start installing process that separates amateurs from specialists. 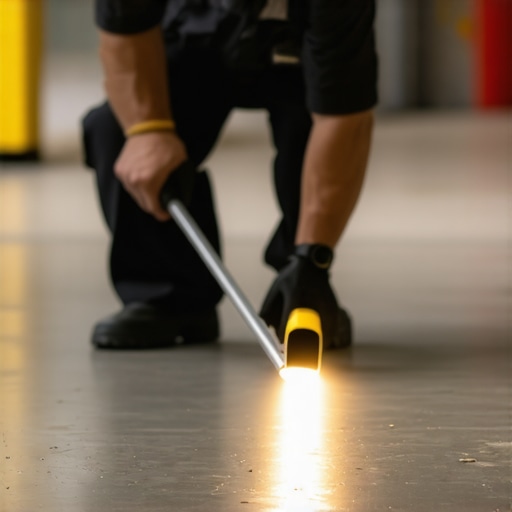
The Primer Choice That Dictates Your Success
Once the floor is clean and the high spots are mapped, don’t just dump the leveler. Without the right primer, you’ll witness why your self-leveler is pulling away from the concrete just days after it dries. The primer acts as a bridge; it seals the pores of the concrete so the leveler doesn’t lose its moisture too fast and helps it stick like it was part of the original slab. I remember a project in a small clinic where I thought I could skip the ‘periphery’ prep. I poured ten bags of expensive compound only to realize it was disappearing. I hadn’t learned how to stop your floor leveler from leaking through the subfloor or even how to dam a doorway before pouring self-leveler. Half my material ended up in the floor joists below, creating a huge mess and a very angry facility manager.
The Art of the Perfect Pour
When it’s finally time to pour, speed and precision are everything. You need the secret to mixing leveler for a glass-smooth finish: have one person dedicated to mixing and another to spreading. If you work solo, you’ll find the reason your leveler is setting up too fast is often a combination of heat and lack of momentum. Once the material is down, use a gauge rake to set the depth and then follow up with how to use a spiked roller for the perfect leveling pour. This tool doesn’t just spread the liquid; it breaks the surface tension and releases trapped air bubbles that would otherwise turn into pinholes. Following these precise floor leveling techniques to achieve flawless surfaces is how you create a subfloor that can withstand the weight of an MRI machine without a single crack.Despite what the ‘weekend warrior’ YouTube channels might tell you, more water does not equal a smoother floor. In fact, it is the fastest way to ruin a batch. I see it all the time: an installer thinks the mix looks too thick, so they add an extra quart of water to help it flow. But as the National Wood Flooring Association (NWFA) points out in their technical manuals, exceeding the manufacturer’s water-to-powder ratio causes ‘segregation.’ The heavy aggregates sink to the bottom, and the vital polymers float to the top, leaving you with a brittle, chalky surface that will eventually crack your tile or cause why your luxury vinyl planks are separating in the sun. If you have been tempted to ‘eyeball’ the water, stop. Use a dedicated measuring bucket every single time to avoid flooring installation mistakes to avoid for lasting results.
Can you really trust a ‘self-leveling’ compound to do its own work?
Here is the hard truth: self-leveler does not actually level itself; it is merely ‘highly flowable.’ If you just pour it and walk away, you will end up with a series of connected puddles rather than a flat plane. You have to actively manage the material with a gauge rake to ensure it reaches the corners. This is a core part of mastering floor leveling pro secrets for perfect installations. I have seen pros skip the rake and then wonder why their large-format tiles have lippage issues. Remember, your tile is only as good as the substrate. If the subfloor is wavy, the trowel notch secret for getting full thinset coverage will not save you from a hollow-sounding floor. 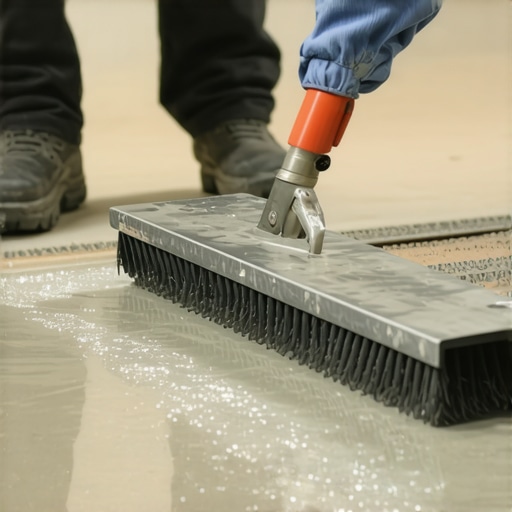 Another nuance people miss is the ‘oops’ factor of air entrainment. If you use a high-speed drill to mix your compound, you are basically whipping meringue. You are folding air into the mix, which leads to why your self-leveler is bubbling over plywood. Those tiny bubbles might look harmless when wet, but they turn into craters as the material sets, compromising the bond for your adhesive. It is a painstaking process, but getting these details right is the only way to avoid a total tear-out. Have you ever fallen into the trap of over-watering or over-mixing? Let me know in the comments—I would love to hear how you fixed it.I have spent thousands of dollars on gadgets that ended up gathering dust in my garage, but there are a few pieces of gear I never step onto a job site without. First on my list is a dual-propeller mixing paddle. Most guys use those cheap, single-spiral ones that just spin the mud in a circle, but the dual-propeller actually pulls the material from the bottom and folds it over. This is the only way to ensure you don’t get dry clumps of powder that lead to structural weak points. It is a fundamental part of the secret to mixing leveler for a glass-smooth finish. Second, I am a fanatic about using a dedicated HEPA-filtered dust shroud on my grinders. In a medical facility, a single puff of silica dust can shut down an entire wing. It is not just about the mess; it is about protecting the bond and the air quality. If you are moving from concrete to wood, remember that the best primer for installing leveler over plywood is just as critical as the tools you use to spread it.
Invest in Tools That Don’t Quit
I have seen too many projects fail because an installer tried to use a standard drill for mixing. A standard drill will burn out its motor before you finish the third bag. You need a dedicated, low-RPM high-torque mixer. According to the LATICRETE Technical Data Sheets, consistent mixing speeds are vital for maintaining the chemical integrity of the polymers within the leveling compound. If you vary the speed or use the wrong paddle, you are literally changing the chemistry of your floor. This kind of attention to detail is what prevents flooring installation mistakes to avoid for lasting results. When you have the right gear, the job becomes less about ‘fixing’ problems and more about executing a plan. 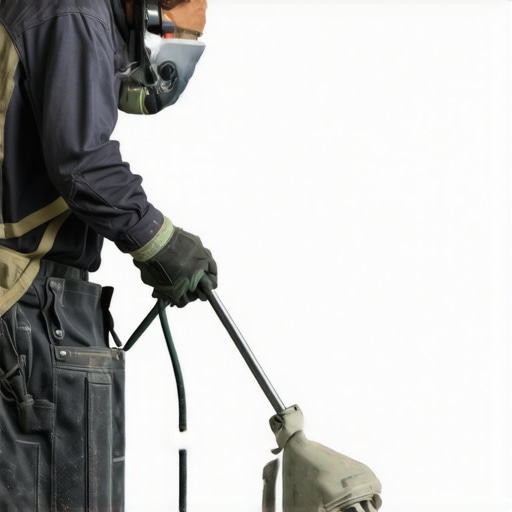
How do I maintain my subfloor integrity for the long haul?
Maintenance starts the moment the leveler cures. Once your finish floor is down, the best way to maintain that bond is climate control. If you let a building swing 30 degrees in temperature or 40% in humidity, you are asking for trouble. For those who eventually transition into mastering hardwood floor refinishing, you know that seasonal shifts can cause the subfloor and the finish to move at different rates. To keep things stable, keep your HVAC running even during the ’empty’ phase of a commercial build. Follow the hardwood floor care secrets to longevity and shine by ensuring the environment stays consistent.
Scanning the Future of Leveling
I predict that in the next five years, we will stop using straightedges entirely. We are already seeing the rise of LiDAR-based mobile apps that can map a floor’s topography in seconds, creating a digital heat map of every dip and crown. This technology will allow us to calculate exactly how many gallons of material we need with 99% accuracy. For now, keep your 10-foot straightedge handy, but don’t be afraid to embrace these digital shifts. My challenge to you is this: on your next pour, don’t just ‘eyeball’ your water. Use a graduated measuring cylinder—not a bucket with a Sharpie line. Experience the difference a chemically perfect mix makes, and you’ll never go back to guessing again.
The Hidden Reality of Post-Pour Patience
After twenty years on the job, the biggest shift in my mindset wasn’t learning a new tool, but learning to respect the ‘cure.’ You see the surface looking matte and feel the urge to walk on it, but the chemistry inside is still volatile. I’ve seen beautiful installs ruined because someone turned the heat up too high to ‘help it dry,’ leading to the exact floor leveling challenges common mistakes and how to avoid them that we try to prevent. My rule of thumb? If the air is humid, double your wait time. It’s better to lose half a day now than to have to revamp your home with expert flooring installation tips later because of a bond failure. Remember, moisture is the enemy of longevity, and patience is your best sealant.
Gear That Separates Pros from Amateurs
When you’re aiming for a high-stakes finish, generic tools won’t cut it. I always recommend the following for anyone serious about the craft. First, a High-Torque, Low-RPM Mixer: a standard drill creates heat and air; a dedicated mixer creates a silk-like slurry. Second, Dual-Propeller Paddles: these are non-negotiable for avoiding ‘islands’ of dry powder in your mix. Third, Calibrated Measuring Pails: accuracy is the difference between a floor that lasts and one that dusts. If you’re moving into residential work next, keep mastering hardwood floor refinishing expert tips for 2025 in your back pocket, as subfloor flatness is even more critical when sanding thin veneers. For a comprehensive roadmap, I always point my crew toward the ultimate guide to floor leveling for a perfect finish.
Take the First Step Toward a Flawless Finish
Mastering floor leveling isn’t just about the science of the pour; it’s about the pride you take in the parts no one will ever see. When that hospital gurney rolls across your floor five years from now and it’s as silent as a library, you’ll know you did it right. If you ever hit a snag or need a second opinion on a complex slab, don’t hesitate to contact us for guidance. You have the tools, the technique, and the mindset—now go create a surface that stands the test of time. #IMAGE_PLACEHOLDER_E# Have you ever had a pour go wrong because of the building’s temperature? Share your story in the comments below!