
There is no sound quite as betraying as a loose stair tread in a quiet house. I remember sneaking down to the kitchen at 2 AM last winter, trying my best to stay silent, only to have the fourth step let out a groan that sounded like a dry-docked ship. It wasn’t just the noise; I could feel the wood shift under my heel. It’s that unsettling ‘thud’ that tells you the structural bond has surrendered. For years, I ignored it, but eventually, the gap got wide enough that I started worrying about the safety of my kids. I’ve spent more hours than I’d like to admit underneath staircases and hovering over hardwood floor care secrets to longevity and shine, trying to find the one fix that actually sticks.
Stop Tiptoeing Around Your Own House
Most people assume that a loose tread is just a cosmetic annoyance, but it’s actually a sign that your home’s ‘moving parts’ are out of sync. When you have a loose tread, you aren’t just dealing with a noise; you’re dealing with friction that slowly wears down the wood fibers. I’ll be honest: my first attempt at a fix was a disaster. I grabbed a hammer and a few 2-inch finish nails, thinking I’d just ‘pin’ it back into place. I didn’t bother checking the shim trick for fixing a bouncy plywood subfloor first. The result? I split a gorgeous piece of solid oak right down the middle because I didn’t pre-drill or understand how the wood was expanding. It was an expensive, ugly mistake that taught me a valuable lesson: if you don’t address the root cause—usually a gap between the tread and the stringer—the squeak will always return.
Can a DIYer really fix this without calling a pro?
You might be skeptical. Maybe you’ve tried those ‘Squeeeeek No More’ kits or dumped wood glue into the cracks only for the tread to start wiggling again two weeks later. I get it. But the truth is, once you understand the mechanics of how a staircase is put together, you can achieve a professional-grade result with basic tools. Whether you are dealing with revamp your home with expert flooring installation tips or just a single annoying step, the physics remain the same. According to the National Wood Flooring Association, wood naturally expands and contracts with humidity, which is why mechanical fasteners and high-quality adhesives must work in tandem to maintain a silent bond. Today, we’re going to walk through the permanent solution—no more temporary band-aids. Have you ever tried a ‘quick fix’ on your stairs only to have it fail a month later? Drop a comment and tell me what happened! We’re about to dive into the real-deal method that will save your sanity and your shins.
Find the Friction Before You Fix It
Before you reach for your drill, you have to play detective. A squeak is just the sound of two pieces of wood rubbing together like a pair of dry crickets. In most staircases, the tread (the part you step on) has pulled away from the stringer or the riser. To find the culprit, you need a second pair of feet. Have someone slowly walk up and down the stairs while you pinpoint the exact location of the movement. If you have access to the underside of the stairs, look for a visible gap or a ‘rub mark’ where the wood has been polished smooth by friction. If the subfloor itself is the problem, you might need to look into the plywood sandwich trick for fixing bouncy floor joists to stabilize the entire structure.
The Shim and Glue Double-Whammy
Once the gap is identified, your goal is to fill it so movement is physically impossible. This isn’t just about sticking things together; it’s about creating a solid block. Use thin cedar shims dipped in wood glue. Gently tap the shim into the gap between the tread and the stringer. Don’t drive it in so hard that you lift the tread—you just want to ‘kiss’ the wood and fill the space. If you are dealing with a larger structural issue, you might even find that the shim trick for fixing a bouncy plywood subfloor works wonders here too. 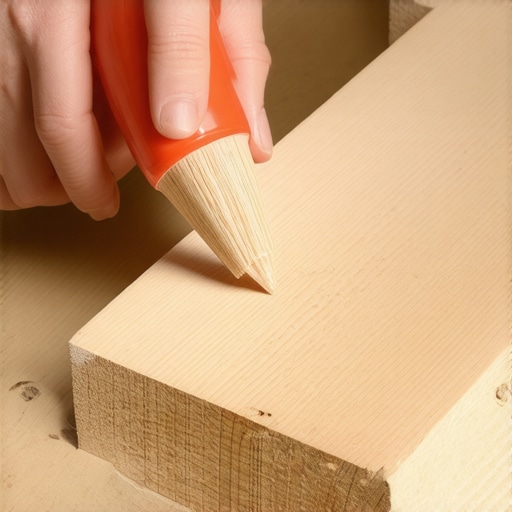 I once helped a neighbor fix a set of stairs where the gap was nearly half an inch. He wanted to use spray foam, which is a massive mistake because it is too compressible. We ended up using solid oak shims and a heavy-duty adhesive. It felt like a rock afterward, and the silence was immediate.
Why Pre-Drilling Saves Your Hardwood
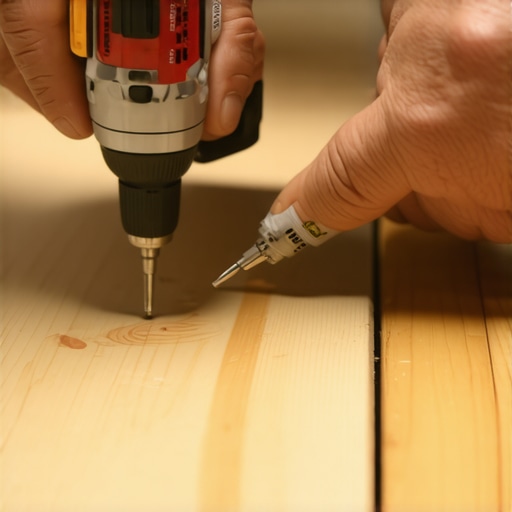
The biggest mistake DIYers make is driving a nail or screw straight into the tread. Hardwood is dense, and if you don’t give the fastener a path, the wood will split along the grain. Always use a drill bit that is slightly smaller than your screw diameter. When I was first learning revamp your home with expert flooring installation tips, I cracked a beautiful walnut tread because I was in a rush and skipped this step. Now, I always pre-drill and countersink the hole so the screw head sits below the surface. This allows you to fill the hole with a matching wood plug later, making the repair invisible.
Check Your Environment Before You Fasten
Wood behaves like a sponge, expanding when it’s humid and shrinking when the furnace kicks on in the winter. If you fix a squeak in the middle of a humid July without checking how to use a moisture meter before installing wood floors, that same repair might fail by January when the wood shrinks and pulls away from your fastener. You want to ensure the wood is at a stable moisture level before you lock it down. This is similar to the care taken in flooring installation fundamentals leveling for a seamless look where the base must be perfectly prepped. If your subfloor is uneven, you might encounter similar issues as when why your floor leveler pitted during the drying process, leading to a weak bond that won’t hold up to daily foot traffic. To prevent future leaks of glue or fillers through the cracks, knowing how to stop your floor leveler from leaking through the subfloor can provide insights into sealing the area properly before you begin your final mechanical fastening.
Here is the hard truth that most DIY videos gloss over: a ‘level’ floor is a vanity project, but a ‘flat’ floor is a structural necessity. I spent years chasing the bubble on my spirit level, trying to get every room perfectly horizontal, only to realize that in a house built in the 1920s, a perfectly level floor often means your baseboards won’t line up and your doors won’t swing. The real secret to a silent, professional-grade installation is prioritizing flatness over levelness. If you don’t know how to measure subfloor flatness before you start installing, you are essentially gambling with the longevity of your materials.
Leveling is a Lie: Focus on Flatness Instead
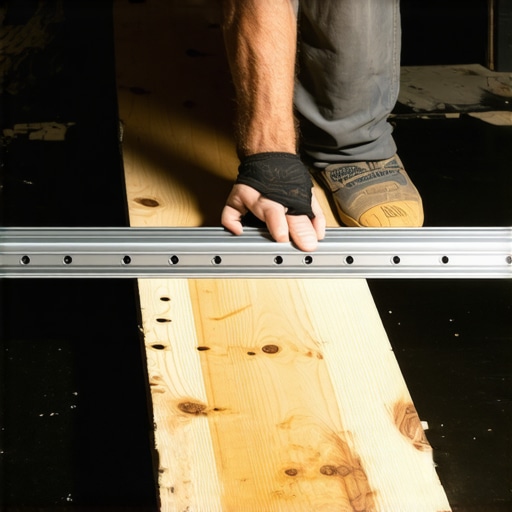
Most homeowners assume these terms are interchangeable, but they aren’t. Level means parallel to the horizon; flat means a smooth plane without dips or humps. You can have a floor that slopes two inches across a room (not level) but is perfectly smooth (flat), and your hardwood will perform beautifully. However, if that same floor is perfectly level but has a 1/4-inch dip in the middle, your floor will bounce, squeak, and eventually fail. This is why I always recommend learning how to check for high spots with a 10-foot straightedge before you even open a box of planks. If you skip this, no amount of expensive underlayment will save you from that hollow ‘clacking’ sound when you walk across the room.
The Primer Trap That Ruins Your Pour
When people realize their floor isn’t flat, they usually run to the big-box store for self-leveling underlayment. Here is the ‘oops’ factor that ruins thousands of projects: skipping the primer or using the wrong one. I’ve seen entire floors of expensive tile fail because the installer didn’t realize why your self-leveler is bubbling over plywood. Wood is porous; it sucks the moisture out of the leveler too fast, causing pinholes and a weak bond. If the leveler doesn’t bond, it will eventually crack under the weight of your furniture, taking your tile or hardwood down with it. Always treat your subfloor like a canvas that needs Gesso; without that chemical bridge, your ‘perfect finish’ is just a floating sheet of brittle concrete.
Why do my ‘level’ floors still lead to cracked tiles?
It comes down to the math of deflection. According to the Tile Council of North America (TCNA) Handbook, the standard for subfloor flatness for large format tiles is 1/8 inch of deviation over 10 feet. If your floor is ‘level’ but wavy, the thinset cannot properly bridge those gaps. This is where the trowel notch secret for getting full thinset coverage becomes your best friend. Even a perfectly flat floor won’t help if you have air pockets beneath the tile. Professional installers know that ‘level’ is for the eyes, but ‘flat and supported’ is for the feet. Have you ever fallen into this trap where you focused so much on the level that you missed the dips? Let me know in the comments! If you are still struggling with a wonky base, check out the ultimate guide to floor leveling for a perfect finish to get your project back on track.
If you’re serious about never hearing that squeak again, you need to stop guessing with your eyes. I’ve wasted enough money on ‘close enough’ to know that a professional-grade moisture meter is significantly cheaper than a $4,000 floor failure. When I first started, I thought I could eyeball the acclimation process. Now, I don’t even take the wood out of the boxes until I’ve followed the specific steps in how to use a moisture meter before installing wood floors to confirm the subfloor is ready. It’s the difference between a floor that stays tight and one that gaps the moment the furnace turns on.
The Gear That Actually Earns Its Keep
I get asked all the time if expensive tools are necessary. My answer is always: only if you want it to last ten years instead of two. For leveling, I’ve moved away from standard trowels alone. I now swear by the spiked roller. If you’ve ever wondered how to use a spiked roller for the perfect leveling pour, you know it’s the only way to release trapped air and get that glass-smooth finish. Without it, you’re left with pinholes that eventually weaken your adhesive bond. For those dealing with existing issues, the ultimate guide to floor leveling for a perfect finish remains the gold standard for correcting a wonky base before you even think about laying your first tile.
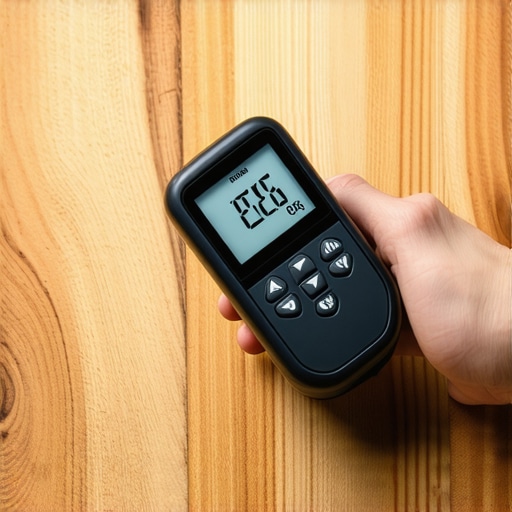
Beyond the pour, you need to think about the environment. Technical documentation from manufacturers like Lignomat suggests that the moisture differential between your hardwood and subfloor should never exceed 4% for strip flooring. If you ignore this, the wood will literally pull itself apart. This is especially true in regions with harsh seasons. I’ve learned that how to keep your hardwood floors from gapping in the winter is largely about humidity control and choosing the right mechanical fasteners during the initial install.
How do I maintain my floor’s stability throughout the year?
Maintenance isn’t just about cleaning; it’s about climate management. You can have the best install in the world, but if your home drops to 15% humidity in January, that wood is going to shrink. I always recommend my clients keep their home between 35% and 55% humidity. For the finish itself, stay away from harsh chemicals. I’ve shared my personal routine in hardwood floor care secrets to longevity and shine, which focuses on pH-neutral cleaners and avoiding the ‘steam mop trap’ that ruins modern finishes.
The Future of Flatness is Digital
Looking ahead, the flooring industry is moving toward digital mapping. We’re already seeing professionals use 3D laser scanners to create topography maps of subfloors before they ever mix a bag of leveler. This eliminates the ‘dip and hump’ guesswork entirely. While you might not need a $10,000 scanner for a DIY bathroom, the trend toward precision is clear. Using tools that provide data rather than ‘gut feelings’ is the hallmark of the modern craftsman. If you want to elevate your results, I challenge you to try one thing on your next project: don’t just use a level, use a 10-foot straightedge to find the high spots first. It’s a simple shift that will save you hours of grinding later. If you hit a snag, you can always contact us for advice on your specific layout.
The Hard Truth About My First Flooring Failure
If there is one thing I’ve learned from years of trial and error, it’s that your floor is only as good as the preparation you can’t see. My biggest regret was thinking I could outsmart physics with a ‘quick fix’ that ignored the underlying moisture levels. I once rushed a project and ended up with the sanding mistake that leaves swirl marks on your wood, simply because I didn’t take the time to calibrate my tools. Don’t be the person who spends thousands on material only to realize the mistake that makes new grout look 20 years old happened in the first ten minutes of the job. Real craftsmanship is about the patience to measure twice and the humility to walk away when the subfloor isn’t ready.
The Toolkit That Saved My Sanity
You don’t need a warehouse full of gear, but you do need these three non-negotiables. First, never start a job without a high-quality moisture meter; it’s your only defense against seasonal shifting. Second, for any leveling work, the ultimate guide to floor leveling for a perfect finish will show you why a spiked roller is essential for a glass-smooth surface. Finally, I always keep a 10-foot straightedge handy. It’s the simplest tool in the shed, but learning how to check for high spots with a 10-foot straightedge will prevent 90% of your future squeaks and cracks. I trust these tools because they’ve turned my most stressful renovations into predictable, professional successes.
Silence Your Stairs Once and for All
Fixing a loose tread or a bouncy subfloor might feel like a daunting task, but it is one of the most rewarding home improvements you can tackle. When you master the balance of mechanical fasteners and proper moisture management, you aren’t just fixing a noise; you are preserving the integrity of your home. Your commitment to hardwood floor care secrets to longevity and shine starts with a solid foundation. Don’t let a single squeaky step keep you from enjoying the quiet of your own home. Take the first step today, prep your surface with care, and build something that lasts a lifetime. Have you ever discovered a hidden subfloor issue that completely changed your project plans? Let me know in the comments below!