
I stood there with a half-empty tube of “Almond” colored caulk in one hand and a crumbling sense of pride in the other, trying to convince myself that the quarter-inch gap in the corner wouldn’t be noticeable once the furniture was moved in. It was my first real DIY project—a hallway that should have taken four hours but was now entering its second grueling day. I had just spent a small fortune on high-quality primed MDF, and every single corner looked like it had been chewed by a frantic beaver. I mistakenly thought if I simply locked the miter saw into that 45-degree notch, the universe would align and my joints would be seamless. I was dead wrong. It turns out, “close enough” in carpentry is the fastest way to make a beautiful $10,000 floor look like a $500 rush job that you’ll regret every time you walk past it.
Stop Trusting the 45 Degree Mark on Your Saw
The hard truth I had to swallow is that your miter saw is a precision tool, but it is only as good as the information you feed it. When I was starting out, I would slam that blade into the 45-degree detent with total confidence, thinking the tool was doing the thinking for me. I didn’t realize back then that even if your saw is calibrated to the nanometer, the wall you are working on is a complete liar. Walls in modern homes—and especially in the charming, crooked ones we love—are rarely a perfect 90 degrees. If a wall is out of square by just one degree, your “perfect” 45-degree cuts will leave a glaring 2-degree void that no amount of paint can truly hide. I’ve seen homeowners spend weeks mastering hardwood floor refinishing expert tips for 2025 only to have the entire room’s aesthetic undermined by sloppy, gapping trim work that draws the eye for all the wrong reasons.
Is a Professional Finish Actually Reachable for a DIYer?
You might be sitting there on your hands, thinking that perfect corners are a dark art reserved for master carpenters with thirty years of sawdust in their lungs and a van full of expensive German tools. I used to think the same thing. I figured I would just have to become an expert at learning how to hide a bad cut under the baseboard like a pro and call it a day. But the “secret” to that tight, professional joint isn’t actually about having a surgical steady hand; it’s about a simple shift in how you handle geometry. We are going to stop guessing and start measuring the actual angle of the corner. According to the National Association of Home Builders (NAHB), standard residential framing guidelines allow for significant “out-of-plumb” conditions, which means that “90-degree” corner in your living room is likely actually 88.5 or 91.2 degrees. That tiny difference is the reason your miters are failing.
Why Your Walls Are Plotting Against Your Sanity
If you have already followed a step-by-step guide to flooring installation and leveling success, you already know that preparation is the difference between a masterpiece and a mess. The same logic applies to your trim. Most people forget that drywall finishers aren’t aiming for surgical precision; they’re aiming for a smooth look. This means drywall mud often builds up right in the vertex of the corner, creating a slight “bulge” that pushes the bottom of your baseboard outward. This makes it physically impossible for the mitered faces to meet flush at the top. I made the painful mistake of ignoring this during my first three rooms, and I ended up having to learn the secret to splicing baseboards for a seamless look just to try and save my long runs from looking disjointed. Today, we are going to fix the problem at the root. We will walk through how to use a simple angle finder to bisect the actual angle of your walls so your cuts snap together like precision puzzle pieces. Have you ever spent more time with a wood filler tub than you did with your actual saw? Tell me your biggest trim frustration in the comments below.
Grab an Angle Finder and Stop Guessing
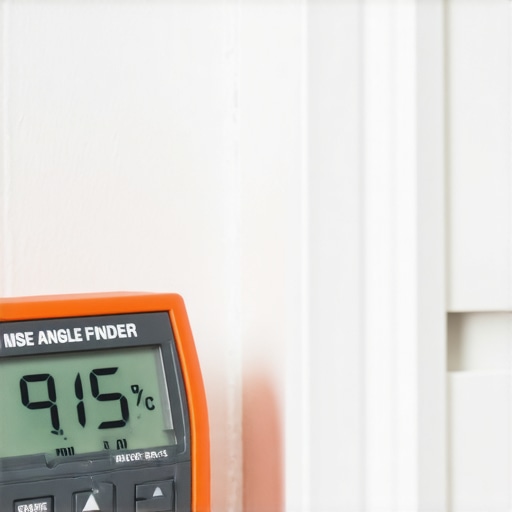
The first tool you need to rescue your project isn’t a bigger saw; it’s a digital angle finder. Think of it as a lie detector for your house. I remember a specific kitchen remodel in a 1920s bungalow where I assumed the pantry corner was square. I cut my boards at 45 degrees, and the gap was so wide I could have parked a bike in it. When I finally bought a digital protractor, I realized the corner was actually 93.4 degrees. If you’ve already mastered flooring installation fundamentals leveling for a seamless look, you know that a flat surface is only half the battle. To get that tight joint, you press the arms of the finder into the corner, lock the reading, and divide it by two. That number—whether it’s 46.7 or 44.2—is your actual cut angle.
The Simple Math of Bisecting Your Corners
Once you have your measurement, don’t just wing it. If your angle finder says 91 degrees, your saw should be set to 45.5 degrees. This is the stage where most DIYers get frustrated because they try to hold the board by hand and ‘eyeball’ the blade. Instead, use a sacrificial fence or a stop block to ensure the wood doesn’t creep while the blade is spinning. This precision is just as vital as using precise floor leveling techniques to achieve flawless surfaces before you even think about laying your first plank. If the baseboard moves even a hair, your 45.5-degree cut becomes a 46-degree mistake, and you’re back to the caulk tube.
How to Outsmart Drywall Mud Build-up
One of the biggest ‘invisible’ enemies is the drywall mud at the bottom of the wall. Drywallers often leave a ‘belly’ of compound in the corner that prevents your baseboard from sitting tight against the framing. When I was working on my own living room, I couldn’t figure out why my perfectly calculated angles still wouldn’t close. I finally realized the bottom of the board was being pushed out by a hidden clump of mud. You need to take a wood chisel and gently scrape out the excess mud about two inches up from the floor. This allows the trim to sit truly flush against the studs. It’s similar to how you would how to check for high spots with a 10-foot straightedge to ensure your subfloor doesn’t have any hidden humps that will ruin your finish.
Use Scrap Pieces to Verify the Fit
Before you commit to a long, expensive piece of trim, cut two 6-inch scrap pieces at your calculated angle. Hold them together in the corner. If they don’t snap together perfectly, adjust your saw by a half-degree and try again. This is where the dry fit rule that prevents costly cutting mistakes saves your budget. I once spent forty minutes fine-tuning two scraps for a single difficult corner, but when I finally cut the full-length boards, they fit like they were grown there. Applying the secret to a perfect miter cut on baseboard corners isn’t about speed; it’s about the patience to test the geometry before the final pull of the trigger.
Let’s dig deeper into why even a “flat” floor can ruin your day. Most DIY guides tell you to ensure the subfloor is flat within 3/16 of an inch, but they often ignore the transition points. Everyone says as long as there are no humps, you’re golden, but in my experience, a floor that is perfectly flat but slightly sloped will still cause your kitchen island to look like it’s sliding into the sea. This is one of those floor leveling challenges common mistakes and how to avoid them that separates the weekend warriors from the pros. If you are working with large format tiles, “flat” isn’t just a suggestion; it’s a mechanical requirement. The Tile Council of North America (TCNA) actually specifies in their handbook that for tiles with any side longer than 15 inches, the subfloor must not deviate by more than 1/8 inch in 10 feet. If you ignore this, you’ll end up with “lippage”—those annoying edges that catch your socks every time you walk by.
The Self-Leveler Mistake Most Pros Won’t Admit
One of the biggest “oops” factors I see involves the use of self-leveling compounds. People treat it like magic water that fixes everything. I once watched a friend pour three bags over an old plywood subfloor without using a primer. By the next morning, the leveler had the consistency of a dried salt cracker and was pulling away from the wood. This happens because the dry wood sucks the moisture out of the leveler too fast, preventing a chemical bond. Understanding why your self-leveler didn’t bond to the wood subfloor is the difference between a rock-solid base and a project you have to rip out with a jackhammer. You must use the specific manufacturer’s primer, and you have to let it get “tacky”—not dry—before you pour.
Don’t Buy Into the Thick Underlayment Lie
There is a common belief that if your subfloor is a bit rough, you can just buy the thickest, most expensive foam underlayment and it will “cushion” the imperfections. This is a dangerous trap. According to the National Wood Flooring Association (NWFA), excessive vertical deflection is the leading cause of joint failure. Thick underlayment under luxury vinyl or laminate creates too much vertical movement. Every time you step, the joints of the planks rub against each other. Eventually, those locking mechanisms will snap. Instead of relying on foam, you need to use precise floor leveling techniques to achieve flawless surfaces before the first plank ever touches the room.
Is Back-Buttering Truly Necessary for Modern Large Format Tiles?
The short answer is: absolutely. Many people think the ridges from a large trowel are enough, but air pockets are the enemy of longevity. If you don’t apply a thin layer of mortar to the back of the tile itself, you aren’t getting 100% coverage. This is exactly why your large format tiles need back buttering every time. Without it, you create hollow spots. One heavy dropped pot or a high-heeled shoe, and that expensive porcelain is going to crack right down the middle. To get it right, you need to master the trowel notch secret for getting full thinset coverage. It takes an extra twenty seconds per tile, but it saves you twenty years of repairs. 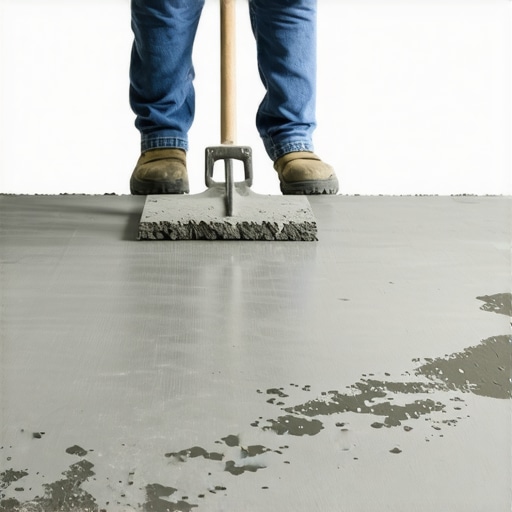 Have you ever fallen into this trap or ignored the “flatness” rule only to regret it later? Let me know in the comments.
Why I Never Drop a Plank Without My Moisture Meter
After seeing too many gorgeous oak floors cup like a Pringles chip, I stopped guessing about humidity. My go-to tool for every single job is a Wagner Orion 950. Unlike cheap pin-style meters that poke unsightly holes in your finish, this uses electromagnetic waves to check deep into the core of the wood. Wagner Meters technical documentation specifies that their ‘IntelliSense’ technology ensures the sensor ignores surface moisture to provide a true reading of the wood’s internal state. If your subfloor and your planks aren’t within 2% to 4% of each other, you are heading for a disaster. Using a how to use a moisture meter before you lay wood floors strategy is the only way to sleep at night. I’ve found that even ‘kiln-dried’ wood from the big box store can be soaking wet if it sat on a humid loading dock for three days.
How do I keep my hardwood floors looking brand new for decades?
Maintenance isn’t just about what you spray on the wood; it’s about controlling the atmosphere. I tell every client that if they want their investment to last, they need a whole-house humidifier integrated into their HVAC. Wood is a living, breathing material. When the heat kicks on in the winter, that wood shrinks, creating gaps. When the humidity hits in July, it expands. You have to master hardwood floor care secrets to longevity and shine to prevent that cyclic stress from eventually cracking the finish.  I predict that in the next five years, we will see ‘smart’ subfloors with built-in sensors that alert your smartphone when the moisture levels reach a critical stress point, allowing you to adjust your thermostat before a single board starts to buckle.
The Vacuum That Actually Saves Your Lungs and Your Finish
Dust is the ultimate enemy of a perfect finish. I eventually stopped using standard shop vacs and invested in a HEPA-certified extractor with an automatic filter pulse. When you use the vacuum attachment that actually picks up fine sawdust, you aren’t just keeping the job site clean—you are preventing microscopic particles from settling into your wet polyurethane or thinset. This level of environmental control is just as vital as knowing the correct way to mix grout so it doesn’t change color. Any contamination, even just a thin layer of old drywall dust, can ruin the chemical bond and the final aesthetic of your floor. I challenge you: on your next room, don’t just sweep with a broom. Use a non-destructive moisture meter and a real dust extractor, and watch your results transform from ‘amateur’ to ‘architectural.’ If you’re still hitting snags with your layout or material selection, contact us and let’s talk through your specific subfloor challenges.
The Invisible Millimeters That Can Break Your Heart
Looking back at that first hallway project, the biggest shift in my mindset wasn’t learning how to use a saw—it was learning to stop fighting the house. I realized that a professional finish comes from accepting the imperfections of the structure. Here are the lightbulb moments that changed my workflow forever:
- Your house is a liar: Never assume a corner is 90 degrees; it is almost certainly a few degrees off, and your tools need to reflect that reality.
- Preparation is the actual job: The actual installation of wood or tile is just the victory lap. The real work is scraping mud, how to achieve flawless floor leveling before tile laying, and checking moisture.
- Slow is fast: A twenty-minute dry fit saves two hours of prying up boards and cleaning dried thinset later.
- Precision is an investment: Buying a $50 digital angle finder is significantly cheaper than wasting two boxes of premium flooring on bad mitered cuts.
#IMAGE_PLACEHOLDER_E#
The Gear That Earned a Permanent Spot in My Truck
You don’t need a warehouse full of tools, but you do need these specific essentials that I swear by. First, a digital protractor is non-negotiable for anyone who wants tight trim joints without the headache. Second, the TCNA Handbook is the ’tile Bible’ that clarifies why tile installation pointers that save time and money always start with the right substrate. Third, a high-quality notch trowel ensures you never have to wonder if your bond is sufficient. Finally, a dedicated HEPA extractor preserves your health and keeps dust from ruining your fresh finish. These are the foundation of mastering floor leveling pro secrets for perfect installations that look like they were done by a high-end contractor.
Build Something That Outlasts the Trends
At the end of the day, your home is more than a collection of angles and materials. It’s the backdrop of your life. When you take the time to measure twice, scrape away the hidden drywall mud, and ensure your moisture levels are perfect, you aren’t just installing a floor—you’re building peace of mind. You won’t be looking for the reason your grout color looks splotchy and uneven or worrying about a squeak in the hallway. You’ll just be enjoying a space that feels solid, intentional, and complete. Don’t be afraid to take it slow; the results are worth every extra minute spent with your angle finder. What’s the one corner or room in your house that always seems to defy logic when you’re measuring? Let’s troubleshoot it together in the comments below.