
I’ll never forget the sinking feeling in my gut when I applied that first swipe of oil-based stain to a set of 100-year-old reclaimed pine planks. Instead of the rich, honeyed glow I’d envisioned, it looked like a Dalmatian with a skin condition. Dark spots here, ghostly pale patches there. I had spent three days pulling rusty nails and scrubbing out grease stains from the unfinished pine, only to ruin the aesthetic in thirty seconds. My biggest error back then? I assumed old wood would behave like new lumber. It doesn’t. Reclaimed pine is a different beast entirely, filled with varying densities and decades of hidden stories that react violently to modern finishes if you don’t prep them right. Today, I’m pulling back the curtain on the exact process I use to get a glass-smooth, professional look on wood that most people would have thrown in the burn pile.
Stop Fighting the Grain and Start Controlling the Absorption
Pine is notoriously finicky because it’s a soft wood with hard opinions. One section will drink up stain like a parched traveler, while the next inch—usually the resin-heavy latewood—will reject it completely. If you’ve ever noticed the sanding mistake that leaves swirl marks on your wood, you know that prep is 90% of the battle. On reclaimed boards, this is magnified. I once ruined a gorgeous fireplace mantel by using a vibratory sander too aggressively, not realizing the hidden risk of using a vibratory sander on old pine involves crushing the delicate fibers rather than cutting them. To get that perfect finish, we have to talk about pre-conditioning and why it’s the non-negotiable step for any hardwood floor care or furniture project involving pine.
Does This Old Wood Actually Deserve the Hype?
You might be looking at a pile of gray, splintery boards and wondering if it’s worth the splinters and the headache. The skepticism is fair. According to the USDA Forest Products Laboratory, the cellular structure of old-growth pine is much denser than the plantation-grown stuff we buy at big-box stores today, meaning it offers a durability and character you simply can’t replicate. It’s absolutely worth the effort, but only if you know how to bridge the gap between rustic and refined. Have you ever had a project look worse after you applied the finish than it did when it was raw wood? Let’s make sure that never happens again.
Start With a Grit That Actually Bites
Reclaimed pine is often harder than the new stuff because it has had a century to air-dry and harden its resins. You cannot treat it like a fresh sheet of plywood. If you start with too fine of a grit, you’ll just polish the surface and the stain will slide right off. I start with a 40 or 60 grit to strip away the gray oxidation and expose the actual wood cells. I once tried to jump from 60 grit to 120 on a wide-plank pine floor because I was in a rush to meet a client deadline. The floor looked okay until I put the first coat of poly on, and then every single cross-grain scratch glowed like neon lighting. To avoid this, follow a strict progression: 60, 80, and then 100. Going past 120 on pine is usually a mistake; you end up burnishing the wood, which closes the pores and leads to that dreaded splotchy look. If you are dealing with uneven subfloors while trying to match these old planks, check out the ultimate guide to floor leveling for a perfect finish to ensure your foundation is as solid as your finish.
Lock the Pores Before You Open the Can
Conditioning is not a suggestion; it is a survival tactic. Think of pine like a dry sponge. If you pour ink on a dry sponge, it creates a concentrated dark blob. If you dampen the sponge first, the ink spreads out evenly. A pre-stain conditioner works the same way by partially filling the most porous parts of the grain so the stain can’t dive in too deep. Before you even touch the conditioner, make sure you know how to use a moisture meter before you lay wood floors or refinish them. Old wood can hold onto humidity in ways that ruin a finish. When you apply the conditioner, let it sit for about 15 minutes, then wipe off the excess. You have a small window—usually about two hours—to get your stain on before the conditioner cures too much and blocks the color entirely.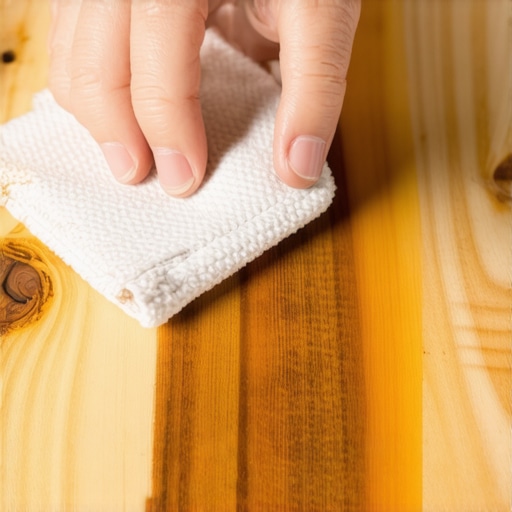
Wipe It On Like You Mean It
When it’s finally time for the color, skip the brush. Brushes hold too much product and lead to pooling, which is why your hardwood stain looks darker in the corners. Use a lint-free rag or a foam applicator. Work in small sections, moving with the grain from one end of the board to the other. If you stop in the middle of a plank, you’ll get a lap mark that is nearly impossible to sand out without starting over. This is similar to the precision needed for mastering hardwood floor refinishing expert tips for 2025. I always keep a clean, dry rag in my left hand to buff away the excess stain immediately after the wet rag in my right hand applies it. It feels like a workout, but that constant movement is what prevents the pigments from settling into the soft earlywood too aggressively. If you find your sanding wasn’t perfect, you might notice the sanding mistake that leaves swirl marks on your wood becoming visible now. If that happens, stop. It is better to sand back a small area now than to finish the whole floor and live with regret. The goal is a uniform, translucent glow that highlights the history of the timber without burying it under a layer of muddy pigment.One of the most dangerous myths in the flooring world is the idea that ‘self-leveling’ compounds do all the work for you. Everyone says you can just pour the bag and watch the floor become a sheet of glass, but in my experience, that is exactly why your self-leveler didn’t bond to the wood subfloor or ended up with a massive hump in the center of the room. Reclaimed wood and old subfloors have a history of movement, and if you treat them as static surfaces, your new finish will eventually fail. I learned this the hard way on a high-end loft project where I skipped the primer. By the next morning, the leveler had the consistency of a saltine cracker because the thirsty old wood sucked the moisture out of the mix before it could cure properly.
Stop Calling It Self-Leveling and Start Helping It Flow
Professional installers know that these products are ‘self-smoothing,’ not self-leveling. If you don’t use a gauge rake and a spiked roller to break the surface tension, you’ll end up with why your floor leveler pitted during the drying process. This is especially true when transitioning from the rustic charm of pine to modern tile. The Tile Council of North America (TCNA) provides strict guidelines, specifically the L/360 standard for floor deflection. If your joists have even a fraction of an inch of ‘bounce,’ your beautiful tile will crack in a straight line within six months. This is often the real reason your floor joists are making your tile crack, and no amount of expensive thinset will save you if the structure is shifting beneath your feet.
Why Do Most Floating Floors Fail at the Doorway?
This is a sophisticated mistake even seasoned contractors make. They forget that wood-based flooring needs to breathe. When you run a continuous floor from a bedroom into a hallway without a break, you are creating a massive, single-unit sheet of wood that expands and contracts with the seasons. If you don’t leave an expansion gap or use a proper transition, you’ll encounter the hidden reason your floating floor is pinching. The floor literally has nowhere to go but up, resulting in a ‘bouncy’ feel or planks that separate at the seams. To ensure a seamless look that actually lasts, you have to prioritize flooring installation fundamentals leveling for a seamless look. 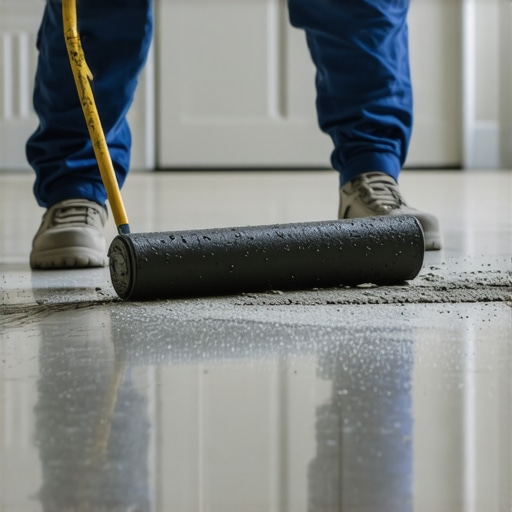
The Structural Limit Most Homeowners Ignore
Another ‘trap’ is the weight of modern materials. If you are moving from old pine to large format porcelain, you are adding hundreds of pounds of dead weight to a structure built in the 1920s. Without checking for high spots with a 10-foot straightedge or assessing the subfloor’s thickness, you are inviting disaster. Always double-check how to achieve flawless floor leveler before tile laying to avoid the costly mistake of having to rip everything out. According to a study by the International Association of Certified Home Inspectors, nearly 20% of flooring failures are caused by improper subfloor preparation rather than the finish itself. Have you ever fallen into this trap where the prep work took twice as long as the actual install? Let me know in the comments. Whether you are aiming for mastering hardwood floor refinishing expert tips for 2025 or simply trying to get a straight line in a house with no square walls, the devil is always in the details you can’t see once the furniture is back in the room.
The Gear That Separates Pros from Amateurs
If you are still guessing at the readiness of your subfloor or your planks by ‘feeling’ them with your palm, you are playing a dangerous game. I don’t care how many years you’ve been in the trade; your hand is not a calibrated instrument. The single most important tool in my kit is a high-quality pinless moisture meter. I personally use the Wagner Meters Orion because it allows me to scan deep into the wood without leaving unsightly holes in a finished surface. Knowing how to use a moisture meter before you lay wood floors is the difference between a floor that stays flat and one that cups like a Pringles chip by mid-winter. This is especially critical for reclaimed pine, which may have been stored in a damp barn for decades. If that wood hasn’t reached an equilibrium moisture content (EMC) with your home’s environment, you’re basically installing a ticking time bomb. According to the National Wood Flooring Association (NWFA) Technical Publication No. A100, wood flooring should be within 4% of the subfloor’s moisture content for strip flooring and 2% for plank flooring. Ignore this, and you’ll be searching for flooring installation mistakes to avoid for lasting results far sooner than you’d like.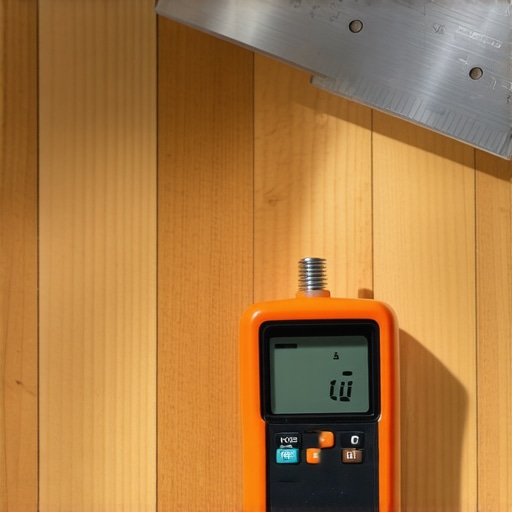
Stop Mopping Your Problems Away
I’ve seen more beautiful finishes ruined by a bucket of water than by actual foot traffic. There is a reason why you should never mop new hardwood for at least two weeks. The finish needs time to fully cross-link and harden. Even after that window, flooding a floor with water is a recipe for disaster. For the reclaimed pine floors we just talked about, water can seep into the micro-cracks and knots that give the wood its character, causing localized swelling that cracks the finish from the inside out. If you are dealing with a mixed-material space, such as a wood-to-tile transition, you also have to be vigilant about the grout. If you notice why your grout is falling out of the joints in the hallway, it is often a sign of subfloor deflection rather than a cleaning issue. Maintenance isn’t just about cleaning; it’s about monitoring the structural health of the entire system.
How do I maintain my floor’s finish for decades?
The secret to hardwood floor care secrets to longevity and shine is a strict ‘dry-first’ policy. Use a high-quality microfiber dust mop daily to remove the grit that acts like sandpaper under your shoes. For the tile sections, ensure you are using pH-neutral cleaners that won’t eat away at the sealer. I predict that in the next few years, we will see the rise of ‘smart’ subfloors embedded with moisture sensors that alert your phone to leaks before they ruin your investment. Until then, you are the sensor. If you are ready to take your project to the next level, I strongly recommend following a step-by-step guide to flooring installation and leveling success to ensure every layer—from the joists to the topcoat—is handled with precision. Try this: go buy a 10-foot straightedge today and check your floors. You’ll be shocked at what you find, and fixing those dips now will save you a lifetime of ‘clicking’ thresholds and cracked tiles.
The Brutal Lesson My First ‘Finished’ Floor Taught Me
After twenty years of sawdust under my fingernails, I’ve realized that the wood isn’t just a material—it’s a living record of where the tree grew and how the house has breathed. The hardest lesson wasn’t about the stain brand; it was about respect.
- Wood never stops moving: Even after a century, reclaimed pine reacts to the humidity in your kitchen. If you don’t allow for acclimation, the best finish in the world will buckle.
- Cleaning is the secret to bonding: Most floor leveling challenges start with a single layer of dust that prevents the primer from biting.
- Trust your eyes, not the clock: I used to stop sanding when the timer went off. Now, I stop when a side-light reveals zero swirl marks.
Tools That Actually Make Your Life Easier on the Job
You don’t need a truckload of gadgets, but you do need these three essentials to cross the finish line with confidence. First, stop guessing about flatness; learn how to check for high spots with a 10-foot straightedge before you even open your first bag of leveler. Second, sawdust is the enemy of a clean finish coat. I rely on the vacuum attachment that actually picks up fine sawdust to ensure the grain is completely clear before the first swipe of conditioner. Finally, keep the National Wood Flooring Association (NWFA) technical manuals bookmarked—they are the gold standard when a project throws you a curveball.
Why Your Home Deserves This Floor
Restoring a reclaimed floor is about more than just aesthetics; it’s about preserving a piece of history that modern lumber simply can’t match. It takes grit—both the sandpaper kind and the internal kind—to work through the uneven subfloors and the finicky grain of old pine. But when you finally see that honeyed glow under the first coat of poly, you’ll know why we put in the extra hours. Once the work is done, mastering the hardwood floor care routine will keep that history alive for the next generation. You have the tools and the knowledge; now it’s time to get to work and transform that space. Have you ever discovered a hidden problem under an old floor that completely changed your project plan? Let me know in the comments below.