
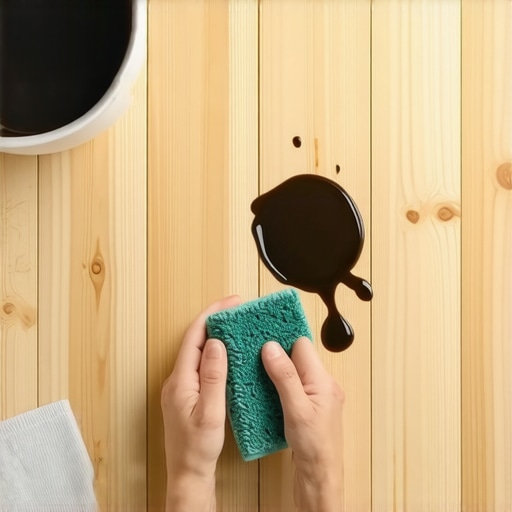
I will never forget the sound of that pizza box hitting the floor. It was not a loud bang, but a soft, wet thud that echoed through my soul because I knew exactly what was inside: a greasy pepperoni pie and a total lack of a floor finish. I had just finished laying the planks and was waiting for the perfect weekend to seal them. In that one second, a huge, translucent oil spot began to spread across the pale, thirsty pine. It felt like a death sentence for my aesthetic dreams. If you have ever looked at a dark, ugly grease blotch on your beautiful raw wood and felt like crying, I have been there. Pine is notoriously porous, acting like a wick for any oil-based substance it touches. But here is the good news: you do not have to live with that blemish or sand your floor until it is paper-thin.
The Panic-Free Way to Lift Oil from Raw Wood
In my early DIY days, I thought the answer was brute force. I grabbed a bottle of industrial degreaser and scrubbed until my arm hurt. It was a disaster. I learned the hard way that you should stop using vinegar and harsh household chemicals immediately on raw wood because they can permanently alter the pH and color of the fibers. Today, we are going to use a much gentler, more scientific approach that relies on pulling the oil out rather than scrubbing it in deeper. We are going to save your floor using items you probably already have in your pantry.
Is it actually possible to save unfinished wood once oil hits it?
I know what you are thinking. It is raw wood, so isn’t the oil just part of the grain now? It feels permanent, like a tattoo you will regret in twenty years. However, while wood is porous, it is also remarkably resilient if you treat it with the right solvents and absorbent materials. According to the USDA Forest Products Laboratory, the cellular structure of softwoods like pine allows for significant liquid movement, which means if we can get a solvent to penetrate, we can also draw the oil back out. Unlike standard hardwood floor care secrets for finished surfaces, unfinished pine requires a dry-extraction mindset. Have you ever had that sinking feeling where a slice of pizza or a leaky candle ruined your afternoon? Tell me about your worst floor disaster! My first attempt at mastering hardwood floor refinishing involved a belt sander and a lot of regret, so trust me when I say we are taking the easy route this time. Before we get into the grit of the process, similar to the sanding secret for restoring wood, we need to talk about why speed and the right absorbent matter more than elbow grease.
Blot Like Your Floor’s Life Depends On It
Before you even think about grabbing a bottle of soap, stop. Blotting is the only acceptable first move. If you wipe, you are essentially painting the oil into the wood’s vascular system. I remember a humid Tuesday when I knocked over a small jar of linseed oil on a fresh pine plank I was prepping for a client. My instinct was to wipe it away fast, but that just smeared the stain from a three-inch circle to a six-inch mess. Instead, take a clean white paper towel and press straight down. Hold it for thirty seconds. Lift, move to a clean spot on the towel, and repeat. You want to pull the liquid vertical, not horizontal. This is where standard hardwood floor care secrets to longevity and shine simply do not apply; we are not protecting a finish yet, we are performing an emergency extraction on a living fiber. Remember that you must stop using vinegar on your hardwood floors immediately even in this stage, as the acid can react with the wood and set the stain permanently into the lignin.
Turn Your Pantry Into a Restoration Lab
Once you have blotted the surface as much as possible, it is time to build a poultice. Think of this like a reverse-mask for your wood. Cover the spot with a generous mound of baking soda or cornstarch—at least half an inch thick. You need enough mass to create a ‘draw’ that pulls the oil out of the grain. This is very similar to how you would manage flooring installation fundamentals like leveling for a seamless look where the goal is to create a uniform surface by pulling or pushing material into the right place. Leave it overnight. If the powder turns yellow or clumpy by morning, it is working. Vacuum it up carefully. I once had a grease spot from a dropped burger that took three rounds of cornstarch before the powder came up white again. If it is still pulling yellow, do not move to the next step. 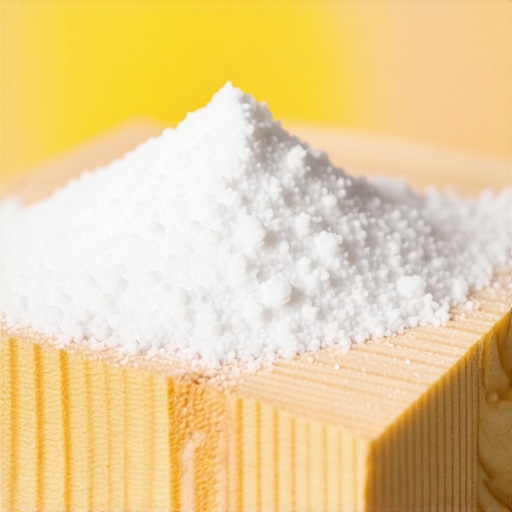
Why Mineral Spirits Beat The Sanding Headache
If a shadow remains after the powder pulls, you need to break the surface tension with a solvent. Odorless mineral spirits are the gold standard for this. They thin the heavy oils so they can be more easily absorbed by your powder. Dampen a lint-free cloth—do not soak it—and dab the area gently. Then, immediately re-apply your powder poultice. This cycle is how I saved a set of raw oak stairs after a spill. It is a slow dance, but it is much better than the sanding secret for restoring wood because you are not losing any material or creating an uneven dip in your flooring. Sanding oil into wood is a rookie mistake; the friction often heat-treats the grease deeper into the grain.
Check the Fiber Moisture Before Sealing
Before you apply any future finish or stain, you must ensure the wood is chemically dry. Knowing how to use a moisture meter before you lay wood floors is a skill that translates perfectly here. If the oil is still deep in the fibers, the meter will give you a higher reading compared to the surrounding dry wood. Just as you would not proceed without mastering floor leveling pro secrets before a tile job, you cannot stain over trapped oil. If the moisture meter reads higher on the spot than on the rest of the plank, the oil is still acting as a barrier, and you need to keep pulling with the poultice.Once the oil is gone, you might think you are out of the woods, but this is where the real nuance of floor restoration and preparation begins. Most beginners—and frankly, many contractors—conflate two very different concepts: ‘level’ and ‘flat.’ You can have a floor that is perfectly level with the horizon, yet it is as wavy as the ocean. If you are prepping for tile, especially large-format pieces, a level-but-not-flat floor is a recipe for lippage. In my years on the job, I have seen more floors fail because the installer focused on the bubble in the spirit level rather than the straightedge. When you are mastering floor leveling pro secrets, your primary tool should actually be a 10-foot straightedge.
Level Doesn’t Mean Flat (And Why Your Tile Cares)
The common myth is that self-leveling compound is a ‘magic juice’ that fixes everything effortlessly. It isn’t. In fact, if you don’t know how to achieve flawless floor leveling before tile laying, the compound can actually make things worse by pooling in the wrong areas. The Tile Council of North America (TCNA) mandates that for tiles with any side longer than 15 inches, the floor cannot deviate more than 1/8 of an inch over 10 feet. If you ignore this, you’ll end up with ‘toe-kickers’—those sharp tile edges that catch your socks.
Can you just use extra thinset to hide a bumpy subfloor?
This is the most dangerous ‘trap’ in the industry. I call it the ‘Shrinkage Trap.’ Many DIYers assume they can simply ‘butter’ the back of a tile with a massive mountain of mortar to compensate for a dip. However, thinset is an adhesive, not a structural filler. As the water evaporates during the curing process, the thinset shrinks. If one side of a tile has 1/4 inch of mud and the other has 3/4 inch, they will shrink at different rates, pulling the tile down unevenly and creating an instant trip hazard. You must get the secret to getting a flat floor for large format tiles right before the first trowel of mortar hits the ground. 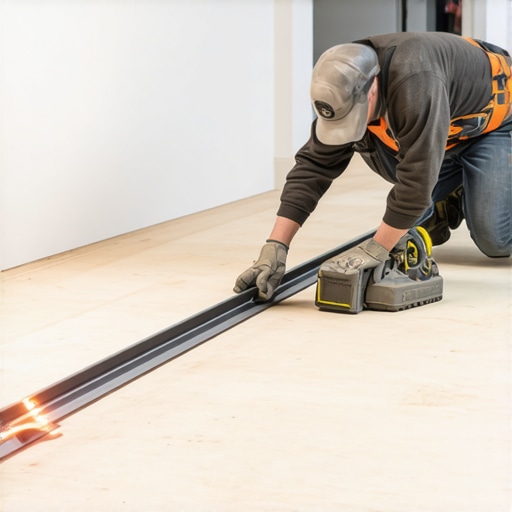
The Aeration Trap Most DIYers Ignore
When you finally decide to pour that leveler, there is a technical ‘oops’ that ruins the finish: speed. Most people use a high-speed mixing drill because they are in a hurry. This whips air into the mixture, creating thousands of tiny bubbles. Once poured, those bubbles rise to the surface and pop, leaving you with a floor that looks like the surface of the moon. This is why self-leveling compounds bubbled over your subfloor in the first place. You need to pay attention to the mixing paddle speed that ruins your leveling compound and always follow up with a spiked roller. Using the roller selection that prevents air bubbles in leveler is the difference between a mirror-smooth finish and a gritty, porous mess that won’t bond to your adhesive. Have you ever fallen into the trap of thinking ‘more glue fixes everything’ or had a leveling pour go wrong? Let me know in the comments!
Stop Relying on Your Eyeballs
If there is one thing I have learned after years of fixing cracked tiles and warped pine, it is that your eyes are liars. You might think that subfloor looks ‘close enough,’ but when you are dealing with the physics of wood expansion or the rigidity of porcelain, ‘close enough’ is just a slow-motion disaster. To scale your DIY skills from hobbyist to pro, you need to invest in a high-quality pinless moisture meter. I personally swear by the Wagner Orion series because it doesn’t leave holes in the wood you just spent hours prepping. According to the National Wood Flooring Association (NWFA) Technical Manual, the moisture content difference between your subfloor and your flooring planks should never exceed 4% for softwoods like pine. If you skip this check, you are basically gambling with your bank account. Knowing how to use a moisture meter before you lay wood floors is not just a suggestion; it is the fundamental law of flooring longevity.
How do I maintain a perfectly level and stable floor for decades?
Maintenance is not just about cleaning; it is about environment control. Wood is a living, breathing material that reacts to the humidity in your home. If you want to master hardwood floor care secrets to longevity and shine, you must keep your home’s relative humidity between 30% and 50%. I have seen beautiful installations ruined in a single winter because the homeowner let the air get too dry, causing the planks to shrink and create massive gaps. For the tile side of things, maintenance starts with the original pour. If you used the spiky roller secret for a mirror smooth pour, your tiles will sit flat, meaning you won’t have high spots that wear down faster or catch the edge of a vacuum. #IMAGE_PLACE_HOLDER_D#
The Tech That Will Change Your Next Project
Looking ahead, we are seeing a massive shift toward ‘smart’ leveling compounds and augmented reality (AR) layout tools. Imagine putting on a pair of glasses and seeing exactly where the low spots are on your concrete slab before you even open a bag of leveler. We are already seeing the beginning of this with high-end cross-line lasers that can project a perfect grid across your room. While mastering floor leveling pro secrets currently requires a lot of manual labor and straightedges, the next five years will be about precision through sensors. Even if you aren’t using lasers yet, you should be focusing on how to achieve flawless floor leveling before tile laying by using a simple 10-foot aluminum screed. It is a low-tech tool that gives high-tech results. I challenge you to try the ‘flashlight test’ on your next prep job: lay a powerful flashlight flat on the floor and look for the shadows. If a shadow is longer than an inch, your floor isn’t flat enough for large-format tile. Don’t be afraid to do one more pour of compound or one more round with the sander. Your future self—and your socks—will thank you.
Hardest Lessons Learned from Real World Mud and Wood
One of the most profound realizations I had after a decade of work was that your subfloor communicates with you if you listen. I started using a simple ‘tapping test’ with a golf ball to find hollow spots in old concrete before I even opened a bag of leveler. It is these small habits that prevent flooring installation mistakes to avoid for lasting results. I also learned that wood acclimation isn’t just about time; it is about reaching a specific moisture equilibrium. If you don’t have the patience to let those planks breathe in their new home, they will remind you of it later with gaps and squeaks. Wood is alive, and tile is rigid; your job is to negotiate the peace between them.
The Shortlist for a Pro-Grade Finish
I am often asked what is in my ‘never-leave-behind’ bag. Beyond the standard trowels, I never start a job without a high-intensity LED light for shadow-mapping low spots. For those moving into complex layouts, the ultimate guide to floor leveling for a perfect finish is an indispensable companion for understanding compound flow. I also highly suggest keeping a physical log of your moisture readings. It sounds tedious, but having that record is your best defense against warranty issues or future repairs. Rely on tools that quantify your progress rather than just your gut feeling.
Step Into Your New Space with Confidence
Your flooring journey is as much about the process as it is the final result. Every time you correctly mix a batch of mortar or pull an oil stain from a raw pine plank, you are building a skill set that lasts a lifetime. Achieving flooring installation and leveling success is not a matter of luck; it is a matter of discipline and following the physics of the materials. Go forth and create a surface that is not only beautiful but structurally sound for decades to come. Don’t be afraid to restart a section if it isn’t perfect—your future self will thank you for the extra hour of effort. What is the one flooring tool you absolutely cannot live without? Let me know in the comments below!