
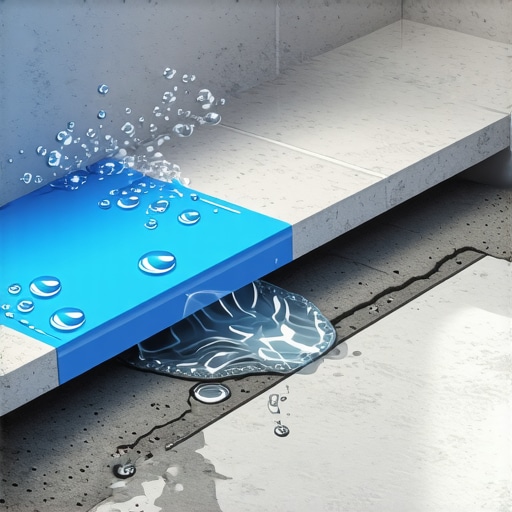
I will never forget the sinking feeling in my stomach when I looked up at my kitchen ceiling and saw a massive, yellowish-brown water ring staring back at me. It was only six weeks after I had finished a complete master bathroom renovation that I was incredibly proud of. I thought I was a DIY hero, but standing there in my kitchen, I realized I was just a guy who forgot the most important layer under the tile. I had focused so much on installing tiles like a pro that I ignored what happens when water inevitably seeps through the grout lines. Today, I want to save you from that same gut-wrenching moment by explaining exactly why a waterproofing membrane is the one thing you cannot skip. We are going to dive into how this invisible layer protects your subfloor, prevents mold, and keeps your hard work from literally falling through the floor. Have you ever noticed a ‘musty’ smell in your bathroom that just won’t go away? That might be your subfloor crying for help.
Stop Water Before It Ruins Your Home’s Bones
Most people assume that tile and grout are waterproof. I certainly did. But the truth is, grout is naturally porous. It is basically a hard, sandy sponge. Without a dedicated barrier, every shower splash and every humid morning sends moisture straight into your joists. Early in my career, I made the massive flooring installation mistake of trusting the tile to do the heavy lifting. I learned the hard way that even if you spend hours mastering floor leveling to get a flat surface, moisture will find the smallest path of least resistance. According to the Tile Council of North America (TCNA), water penetration is the leading cause of structural failure in residential bathrooms, often costing homeowners thousands in remediations that a simple membrane could have prevented.
Does a rubbery sheet really make that much difference?
I get the skepticism. You are already spending a fortune on the stone and the vanity, and now someone wants you to buy a roll of orange or blue ‘fabric’ to glue down first. It feels like an unnecessary upsell. But after seeing rot eat through three-quarter-inch plywood in less than a year, I can tell you it is the most valuable insurance policy you will ever buy. When you are planning your flooring installation, this membrane acts as a decoupled barrier, meaning it does not just stop water; it also prevents cracks in your tile when the house naturally shifts.
The Invisible Shield Your Subfloor Is Begging For
If you have ever had to get the smell of old pet urine out of floor joists, you know how hard it is to clean structural wood once it is soaked. Now imagine that wood is constantly damp from shower steam or a slow, hidden leak. It is a recipe for disaster. Using a high-quality membrane ensures that any moisture that gets past the tile stays on top of the barrier where it can eventually evaporate, rather than soaking into the wood and inviting a colony of black mold to move in. Trust me, you do not want to be the person who has to tear up a brand-new floor because the plywood turned into mush underneath. Have you ever felt a ‘spongy’ spot on a bathroom floor that you suspect is water damage?Once you’ve committed to the membrane, you have to treat the preparation like a science experiment. I used to think ‘broom clean’ was enough, but I learned quickly that even a thin film of drywall dust can act like a layer of ball bearings, preventing your adhesive from actually grabbing the wood. Before you even open your roll of membrane, make sure you know how to achieve flawless floor leveling because once that membrane is down, your opportunity to fix a 1/2-inch dip is gone.
Lay the Foundation Before You Ever Touch a Tile
The process starts with a vacuum, not a broom.
Ditch the Dust Before You Start
I’ll never forget my first solo bathroom job in a cramped condo. I was in a rush, skipped the shop-vac, and figured the thinset would just ‘eat’ the dust. Halfway through laying the sheet, I stepped back, and the whole corner of the membrane stuck to my work boot and lifted right off the plywood. It was a mess. Now, I always follow the best way to prep a dusty floor by using a damp sponge after vacuuming. This ensures the mortar bites into the subfloor rather than just sitting on top of a layer of debris.
Mix Your Adhesive to the Right Consistency
You aren’t looking for the thick, peanut-butter consistency you’d use for heavy stone. For a membrane, you want it slightly wetter—think more like cake frosting. If you’ve been revamping your home with expert flooring tips, you know that the mortar needs to collapse easily when you press the sheet into it. Use a 1/4″ x 3/16″ V-notched trowel to get a consistent bed. If the mix is too dry, it won’t transfer to the fleece backing of the membrane, and you’ll end up with hollow spots that sound like a drum when you walk on them later.
The Trowel Angle Matters More Than You Think
When you’re spreading, hold your trowel at a consistent 45-degree angle. This isn’t just for looks; it ensures you’re leaving exactly the right amount of material. I always tell people to check the trowel notch secret to understand why coverage is the difference between a floor that lasts and one that fails. Once the mortar is down, roll the membrane out and use a flat grout float or a heavy roller to press it in. #IMAGE_PLACE_HOLDER_B#
Seal the Seams or Suffer the Consequences
A sheet of plastic on the floor is great, but water is sneaky—it loves corners and seams.
Don’t Forget to Tape Those Joints
This is where most DIYers get lazy. You have to use waterproof banding—basically a thin, flexible tape made of the same material—over every single seam and where the floor meets the wall. Use tile installation pointers to ensure your corners are folded tightly. If you leave even a pinhole gap in a corner, that’s where the moisture will migrate. Think of it like a submarine; a 99% sealed hull is still a sinking ship.
Why a Decoupling Layer Saves Your Grout
Beyond just stopping water, this membrane acts as a ‘bridge.’ Houses move, wood expands, and concrete shrinks. If your tile is glued directly to the subfloor, those movements translate directly into the tile, which is why your porcelain tile is cracking in a straight line. The membrane allows the subfloor to move slightly without snapping the tile on top. It’s a shock absorber for your home’s structural shifts, keeping your grout lines intact for years.
I am going to let you in on a secret that most hardware store associates won’t tell you: the term ‘self-leveling’ is a marketing lie. Many homeowners think they can just dump a bucket of liquid underlayment and watch it turn into a glass-flat surface. In reality, that liquid has a mind of its own and high surface tension. If you don’t use precise floor leveling techniques to physically move the material into the corners, you will end up with ‘islands’ and ‘valleys’ that make your tile job a nightmare. I’ve seen seasoned pros get humbled because they assumed gravity would do 100% of the work. You need to be the one in control, guiding the material to ensure you’re truly achieving flawless floor leveling before that first sheet of membrane touches the ground.
The Science Behind Why Primers Actually Work
Everyone wants to skip the primer because it feels like just another ‘sticky liquid,’ but this is a classic ‘oops’ factor that leads to total floor failure. Think of your wooden or concrete subfloor like a giant, thirsty sponge. If you pour your leveler or thinset directly onto a raw subfloor, the substrate will instantly suck the moisture out of your mix. This ‘flash drying’ is why your floor leveler pitted during the drying process, leaving tiny craters that compromise the bond. A high-quality primer seals those pores, ensuring the moisture stays in the adhesive where it belongs. Without it, you might find why your floor primer is peeling off alongside your expensive new tile only a few months later.
Is Large Format Tile More Demanding Than Standard Porcelain?
Absolutely. If you are moving into the world of 12×24 or 24×48 inch tiles, the margin for error disappears. According to the National Tile Contractors Association (NTCA), over 80% of installation failures are linked back to improper substrate preparation. When you work with these big ‘planks,’ any tiny hump in the floor becomes a pivot point that causes ‘lippage’—where one tile edge sits higher than the next. You cannot just ‘back-butter’ your way out of a crooked floor. This is where the secret to getting a flat floor becomes your best friend. You must also account for the hidden cost of using cheap thinset; large tiles require medium-bed mortars that won’t shrink and pull the tile down as they cure. #IMAGE_PLACE_HOLDER_C#
The Real Reason Your Grout Cracks (It Isn’t Just the House Shifting)
While we talk a lot about waterproofing, we often forget that a membrane’s secondary job is shear stress management. I’ve heard many DIYers claim that if you use enough screws in your subfloor, you don’t need a decoupling layer. That is a myth. Wood and ceramic have completely different expansion coefficients. When the humidity changes, your wood subfloor is growing and shrinking while your tile stays rigid. This creates a ‘tug-of-war’ that the tile eventually loses. By using a membrane, you create a neutral zone where the subfloor can do its thing without snapping your grout lines. This is the real trowel notch secret: it’s not just about height, it’s about creating a uniform bond that allows for this microscopic movement. Have you ever fallen into the trap of thinking a leveler would magically fix a 2-inch dip without any help? Let me know in the comments.
If you’re staring at that 2-inch dip I mentioned earlier, you need to stop trusting your eyes. I spent years thinking I had a ‘calibrated eyeball’ until I finally started using how to check for high-spots with a 10-foot straightedge. It was a humbling experience to see just how many ‘waves’ I was missing on what I thought was a flat subfloor. Now, I don’t mix a single bag of product without a dedicated high-torque, variable-speed mixer. If you use a standard household drill, you’re going to burn out the motor and introduce far too many air bubbles into your slurry. According to the technical data sheets from MAPEI, improper mixing speeds or durations can reduce the compressive strength of your underlayment by up to 20%, leading to premature cracking under heavy tile or stone. I always follow the secret to mixing the perfect bucket of self-leveler every time, which includes letting the mix ‘slake’—that’s just a pro term for letting it sit for a few minutes—to ensure the polymer additives are fully hydrated and ready to bond.
How can I keep my flooring investment looking pristine for decades?
The secret to longevity isn’t a magical wax or a heavy-duty scrubber; it is avoiding the ‘natural cleaner’ traps that circulate on social media. One of the biggest heartbreaks I see in my consulting work is homeowners using acidic pantry staples on high-end luxury finishes. I call it the vinegar mistake that eats through your natural stone tiles. That ‘eco-friendly’ cleaning hack will etch your marble or limestone permanently, leaving it looking like dull, dusty concrete. For those of you with timber underfoot, hardwood floor care secrets to longevity and shine usually boil down to climate control rather than surface chemicals. Invest in a high-quality hygrometer for your main living space. Wood is a living, breathing material, and if your home’s humidity swings more than 20% between summer and winter, you’re going to see gaps, squeaks, and crowning. If your floor has already taken a decade of abuse, you might need to look into mastering hardwood floor refinishing to restore that original architectural luster. #IMAGE_PLACE_HOLDER_D#Looking toward the future, the industry is rapidly moving toward ‘smart’ installations. We’re already seeing the rise of decoupling membranes with integrated heat sensors and moisture-detecting filaments that can alert your smartphone before a hidden pipe leak becomes a structural catastrophe. The trend is shifting from simply ‘covering’ a floor to ‘monitoring’ its health in real-time. If you are planning a high-end renovation in 2025, these integrated systems are worth the extra investment for the peace of mind they provide. Before you lay your next row of tile or plank, I challenge you to go out and buy a true 10-foot aluminum straightedge. Stop relying on a short 4-foot level for a large room; it’s the single best way to ensure you are using precise floor leveling techniques that actually create a professional-grade, mirror-flat surface.
Lessons Carved in Mortar and Water Damage
If I could go back to that first renovation, I would tell myself that the ‘invisible’ work is the only work that actually matters. First, I learned that a leveler is only as good as the person spreading it; ignoring floor leveling challenges won’t make them disappear once the tile is down. Second, I realized that ‘eyeballing it’ is a recipe for lippage. Always remember the dry-fit rule to visualize your layout before the adhesive starts to set. Finally, moisture is a patient enemy. It doesn’t rot your house overnight; it waits until you’ve forgotten the project was ever a struggle.
The Unsung Heroes in My Tool Bag
To get professional results, you need more than just a bucket and a prayer. I never start a job without these three items:
- A Professional Moisture Meter: You cannot guess if your subfloor is dry enough. I always show beginners how to use a moisture meter because it is the only way to prevent adhesive failure before it starts.
- The 10-Foot Aluminum Straightedge: It is the ultimate truth-teller for flat surfaces, revealing dips that a standard 4-foot level would miss.
- A Precision Laser Level: This is critical when you start your tile layout from the center to ensure your lines stay crisp across the entire room.
#IMAGE_PLACE_HOLDER_E#
Create a Foundation You Can Actually Trust
Installing a floor isn’t just about the aesthetics you see on the surface; it is about the peace of mind that comes from knowing the structure underneath is protected. When you master flooring installation fundamentals, you aren’t just a DIYer—you are a craftsman protecting your home’s value. Don’t rush the membrane, don’t skip the primer, and treat your subfloor with the respect it deserves. Your future self (and your kitchen ceiling) will thank you for the extra effort today. Have you ever found a surprise under your old flooring—like mold or a hidden leak—that made you rethink your whole project? Let me know in the comments below.