
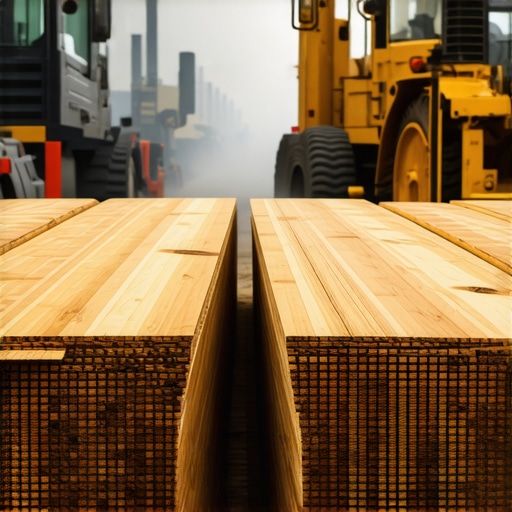
I’ll never forget the smell of the VOC-heavy adhesive I used five years ago during my first ‘green’ remodel; it was the moment I realized that just because a plant grows fast doesn’t mean the floor in my house is actually helping the planet. I was so caught up in the hype of sustainable materials that I ignored the fine print, and within six months, my beautiful planks were warping because I didn’t realize why bamboo floors need triple the acclimation time compared to standard oak. It was a heart-wrenching, expensive lesson that left me questioning everything I thought I knew about eco-friendly home design. Today, I’m going to pull back the curtain on the bamboo industry and show you exactly what to look for so you don’t make the same mistakes I did. We are going to look beyond the ‘rapidly renewable’ label to find out if your flooring choice is truly sustainable or just a clever piece of greenwashing.
The Hidden Environmental Cost of Your Living Room
When we talk about bamboo, the first thing everyone mentions is how fast it grows—and they aren’t wrong. However, a fast-growing weed is only one small part of the equation. Many of the bamboo products sold in big-box stores are shipped thousands of miles from overseas, creating a massive carbon footprint that often outweighs the plant’s natural carbon-sequestering benefits. Then there’s the issue of how those stalks are actually held together. Most bamboo flooring isn’t a solid piece of wood; it’s a composite of fibers held together with resins and glues. According to environmental research from groups like the World Resources Institute, many of these binders contain urea-formaldehyde, which can off-gas in your home for years. If you’ve been focused on choosing the right hardwood floors for your home, you know that air quality is just as important as the source of the wood.
Is this ‘green’ floor actually worth the hype?
I used to think so, but after seeing how easily it scratched under my dog’s paws and how much it reacted to the slightest bit of humidity, I’ve become a lot more skeptical. Have you ever installed a floor only to have it start making strange noises or showing gaps just a few months later? Drop a comment below if you’ve ever felt ‘green-guilt’ after a renovation gone wrong! If you’re dealing with issues like a floor that clicks or shifts, it might be a sign of a deeper problem, similar to why your LVP floor is clicking when you walk on it. Before you commit to bamboo, you need to understand that its ‘greenness’ depends heavily on the specific manufacturing process, not just the plant itself. Even if you get the leveling right by following the ultimate guide to floor leveling for a perfect finish, a poorly manufactured bamboo plank is going to fail you eventually.
Look for the Janka rating and formaldehyde-free resins
To find bamboo that actually lasts, you need to look at its density, not just its color. High-quality bamboo flooring is typically strand-woven, which means the raw fibers are shredded and then compressed under intense pressure. Think of it like comparing a loosely packed snowball to a block of ice; the ice is going to survive the sun and the pressure much longer. If you do not know how to spot high-quality engineered wood before you buy, you might end up with horizontal or vertical grain bamboo that is significantly softer and prone to deep dents from simple high heels or furniture legs. Always ask for the Janka hardness rating—a good strand-woven floor should be north of 3,000, which is nearly twice as hard as red oak. This density is what provides the longevity you expect, but it also makes the material less forgiving if your subfloor isn’t perfect.
Kill the click by mastering your subfloor
A bamboo floor is only as good as the surface beneath it. If your subfloor has even a 1/8-inch dip over a six-foot span, your new floor will flex, groan, and eventually snap at the locking mechanism. I learned this the hard way during a kitchen remodel where I thought the plywood looked flat enough to the naked eye. Three months later, every time we walked near the refrigerator, it sounded like we were stepping on dry twigs. I now highly recommend using the chalk dust secret for finding low spots in subfloors to map out your terrain before you even open a box of planks. If you find significant irregularities, you will need to apply a self-leveling compound. To ensure a professional finish, do not forget the spiky roller secret for a mirror-smooth pour which helps release trapped air bubbles that can weaken the leveler and create tiny pits.#IMAGE_PLACE_HOLDER_B#
Use a moisture meter to save your investment
Bamboo is basically a giant sponge that happens to look like wood. It reacts to ambient humidity and subfloor moisture faster than almost any other material. You cannot skip the testing phase if you want your floor to stay flat. Before you even think about nailing or gluing, you need to know how to use a moisture meter to prevent floor failure. I once witnessed a project where a DIYer installed bamboo over a concrete slab that felt dry to the touch but was actually still curing; within a month, the ends of the planks were curling up like dried leaves because they were sucking up the rising vapor. Check both your bamboo planks and your subfloor; the moisture content should be within 2% to 4% of each other for a stable installation.
Mind the gap for seasonal shifts
When you finally start laying planks, remember that the wall is not your friend. You must leave a significant expansion gap around the entire perimeter of the room. If you lock your floor tight against the baseboards or the drywall, the first time the humidity hits 60%, the entire floor will peak in the middle of the room because the wood has nowhere to expand. This is why understanding why your floor-to-wall gap is the most important part of lvp and other floating floors is vital for long-term success. Also, be extremely gentle with your tools during the click-lock process. A common mistake is swinging a mallet directly against the plank. Avoid the rubber mallet mistake that ruins tongue-and-groove joints by always using a dedicated tapping block to distribute the force evenly. One wrong strike can chip the fragile bamboo tongue, leading to a permanent gap that will collect dirt for the next decade.Most DIYers—and even some pros who should know better—obsess over making a floor ‘level.’ They spend hours with a 6-foot bubble level trying to get the floor perfectly horizontal relative to the horizon. But here is the contrarian truth: your floor doesn’t actually need to be level; it needs to be flat. A floor can be slightly out of level (sloping a quarter-inch across a room) and still be a successful installation, provided there are no humps or dips. If you focus on levelness while ignoring flatness, you are inviting flooring installation mistakes to avoid for lasting results. This is especially true for modern, oversized tiles where the secret to installing large format tile without lippage is a subfloor that is dead-flat, not necessarily dead-level. According to the Tile Council of North America (TCNA) Handbook, the industry standard for flatness is much more rigorous than most people realize—specifically requiring a tolerance of 1/8 inch in 10 feet for large format tiles to prevent cracking and lippage. The ‘oops’ factor often happens before the material even touches the ground. I see people grab a high-speed drill and whip their self-leveling compound like they are making a meringue. This is a disaster. Using a high RPM introduces thousands of tiny micro-bubbles into the mix. The mixing paddle speed that ruins your leveling compound is anything over 300-450 RPM. Those bubbles don’t just disappear; they create a honeycomb structure that makes the dried surface brittle and prone to cracking under the weight of furniture. #IMAGE_PLACE_HOLDER_C#
Why does your self-leveling pour look like a topographical map?
If you’ve ever poured a ‘self-leveling’ product only to find it didn’t actually level itself, you aren’t alone. Why your self-leveling pour looks like a topographical map usually boils down to surface tension and improper primer use. If the subfloor isn’t sealed correctly, it acts like a sponge, sucking the moisture out of the leveler before it has time to flow. This causes the liquid to ‘freeze’ in place, leaving you with ridges instead of a mirror finish. You can avoid this by mastering floor leveling pro secrets for perfect installations and ensuring your substrate is meticulously primed. Have you ever spent hours trying to get a floor perfectly level only to realize it didn’t matter because the surface was still wavy? Let me know in the comments if you’ve fallen into the ‘level vs. flat’ trap! Before you lay a single plank or tile, you must understand how to achieve flawless floor leveling before tile laying to ensure your investment doesn’t end up clicking, shifting, or cracking within the first year.Once you’ve survived the installation, the real battle begins: keeping that surface looking like it didn’t just come out of a clearance bin. I’ve seen $15,000 oak floors ruined in three years because of a $50 steam mop. If there is one thing I beg you to hear, it’s that heat and moisture are the natural enemies of your finish. You should never use a steam mop on luxury vinyl or hardwood. The high-pressure steam forces water into the seams, causing the core to swell and the wear layer to delaminate. Similarly, stop using vinegar on your hardwood floors immediately. The acidity eats away at the polyurethane, leaving you with a dull, unprotected mess. For real hardwood floor care secrets to longevity and shine, stick to pH-neutral cleaners specifically formulated for floor finishes.
How do I keep my floor stable year-round?
The secret isn’t just cleaning; it’s climate control. According to the National Wood Flooring Association (NWFA) Technical Manual, wood floors perform best when the interior environment is kept between 60 to 80 degrees Fahrenheit and 30% to 50% relative humidity. If you live in a climate with harsh winters, you need a whole-home humidifier. Without it, your bamboo or oak will shrink, leading to unsightly gaps that no amount of wood filler can truly fix. Maintaining this balance is the difference between a floor that lasts decades and one that requires mastering hardwood floor refinishing expert tips for 2025 much sooner than you anticipated.
Don’t trust your eyes alone
When it comes to scaling your skills, you have to upgrade your kit. I used to rely on a traditional bubble level, but for long runs, it’s practically useless. Now, I won’t start a project without the laser level move for perfectly straight hallways. It allows you to see the entire topography of the room at a glance. If you’re working with wood, combine this with the string line method for perfectly straight hallway wood to ensure your first row is dead-on. If that first row is off by even a fraction of a degree, by the time you reach the other side of the house, your planks will be running diagonal to the walls. #IMAGE_PLACE_HOLDER_D# I predict the future of flooring installation is moving toward ‘smart leveling’—systems that use lidar scanning via your phone to generate a 3D heat map of your subfloor in real-time. But until that’s standard, you have to do the manual legwork. If you are planning a large-scale project, I challenge you to try the ‘string line’ trick on your next hallway. It’s a low-tech solution that provides high-stakes accuracy. If you need more specific guidance on layout, check out my step-by-step guide to flooring installation and leveling success to avoid the common pitfalls that haunt most DIYers.
Hard-won truths from the subfloor trenches
After years of hearing every creak and groan a poorly installed floor can make, I’ve realized that the ‘perfect’ floor is 10% the material you pick and 90% the preparation you do. I spent too much time worrying about the shade of the bamboo and not enough time worrying about the concrete slab’s moisture content. If I could go back, I would tell myself to stop obsessing over the Janka rating and start obsessing over whether my primer was applied correctly. Realize that floor leveling challenges common mistakes and how to avoid them usually start with impatience. Another lightbulb moment? Trusting the box instructions blindly. Most manufacturers give you the bare minimum; pro results require precise floor leveling techniques to achieve flawless surfaces that go beyond the basic ‘broom-clean’ standard.
My go-to kit for a pro-level finish
If you’re serious about this, put down the cheap hardware store levels and invest in gear that gives you data. I personally never start a layout without a high-quality pinless moisture meter and a reliable laser line. For those working with transitions, tile selection tips for elegant hardwood floors in 2025 suggest that having the right trowel sizes on hand is just as important as the tile itself. I also highly recommend the NWFA (National Wood Flooring Association) technical manuals; they are the ‘industry bible’ for wood flooring and provide the engineering standards that help you achieve a professional-grade result. Mastering flooring installation fundamentals leveling for a seamless look requires these tools to turn guesswork into science.
Build a foundation you will never have to question
Taking on a floor is an act of love for your home. It is hard work, it is messy, and your back will likely ache, but there is nothing quite like the feeling of walking across a room that is silent, solid, and stunningly flat. Do not be intimidated by the technical specs or the chemistry of the glues. Take it one row at a time, check your measurements twice, and give your materials the time they need to acclimate. You are building more than just a surface; you are building the foundation of your daily life. Have you ever discovered a hidden subfloor disaster after pulling up old carpet? Let me know in the comments below!