
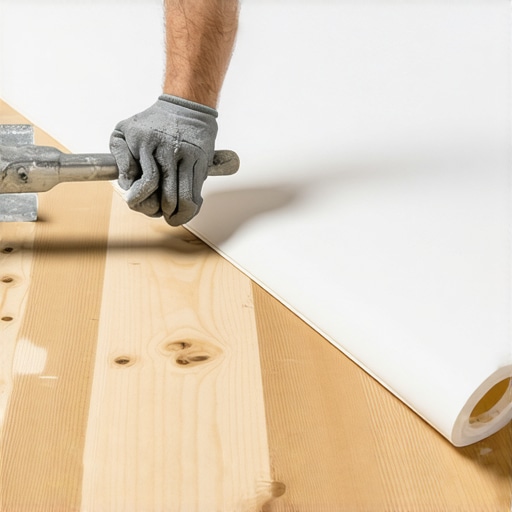
I’ll never forget the feeling of standing in my kitchen at 2 PM, watching the afternoon sun slice across my brand-new vinyl floor. I had spent all weekend installing it, feeling like a DIY champion. But as the light hit the surface, my heart sank. Those “invisible” gaps between the plywood sheets? They weren’t invisible anymore. They looked like miniature mountain ranges stretching across my kitchen. I’d made the classic rookie mistake of thinking the vinyl would mask the subfloor’s imperfections. It didn’t. In fact, thin vinyl acts like a highlighter for every single bump, ridge, and staple head underneath.
Stop Your Subfloor From Ghosting Your New Vinyl
If you are planning to lay down luxury vinyl or sheet goods, you have to realize that “telegraphing” is your biggest enemy. Telegraphing is the industry term for when the texture or gaps of your subfloor show through your finished flooring. It’s the reason many flooring installation mistakes happen early in the process. You think you’re saving time, but you’re actually just scheduling a redo for six months from now. I learned the hard way that you can’t just slap some tape over a seam and call it a day. In my early years, I once tried using regular wood putty, only to have it crack and crumble within a month because the house settled. According to the Resilient Floor Covering Institute, even minor subfloor irregularities can lead to premature wear and tear on your vinyl surface. This isn’t just about looks; it’s about making sure your floor actually lasts.
Is All This Extra Prep Really Worth the Hype?
I get it. You just want to see the pretty new floor. You might be asking if you really need to spend an extra afternoon on your hands and knees with a sander and compound. The short answer is yes. If you don’t take the time to level a plywood subfloor properly, those seams will eventually cut into the underside of your vinyl. We are going to tackle this by focusing on three main areas: sanding the “peaks,” filling the “valleys,” and choosing the right patch. I’ve found that leveling for success starts with a clean, dry surface. If you’ve ever had a self-leveling compound bubble over your subfloor, you know that the chemistry of your patch matters just as much as your technique. Have you ever finished a floor only to realize you can see the ghost of a seam every time the sun comes out? Let me know—I’d love to hear your horror stories so we can fix them together. Before we get into the nitty-gritty of the patching compounds, let’s talk about the one tool that changed my life: the floor sander.Before you even touch a bag of compound, you need to identify where the trouble hides. I use the chalk dust secret for finding low spots in subfloors. Simply rub a piece of sidewalk chalk over the seams and sand lightly with a hand block; the chalk will stay in the valleys, showing you exactly where your filler needs to go. Once you’ve mapped the terrain, grab your belt sander. You aren’t trying to reshape the house, just knocking down the high factory edges of the plywood. If you feel any movement while walking, perform the hammer test for finding loose floor joists to ensure your base is rock solid. A patch is only as good as the wood beneath it. If the subfloor bounces, the patch will crack, and you’ll be left with a crunching sound under your feet every time you walk to the fridge.
Flatten the Peaks and Find the Low Spots
Finding the balance in how to level a plywood subfloor without adding weight is all about precision. You want to sand the ‘proud’ edges—those spots where one sheet of plywood sits just a fraction of an inch higher than its neighbor. I once spent four hours sanding a single room because I was obsessed with making it look like a bowling alley. While you don’t need it that perfect, you do need a continuous plane. If you skip this, the edge of the plywood will act like a knife, slowly wearing through the bottom of your vinyl over years of foot traffic.
Lock Down Your Plywood Before You Patch
Loose boards are the silent killers of a great flooring job. If you hear a squeak, fix it now. I usually drive 2-inch floor screws into the joists every six inches along the seam. This prevents the ‘seesaw’ effect where one sheet moves and the other doesn’t, which is the primary cause of flooring installation mistakes involving seam failure. I remember working on a 1920s bungalow in the dead of winter; I thought the seams were ‘close enough,’ but when the heat kicked on, the plywood expanded just enough to turn those seams into speed bumps. I had to rip up $800 worth of vinyl. #IMAGE_PLACE_HOLDER_B#
Apply the Patching Compound for a Glass Finish
Now comes the part where most DIYers panic: the compound. You want a Portland cement-based patch, not wood filler. Wood filler is for furniture; it shrinks and cracks under the weight of a person. Cement-based compounds are designed to stay dimensionally stable. When you start mixing, pay attention to the mixing paddle speed that ruins your leveling compound. If you whip it too fast, you introduce air bubbles that will pop and leave tiny craters, leading to those annoying ghosting marks on your self-leveling finish.
Don’t Mix More Than You Can Spread
These compounds set fast—usually within 15 to 20 minutes. If you mix a giant bucket, half of it will turn into a brick before you can use it. Mix small batches to the consistency of peanut butter. It should stay on your trowel without dripping but be soft enough to spread with minimal pressure.
Feather the Edge for a Seamless Transition
When you apply the patch, don’t just fill the gap. You need to ‘feather’ it out. This means spreading the compound 6 to 12 inches away from the seam on both sides. Think of it like a highway ramp; you want a gradual slope, not a curb. I use a 12-inch drywall knife for this. In a kitchen remodel last summer, I rushed the feathering and ended up with a slight ridge. Once the high-gloss vinyl went down, that ridge looked like a buried garden hose. For flooring installation fundamentals, the goal is always a transition so smooth you can’t feel it with your eyes closed. Pull the knife flat against the wood at the outer edges to scrape the compound down to almost nothing.While feathering the edge is vital, there is a common myth I see all the time: the idea that you can fix a subfloor’s ‘waves’ with a thicker underlayment. In my experience, that’s exactly how you break your floor. People often think that if the plywood isn’t perfectly flat, a premium, high-density pad will bridge the gap. But Luxury Vinyl Plank (LVP) is a rigid system that requires a non-deflecting foundation. When you add too much cushion, you create a trampoline effect. Every step you take puts stress on the click-lock joints, which eventually snap. I’ve seen countless homeowners learn that why cheap vinyl underlayment makes your floor sound hollow is often because they tried to use it to mask poor prep work. This is one of the top 5 mistakes that make cheap lvp look even cheaper. If your subfloor isn’t flat to within 3/16 of an inch over a 10-foot radius, no amount of foam is going to save you.
Stop Using Underlayment as a Crutch
The hidden ‘trap’ that catches even seasoned DIYers is the moisture content of the plywood itself. I once worked on a project where the homeowner had just finished a massive drywalling job. The air was thick with moisture, and the plywood had soaked it up like a sponge. We patched the seams and laid the vinyl immediately. Three weeks later, once the HVAC system had dried out the house, the plywood shrunk, the patches cracked, and the vinyl started ‘tenting’ at the seams. This is why you need to know how to use a moisture meter to prevent floor failure. According to the National Wood Flooring Association (NWFA), the moisture level of your subfloor should be within a tight margin of the environment’s equilibrium moisture content before you even think about applying a patch or leveling compound. This ensures that the wood doesn’t shift dramatically after the floor is sealed. #IMAGE_PLACE_HOLDER_C#
Why Moisture Meters Aren’t Just for Professionals
Another nuance is the ‘water-to-powder’ ratio. Most people eyeball it, but if you add even half a cup too much water, the polymers in the Portland cement won’t bond correctly, leading to a brittle surface that turns to dust under your floor. It’s better to have a mix that is slightly stiff than one that is too runny. This is a nuance often missed in step-by-step guide to flooring installation and leveling success tutorials that focus only on the speed of the job rather than the chemistry. Furthermore, if you are working on a concrete-to-wood transition, skipping the primer is a recipe for disaster. Wood is porous and sucks the water out of the patch too fast, which is why you must prime concrete before every leveling job or use a specialized wood primer to ensure the bond holds for decades, not months.
Does the ‘Self’ in Self-Leveler Actually Mean Anything?
It’s a bit of a misnomer. Many people assume they can just pour a bucket of liquid and it will behave like water, finding its own perfect level. In reality, surface tension and the ‘pot life’ of the product mean you usually have to help it along. If you just pour and walk away, you’ll end up with a series of humps that look like a topographical map. To avoid this, you need to be mastering floor leveling pro secrets for perfect installations, which include using a gauge rake and a spiky roller to break the surface tension and release trapped air. Have you ever fallen into this trap of trusting the label too much? Let me know in the comments—I’d love to hear how you handled it.
Stop Eyeballing Your Work and Get a Laser
I used to think my eyes were as good as any tool, but then I tried to run a row of plank flooring through a thirty-foot hallway. By the time I reached the other end, I was off by nearly two inches. Now, I never start a project without using the laser level move for perfectly straight hallways. It’s not just about the first row; it’s about making sure your floor doesn’t look like it was installed by someone after three cups of coffee. When you’re utilizing the laser level move for perfectly straight hallways, you aren’t just checking if the surface is flat; you’re ensuring the entire layout is square with the house. This precision is what separates a DIY attempt from a professional-grade finish that adds real value to your home.
#IMAGE_PLACE_HOLDER_D#
If you really want to scale your floor leveling game, you need to invest in a pinless moisture meter. I’m partial to the Wagner Meters Orion series because it doesn’t leave unsightly holes in your expensive subfloor while giving you deep-depth readings. According to the NWFA Technical Manual Section B, subfloor moisture must be within a very specific range compared to the flooring material to prevent catastrophic failure. If you ignore this technical step, you’ll eventually find out why your lvp floor is clicking when you walk on it as the planks expand and contract against a moving base. Understanding how to use a moisture meter to prevent floor failure is the true difference between a floor that lasts decades and one that fails before the first year is out.
How do I maintain my floor’s perfect level for years?
Maintenance is where most homeowners unknowingly sabotage their hard work. You might have spent weeks following a step-by-step guide to flooring installation and leveling success, only to ruin the integrity of the installation with a bucket of soapy water. First, you have to stop using vinegar on your hardwood floors immediately. The acid in vinegar breaks down the protective polyurethane or wax finish, leaving the wood vulnerable to the very moisture you worked so hard to exclude. Similarly, the reason why you should never use a steam mop on luxury vinyl comes down to the heat and pressure at the joints. High-pressure steam can penetrate those click-lock seams and reactivate the moisture in your subfloor patch, causing it to soften and swell. For real hardwood floor care secrets to longevity and shine, always stick to pH-neutral cleaners and microfiber pads that don’t saturate the seams.
The Future of Level Floors is Getting Smarter
Looking ahead to 2025 and beyond, I suspect we’ll soon see “smart” subfloors equipped with embedded sensors that alert your smartphone if humidity levels spike under your vinyl planks. Until those high-tech solutions become affordable, we rely on our tools and our technique. My best advice for your next project? Grab a high-quality green-beam laser level and see the difference it makes in your alignment. It is the single most satisfying “pro move” you can make during a renovation. Don’t let your hard work go to waste by skipping these final maintenance details—your future self, and your knees, will thank you. If you’re ready to get started, double-check your moisture readings and commit to the right cleaning tools from day one.
Hard Truths from the Trenches of Subfloor Prep
Over the years, I’ve realized that the physical labor of laying the planks is actually the easy part. The real work—the stuff that determines if you’ll still love your floor in five years—happens before the first box is even opened. One of the most common floor leveling challenges I see is the ‘good enough’ attitude. If you can feel a seam with your finger, you will see it with your eyes once that vinyl is down. Another lightbulb moment for me was realizing that shadows are your best friend; I always turn off the overhead lights and use a flashlight held low to the floor to find those hidden ‘mountain ranges.’ I’ve also learned that rushing the drying time is a guaranteed way to see flooring installation mistakes manifest as peeling or cracking later. Always give your patch an extra hour if you’re in a humid climate. It’s better to lose an hour of sleep than to lose an entire weekend ripping up a failed installation.
The Gear That Separates Amateurs from Pros
If you are serious about achieving a glass-like finish, you need more than just a bucket and a stick. My essential toolkit always includes a few non-negotiables. First, the spiky roller secret for a mirror-smooth pour isn’t just for commercial jobs; it’s the only way to ensure you don’t have tiny pinholes in your self-leveler. For layout, I rely heavily on the laser level move for perfectly straight hallways to keep everything square and aligned with the rest of the house. Finally, I never trust my gut when it comes to hydration; I use how to use a moisture meter to prevent floor failure to know exactly when the subfloor is ready for the finish. These aren’t just gadgets—they are insurance policies for your hard work and help you achieve a perfect finish every time.
Your Floor Deserves the Best Foundation
At the end of the day, flooring installation fundamentals aren’t about fancy materials; they are about respect for the process. When you take the time to sand, patch, and prime, you are building a legacy for your home. You’ll feel that difference every time you walk across the room without hearing a single squeak or seeing a single ghosting line. Don’t be afraid of the prep—embrace it as the secret ingredient to your success. After all, the secrets to longevity and shine begin with what is underneath your feet. What’s the one subfloor issue that’s keeping you up at night? Share your project details in the comments below, and let’s get your floor perfectly level together!