
I will never forget the feeling of standing in my kitchen at 2:00 AM, staring at what I thought was a masterpiece, only to see a ghostly white haze creeping across my brand-new slate tiles. I had spent weeks mastering tile installation strategies, yet here I was, looking at grout that looked like it had been dusted with flour. It is heartbreaking. You put in the sweat equity, you pick the perfect shade, and suddenly your floor looks twenty years old before you have even walked on it. If you are seeing a white, chalky residue on your fresh grout lines, do not rip up the floor just yet. You are not failing; you are just dealing with a chemistry problem that we are going to solve together right now.
The Ghost in the Grout Lines
When I first started out, I made the classic rookie move: I thought more water meant a cleaner finish. I was using the wet sponge move, but I was being way too aggressive. That excess moisture did not just clean the tile; it drowned the pigment and pulled minerals to the surface. This phenomenon is known as efflorescence. It is essentially salt deposits left behind as the water evaporates. According to the Tile Council of North America (TCNA), improper water-to-powder ratios during mixing and excessive water during cleanup are the primary culprits behind grout discoloration and structural weakness. I learned the hard way that grout is finicky—it is more like baking a delicate souffle than mixing mud. Have you ever finished a project only to have it look worse a week later? Tell me I am not the only one who has felt that sinking feeling!
Is a fancy sealer actually worth the hype?
A lot of folks think they can just slap a heavy-duty sealer over the white chalk and call it a day. I used to think that too. But here is the reality: sealing over efflorescence is like painting over rust. It might hide the problem for a week, but those minerals are still there, and the sealer will not bond properly to a powdery surface. We need to address the root cause—whether it is why dark grey grout always looks splotchy or if you simply over-washed the joints during the initial set.
Stop the Powdery Mess Before It Starts
Before we dive into the deep cleaning methods, let us talk about why this keeps happening. Often, the trouble starts long before you open the grout bag. If you did not manage floor leveling challenges correctly, your tiles might have slight vertical movement that stresses the grout, making it more porous. I once skipped a thorough subfloor prep and ended up with grout cracks that let moisture migrate in and out, constantly bringing new salts to the surface. It all comes back to the foundation. If your grout is turning white, it is screaming for a better balance between proper hydration and careful cleaning techniques.
Strip Away the Chalk with This Mix
To get that ghost out of your grout, you cannot just scrub with plain tap water. I usually reach for a pH-neutral cleaner first, but if the efflorescence is stubborn, a very mild sulfamic acid solution is the heavy artillery you need. Think of it like stripping old wax off a car—you need to get down to the actual material to fix the chemistry. Just be careful; if you have natural stone, acid is your absolute enemy. For those working with manufactured materials, check why porcelain tiles crack more often than ceramic on wood before you start applying heavy pressure during repairs. Use a soft nylon brush and work in small, focused circles. This is also the perfect time to use the secret to getting dried thinset off your new tiles if you left any stray bits behind during the initial installation. 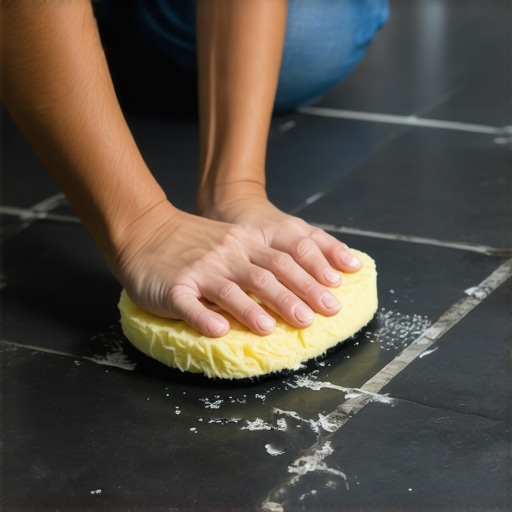
Wring That Sponge Until Your Knuckles Turn White
This is where most DIYers fail. We want the floor to look clean immediately, so we use a soaking wet sponge. Stop right there. Imagine your grout is a sponge itself; it will soak up every drop of dirty, mineral-heavy water you push into it. When you are performing the wet sponge move for professional grout lines, you need to wring that tool until it is barely damp to the touch. If you can squeeze out even a single drop of water, it is still too wet. In my own Troy bathroom project, I learned the hard way that the plywood mistake that causes grout cracks in troy bathroom remodels often begins with simple moisture mismanagement during cleanup. I was so worried about the haze that I saturated the joints, which led to a week of frustrating, splotchy colors.
Stop Whipping Air Into Your Grout
Grout is a chemical reaction, not just a bucket of mud. If you over-mix it with a high-speed drill, you are essentially whipping air into the mixture like a meringue. Those tiny micro-bubbles eventually pop, leaving pinholes where moisture and salts can hide and later migrate to the surface. Always mix by hand or on the lowest possible speed setting. Once it is mixed, let it slake for ten minutes. This is non-negotiable. It is like letting bread dough rest so the chemistry can settle. If you skip this waiting period, you are practically inviting why dark grey grout always looks splotchy after cleaning to become a permanent feature of your home.
Why Your Subfloor Might Be Secretly Sweating
If you are dealing with a concrete slab or a recent revamp your home with expert flooring installation tips, the moisture causing that white powder might be coming from below. I never start a grout repair without knowing exactly what is happening underneath the tile. You should learn how to use a moisture meter to prevent floor failure because if the slab is still off-gassing water, no amount of surface cleaning will stop the efflorescence from returning. It is like trying to dry a towel while it is still hanging in a steam room. If you find the moisture levels are high, you might need to look into why your basement floor needs a moisture barrier even if it feels dry to break the cycle.
The Five-Second Test for a Perfect Seal
Once the grout is clean and bone-dry—wait at least 48 to 72 hours—you can finally protect your hard work. But do not just pour the sealer on and hope for the best. Use the spray bottle hack for testing floor sealer coverage to see if the grout is actually absorbing the liquid. If the water beads up, the pores are closed and you are safe. If it soaks in, you need that sealer to act as a permanent shield. This is the final step in a step-by-step guide to flooring installation and leveling success that stands the test of time.Most homeowners believe that ‘self-leveling’ compound is a magic wand that fixes every sin of a lumpy subfloor. I’ve seen countless DIYers pour a bag and expect a glass-like finish, only to end up with a hardened mess of ripples and valleys. The common myth is that the liquid does the work for you. In my experience, self-leveling is actually a misnomer; it is more like thick honey than water. If you don’t use precise floor leveling techniques to achieve flawless surfaces, you are just moving the bumps from one side of the room to the other. You need to actively ‘help’ the material find its home with a gauge rake and a spiked roller to release surface tension.
Can you really skip the floor primer?
I have had neighbors tell me they skipped the primer to save twenty bucks and a few hours. This is the ultimate ‘trap’ that leads to delamination. According to the National Wood Flooring Association (NWFA), substrate preparation is the single most critical factor in the longevity of any flooring system. Without a proper bond, the leveler will eventually curl and crack. This is why you must prime concrete before every leveling job—it seals the pores of the subfloor so air bubbles don’t rise up and create craters in your finished surface. If you see tiny ‘pinholes’ in your dried leveler, that is the ghost of air escaping from an unsealed slab. 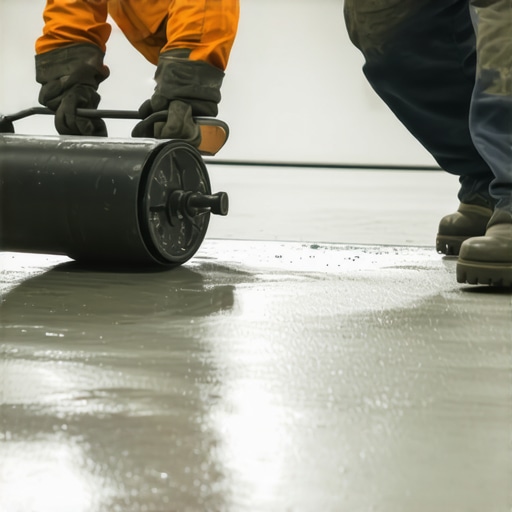
The Hidden Science of the Expansion Gap
Another nuance that even seasoned weekend warriors miss is the true necessity of the expansion joint. Most people think a quarter-inch gap is just a suggestion. However, the physics of a house breathing with the seasons is relentless. I once saw a beautiful wide-plank installation literally buckle in the center because the installer didn’t understand why your floor-to-wall gap is the most important part of lvp and hardwood alike. It isn’t just about the boards growing; it is about the subfloor itself shifting. If you are struggling to find where the floor dips, I recommend the chalk dust secret for finding low spots in subfloors. It is a simple, analog trick that beats an expensive laser level any day of the week for localized repairs.
Avoid These Late-Stage Installation Errors
As you approach the finish line, don’t get lazy with your layout. One of the most common flooring installation mistakes to avoid for lasting results is failing to ‘dry fit’ your final rows. I always suggest pulling planks from at least three different boxes to ensure the grain and color variations are balanced. This prevents ‘banding’ where one corner of the room looks darker than the other. Success in how to achieve flawless floor leveler before tile laying depends on your patience during these final steps. Have you ever fallen into the trap of rushing the subfloor prep only to regret it when you see the first dip? Let me know in the comments—I’ve been there, and we can troubleshoot it together.
Once you have mastered the layout, you need to think about the long game. I have seen too many people finish a project and then ruin it three months later because they did not have the right tools for the aftercare phase. For me, the most underrated tool in my arsenal is not a fancy saw—it is actually a dead blow hammer. I learned why you should use a dead blow hammer for floor capping the hard way after I marred a piece of expensive cherry wood with a standard rubber mallet. The dead blow hammer provides that localized, non-rebounding force that seats a plank or a tile perfectly without damaging the delicate finish.
If you are serious about avoiding future headaches, you absolutely must own a pinless moisture meter. I never start a job without one. Understanding how to use a moisture meter to prevent floor failure is what separates the weekend warriors from the professionals who get called back for high-end jobs. If the subfloor is holding onto 12% moisture and your hardwood is at 6%, you are building a ticking time bomb of warping and gaps. According to the National Wood Flooring Association (NWFA) Technical Publication No. C100, the moisture content of the flooring must be within 2-4 percent of the subfloor’s moisture content before installation begins. This is a scientific law, not a suggestion.
How do I keep my flooring investment looking fresh?
Maintenance is not just about cleaning; it is about using the right chemistry. One of the biggest mistakes I see is homeowners reaching for the pantry. You need to stop using vinegar on your hardwood floors immediately. The acid in vinegar slowly eats away at the polyurethane finish, leaving your floors dull and unprotected. Instead, look for hardwood floor care secrets to longevity and shine that involve pH-neutral cleaners specifically designed for wood. If you do run into a disaster, like a minor flood, you might be able to save it if you act fast—I have actually used how to save a water-damaged wood floor with a vacuum to pull moisture out of individual boards before they could cup.

As for the future, I predict we are moving toward a world where LIDAR and 3D room scanning will be standard on every smartphone. Imagine being able to walk a room and get a digital heat map showing exactly where you need leveler before you even buy a bag. This will make mastering floor leveling pro secrets for perfect installations accessible to everyone, reducing waste and ensuring every floor is as flat as a billiard table. This digital shift will eventually eliminate the guesswork of manual subfloor checks and allow for pixel-perfect transitions between different materials.
Even if a plank does go rogue later on, do not panic. You can learn how to repair a loose hardwood plank without tearing up the row using specialty adhesive injections. It is these little technical tricks that keep a house feeling like a home rather than a construction site. My biggest piece of advice? Don’t just look for the cheapest materials; learn how to spot high-quality engineered wood before you buy so your maintenance routine stays easy for decades. Go out and buy a pinless moisture meter today—it is the best investment you will ever make for your home’s foundation.
3 Hard Truths My First Failed Grout Job Taught Me
Looking back at my early mistakes, I realized that humidity is your invisible boss. If the room is too humid, the grout won’t dry; if it’s too dry, the grout cures too fast and cracks. I also learned that tile installation pointers that save time and money often come down to just slowing down and letting the chemistry work. Another epiphany? Your knee pads are more important than your saw. If you’re in pain, you’ll rush the expansion joint secret for large tiled living areas, and that’s when structural failures start happening six months down the line. Finally, remember that grout is porous; if you use a dirty bucket, you’re literally mixing failure into your joints.
A Few Tools That Actually Make a Difference
If you want to move beyond the beginner phase, you need a few specialized items. I swear by my magnesium float—it doesn’t grab the tile the way rubber does, allowing for a much smoother glide. I also never leave home without a contour gauge; it’s the only way to get those impossible cuts around door jambs right the first time. For the foundation, check out the ultimate guide to floor leveling for a perfect finish to see why a spiked roller is a life-changer for removing air bubbles from your leveler. Finally, keep a small bag of sulfamic acid crystals on hand—it’s the only thing that safely dissolves that white efflorescence without eating your tile alive.
Go Build Something Beautiful
At the end of the day, a flooring installation is more than just a renovation; it is the foundation of every memory you will make in that room. Don’t let a little white powder on your grout lines or a minor subfloor dip discourage you. You now have the technical knowledge to troubleshoot almost any issue, from moisture spikes to splotchy pigments. Take your time, trust your moisture meter, and remember that even the pros started with a messy bucket and a lot of questions. Have you ever had a project where the grout turned out a completely different color than the box promised? Let me know in the comments below!