
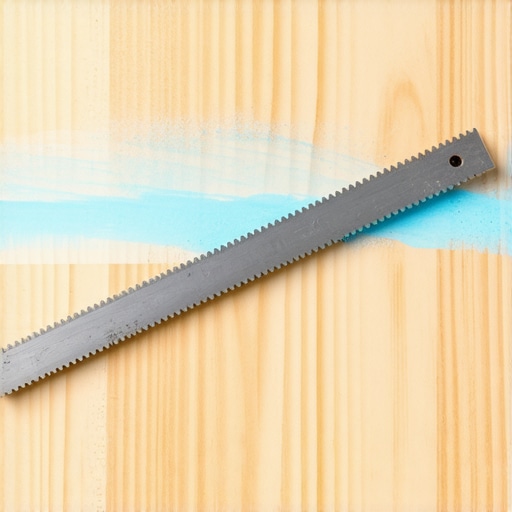
I will never forget the sinking feeling in my gut when I stepped onto my freshly installed dream floor and heard that dreaded *click-clack* sound. I had spent thousands on premium materials, only to realize I had built my masterpiece on a subfloor that looked like the surface of the moon. My mistake? I assumed my eyes were good enough to spot a dip. They were not. Now, whenever I help a neighbor prep for a new project, I bring a humble stick of sidewalk chalk or a bag of carpenter powder. It sounds primitive, but this low-tech secret reveals every hidden valley that is waiting to ruin your project. Today, we are going to stop guessing and start knowing exactly where your subfloor is failing you before you lay a single plank. I want to show you how to avoid the heartbreak of a floor that feels more like a trampoline than a solid foundation.
The Day My Living Room Floor Started Talking Back
I once thought a quick visual check was plenty. I was wrong, and my bank account suffered for it. That painful experience taught me that why your lvp floor is clicking when you walk on it usually has nothing to do with the quality of the planks and everything to do with the tiny 1/4-inch dip you missed during prep. According to the National Wood Flooring Association (NWFA), most manufacturers require a subfloor to be flat within 1/8 of an inch over a 6-foot radius to prevent joint failure. If you skip this, you are basically setting a timer for your floor to break. While many people search for expert flooring installation tips, they often overlook the most basic tool in the shed: visualization. I spent three long days ripping up perfectly good wood because I was too stubborn to spend twenty minutes with a straightedge. It is a gut-wrenching mistake I do not want you to repeat.
Is a bag of chalk really worth the mess?
I get the skepticism. In an age of digital levels and 360-degree lasers, using chalk feels like something out of a 19th-century workshop. But here is the thing: lasers tell you where a point is, but chalk shows you the physical shape of the entire surface. When you slide a straightedge across a dusty floor, the chalk stays in the low spots and disappears from the high ones. It creates a physical map you cannot argue with. It is the difference between seeing a problem and feeling it under your boots. Have you ever finished a room only to find a soft spot that drives you crazy every time you walk over it? Tell me I am not the only one who has had to pull up boards because of a hidden dip. If you are worried about the prep, learning precise floor leveling techniques will save you hours of frustration later. Trust me, the mess of a little chalk is nothing compared to the mess of a failed installation. Even if you follow the ultimate guide to floor leveling, you still need a way to verify your work. This chalk method is your final audit. It is cheap, it is foolproof, and it is the only way I can sleep at night after a big job. Now, let us get into the grit of how to actually execute this without turning your entire house into a dust bowl.
Clean the Surface Until You See the Real Problems
You cannot map a floor that is covered in debris, old adhesive, or dust. Think of it like trying to read a map with mud smeared all over the lens; you are going to miss the details that matter. Before you even touch the chalk, you need to get down to the structural layer. If you are working on an old renovation, you might need to learn how to remove old mastic without damaging the slab, because even a 1/16-inch bump of old glue will throw off your straightedge and give you a false reading. I spent hours once wondering why my level kept rocking, only to find a tiny, hardened bead of construction adhesive from 1982 hiding in a corner. Sweep, vacuum, and then vacuum again. If you are on a wooden subfloor, this is also the time to check for movement. If things feel soft, you should know how to fix a bouncy floor with a few well-placed screws before you worry about the flatness. A flat floor that moves is just as bad as a wavy floor that is solid.
Turn Your Straightedge into a Topographic Map Maker
Once the floor is pristine, grab a 6-foot or 8-foot aluminum straightedge. Lay it flat on the floor and sprinkle a light dusting of carpenter’s chalk or even fine baby powder along the side of it. Now, slide that straightedge slowly across the room. It is like a squeegee for information. In a perfect world, the metal bar would carry every grain of powder with it. But your floor isn’t perfect. As you move, the straightedge will glide over the ‘peaks’ and leave the powder behind in the ‘valleys.’ It creates a literal physical outline of every dip. 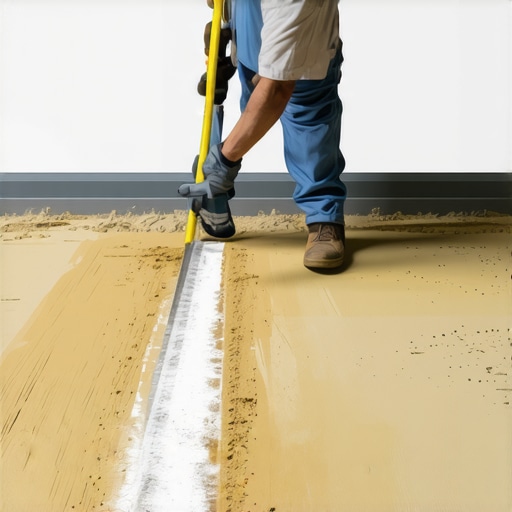
How to Mark Your Targets Without Making a Mess
When you lift that level, you will see little islands of white powder. Those are your enemies. Use a pencil or a permanent marker to circle the perimeter of these chalky patches. I like to write the approximate depth in the middle of each circle—maybe it’s 1/8 of an inch, maybe it’s a full half-inch canyon. By the time you have worked your way across the room, your subfloor will look like a weather map. This visual guide tells you exactly where you need to apply precise floor leveling techniques. You are no longer guessing how much compound to mix; you are seeing the volume of the holes you need to fill.
The Time a 1950s Kitchen Almost Broke My Spirit
I remember a job in a mid-century ranch where the homeowner wanted large-format porcelain tile. The floor looked ‘fine’ to the naked eye. I decided to do the chalk slide just to be safe. Halfway across the kitchen, the chalk didn’t just stay in a small spot; it disappeared into a three-foot-wide depression that was nearly 5/8 of an inch deep. If I had laid that tile, every single one of those expensive slabs would have cracked within a month because of the hollow space underneath. Because I found it early, I was able to use the best way to patch a concrete slab before leveling to bridge that gap. It added a half-day to the prep, but it saved me a five-thousand-dollar callback.
Watch Out for the Dry Lake Bed Effect
When you finally start pouring your filler, don’t rush the chemistry. One of the biggest heartbreaks is seeing your hard work fail because the material dried too fast or the subfloor sucked the moisture out of the mix. This is a common reason why your self-leveling compound is cracking like a dry lake bed shortly after it sets. Always prime your surface. Think of the primer as the glue that keeps your new ‘flat’ floor attached to your old ‘wavy’ one. If you skip the primer, that chalk map you worked so hard to create will just end up being a map of where your floor is going to delaminate.
Self-Leveling Compounds Don’t Actually Level Themselves
Most people think ‘self-leveling’ is a set-it-and-forget-it miracle. In reality, that is a dangerous myth that leads to wavy floors and wasted money. While the name implies the fluid will find its own horizon like water in a lake, the truth is that surface tension and viscosity mean you have to help it along. If you just pour and walk away, you’ll end up with a series of connected puddles rather than a flat plane. I’ve seen DIYers follow the ultimate guide to floor leveling but still fail because they didn’t use a gauge rake or a spiked roller to break the surface tension. In my experience, even the best compounds need a human touch to reach the corners and ensure a truly flat transition. If you are aiming for mastering floor leveling pro secrets for perfect installations, remember that you are the pilot; the compound is just the fuel.
The Invisible Trap of Over-Hydrating Your Mix
Here is a mistake I see even ‘pro’ contractors make: adding an extra splash of water to make the mix ‘flow better.’ It seems logical, but it is a recipe for structural disaster. According to the Tile Council of North America (TCNA), precise water-to-powder ratios are non-negotiable for compressive strength. When you over-water, the heavy aggregates sink to the bottom and the weak, chalky polymers float to the top. This is a primary reason why your self-leveling compound is cracking like a dry lake bed. You might think you’ve achieved a smooth look, but you’ve actually created a brittle shell that will crumble the second you start walking on your new LVP or tile. 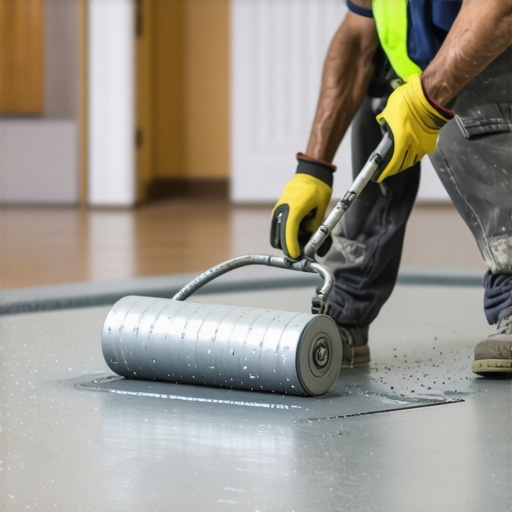
Should You Really Grind Down That High Spot Yourself?
Many readers ask if they should just buy a bag of leveler or rent a heavy-duty grinder. If you have a single ‘peak’ rather than a ‘valley,’ grinding is often the smarter move, but it is significantly more dangerous for your lungs and your home’s cleanliness. If you go this route, you must learn how to sand a floor without creating a dust storm. Grinding concrete releases crystalline silica, which is no joke. I always prefer to fill the lows whenever possible, but if a high spot is preventing a seamless transition, you have to address it head-on. If you skip this, you’ll likely find why your vinyl floor is tent peaking in the middle a few months after the seasons change.
Why Modern Wide Planks Demand More Than the Minimum
We are seeing a huge trend toward wide-plank engineered wood and large-format tiles, but these materials are incredibly unforgiving. A standard 2-inch strip of oak can hide a slight dip; a 9-inch wide plank of European Oak cannot. It will bridge the gap, leave a hollow space, and eventually the tongue-and-groove joint will snap under the pressure. This is a common entry in 7 mistakes that ruin your luxury vinyl plank installation. Professional installers often use a ‘double-straightedge’ method where they check for flatness in two directions simultaneously to ensure there is no ‘crowning’ in the center of the room. Have you ever fallen into this trap of assuming ‘good enough’ would work for wide planks? Let me know in the comments below, and let’s keep each other from making these thousand-dollar mistakes.After you have conquered the subfloor mountain and laid your last plank, the real game begins: the long-term survival of your investment. If you really want to graduate from ‘lucky amateur’ to ‘informed pro,’ you need to own a pinless moisture meter. I am not talking about a cheap prong-style tool that pokes holes in your wood; I mean a high-quality meter like those recommended in the National Wood Flooring Association (NWFA) technical guidelines. Learning how to use a moisture meter to prevent floor failure is the single most important step you can take after you finish the prep. I have seen beautiful white oak floors buckle into a wave pool because the homeowner installed them over a subfloor that looked dry but was actually holding 14% moisture. The standard rule, according to NWFA, is that wood should be within 2% to 4% of the subfloor’s moisture content before you even think about fasteners.
How do I keep my new floor looking brand new for decades?
It starts with the basics. You absolutely must stop your pets’ claws from ruining your vinyl planks or hardwood by keeping them trimmed and using area rugs in high-traffic zones. But the biggest killer isn’t the dog—it’s the mop bucket. Please, stop using dish soap on your floors. It leaves a filmy residue that attracts dirt like a magnet and eventually dulls the finish. Stick to pH-neutral cleaners specifically formulated for your finish type. If you are dealing with wood, mastering hardwood floor care secrets to longevity and shine means understanding that standing water is your absolute enemy. Microfiber and a light misting of cleaner are your best friends. Beyond the leveler and the chalk, there are 7 tools you actually need for a professional DIY hardwood install that most people forget until they are halfway through the job. My personal favorite is the dead-blow hammer. It allows you to seat planks without the rebound that a standard rubber mallet gives you, protecting those delicate tongue-and-groove joints from micro-cracking. 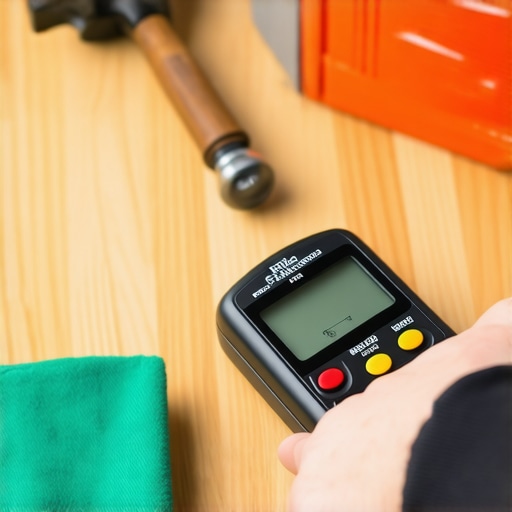 Looking forward, I predict we will soon see moisture-sensing underlayments that sync with your phone to alert you if a pipe leaks under your luxury vinyl. We are not quite there yet, but the tech is coming to residential homes soon. Before you start your next project, I challenge you to go out and buy a pinless moisture meter. Test your subfloor and your new planks daily for a week leading up to the install. This data-driven approach will give you more peace of mind than a hundred visual checks ever could.
The Brutal Truths My Subfloor Taught Me the Hard Way
Over decades of working on residential sites, I’ve realized that a flat surface is a luxury earned, not a given. First, your eyes are your biggest liars; if it looks flat, it probably isn’t, and that 1/8-inch dip will feel like a crater once the planks are down. Second, never trust a builder’s subfloor without checking it yourself, as even new construction settles in ways that create waves. Third, floor leveling challenges are usually won or lost in the first thirty minutes of cleaning. Finally, if you feel rushed, stop immediately. A rushed subfloor is a ticking time bomb for your expensive materials. If you notice why your subfloor patching compound is cracking under pressure, it is almost always a sign of poor priming or a mix that was too thin to hold its own weight.
#IMAGE_PLACEHOLDER_E#
What I Keep in My Truck for Every Leveling Job
I don’t leave for a project without a few specific items that ensure a professional result. I always carry a high-end pinless moisture meter because guessing moisture content is how you end up with buckled boards three months later. For the actual mapping, I rely on an 8-foot aluminum straightedge for the chalk trick I’ve detailed here. I also recommend a gauge rake to ensure your self-leveler is spread at the exact thickness required for the span. If you are hiring someone else, look for these items in their kit; they are part of the 7 signs your tile contractor is cutting corners on prep work if they are nowhere to be found. I also trust the technical bulletins from the TCNA and NWFA more than any YouTube ‘influencer’ because their standards are backed by actual structural testing.
Build Your Home on Something Better Than Hope
There is an incredible peace of mind that comes from knowing your foundation is perfect. By following a step-by-step guide to flooring installation and leveling success, you aren’t just putting down wood or tile; you are installing confidence. Don’t be afraid of the chalk mess or the extra hour it takes to map those dips. Whether you are fixing a minor valley or using the hammer test for finding loose floor joists, your effort today determines if your floor lasts five years or fifty. You’ve got the secrets now—it is time to go make that floor rock solid. Have you ever discovered a massive dip in your floor only after you started laying the first row of planks? Let me know in the comments below and let’s troubleshoot it together.