
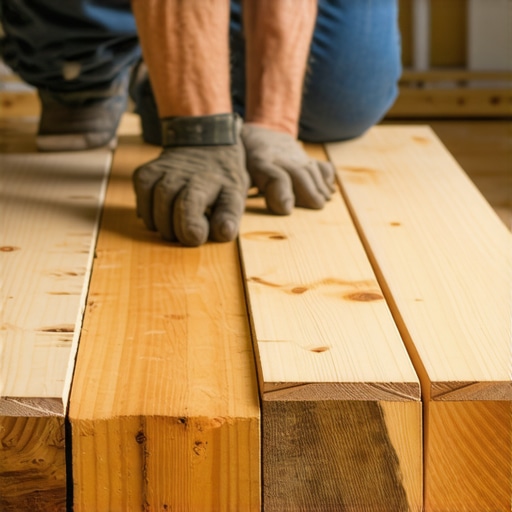
I remember the first time I really messed up a floor. It was a crisp Saturday morning, and I was helping a friend replace a single water-damaged board right in the middle of his foyer. I figured, hey, it’s red oak, how hard could it be? I grabbed a piece of oak from the scrap pile, cut it to size, and nailed it in. It looked okay until I put the finish on. Then, it happened. The new board looked like a neon sign flashing ‘I don’t belong here.’ The grain was wild and cathedral-like, while the rest of the floor was tight and linear. I felt like a failure. It was a classic flooring installation mistake that I’ve spent the last decade making sure no one else repeats. You see, matching wood isn’t just about the species; it’s about the soul of the tree and how it was cut. If you don’t respect the grain, that one plank will haunt your peripheral vision every time you walk into the room. We aren’t just fixing a hole today; we are preserving the visual rhythm of your home. Have you ever done a ‘quick fix’ only to realize you’d created a permanent eyesore? [image]
Stop Your Floor from Looking Like a Patchwork Quilt
When you are dealing with a single plank replacement, the stakes are oddly higher than a full floor install. With a whole floor, everything blends into a sea of variety. But with one board? It’s a solo performance. I’ve learned that you have to look at the ‘cut’ of the wood before you even think about reaching for the saw. Most people just look at the color, but as any expert in hardwood floor refinishing will tell you, color can be tweaked with stain, but grain is forever. If your floor is rift-sawn—meaning the grain lines are straight and parallel—and you drop in a plain-sawn board with those big, sweeping arches, it’s going to look like a zebra in a pack of horses. To get it right, you might even need to learn how to identify heartwood versus sapwood, because the density and ‘pith’ of the board determine how it reflects light. According to the National Wood Flooring Association, the angle at which the wood is sliced from the log determines its ‘figure,’ and mismatching these figures is the number one reason DIY patches fail.
Is grain matching actually worth the extra effort?
You might be thinking that life is too short to spend three hours at the lumber yard hunting for one specific board. I used to think that too, until I realized that a bad match actually decreases the perceived value of the property. It screams ‘amateur repair.’ If you want that high-end look and long-term floor shine, you have to be willing to be a bit of a wood-grain detective. It’s about finding a board that shares the same ‘growth ring’ story as its neighbors. It’s tedious, yes, but the first time you finish a repair and can’t even find where the old board was, you’ll feel like a freaking wizard. Trust me, the ‘neighborly’ thing to do is to get it right the first time so you aren’t staring at a mistake for the next twenty years.
Hunt for the Grain at the Lumber Yard
You’re at the lumber yard, and the guy behind the counter probably thinks you’re obsessive because you’ve spent forty minutes flipping through 1x4s. Let him think that. You’re looking for the growth rings on the end grain, not just the face. If your existing floor has tight, vertical lines, you need rift-sawn wood. If it looks like a topographic map of the Rockies, you’re searching for plain-sawn. I once rushed this part on a kitchen patch and ended up with a massive ‘flame’ pattern board right in front of the sink. It looked like a fire was starting under the dishwasher every time the sun hit it. To avoid my shame, bring a small spray bottle of water. Misting the raw wood reveals the true ‘soul’ of the grain that’s often hidden by mill dust. Once you find that perfect match, you aren’t just buying lumber; you’re buying peace of mind. 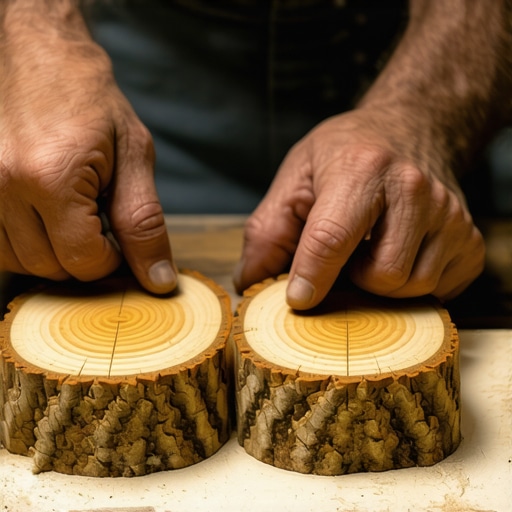
Level the Playing Field First
Even if you have the perfect board, it won’t matter if the foundation is wonky. I’ve seen guys drop a perfect match into a dip in the subfloor, and within a week, the board is rubbing against its neighbors and squeaking like a frantic mouse. Before you even dry-fit the piece, you absolutely need to know how to measure subfloor flatness before you start installing. This ensures your new plank doesn’t become a pivot point. If you find a low spot, don’t just ‘bridge’ it with the board and hope for the best. This is where mastering floor leveling pro secrets for perfect installations saves the day. If it’s a wood subfloor, use a feathered-out floor patch to create a flat plane.
Give the Wood Some Room to Breathe
Wood is alive; it breathes, expands in the summer humidity, and shrinks when the heater kicks on in January. When you’re sliding that board into its new home, don’t jam it in like you’re trying to win a game of Tetris. I always use a modified version of the quarter trick for checking expansion gaps in luxury vinyl floors to ensure I have a tiny bit of wiggle room at the ends of the plank. If you forget this, the first humid day will turn your beautiful repair into a buckled speed bump that everyone will trip over.
Sand Like Your Reputation is on the Line
Once the board is secured, the real magic happens during the sanding. This isn’t about brute force; it’s about blending. You want to start with a medium grit and work your way up, moving the sander in the direction of the grain. Whatever you do, don’t stay in one spot too long, or you’ll create a ‘dish’ in the floor that highlights the repair like a spotlight. To get that pro-level sheen that matches the rest of the room, understanding why you must sand between polyurethane coats is the final secret. It’s the difference between a floor that feels like smooth glass and one that feels like unfinished plywood. Focus on the transition edges where the new wood meets the old; that’s where the ‘invisible’ repair is either won or lost.You’ve got the grain matched, the board is in, and you’re feeling like a pro. But here is where I see most people—even some guys who have been in the trade for years—completely lose the plot. They treat ‘flat’ and ‘level’ like they’re the same thing. They aren’t. A floor can be as flat as a billiard table but still slope two inches toward the kitchen. If you’re planning on installing tiles like a pro, that slope will kill your layout the moment you hit a cabinet or a doorway.
Stop Treating Thinset Like a Leveling Compound
The most common ‘pro’ myth I hear is that you can just ‘build up’ the thinset to fix a low spot. ‘Oh, it’s just a half-inch dip, I’ll just use a bigger trowel,’ they say. This is a massive mistake. According to the Tile Council of North America (TCNA) Handbook, standard thin-set mortar is designed to be just that—thin. It’s meant to be 3/32 inch to 1/4 inch thick after the tile is set. If you glob it on to fill a hole, it will shrink as the water evaporates. This creates ‘lippage’ or, worse, hollow voids that lead to cracked tiles six months down the line. If you’re seeing issues, why your trowel size is ruining your tile bond usually comes down to trying to use mortar as a structural filler instead of an adhesive. To avoid this, you need to use a dedicated compound and follow the ultimate guide to floor leveling for a perfect finish.
Why Your Floor Can Be Flat but Still Totally Wrong
I once walked into a high-end bathroom remodel where the contractor had spent three days ‘flattening’ the floor with layers of plywood and shims. It looked great until we tried to install the large format tiles. Because the floor wasn’t truly level—just flat—the grout lines started to ‘stair-step’ as we moved toward the wall. This is one of those floor leveling challenges that separates the amateurs from the experts. When dealing with big tiles, you must know how to back butter large format tiles the right way to ensure that even if the floor has a slight pitch, you are maintaining 95% coverage for structural integrity.
Does every subfloor really need a primer before the pour?
This is the question that usually gets a ‘nah, it’s fine’ from DIYers. But if you’re pouring self-leveler over plywood, skipping the primer is the fastest way to ruin your weekend. Plywood is incredibly thirsty. If you pour leveler on raw wood, the wood sucks the moisture out of the mix before it can properly flow. This is why your self-leveler is bubbling over plywood or setting up like oatmeal before it even reaches the corners. You have to seal that wood first using the best primer for installing leveler over plywood. It’s an extra hour of work that saves you from having to grind off a botched three-hundred-dollar pour. Getting the secret to mixing leveler for a glass smooth finish isn’t about luck; it’s about the chemistry of the bond. Have you ever fallen into this trap? Let me know in the comments.
I’ve spent thousands of dollars on tools over the last decade, but the one that has saved my reputation more than any other is the moisture meter. Before you even think about starting a 100-square-foot patch or a step-by-step guide to flooring installation and leveling success, you must know the moisture content (MC) of your subfloor. If your plywood is sitting at 12% moisture and your new hardwood is acclimated to 6%, you are literally installing a ticking time bomb. Within three months, those boards will shrink, leaving gaps big enough to swallow a credit card. I personally use the Wagner Meters Orion series because it’s pin-less; I can scan an entire room in minutes without leaving tiny puncture wounds in the expensive white oak. It’s the single most important step in revamp your home with expert flooring installation tips that most weekend warriors skip.
Throw Away Your Short Levels
If you are still trying to level a room with a 4-foot bubble level, you are essentially flying blind. A 4-foot level can span a dip without ever showing you the true depth of the problem. To get professional results, you need to know how to check for high spots with a 10-foot straightedge. I use a lightweight aluminum box beam straightedge to identify ‘the waves.’ If you find a hump, you grind it down; if you find a valley, you fill it. This is the only way to achieve precise floor leveling techniques to achieve flawless surfaces. According to the technical specifications in the Laticrete Technical Data Sheet 154, the bond strength of any leveling or adhesive product is only as strong as the cleanliness of the substrate. If you leave even a thin film of drywall dust behind, your beautiful leveler will eventually delaminate from the subfloor, leading to that hollow ‘clacking’ sound when you walk across the room.
How do I keep my floors from shifting as the seasons change?
The secret to a floor that stays tight for twenty years isn’t just in the installation; it’s in the climate control. Wood is a sponge. If your house swings from 20% humidity in the winter to 70% in the summer, your floor will move like an accordion. I always tell my clients that if they want to avoid searching for how to keep your hardwood floors from gapping in the winter, they need a whole-house humidification system. You want to keep your home between 30% and 50% relative humidity year-round. This stability protects your investment and ensures that your hardwood floor care secrets to longevity and shine actually pay off over time. Looking ahead, I predict we are going to see ‘smart subfloors’ within the next five years—integrated sensor mats laid under the hardwood that send an alert to your phone the moment they detect a moisture spike from a hidden pipe leak or high humidity.
Invest in Quality Transition Strips
Don’t spend weeks on a floor only to ruin the look with a cheap, generic transition piece from a big-box store. If you are moving from a thick hardwood to a thinner tile, you need to understand why you need a specific transition strip between different flooring heights. A custom-milled reducer made from the same wood species as your floor will always look better than a ‘one-size-fits-all’ metal strip. It’s these small, high-effort details that convince people you hired a master craftsman. For your next project, I challenge you to ditch the generic T-molding and try scribing a custom transition piece to fit your specific height difference perfectly. It takes an extra hour of sanding and fitting, but the visual seamlessness is worth every second.
The Hardest Lessons Learned from a Decade of Subfloor Surprises
Over the years, I’ve realized that the ‘invisible’ part of a repair happens long before the first nail is driven. Here are the lightbulb moments that changed how I approach every job site:
- Moisture is the ultimate silent killer. I used to think I could ‘feel’ if a subfloor was dry. I was wrong. You must know how to use a moisture meter before installing wood floors because ambient humidity and subfloor moisture content must be within a tiny margin of each other, or you’re just inviting future gaps.
- The ‘Tap Test’ is your best friend. Before you lay tile, walk the floor and tap with a hammer handle. If it sounds hollow, the subfloor is delaminating. This prevents why your new tile floor is making a cracking sound later on.
- Patience pays in primer. I once rushed a self-leveler pour without letting the primer get ‘tacky’ enough. The result? Bubbles everywhere. Taking that extra twenty minutes is the difference between a glass finish and a moonscape.
My Survival Gear for Flawless Floors
You don’t need a warehouse full of tools, but these specific items are non-negotiable for my projects. First, a 10-foot aluminum straightedge is the only way to truly see the ‘valleys’ in your subfloor. Second, I swear by Laticrete 253 Gold for most tile work; it has the perfect ‘grab’ for avoiding how to fix a lippage problem in your new tile layout. For hardwood, the NWFA Technical Manuals are my ‘bible’ for species-specific expansion coefficients. Finally, don’t overlook the spacing secret for installing tile over plywood, which usually involves a high-quality uncoupling membrane to manage the different movement rates of wood and stone.
Your Blueprint for a Professional Finish
At the end of the day, flooring isn’t just about utility; it’s about the craftsmanship you leave behind for the next generation. Whether you are following tile selection tips for elegant hardwood floors in 2025 or grinding down a high spot, remember that the most beautiful floors are built on the foundations no one sees. Don’t be afraid to take it slow. Your future self will thank you every time they walk across a silent, perfectly flat floor. Have you ever encountered a subfloor problem that seemed impossible to fix? Let me know in the comments below!